Creative Ways to Decorate with Dried and Pressed Flowers


Decorate with dried flowers using 20 projects: a herbarium, vase bouquet, bookmark, card, candle, wreath, cloche, coaster, paper, garland, wax sachet, potpourri, oil bottle, branch hanging, hoop, phone case, lantern, magnet, place card, and sample book. Using dry flowers, potpourri is the fastest timed project here: 15 min. Each idea gives materials, source-reported time, cost and size when available, plus a suggested level. Choose pressed flowers for flat crafts and whole blooms for sculptural displays.
Which project fits your afternoon?
Times separate work from waiting. “n/s” means the source gives no figure. Levels are editorial estimates; the coaster cost includes supplies.
| # | Idea | Flowers | Time | Cost | Level |
|---|---|---|---|---|---|
| 1 | Framed Herbarium | Rosemary and pansies | Press 2–3 weeks | n/s | easy |
| 2 | Dried Bouquet in a Vase | Roses, lavender and statice | Dry 2–4 weeks | n/s | easy |
| 3 | Pressed Flower Bookmark | Small pressed flowers or leaves | Dry 20–30 min | n/s | easy |
| 4 | Window Greeting Card | Small pressed flowers and leaves | 30 min | n/s | medium |
| 5 | Decorative Pressed Flower Candle | Pressed blossoms and greenery | n/s | n/s | easy |
| 6 | Dried Flower Wreath | Yarrow, cornflowers and pampas | 1–2 h | n/s | easy |
| 7 | Dried Flower Cloche | Craspedia, baby’s breath and fern | n/s | n/s | easy |
| 8 | Pressed Flower Resin Coaster | Flat pressed blooms | Cure 24 h | ~$65 | medium |
| 9 | Handmade Floral Paper | Rose, lavender and calendula | n/s | n/s | easy |
| 10 | Dried Flower Garland | Statice, hydrangea and roses | n/s | n/s | easy |
| 11 | Botanical Wax Sachet | Lavender and rosebuds | 20 min + 1 h cooling | n/s | easy |
| 12 | Flower Potpourri Display | Roses, calendula and lavender | 15 min | ~$5–10 | easy |
| 13 | Herbarium Bottle in Oil | Lavender, rosebuds and globe amaranth | Settle 30 min | n/s | easy |
| 14 | Branch Wall Hanging | Dried bouquet flowers and eucalyptus | n/s | n/s | easy |
| 15 | Flower Embroidery Hoop | Ferns, strawflowers and gomphrena | n/s | n/s | medium |
| 16 | Pressed Flower Phone Case | Larkspur, Queen Anne’s lace and rose leaves | Overnight drying | n/s | medium |
| 17 | Pressed Flower Jar Lantern | Daisies, violas and pansies | 35 min | ~$5–10 | easy |
| 18 | Pressed Flower Resin Magnet | Hydrangea, clover and forget-me-nots | Cure 24 h | n/s | medium |
| 19 | Acrylic Flower Place Card | Flat pressed blossoms | n/s | n/s | medium |
| 20 | Hand-Sewn Flower Sample Book | Flat garden flowers | n/s | n/s | medium |
Press and dry your garden
1. Framed Herbarium
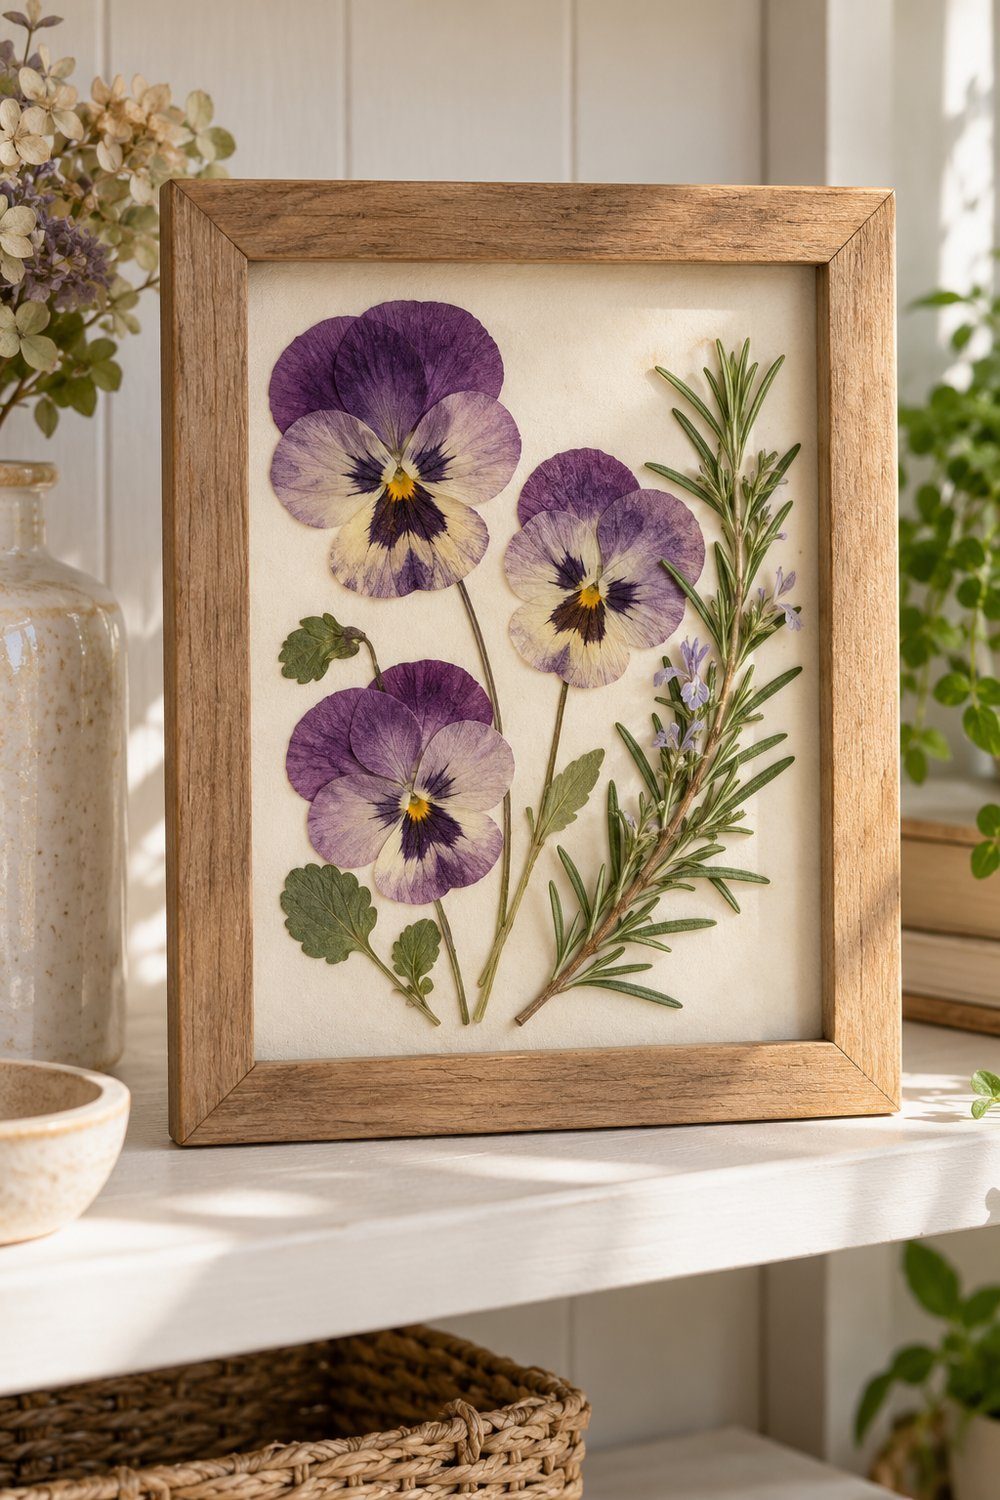
Turn pressed garden specimens into a framed herbarium that lets their outlines take center stage. Rosemary follows the tutorial; flat pansies make a colorful alternative. Sandwich your specimens between paper towels, weight them with books, and leave for 2–3 weeks. Trim background paper to your frame, arrange the dry plants, then brush on Mod Podge in light layers. Let each layer dry before framing.
Materials: Flowers, books, paper towels, frame, scrapbook paper, Mod Podge, scissors, brush.
Cost n/s · Time n/s (+ pressing 2–3 weeks) · Size n/s · Level easy
Tutorial: Amy Anderson, Mod Podge Rocks
Watch Crissy Baumann of First Day of Home compare pressing and drying methods before committing your best flowers. The demonstration helps you see how a flat pressed specimen differs from a dried flower head, so you can match your garden material to the finished project.

For a book or wooden press, Crissy’s guide allows 2–4 weeks. Her microwave-press method starts with 25 seconds, then 10 seconds at a time, releasing moisture between bursts. A numeric temperature is not specified; use the press manufacturer’s settings. Crissy Baumann’s pressing guide.
2. Dried Bouquet in a Vase
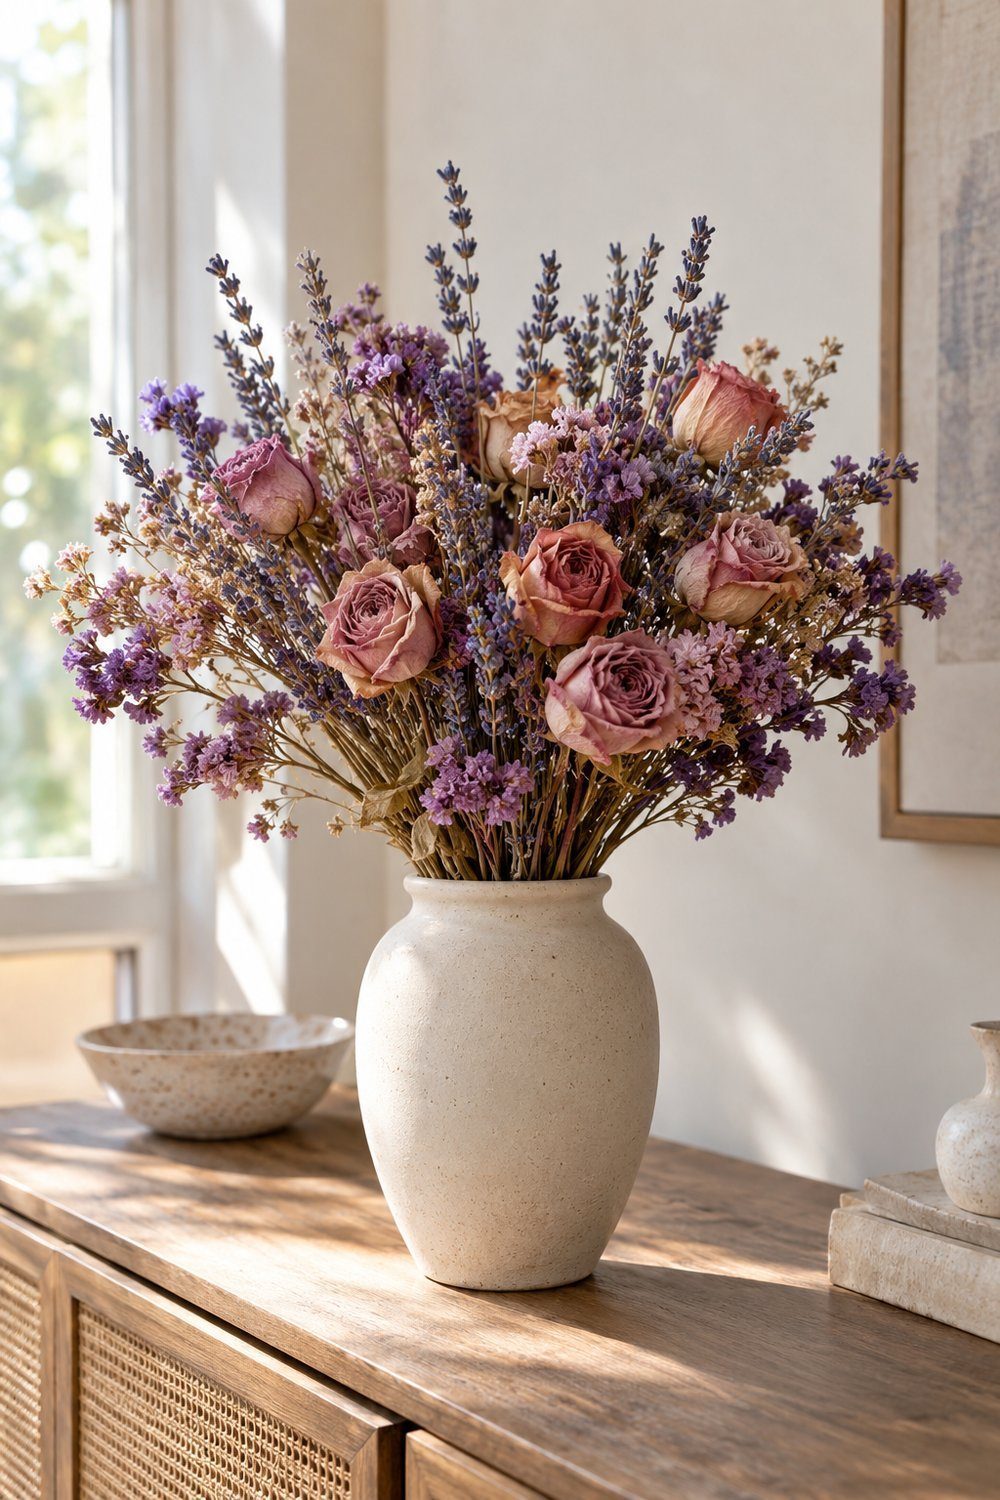
Keep the sculptural shape of roses, lavender, or statice by drying your bouquet upright in reverse. Remove unwanted foliage, tie small bunches securely, and suspend them upside down with airflow between bundles. Choose a dark, warm, dry spot and allow 2–4 weeks before arranging the stems in a vase. For fuller heads, bury flowers face up in silica gel, seal the container, and keep at room temperature. Allow days to weeks, then brush away crystals.
Materials: Flowers, scissors, string, hanger, vase; optional silica gel, airtight container, mask, gloves, brush.
Cost n/s · Time n/s (+ air drying 2–4 weeks) · Size n/s · Level easy
Tutorial: Lori Lovely, Bob Vila
For the source’s oven alternative, use 150–200 °F (66–93 °C) for 1.5–2.5 h, then cool and finish drying for 8–12 h. Keep those settings with that oven method; air drying and sealed silica use the conditions described above.
Small botanical accents
3. Pressed Flower Bookmark
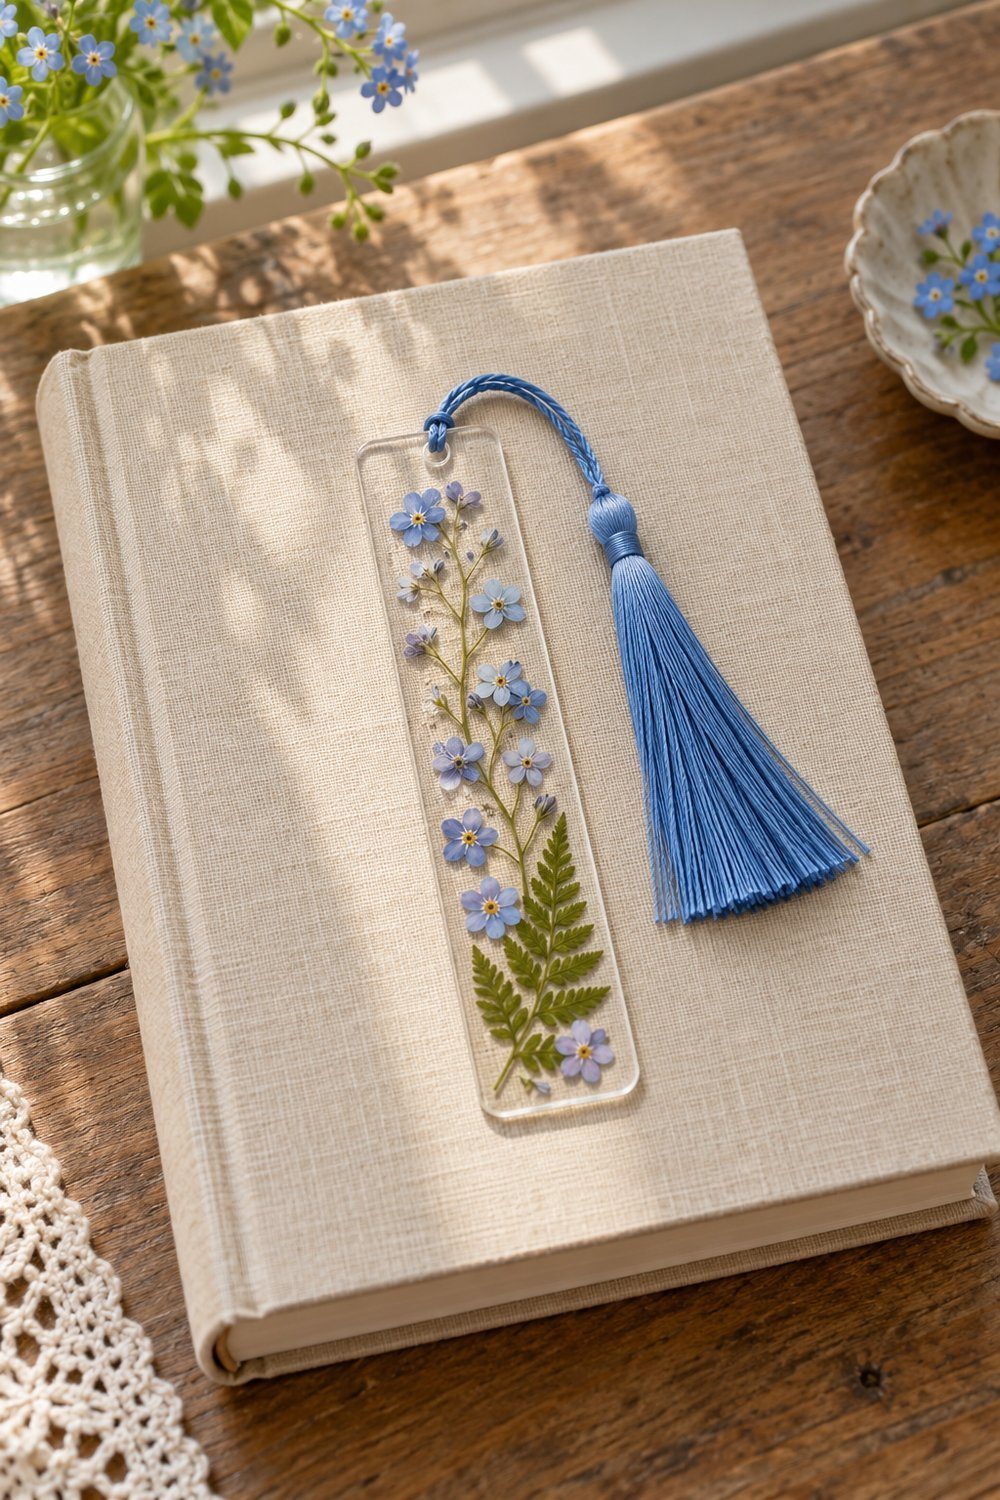
Dress your reading corner with an acrylic bookmark carrying a miniature garden. Choose thin pressed flowers or a small fern leaf so the design stays close to the surface. Peel the protective film from the working side, brush on Mod Podge, and place the flowers face down against the glue. Allow 20–30 min before sealing with another coat. Once dry, remove the film from the reverse and add a tassel.
Materials: Pressed flowers, acrylic bookmark, tassel, Mod Podge, brush.
Cost n/s · Time n/s (+ base-coat drying 20–30 min) · Size n/s · Level easy
Tutorial: Crissy Baumann, First Day of Home
4. Window Greeting Card
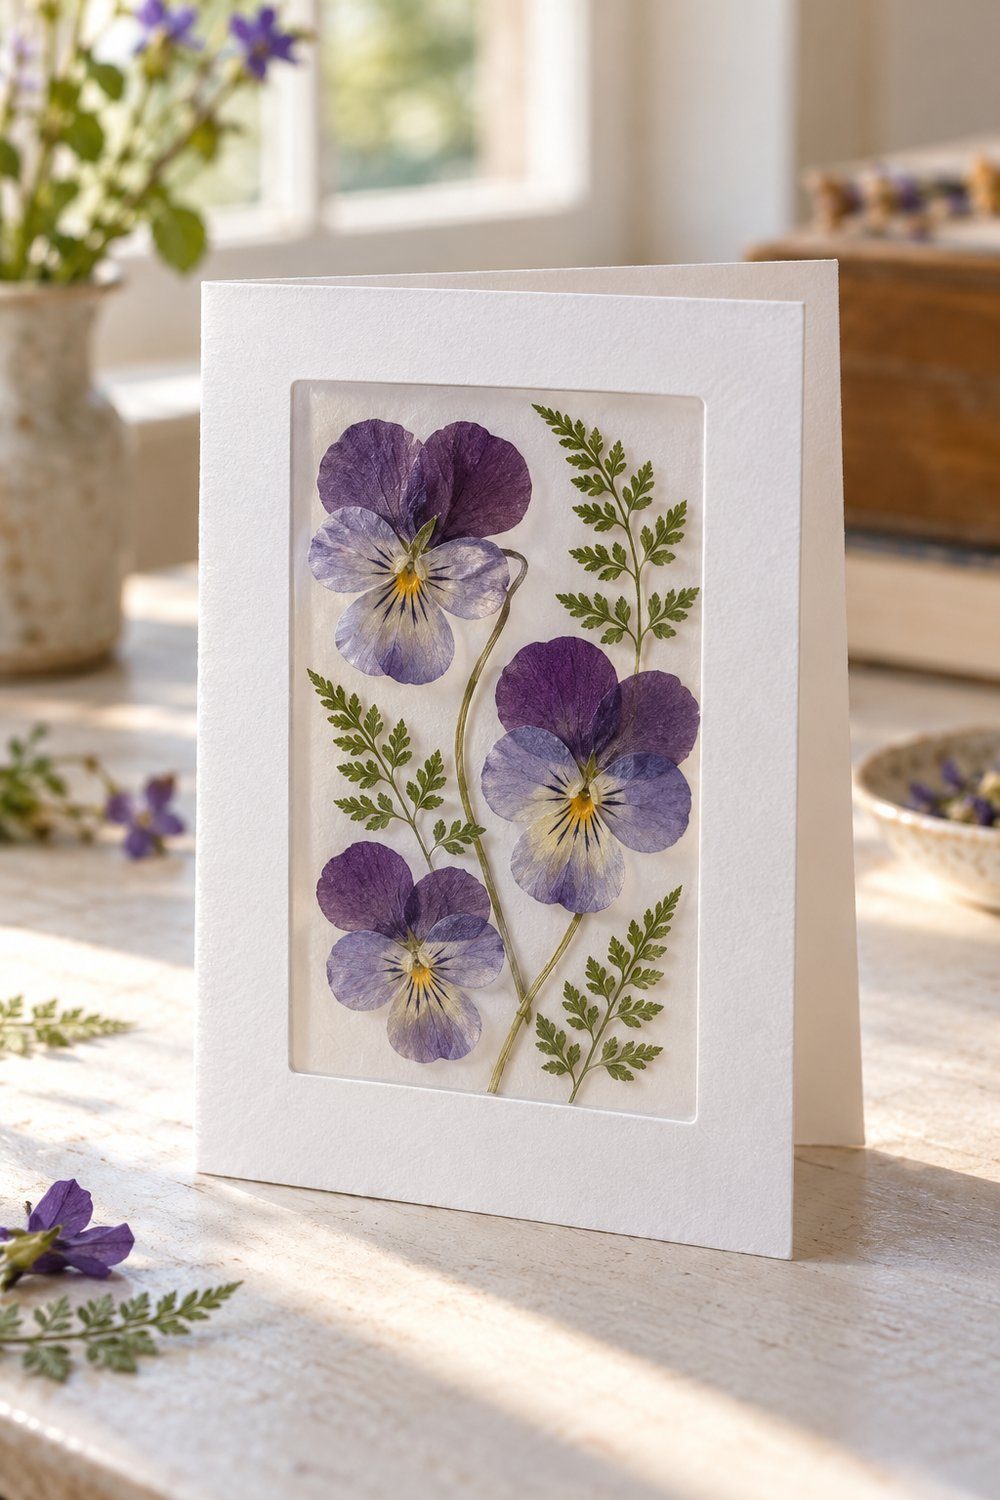
Make your card part of the decor by giving it a translucent floral window. Small flat blossoms, such as violas, suit the space. Press your flowers until dry, then cut a window in folded cardstock. Sandwich the flowers face down between clear adhesive laminate pieces, leaving a sticky margin. Attach that margin inside the card and smooth it down. Prop it on a shelf for a stained-glass effect.
Materials: Pressed flowers, cardstock, clear EasyLiner, scissors, ruler, white paper, book.
Cost n/s · 30 min (+ pressing about a week) · Window 3.25 × 4.5 in (8.5 × 11 cm) · Level medium
Tutorial: Jennifer of The Craft Patch, Duck Brand
5. Decorative Pressed Flower Candle
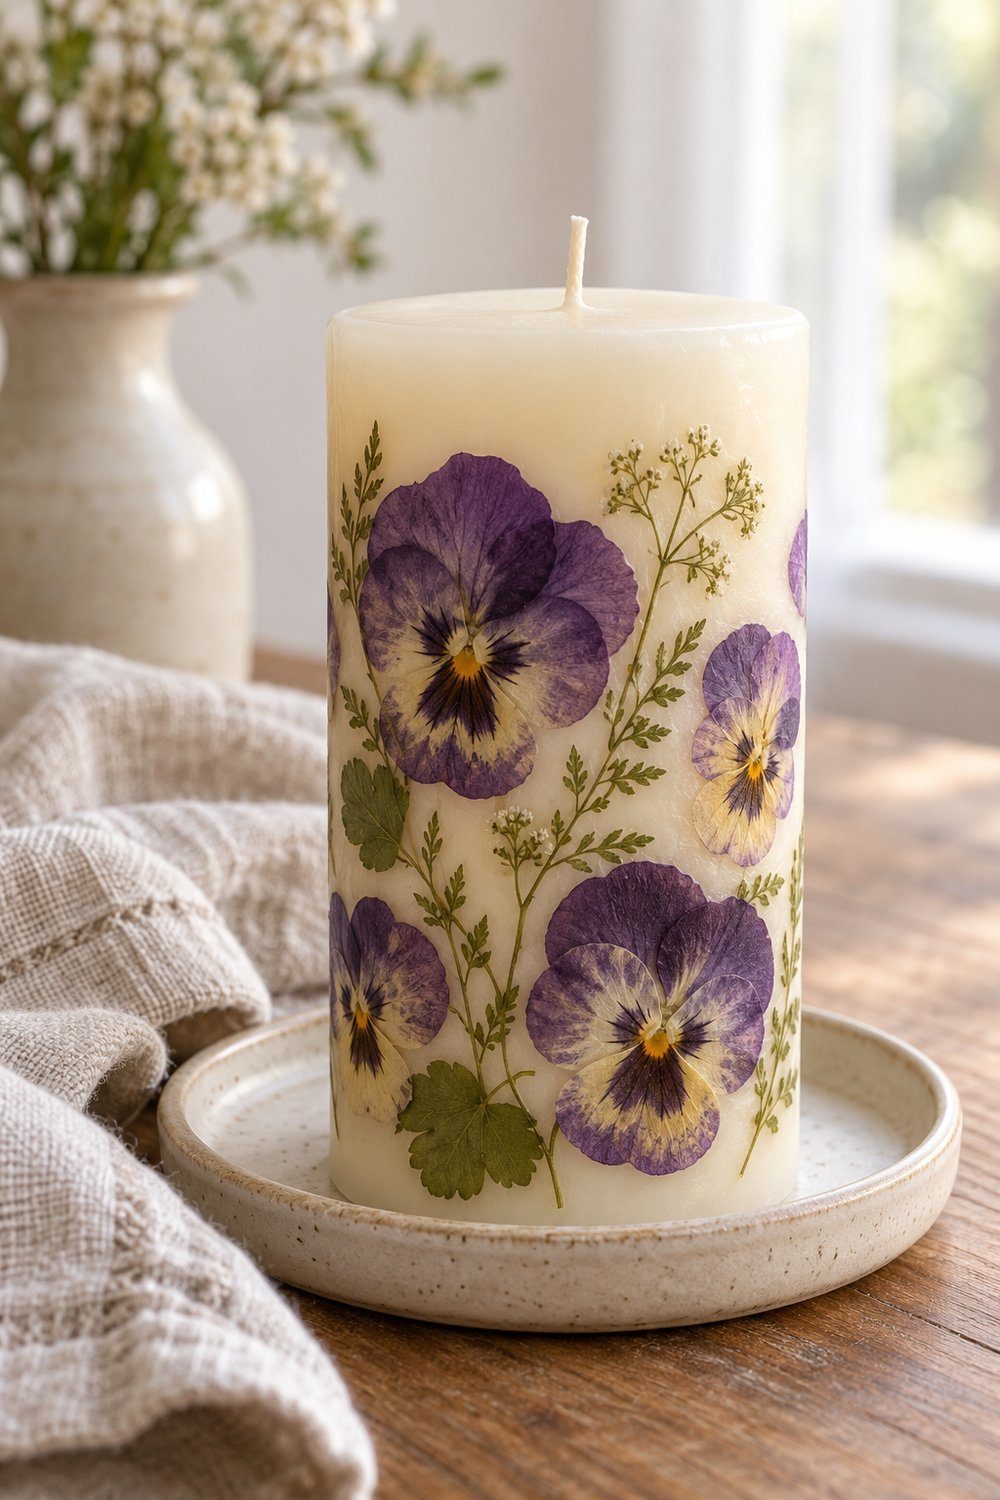
Use a pillar candle as a pale backdrop for pressed blossoms; tiny pansies and wispy greenery give a garden-border look. Lay out your pattern, melt wax in a matching tealight, and hold a flower against the pillar with tweezers. Brush melted wax over the flower in gentle strokes, then continue around the sides. Let the wax firm before displaying. Display it unlit beside an LED candle.
Materials: 1 pillar candle, pressed flowers, tealight, lighter, tweezers, silicone brush.
Cost n/s · Time n/s · Size n/s · Level easy
Tutorial: Debbie Chapman, One Little Project
Flowers with shape and texture
6. Dried Flower Wreath
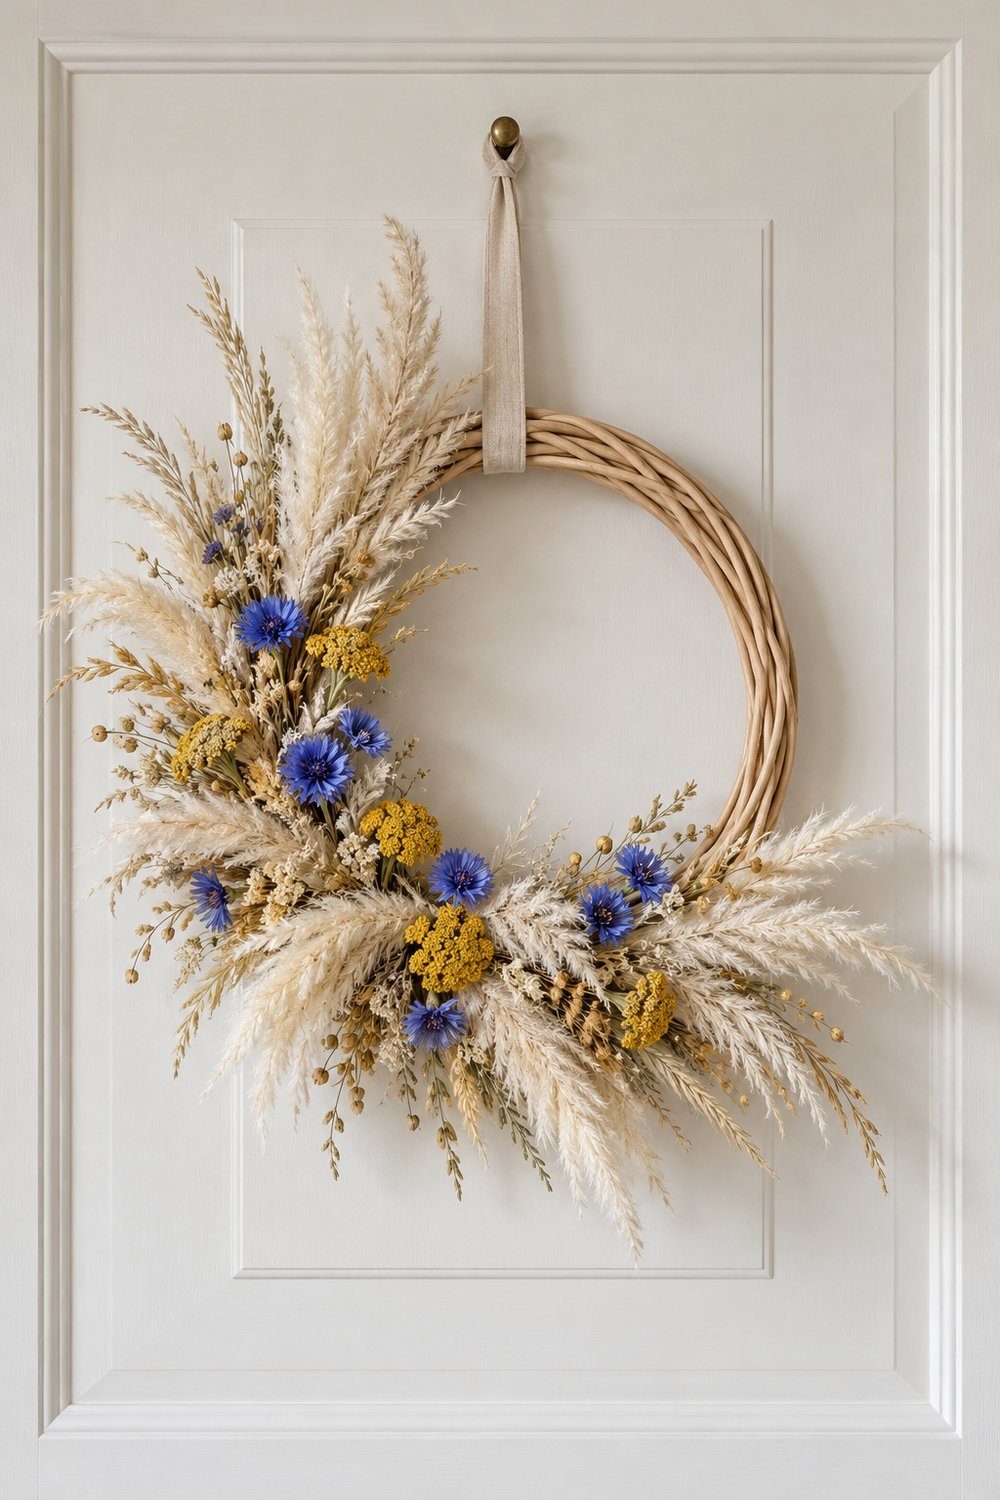
Build a wreath with a soft grassy base and distinct dried flower heads. Yarrow and cornflowers work with the pampas grass suggested in the tutorial. Pull the grass into short pieces, group it into small bunches, and weave it around part of the rattan base. Add the flowers in the same direction, using wire wherever stems need help staying put. Finish with ribbon.
Materials: Rattan base, pampas, dried flowers, ribbon, scissors, wire.
Cost n/s · 1–2 h · Overall size n/s; grass pieces about 4 in (10 cm) · Level easy
Tutorial: Becki Clark, Gathered
For a seasonal companion, see Christmas Decorations with Dried Bouquets for Your Home.
7. Dried Flower Cloche
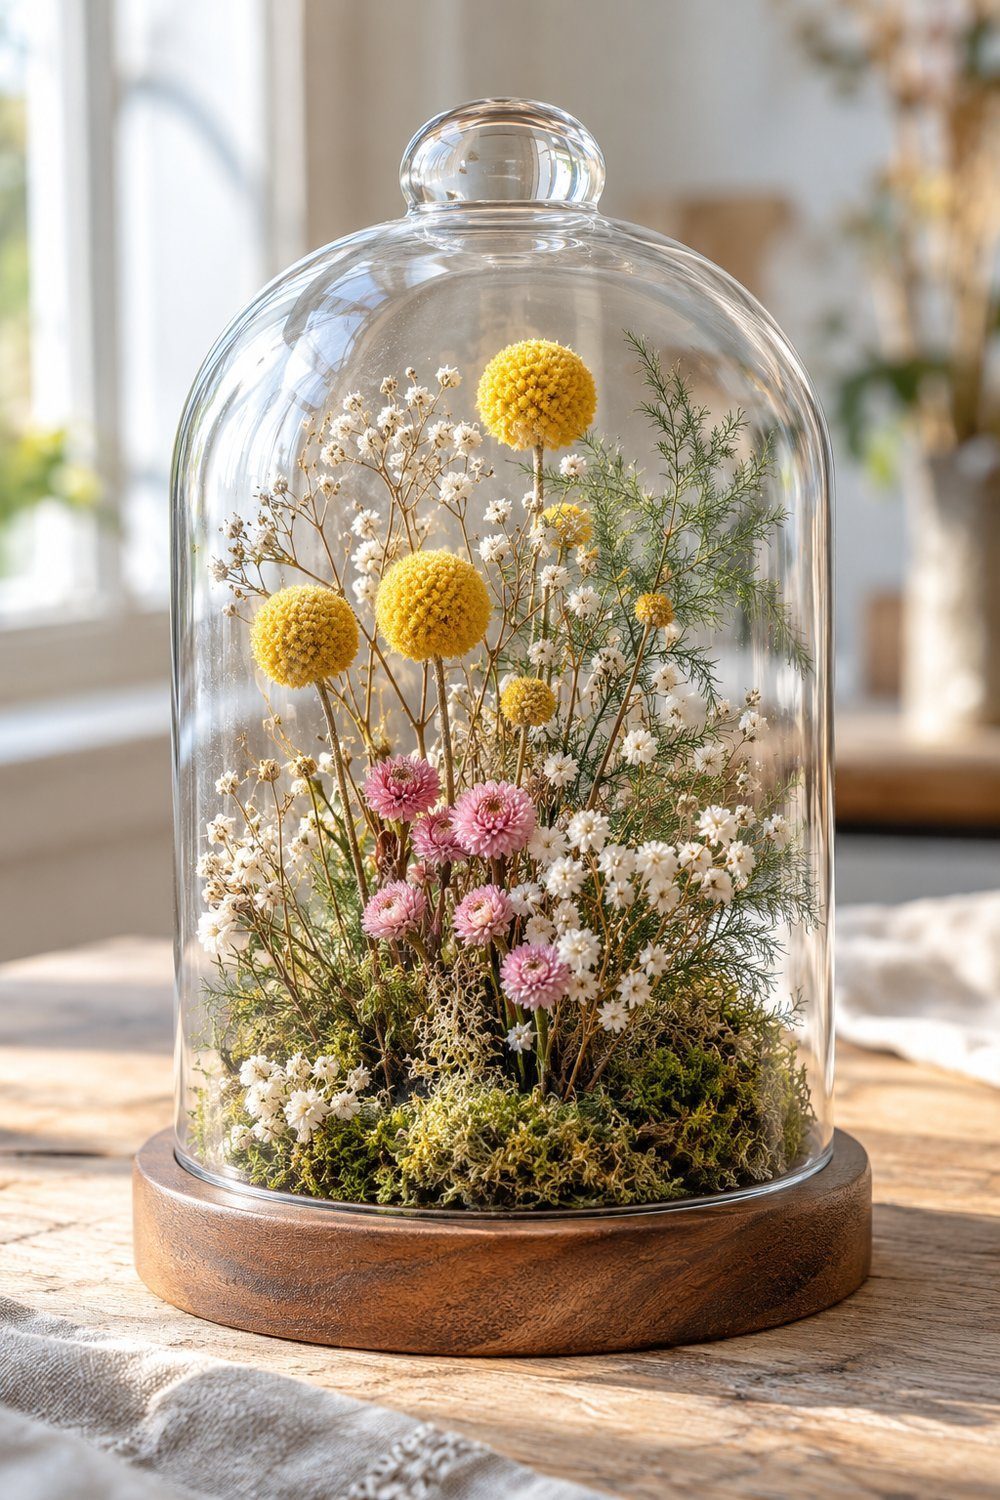
Put your smallest dried arrangement under glass for a tidy shelf display. Craspedia, baby’s breath, and ming fern supply contrasting shapes in Rachel’s version. Set a flower frog on the base, cover it with filler flowers or moss, then add the thicker stems for structure. Slip slender statement stems into that support and lower the dome to test the fit. Adjust the height before closing it.
Materials: 1 glass dome, dried flowers, frog, scissors, optional moss.
Cost n/s · Time n/s · Size n/s · Level easy
Tutorial: Rachel, The Crafted Life
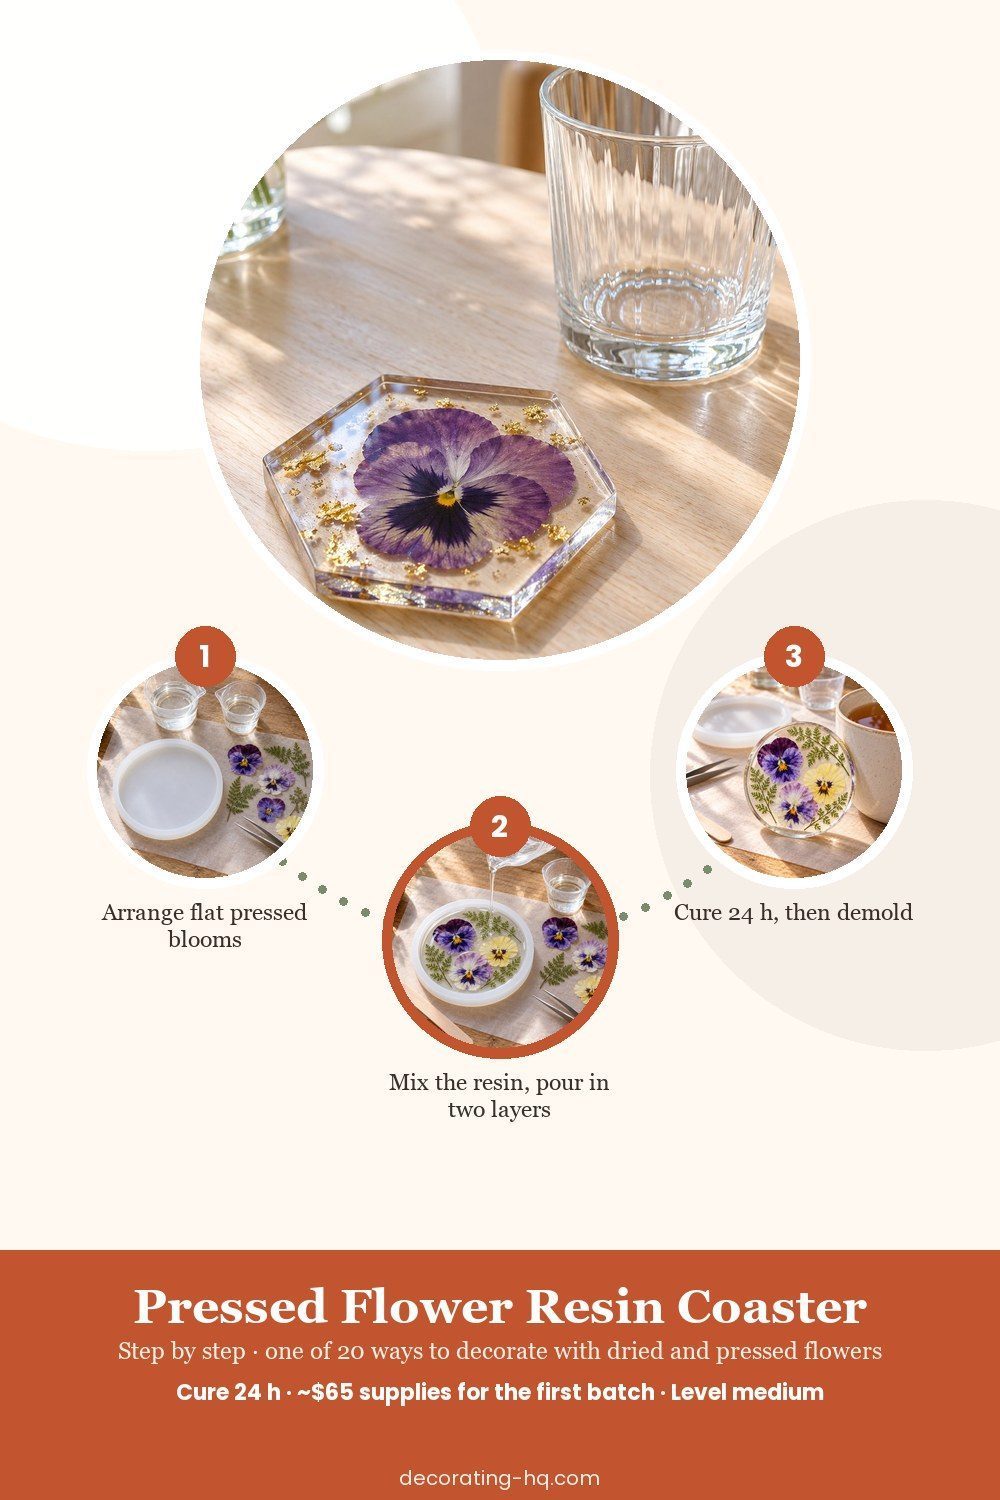
8. Pressed Flower Resin Coaster
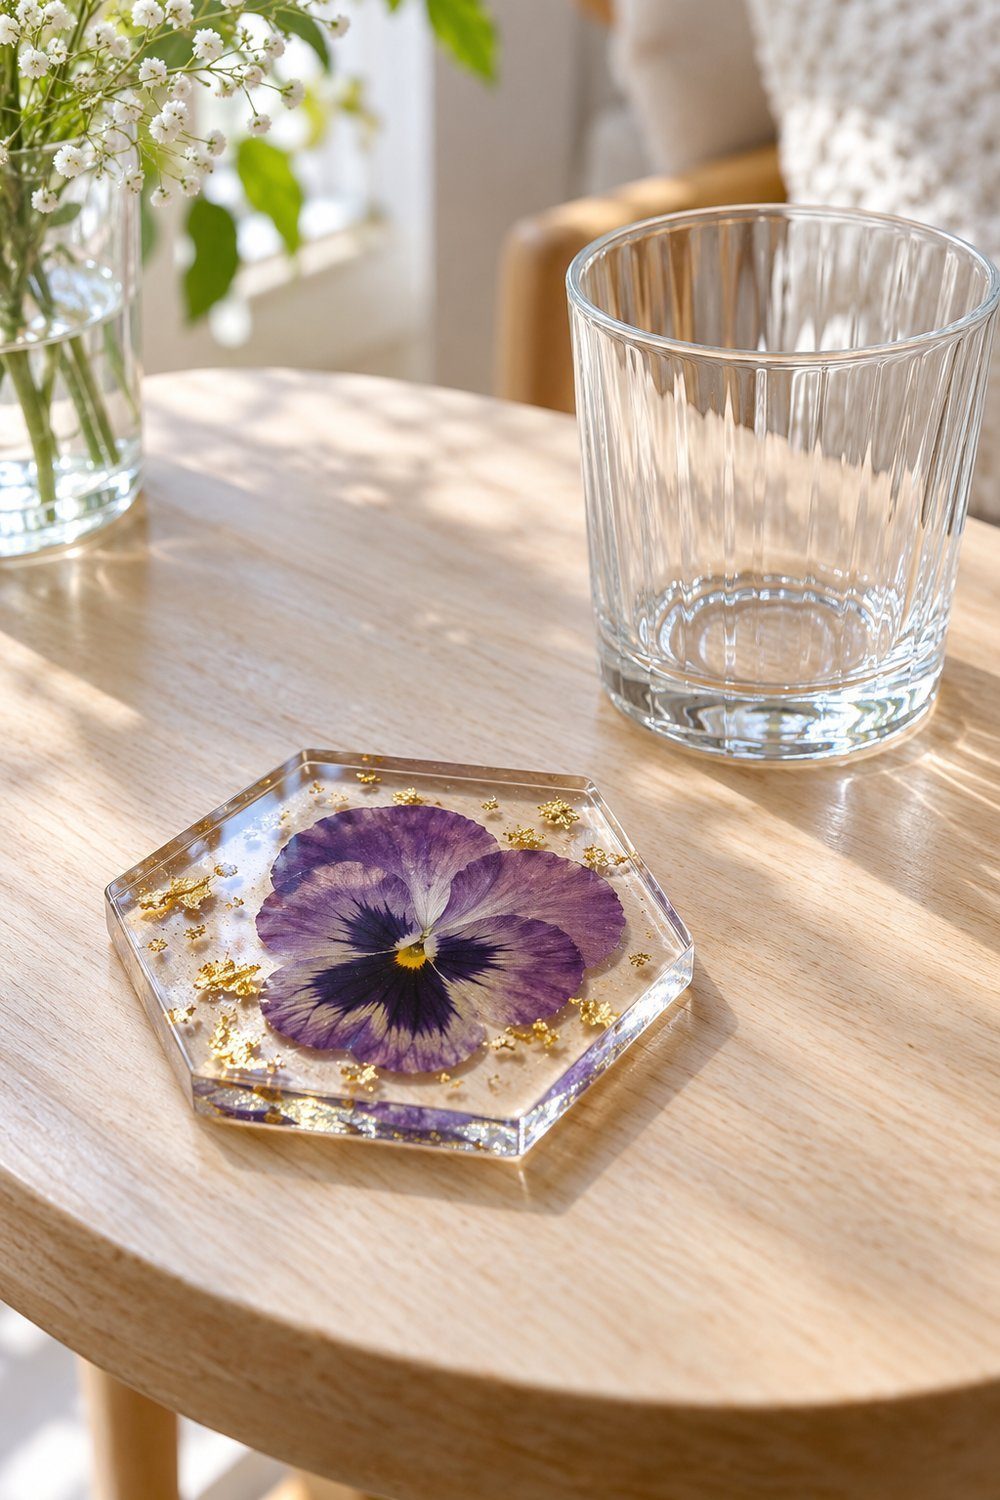
Preserve a flat bloom inside a clear coaster for a useful tabletop accent. A pressed pansy or cosmos flower makes a readable focal point; that choice is yours. Clean and dry the mold, arrange your flower design beside it, and mix the resin according to its label. Pour a shallow layer, position the flowers, then cover with the remaining resin. Cure before releasing the coaster.
Materials: Epoxy, silicone mold, pressed flowers, optional gold flakes, measuring cups, stick, gloves, protective paper.
Cost ~$65 · Time n/s (+ cure 24 h) · Size n/s · Level medium
Tutorial: Holly Heuver, Garden Therapy
9. Handmade Floral Paper
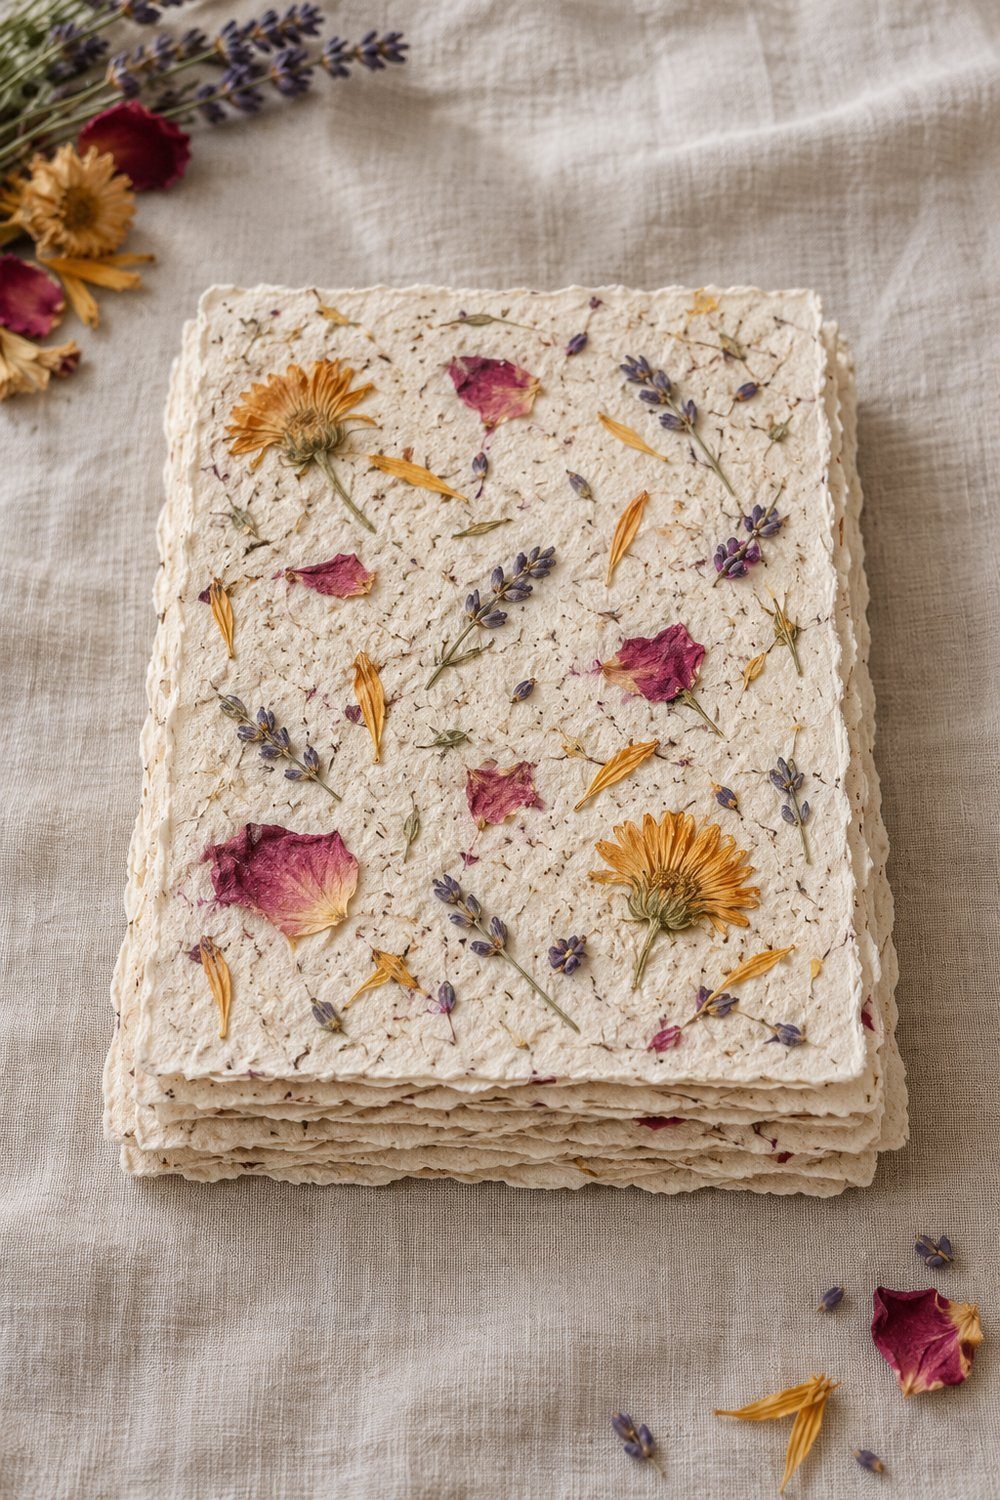
Let loose petals become the decoration in handmade paper. Rose, lavender, and calendula are all named in this tutorial. Tear scrap paper, soak it in hot water, then blend small batches with water. Lift the pulp with a mold and deckle, transfer it to your prepared drying surface, and press scattered petals into the wet sheet. Sponge away excess water and leave to dry.
Materials: Scrap paper, water, dried petals, tub, craft blender, mold and deckle (2 frames), sponge, drying towels.
Cost n/s · Time n/s; soak a few hours or overnight · Size n/s · Level easy
Tutorial: Stacy Karen, adapted by Herbal Academy, Herbal Academy
10. Dried Flower Garland
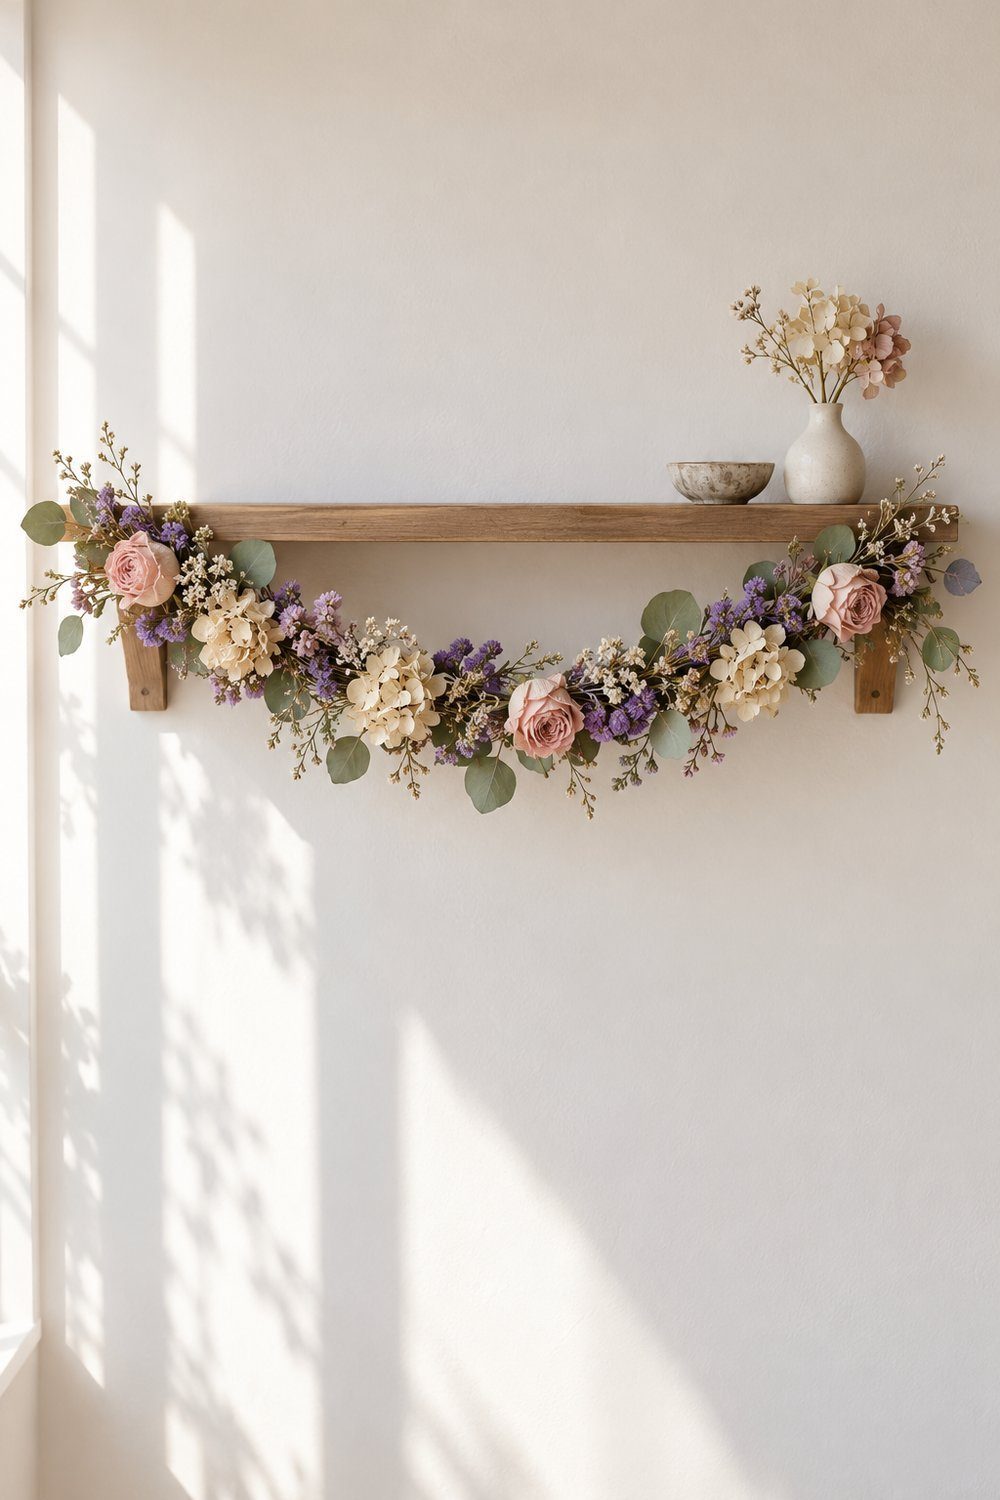
Run a flexible garland along a shelf or table to make leftover dried stems feel intentional. Statice, hydrangea, roses, and eucalyptus all appear in Charlotte’s mix. Fasten craft wire to ribbon or string, add small flower bunches, and wrap as you work along the support. Reserve the finishing bunch and attach it facing backward to hide the last stems. Fill the gaps with spare flowers.
Materials: Dried flowers, wire, ribbon; reserve 1 finishing bunch.
Cost n/s · Time n/s · Size n/s · Level easy
Tutorial: Charlotte Smith, Lotts and Lots
11. Botanical Wax Sachet
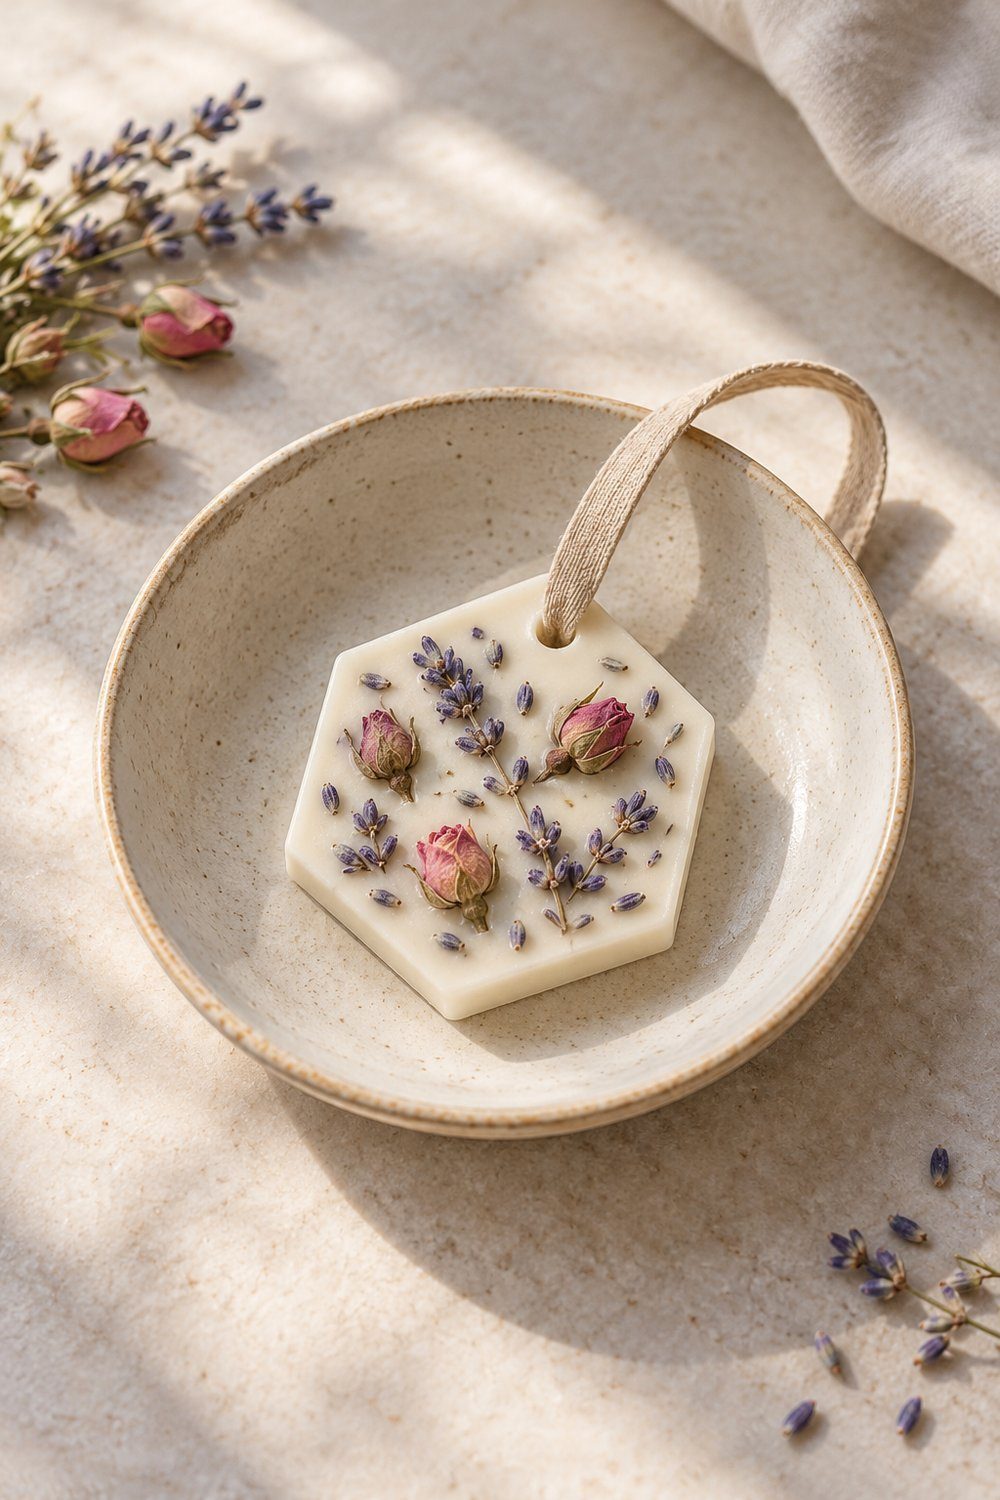
Hang a botanical wax tablet in a small space or display it in a decorative bowl. Lavender and rosebuds look especially clear against creamy soy wax. Melt the wax in a double boiler, stir in the tutorial’s fragrance blend, and pour into a silicone mold. When the surface turns cloudy, gently press on your dried flowers. Let the tablet harden, release it, and thread ribbon through the hole. Use tissue against fabric.
Materials: Soy wax, essential oils, dried flowers, silicone mold, melting pot, ribbon.
Cost n/s · 20 min (+ cooling 1 h) · Size n/s · Level easy
Tutorial: Irena, Country Hill Cottage
12. Flower Potpourri Display
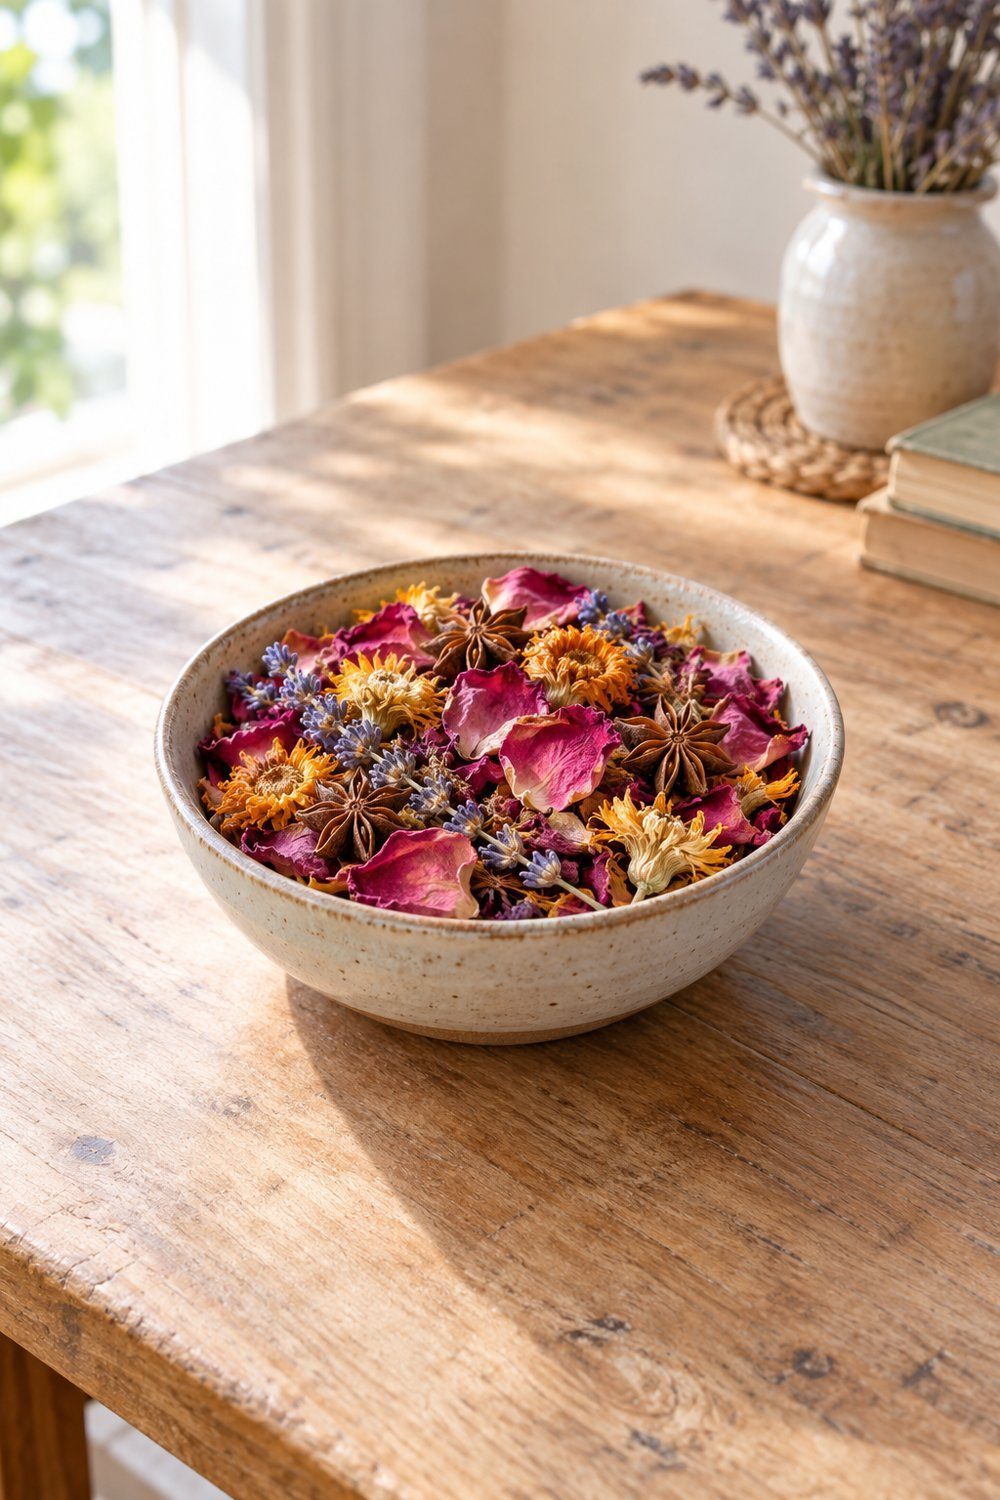
Turn fragile petals into a fragrant display you can enjoy at close range. Use dried roses, calendula, lavender, or gomphrena with whole spices for contrast. Combine the dry flowers and optional fruit in a bowl, add your chosen essential oils, then toss with orris root powder to hold the scent. Transfer the mix to a wide-mouth container with a breathable covering.
Materials: Dried flowers, optional dried fruit, spices, essential oils, orris powder, bowl, breathable container.
Cost ~$5–10 · 15 min total · 1 quart (950 mL) jar · Level easy
Tutorial: Eryn Whalen, Eryn Whalen Online
13. Herbarium Bottle in Oil
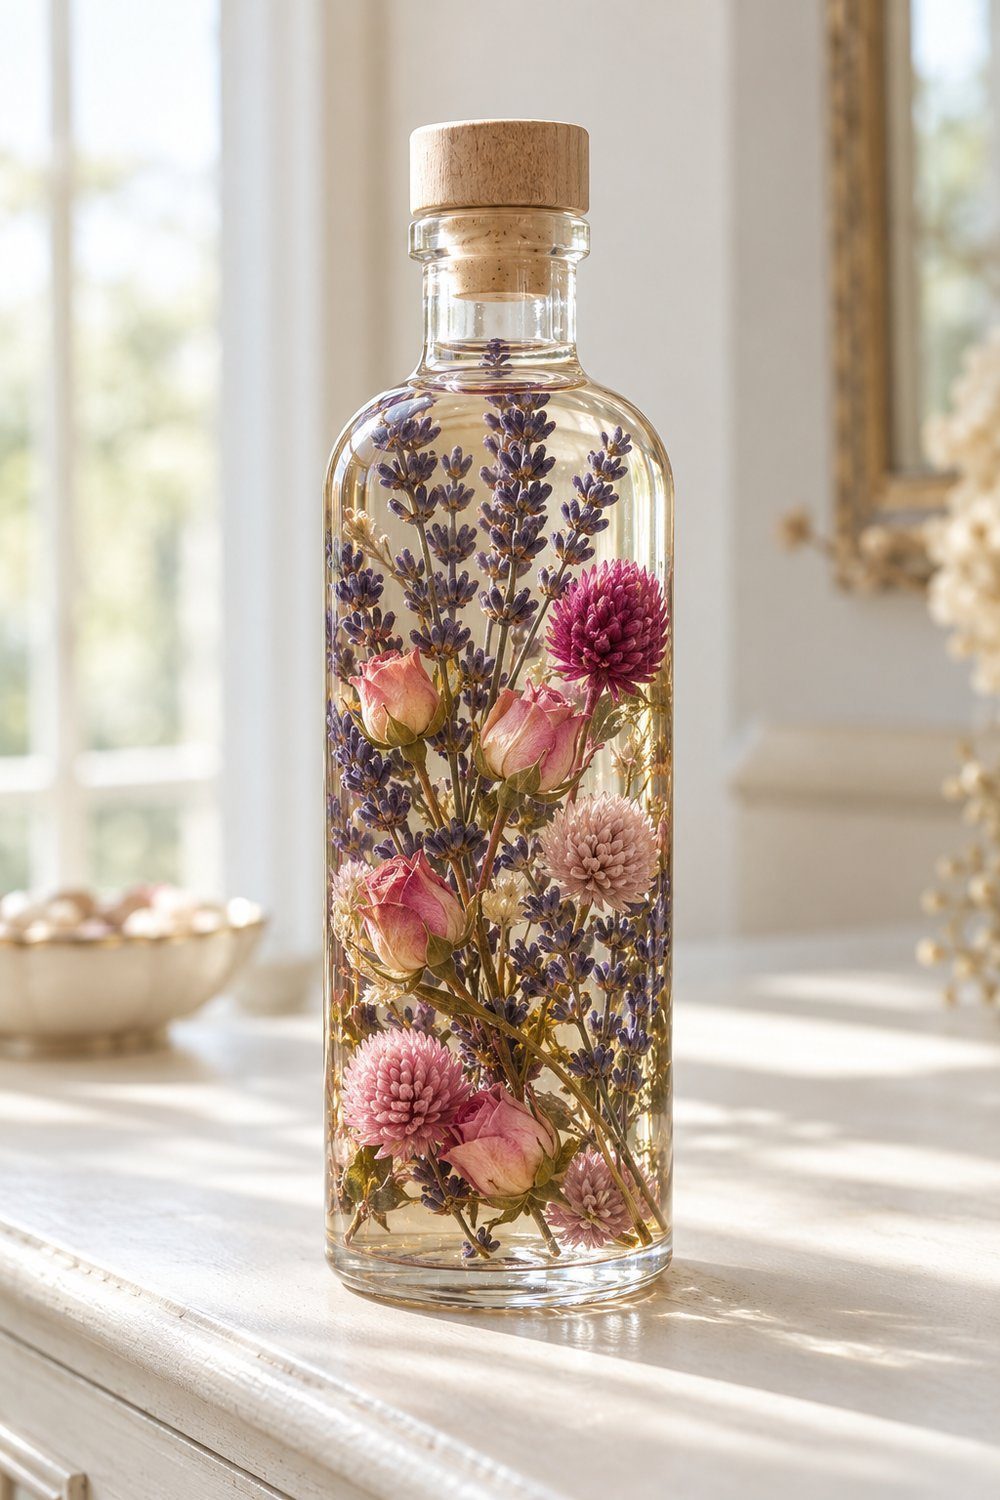
Suspend the shapes of a small bouquet in a clear bottle of oil. Jennifer’s arrangement combines lavender, rosebuds, and globe amaranth; statice is another option in her examples. Trim the dried stems, guide them through the opening with tweezers, and build a loose arrangement. Tilt the bottle while slowly pouring mineral oil down the side. Leave it open for 30 min so bubbles can escape, then close with a snug cork or lid.
Materials: Bottle with lid, dried flowers, mineral oil, scissors, long tweezers.
Cost n/s · Time n/s (+ bubbles settling 30 min) · Size n/s · Level easy
Tutorial: Jennifer Howard, Cottage On Bunker Hill
Flowers above the tabletop
14. Branch Wall Hanging
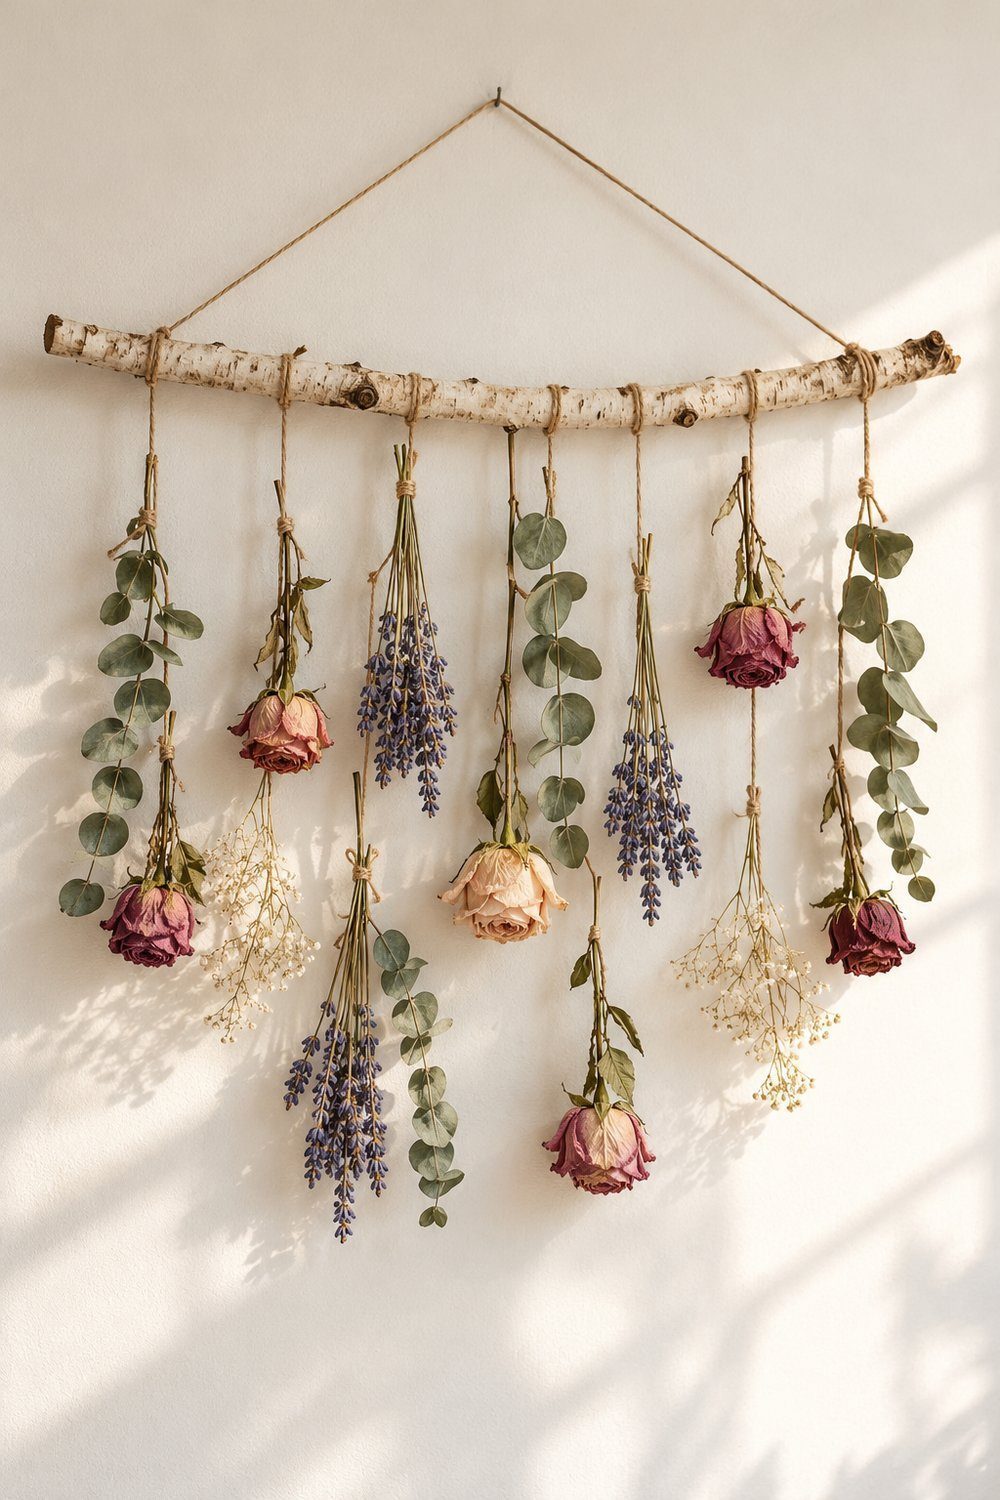
Give a saved bouquet more space by hanging its stems below a branch. Eucalyptus supplies the long lines in Teresa’s version; lavender or dried roses can provide the flowers. Trim your branch and sort the stems, then tie small flower groupings with jute twine. Knot the other ends onto the branch at staggered lengths. Add a longer twine hanger across the top.
Materials: Branch, dried flowers, eucalyptus, jute, scissors, optional hot glue.
Cost n/s · Time n/s · Overall size n/s; hanger twine 24 in (61 cm) · Level easy
Tutorial: Teresa, The How To Mom
15. Flower Embroidery Hoop
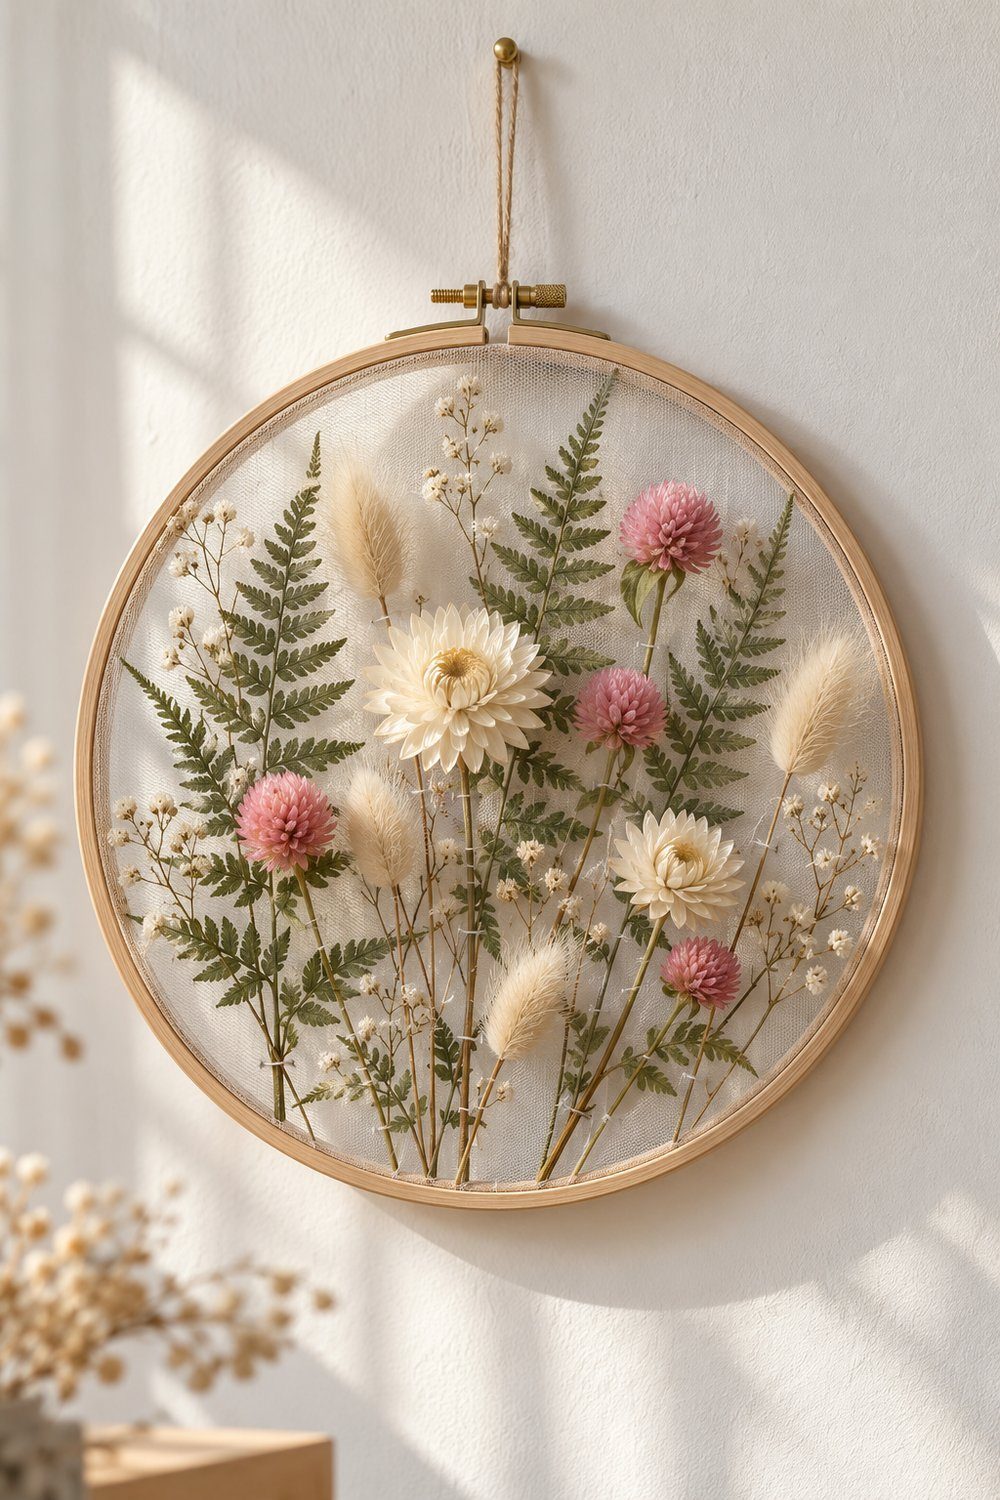
Combine papery flowers with visible hand stitching for a light wall accent. Pressed fern makes the background; strawflowers and gomphrena add raised detail. Stretch tulle in your hoop, lay out the design, and stitch the flatter greenery first. Add smaller stems, then attach larger heads with hot glue, holding them for 30 seconds as described. Trim and secure the tulle at the back.
Materials: Hoop, tulle, scissors, embroidery thread, dried flowers, hot glue.
Cost n/s · Time n/s; hold glued heads 30 seconds · Size n/s · Level medium
Tutorial: Holly Heuver, Garden Therapy
Bring more foliage into your display with Creative ideas for using leaves in decoration.
What will help your flower projects last?
Which flowers are easiest to press?
Start with pansies, violas, small daisies, or ferns. Their flat shapes suit paper crafts. Keep full strawflowers and thicker roses for the vase, wreath, or cloche.
Can you use a saved wedding bouquet?
Yes. Hang stems for a vase, press individual flowers for flat crafts, or use silica gel for fuller heads. Photograph the arrangement before taking it apart.
Will glue keep pressed flowers bright?
Expect natural color changes. Mod Podge attaches and coats flowers; pressing and light exposure also affect their appearance. Display finished pieces away from direct sun.
What can you do with broken petals?
Save clean, dry fragments for handmade paper, potpourri, wax tablets, or resin accents. Keep complete blooms for transparent acrylic and framed work, where their outlines show clearly.
Are all flower candles suitable for lighting?
Keep the decorated pillar unlit. Use an LED votive in the flower lantern. Display the wax sachet at room temperature in a bowl or on a ribbon.
Useful floral finishing touches
16. Pressed Flower Phone Case
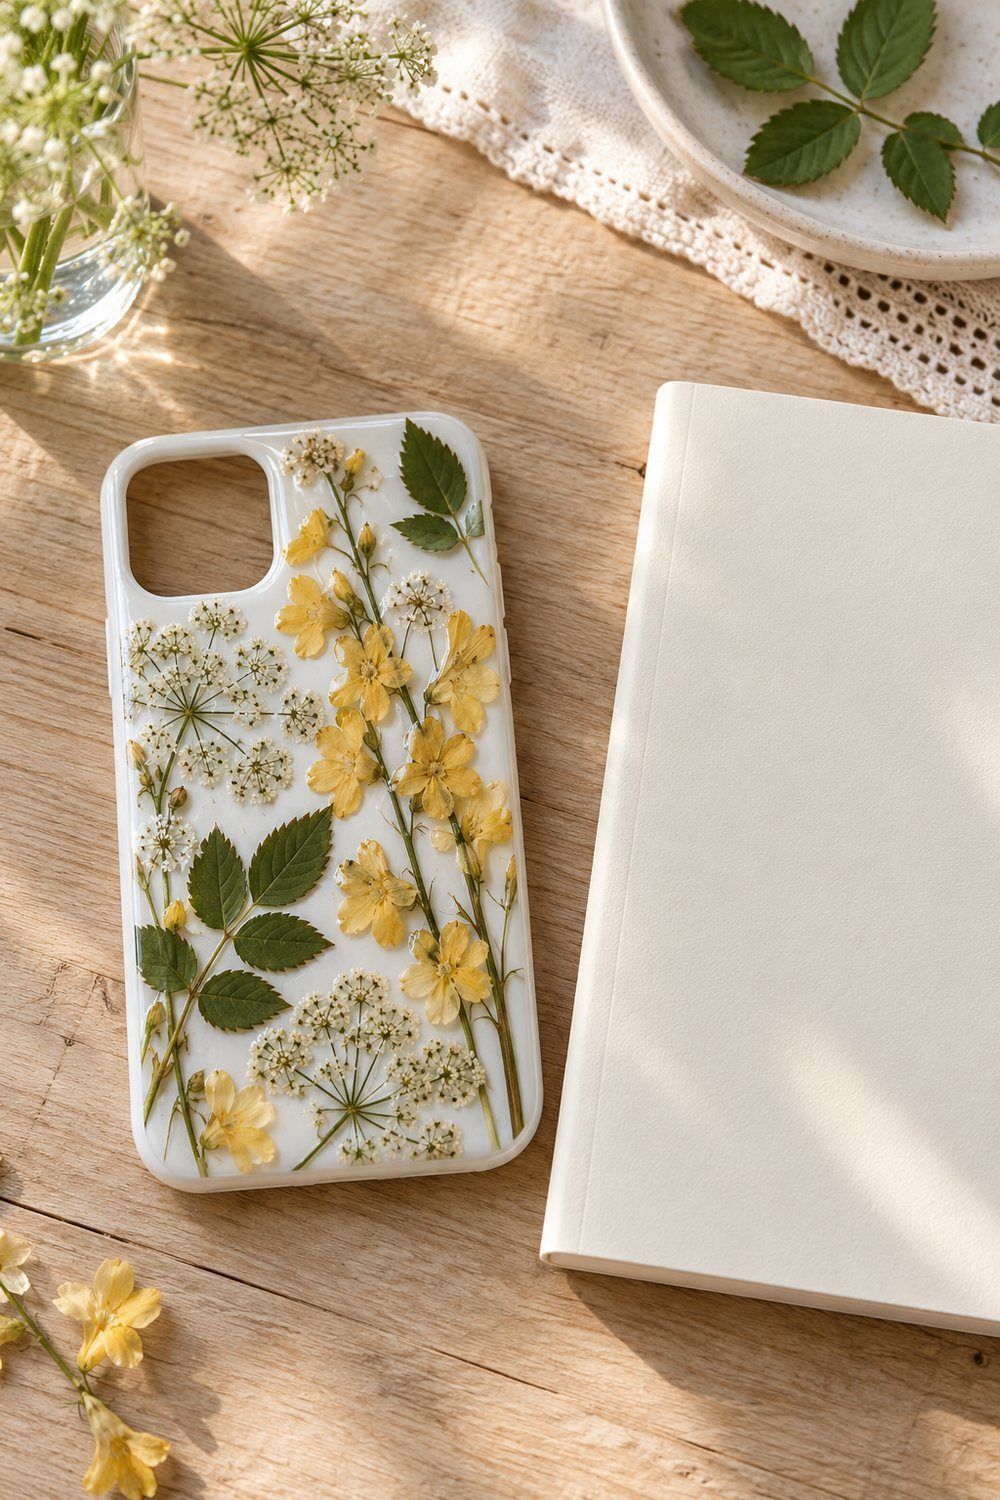
Turn a phone case into portable flower art. Yellow larkspur, Queen Anne’s lace, and rose leaves are Rose’s chosen botanicals. Arrange them on a plain case and photograph the layout, then lift and glue each piece in place with craft glue. Mix the casting resin, spread it over the flowers, and leave the case level to dry overnight. Follow your resin’s label for mixing and cure; the tutorial’s first mixing stage is 2 min.
Materials: Phone case, pressed flowers, craft glue, epoxy, cups, stick, tweezers, protective paper, gloves.
Cost n/s · Time n/s; source drying overnight · Size n/s · Level medium
Tutorial: Rose Jang, You + Nah
17. Pressed Flower Jar Lantern
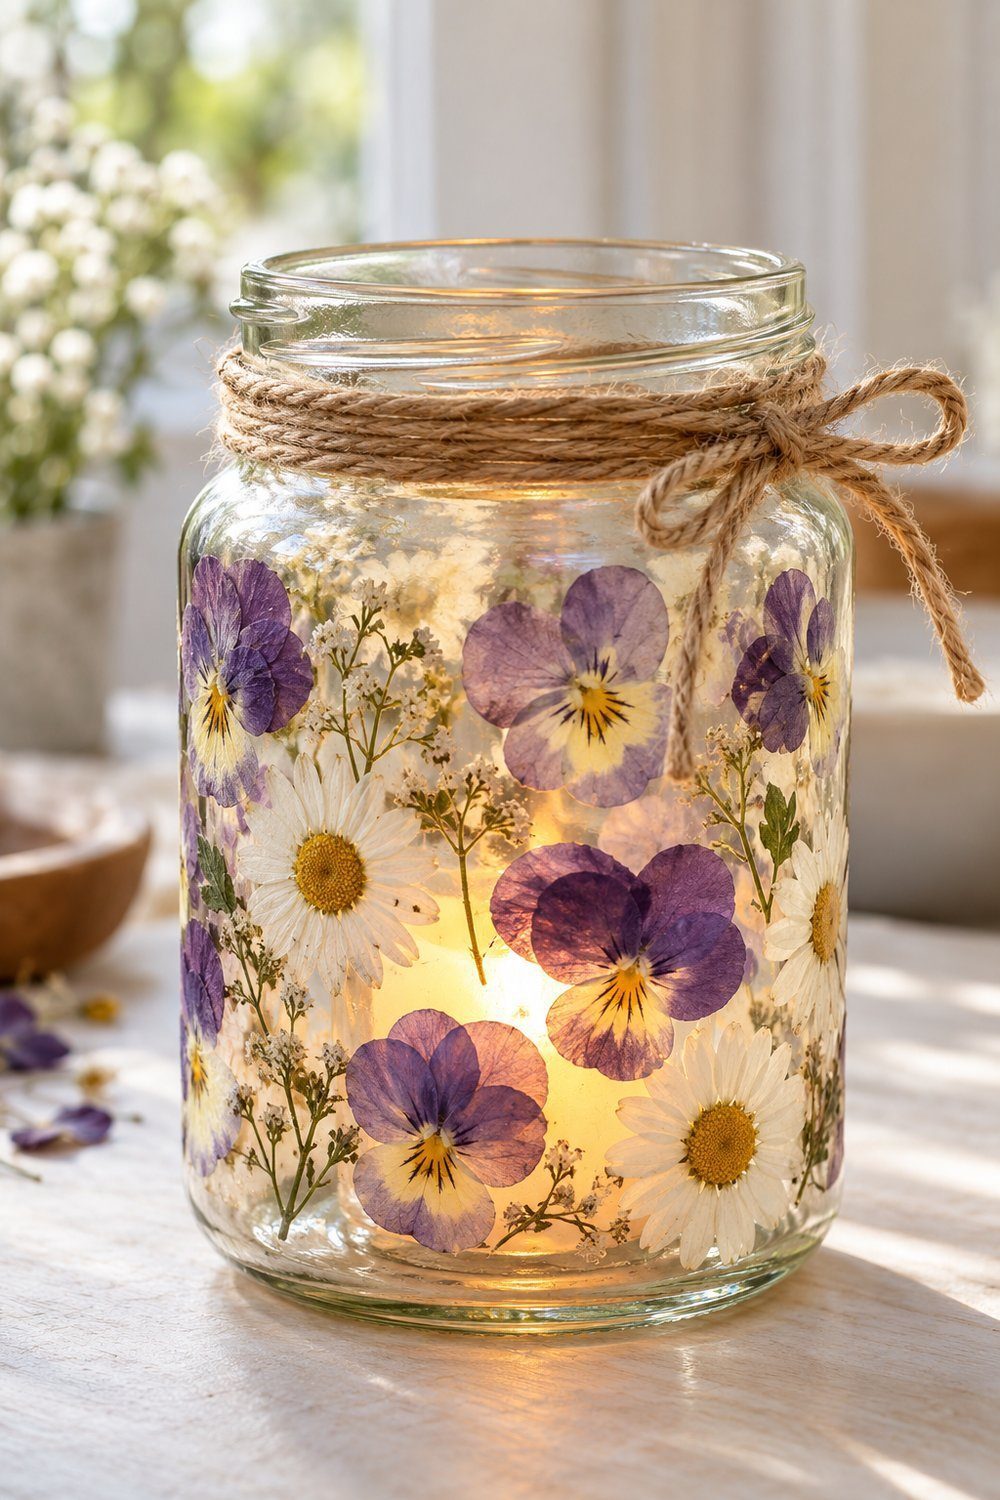
Let a saved food jar carry a ring of delicate garden flowers. Daisies, violas, and pansies are among Crissy’s suggestions. Wash and dry the jar, brush on a thin layer of Mod Podge, and press the flowers onto the outside. Cover the design with another thin coat and allow it to dry before handling. Tie twine at the rim and put an LED votive inside.
Materials: Glass jar, 7–10 pressed flowers, Mod Podge Multi, brush, scissors, twine, LED votive.
Cost ~$5–10 · 35 min including initial drying · Size n/s · Level easy
Tutorial: Crissy Baumann, First Day of Home
18. Pressed Flower Resin Magnet
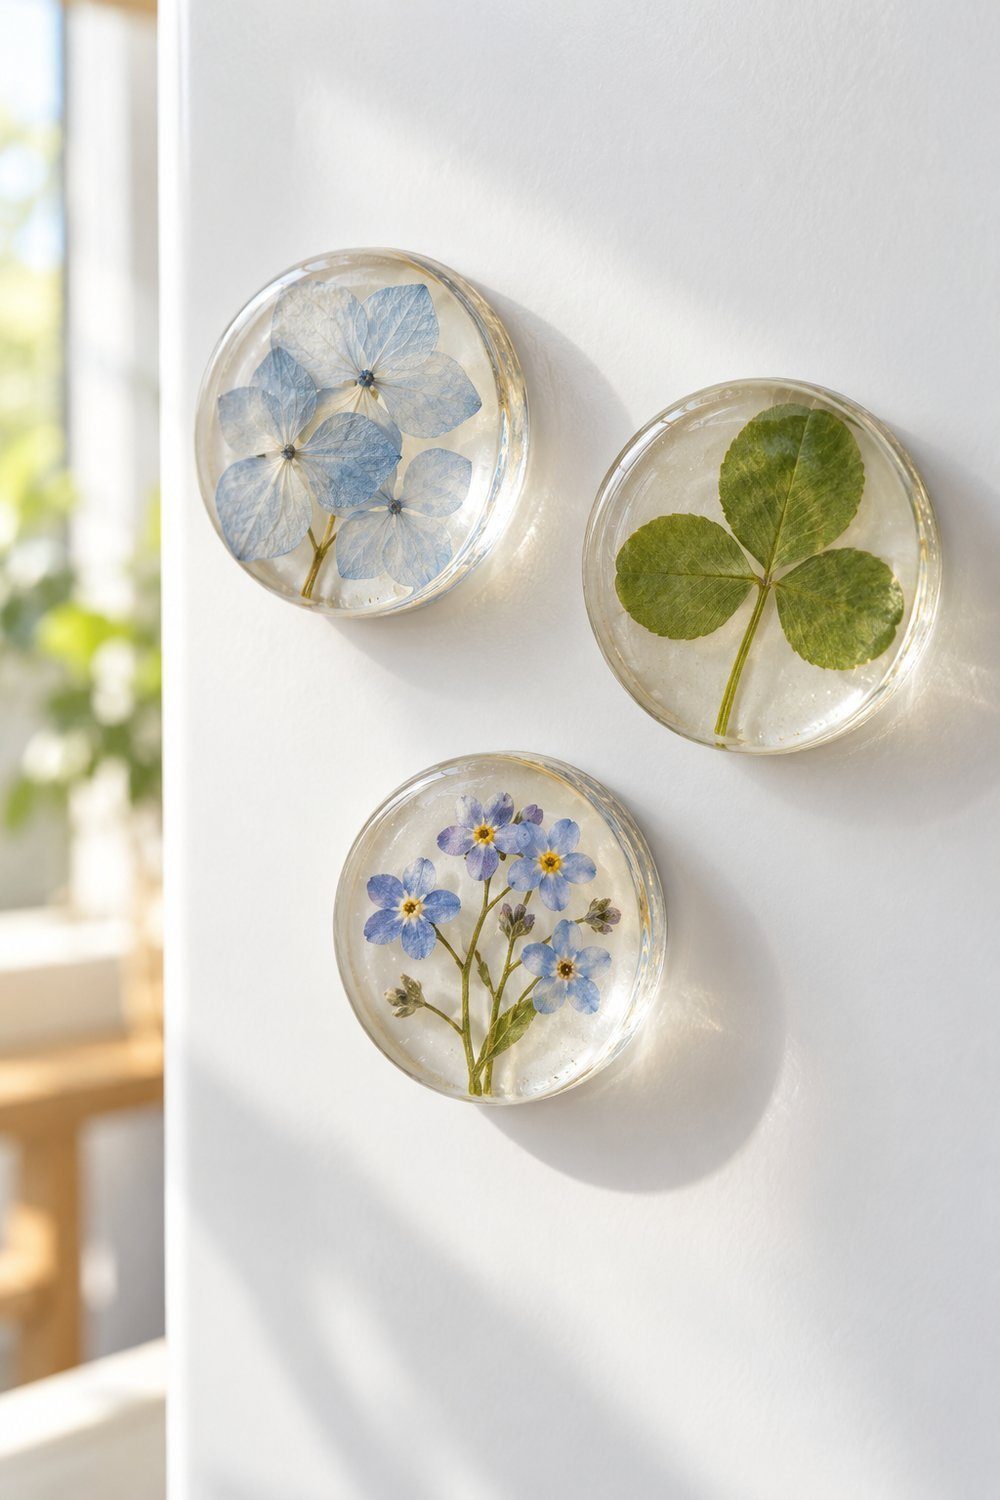
Give your refrigerator or message board a botanical accent with a small resin magnet. Hydrangea florets, clover, and forget-me-nots are the authors’ choices. Prepare the mold with release spray, mix the resin, and pour a partial layer. Add flowers and optional glitter, cover with more resin, then let it cure for 24 h. Release the cast shapes and glue magnets to their backs.
Materials: EasyCast, mold, mold release, cups, sticks, gloves, pressed flowers, optional dye/glitter, magnets, E6000.
Cost n/s · Time n/s (+ cure 24 h) · Size n/s · Level medium
Tutorial: Jane and Sonja, Crafts by Amanda
19. Acrylic Flower Place Card
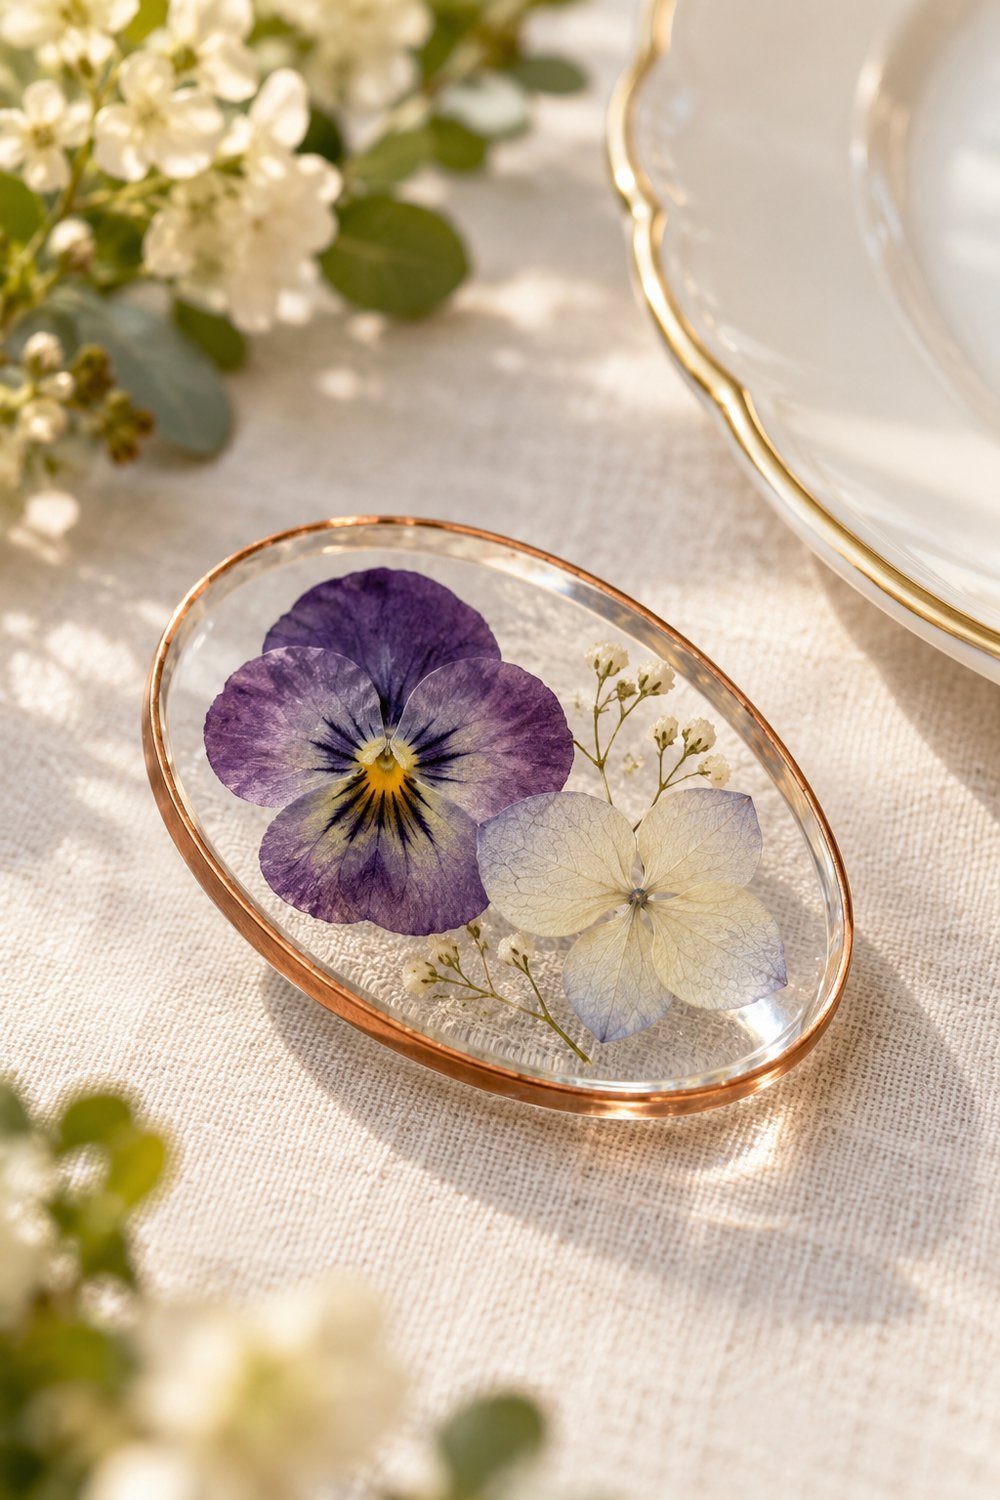
Carry pressed flowers onto the dining table with clear acrylic place cards edged in copper. Tiny pansies or single hydrangea florets fit the flat sandwich; choose your own colors. Prepare matching acrylic blanks, lay flowers on the lower piece, and add the upper piece. Wrap copper tape around the edges to hold the layers together. Clean away fingerprints, then add a name with vinyl or a paint pen.
Materials: Acrylic blanks, pressed flowers, copper tape, vinyl or paint pen, microfiber cloth.
Cost n/s · Time n/s · 3 × 1.75 in (7.5 × 4.5 cm) · Level medium
Tutorial: Jessica M, Modern DIY Bride
20. Hand-Sewn Flower Sample Book
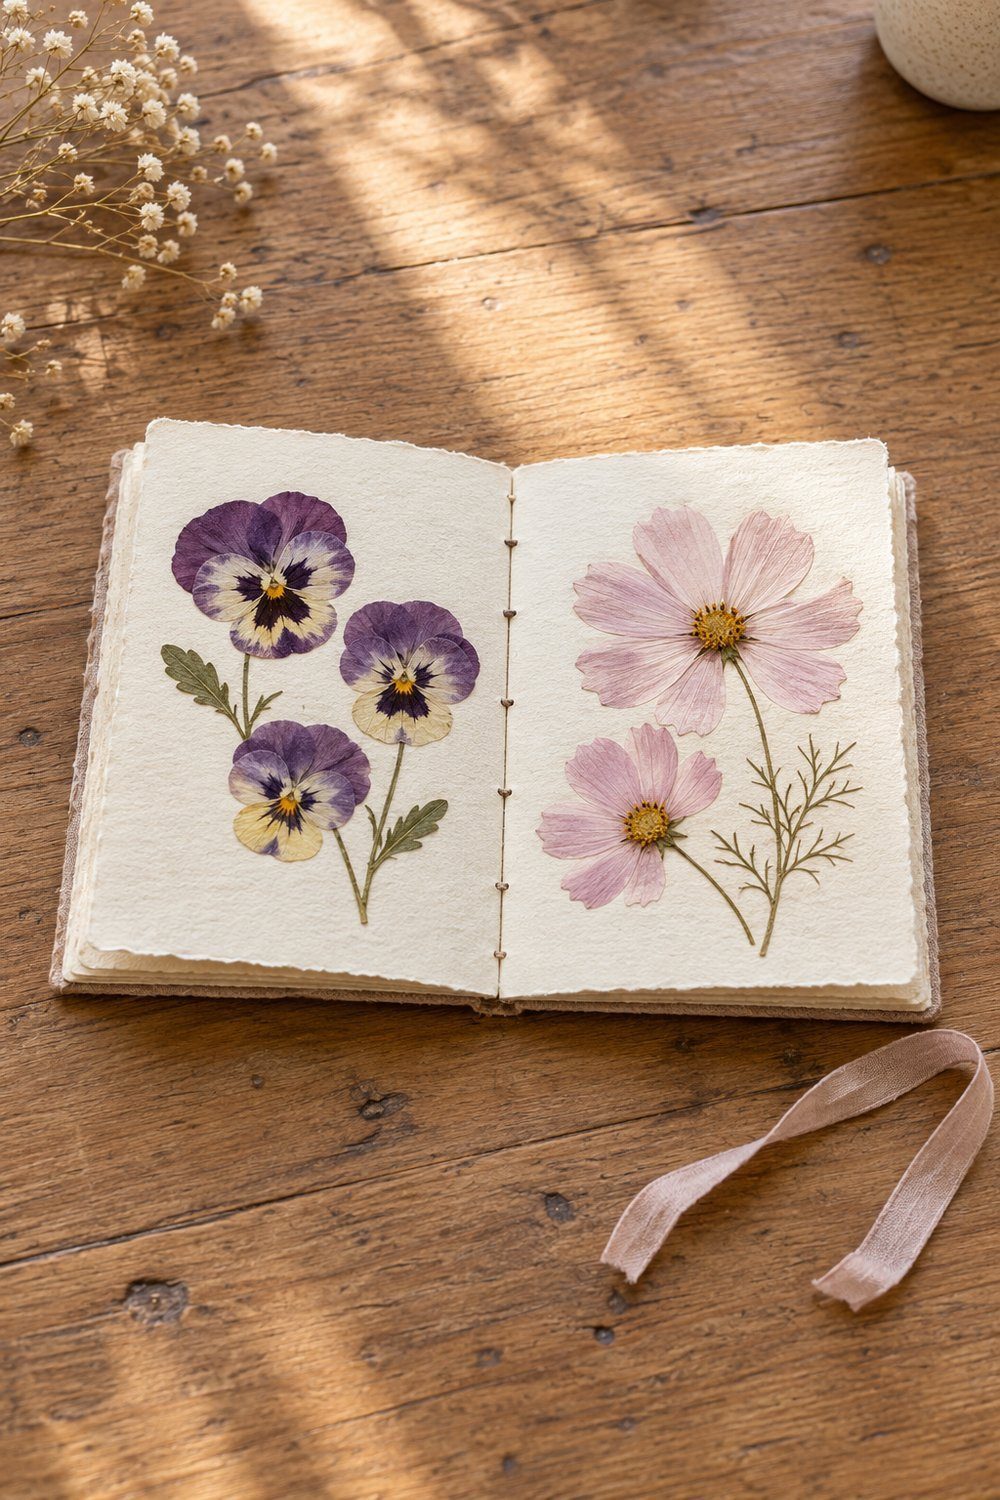
Make a small botanical book you can leave open on a desk or shelf. Thin garden flowers, such as pansies or cosmos, suit its paper pages. Fold 6 sheets of paper together, hold the stack with clips, and machine-sew a long straight stitch down the fold. Place your flowers between the pages, tie the book closed, and weight it while the specimens dry.
Materials: 6 paper sheets, clips, sewing machine, thread, garden flowers, ribbon, weight.
Cost n/s · Time n/s, drying duration n/s · Size n/s · Level medium
Tutorial: Charly, Lotts and Lots
Gather these before you begin
- Choose your finished object before selecting flowers.
- Set aside intact blooms and useful loose petals.
- Allow pressing, drying, or curing time in your schedule.
- Gather the exact adhesive or resin your tutorial uses.
- Protect your work surface and wear gloves when handling epoxy.
- Display finished botanicals away from direct sunlight.
Next: Easy and Elegant Hanging Decorations; Lace Decorated Jars.