Christmas Decorations to Make at Home: 20 Easy DIY Ideas


These Christmas decorations to make at home include ornaments, garlands, wreaths, table pieces, door decorations, gift toppers and candle holders: 20 DIY Christmas decorations with different main materials. Start with paper stars for the fastest stated time, or twine stars, which the tutorial costs at $0 with supplies you already have. Each idea gives materials, steps, published time and cost where available, size when stated, and difficulty.
Repeat deep red ribbon with fresh greenery: it brings paper, wood and fabric together. For more natural pairings, browse holiday decorating with natural elements.
Jump to
Ornaments
1. Pinecone reindeer ornaments
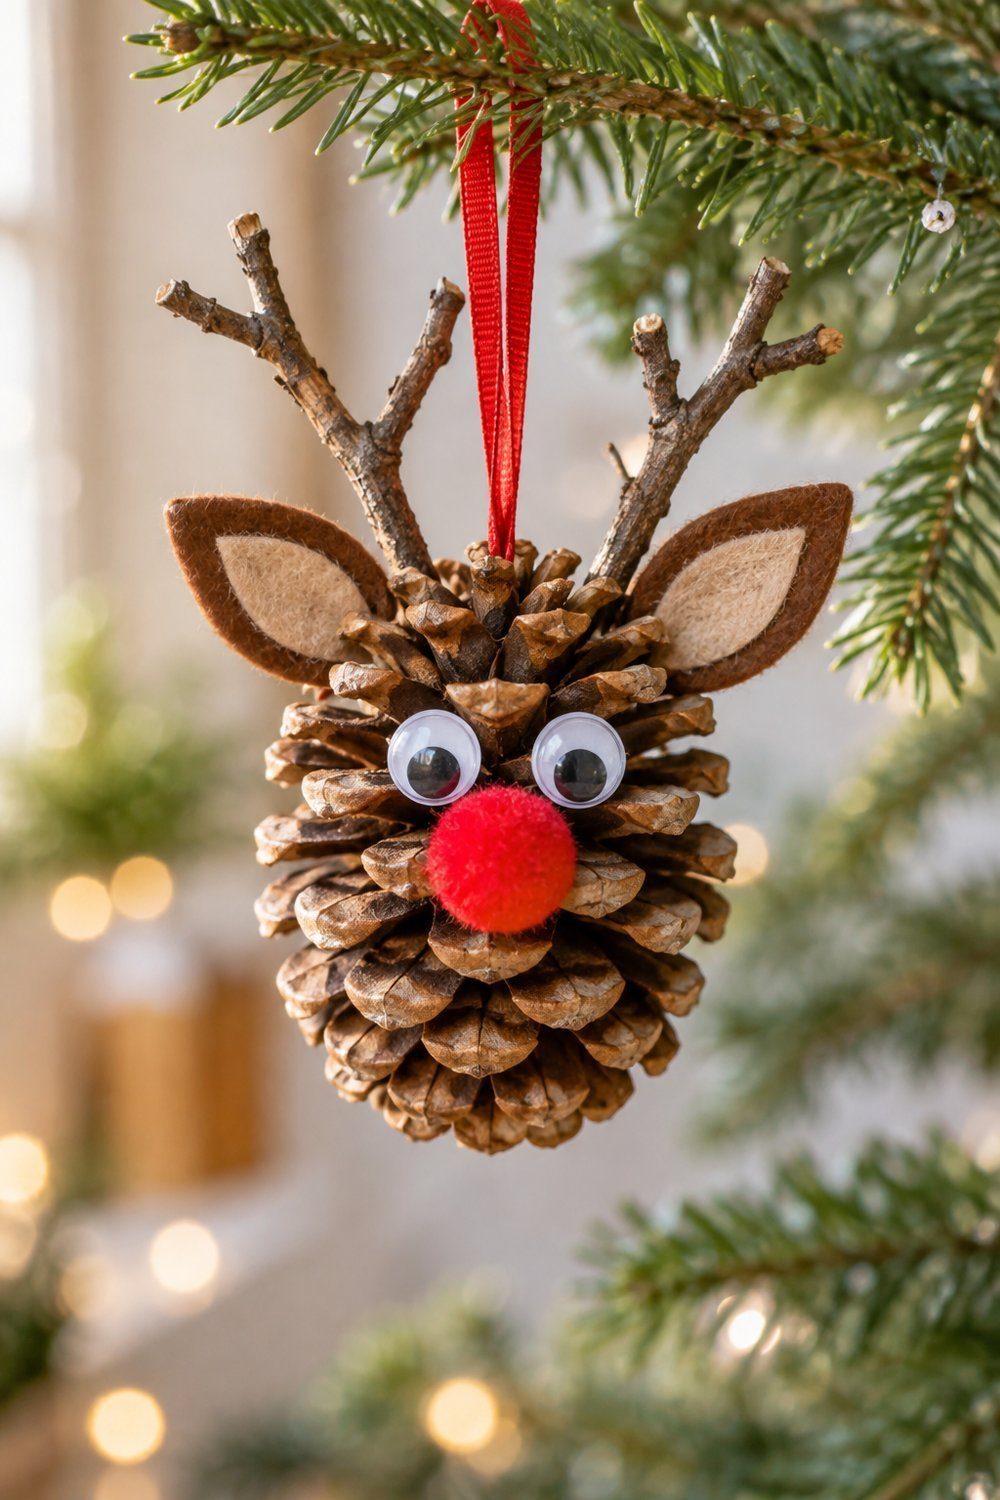
Turn a pinecone into a cheerful little tree reindeer. First, glue a red pom-pom onto the pointed end for its nose. Cut and pinch felt ears, then attach them behind the face. Add googly eyes and twig antlers, and finish with a loop made from 6 in (15 cm) of ribbon. The scales add texture; the ribbon supplies Christmas color.
Materials: Pinecones, twigs, brown felt, googly eyes, red pom-poms, ribbon, hot glue.
Cost: materials you likely have · Time not stated · Level easy
Tutorial: Megan Kapple, One Little Project
2. Salt dough stars
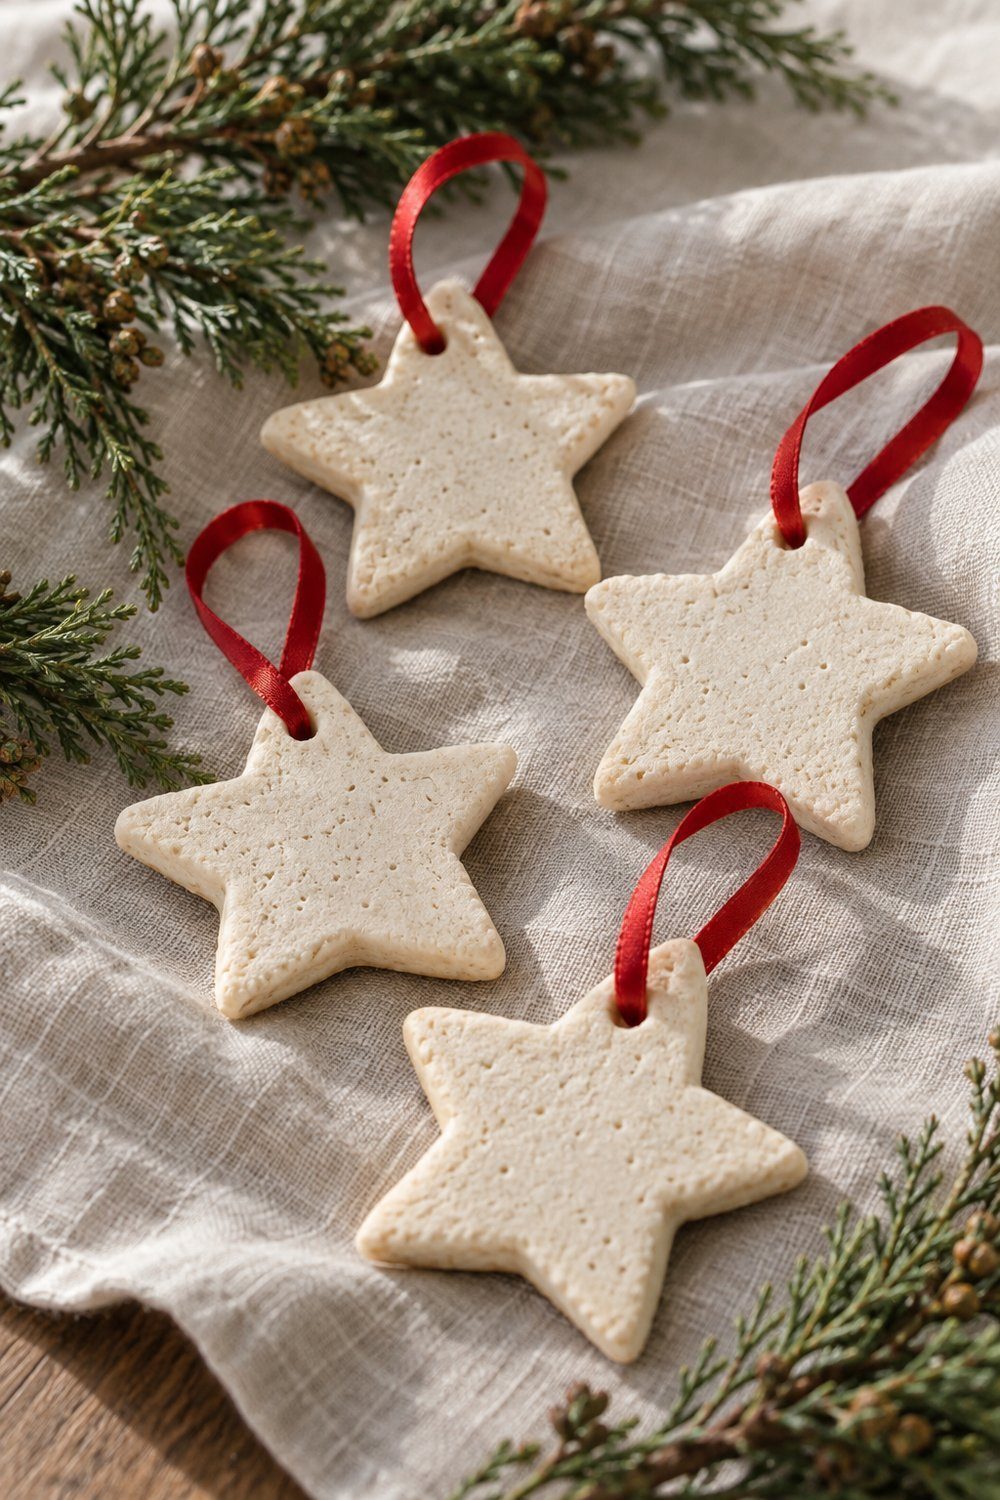
Make these stars early, then let drying happen while you tackle another project. Mix 1 cup flour with 1/2 cup salt and 1/2 cup warm water, then knead until smooth. Roll thinly, cut stars and pierce hanging holes with a straw. Leave the shapes to air-dry for 3 days to a week, until hard throughout, then paint and thread with ribbon. Unpainted stars suit fresh greenery.
Materials: All-purpose flour, table salt, warm water, star cutter, ribbon, optional paint and sealer.
Cost: materials you likely have · Time 3 days to a week, drying · Level easy
Tutorial: Debbie Chapman, One Little Project
3. Wine cork angels
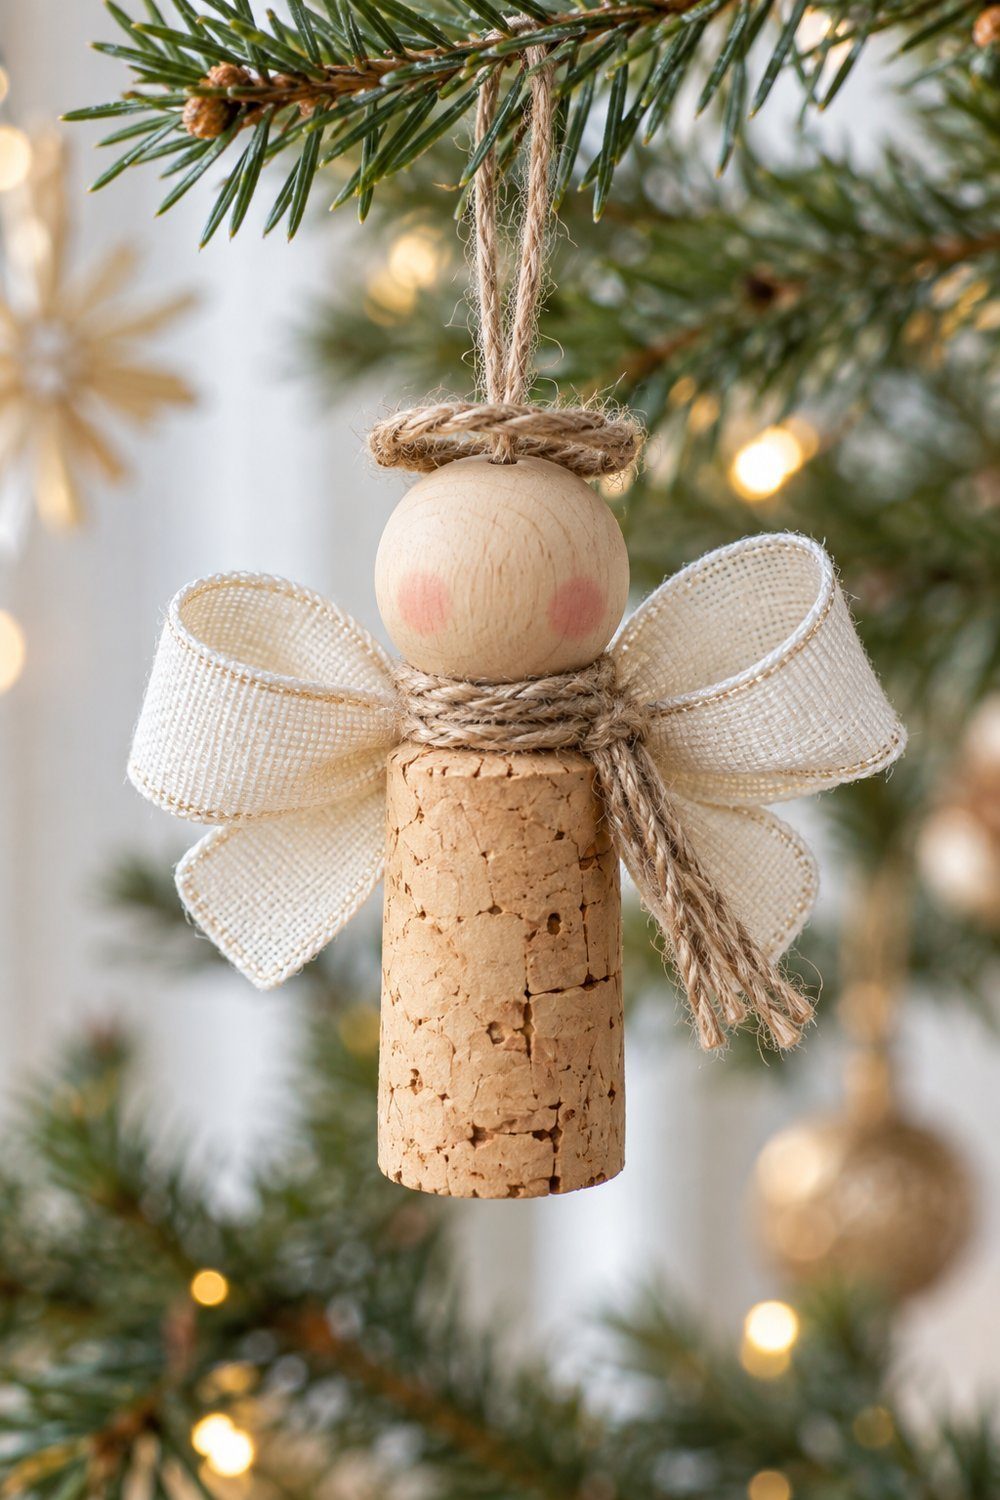
Turn saved corks into tiny angels. Coat a wooden ball with matte Mod Podge, let it dry, then add a simple face and rosy cheeks. Glue the head onto a cork and tie twine around the neck. Make wings from an 8 in (20 cm) ribbon bow, glue them behind the body, and attach a twine hanging loop. Match the wings to your gift wrap for coordinated parcels.
Materials: Wine corks, wooden balls, ribbon, twine, matte Mod Podge, marker, blush, hot glue.
Cost: materials you likely have · Time not stated · Level easy
Tutorial: Megan Kapple, One Little Project
4. Craft stick sled ornaments
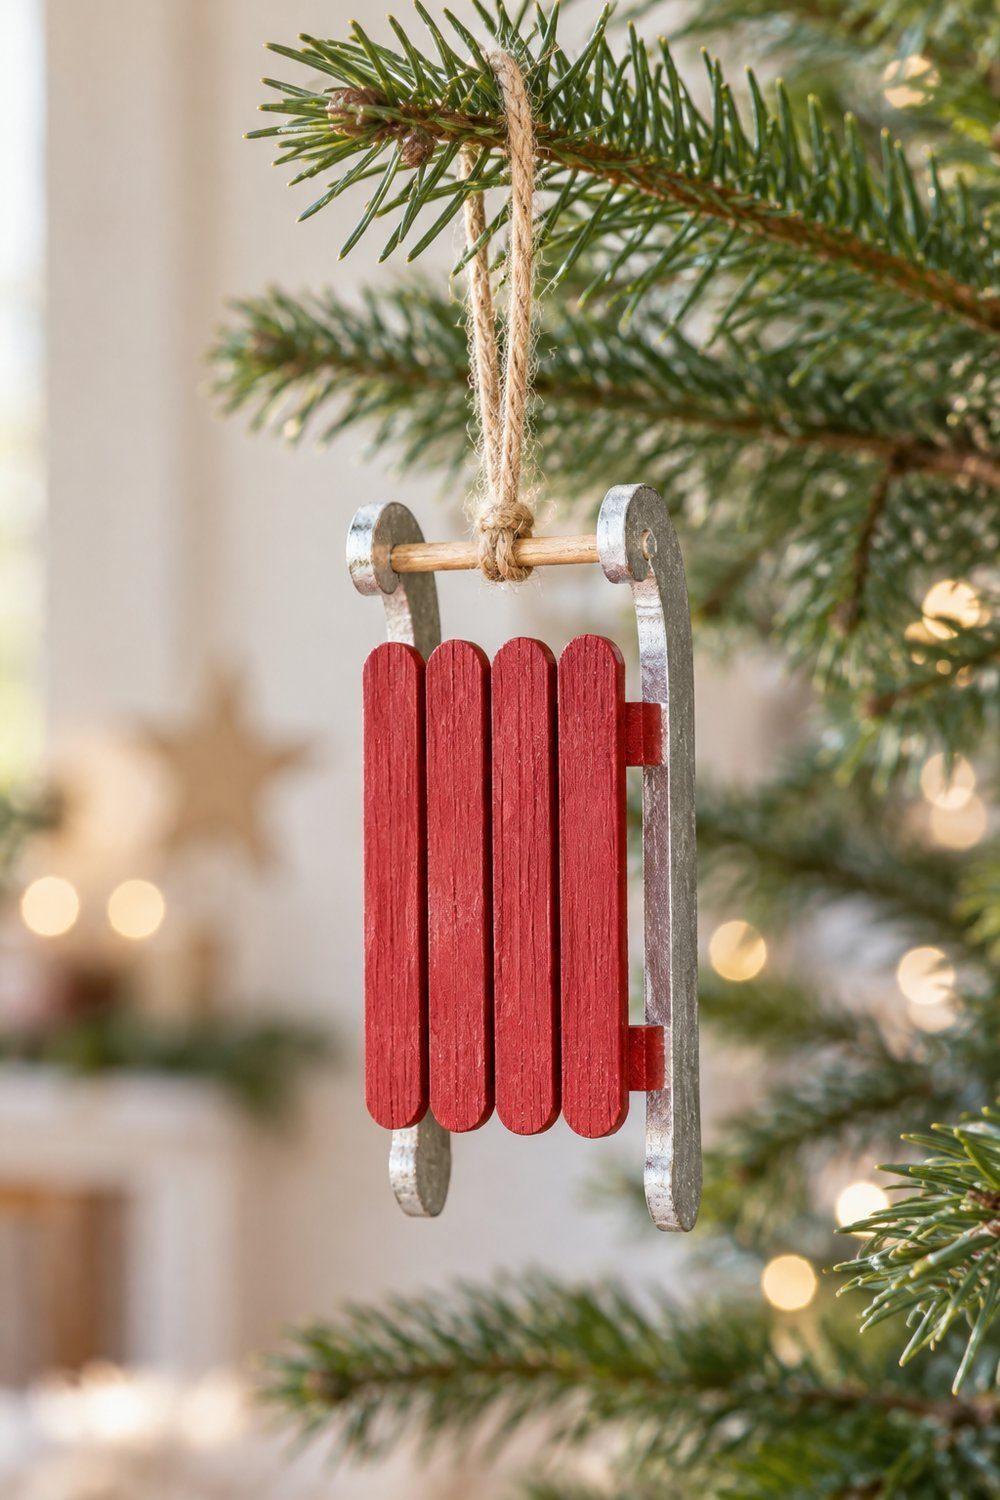
Build a miniature sled with a red seat and brown runners. Line up 4 mini craft sticks so the center 2 stick out about 3/8 in (1 cm) above the others, then glue a 1-1/4 in (3 cm) crosspiece across them. Paint the seat red and 2 regular sticks brown for the runners. Glue the runners on edge along the base, add a steering bar across them, then glue a 6 in (15 cm) loop of twine behind the sled as hanger and tow rope. Tuck a sprig of greenery on the steering bar.
Materials: Mini and regular craft sticks, red and brown acrylic paint, metallic baker’s twine, faux greenery, hot glue.
Cost ~$2 · Time 35 min (20 min active, 15 min drying) · Level easy
Tutorial: Debbie Chapman, One Little Project
5. Wood slice fox ornaments
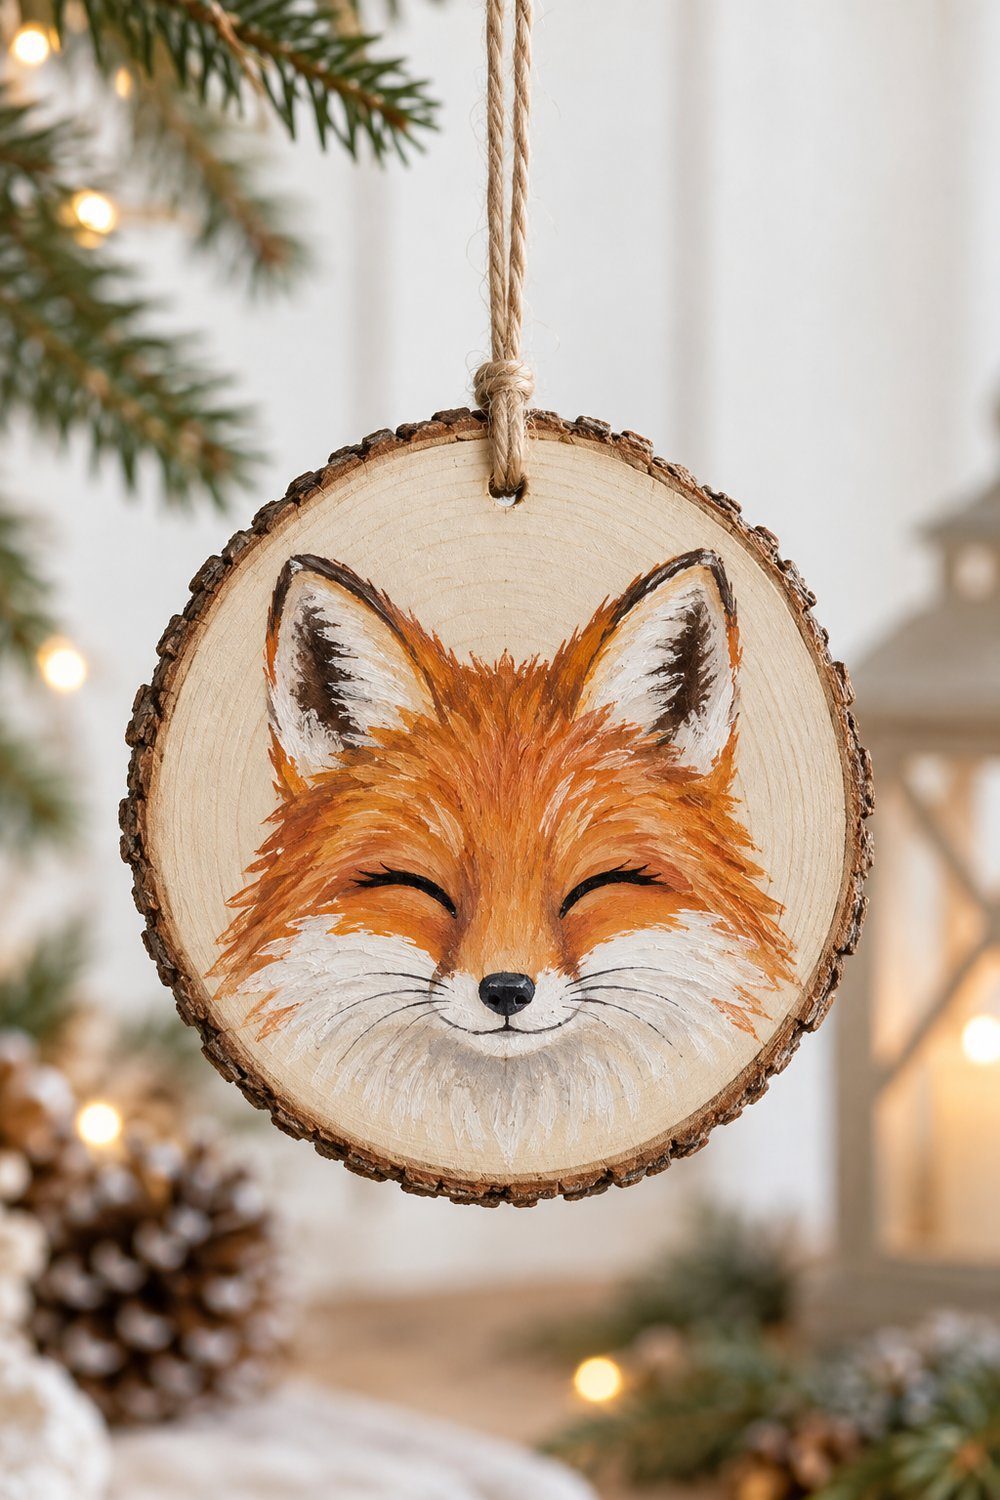
Bring a woodland touch to your Christmas tree with a painted fox face. Start with a ready-cut wood slice and sketch the face lightly in pencil. Paint the face area orange, leaving pale wood around the design, then dot on black eyes and a nose. Thread twine through a predrilled hanging hole. The bark rim naturally frames your painted face.
Materials: Wood slices, pencil, orange and black paint, paintbrush, twine.
Cost: materials you likely have · Time 10+ min · Level easy
Tutorial: FDC, Factory Direct Craft
Garlands and wreaths
6. Dried orange slice garland
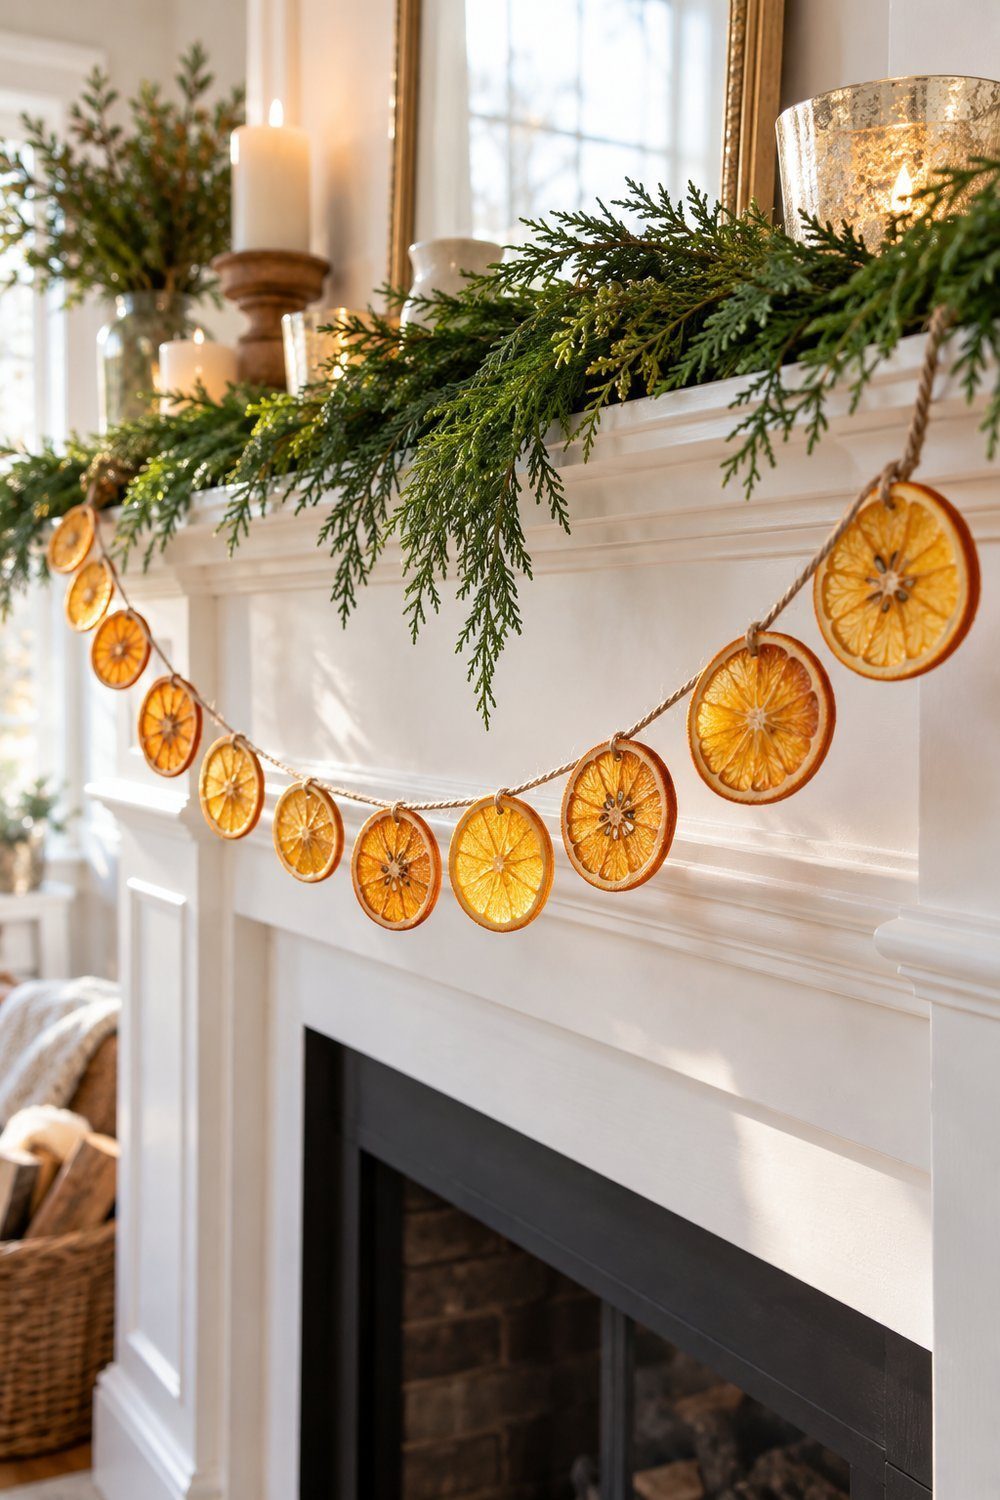
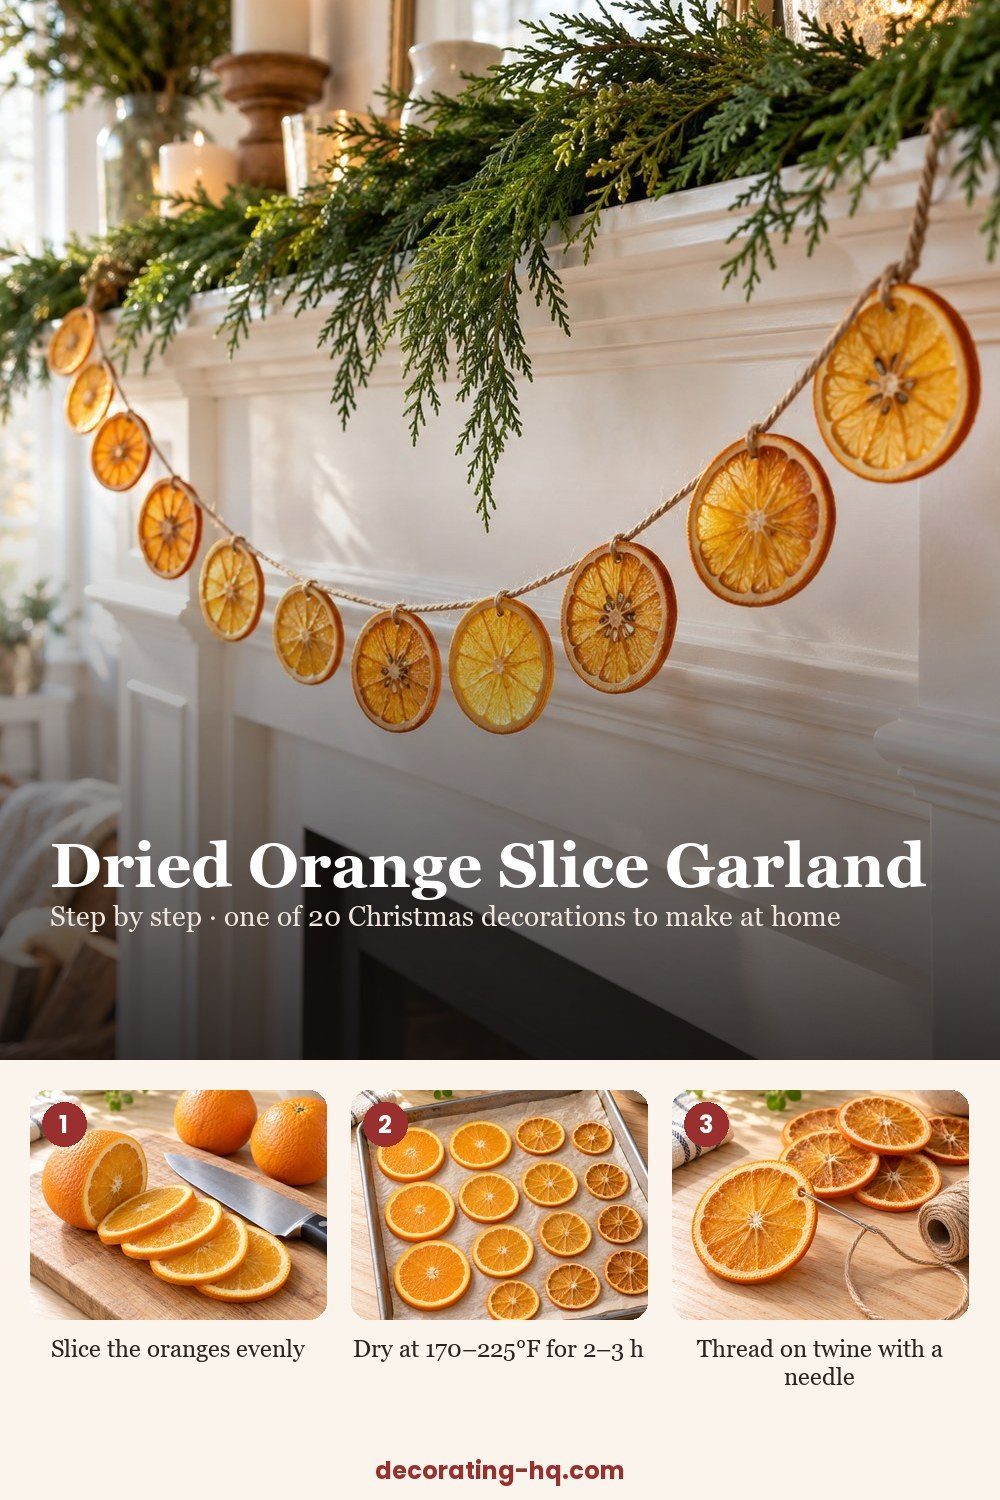
Let amber orange slices bring warm color to a mantel or window. Slice the fruit evenly, blot away extra juice and arrange it on parchment-lined baking sheets. Dry in a warm oven at 170 to 225°F (75 to 110°C) for around 2–3 h, until the edges brown lightly and the rind curls. Once the slices are fully dry and cool, thread a needle through each slice to form your garland. Finish with ribbon and tuck into greenery.
Materials: Oranges, parchment paper, baking sheet, needle, twine.
Cost: materials you likely have · Time 2–3 h, oven drying · Level easy
Tutorial: Julie Blanner, Julie Blanner
7. Sculptural felt garland
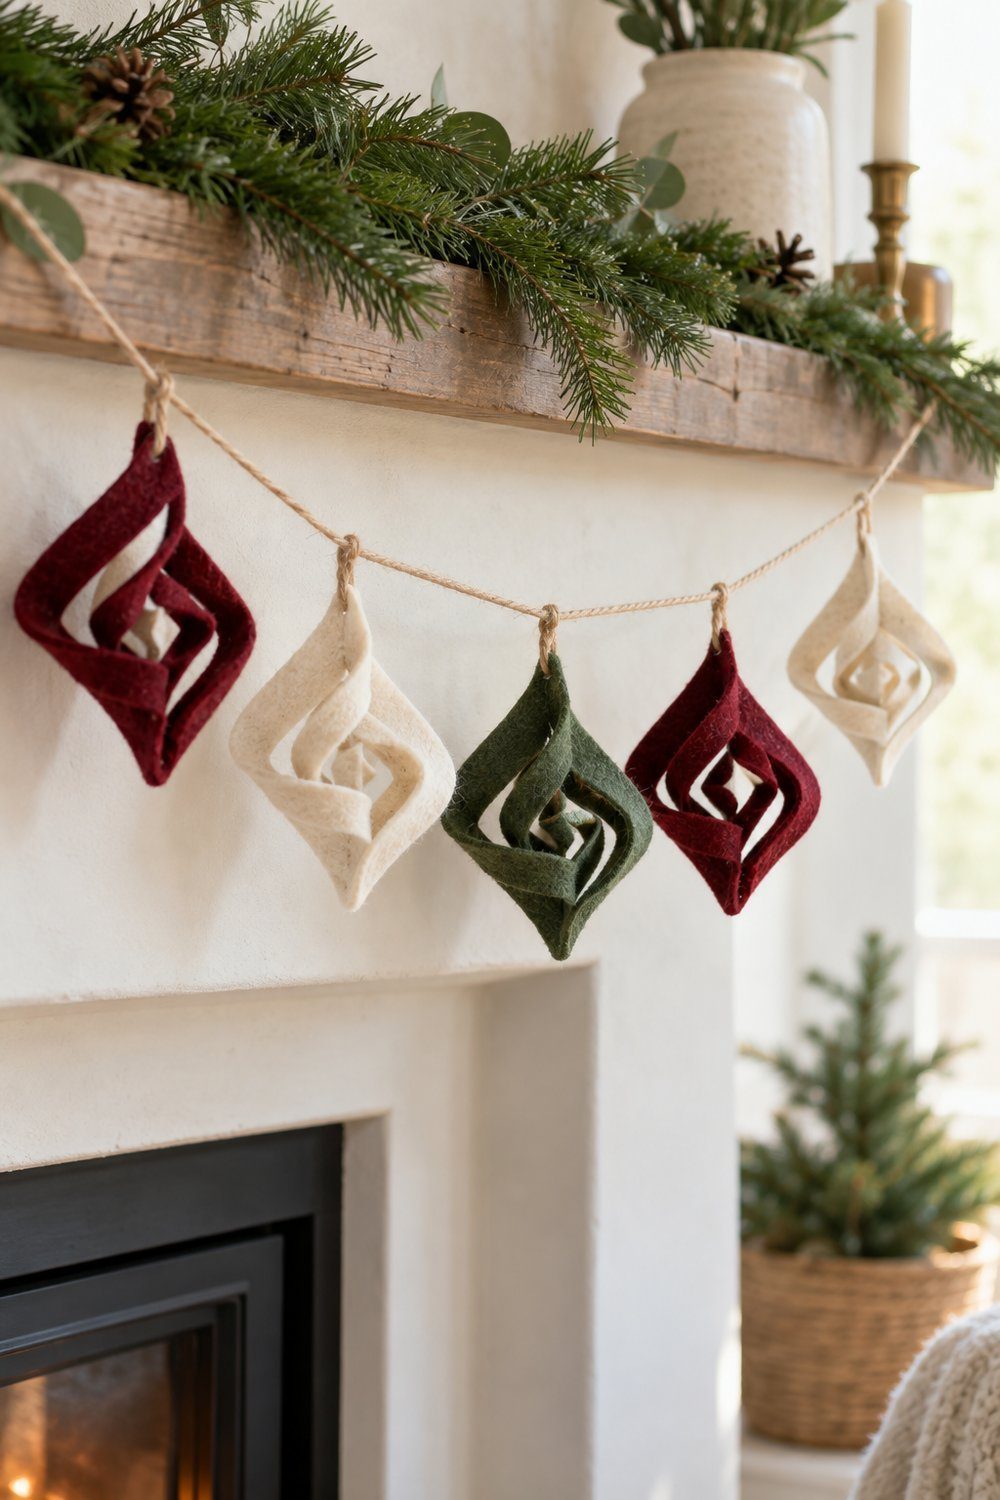
Create airy felt shapes that look more elaborate than their folded beginnings. Cut 4 in (10 cm) squares, fold each diagonally, then fold again. Make parallel cuts through the folded shape while keeping the outer edge joined. Open the square and glue opposing cut sections together, flipping the piece between joins to build its sculptural form. Glue the finished shapes along twine. Burgundy felt looks lovely beside evergreen branches.
Materials: Felt sheets, scissors, hot glue, baker’s twine.
Cost: materials you likely have · Time not stated · Level easy
Tutorial: Amy, Delineate Your Dwelling
8. Plaid ribbon bubble wreath
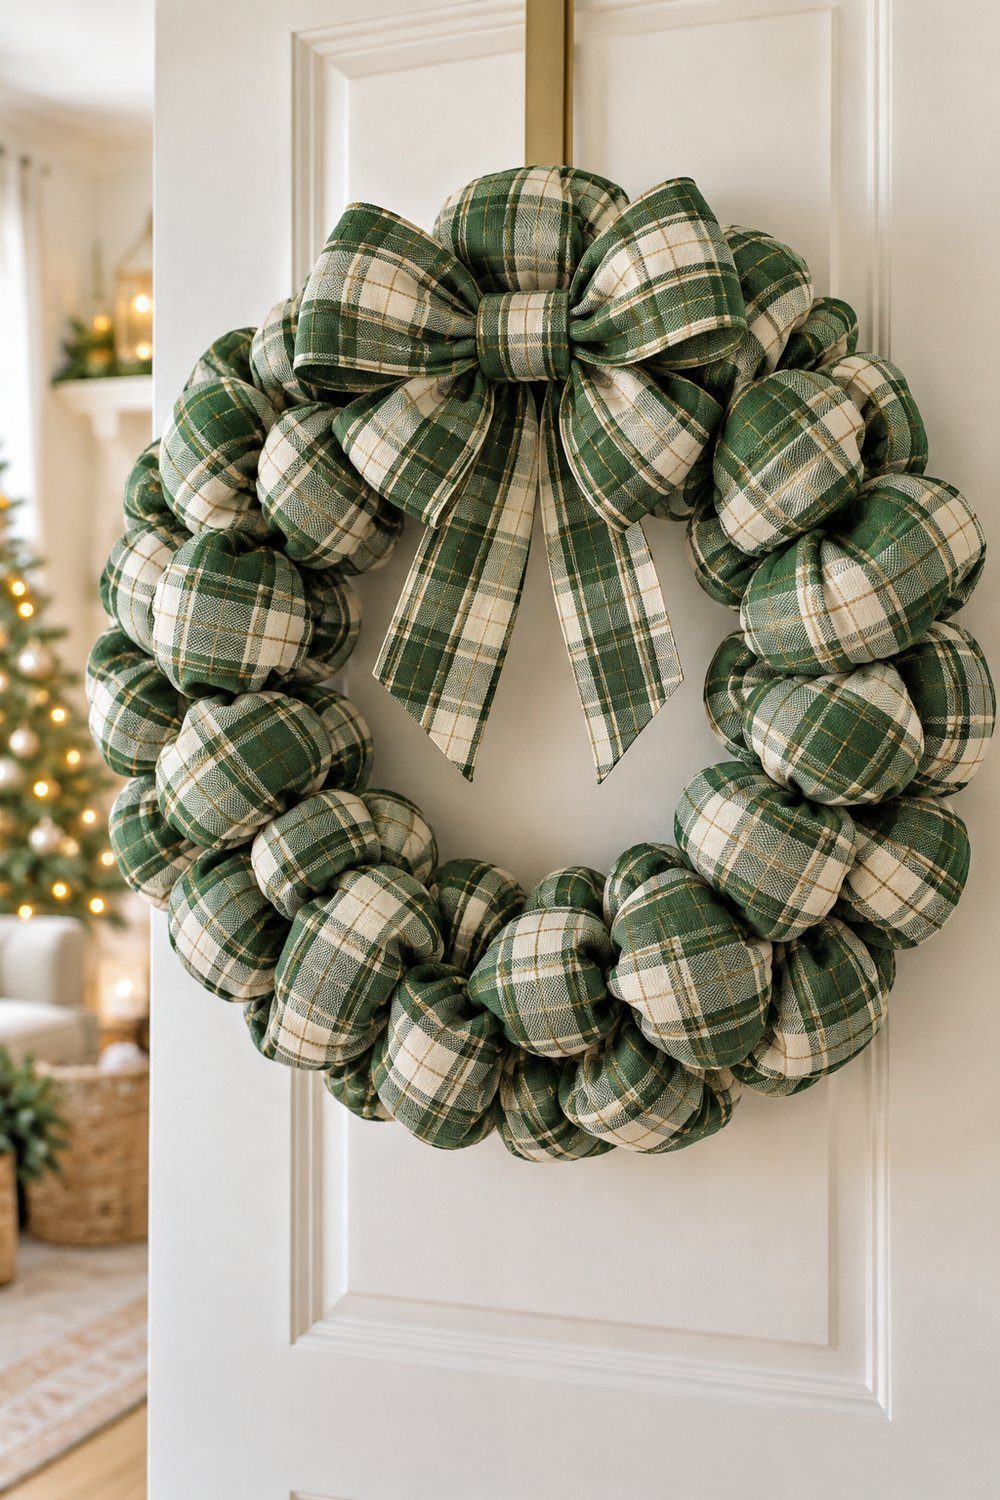
Put ribbon front and center with a full bubble wreath. Secure the ribbon end behind the outer wire, then pull loops between the frame’s wires. Twist the ribbon as you work inward and outward, bunching the loops to cover the frame. Secure each ribbon end behind the wreath, fluff the loops and add a matching bow. Dori Turner’s plaid version uses a 16 in (41 cm) frame; the loops soften a plain door.
Materials: Plaid ribbon, wire wreath frame, hot glue, optional floral wire.
Cost ~$13 · Time about 1 h · Size 16 in (41 cm) frame · Level easy
Tutorial: Dori Turner, Real Homes
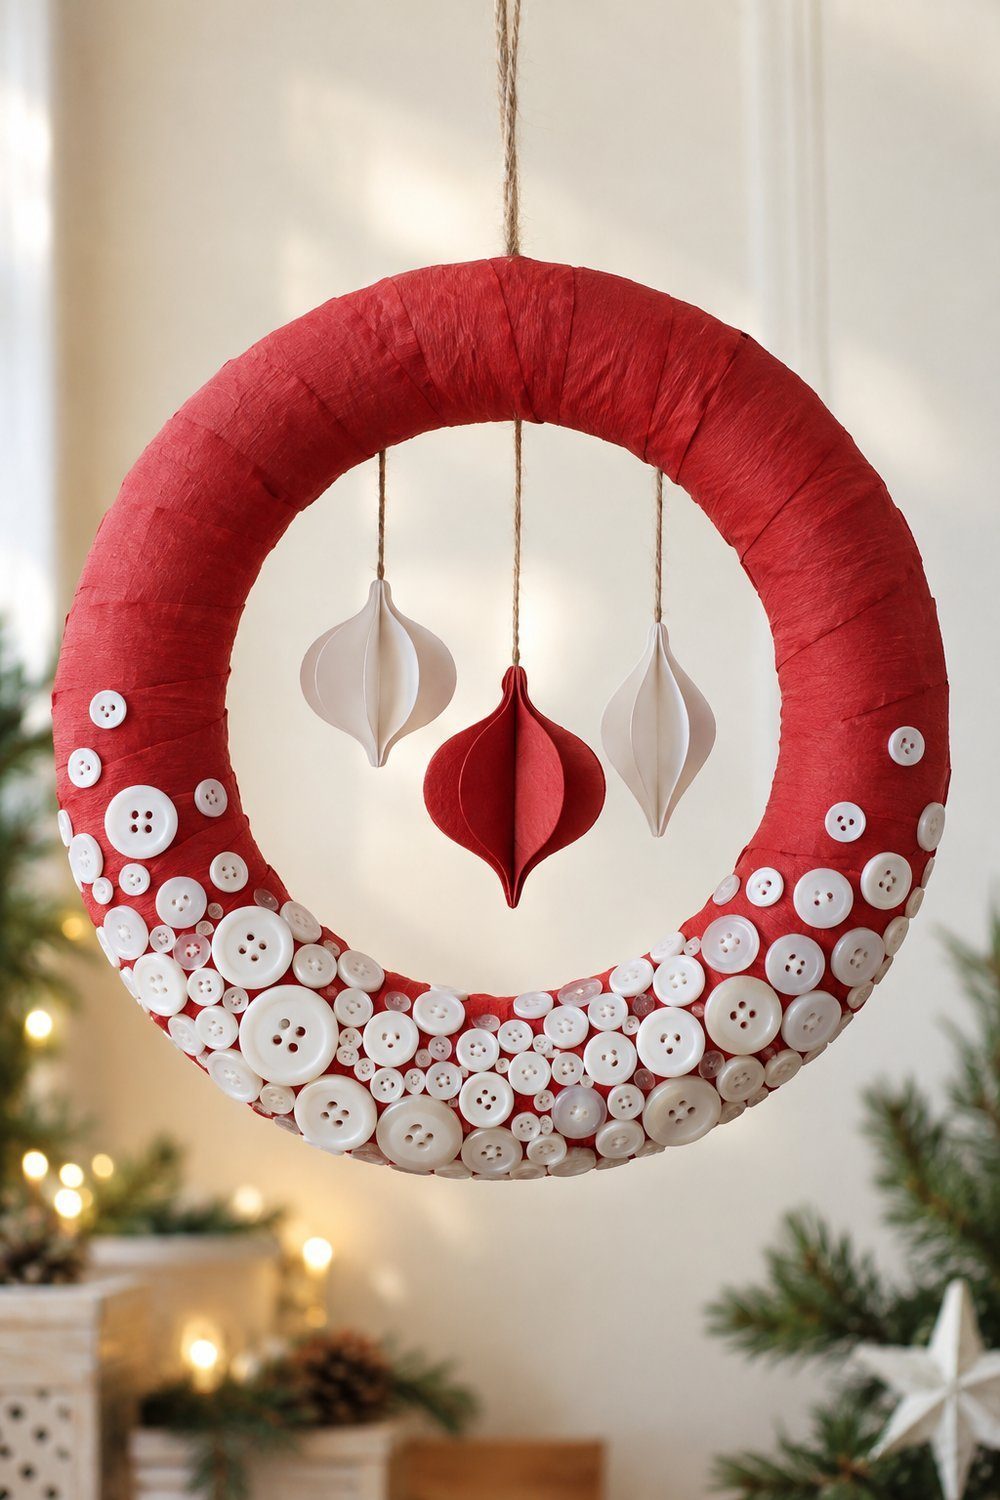
Give a red wreath a falling-snow pattern. Cut wrapping paper around the foam ring, leaving enough to fold over its edges, then snip the excess into tabs. Glue the tabs behind the ring to cover its face. Arrange white buttons sparsely near the top and more closely together toward the bottom, then glue them down. Finish with paper ornaments hanging inside the opening. White buttons resemble falling snow.
Materials: White buttons, floral foam ring, red wrapping paper, white paper, string, hot glue.
Cost ~$10 · Time 30 min · Level easy
Tutorial: Erika Franchuk, DIY & Crafts
Table and mantel
10. Layered sweater trees
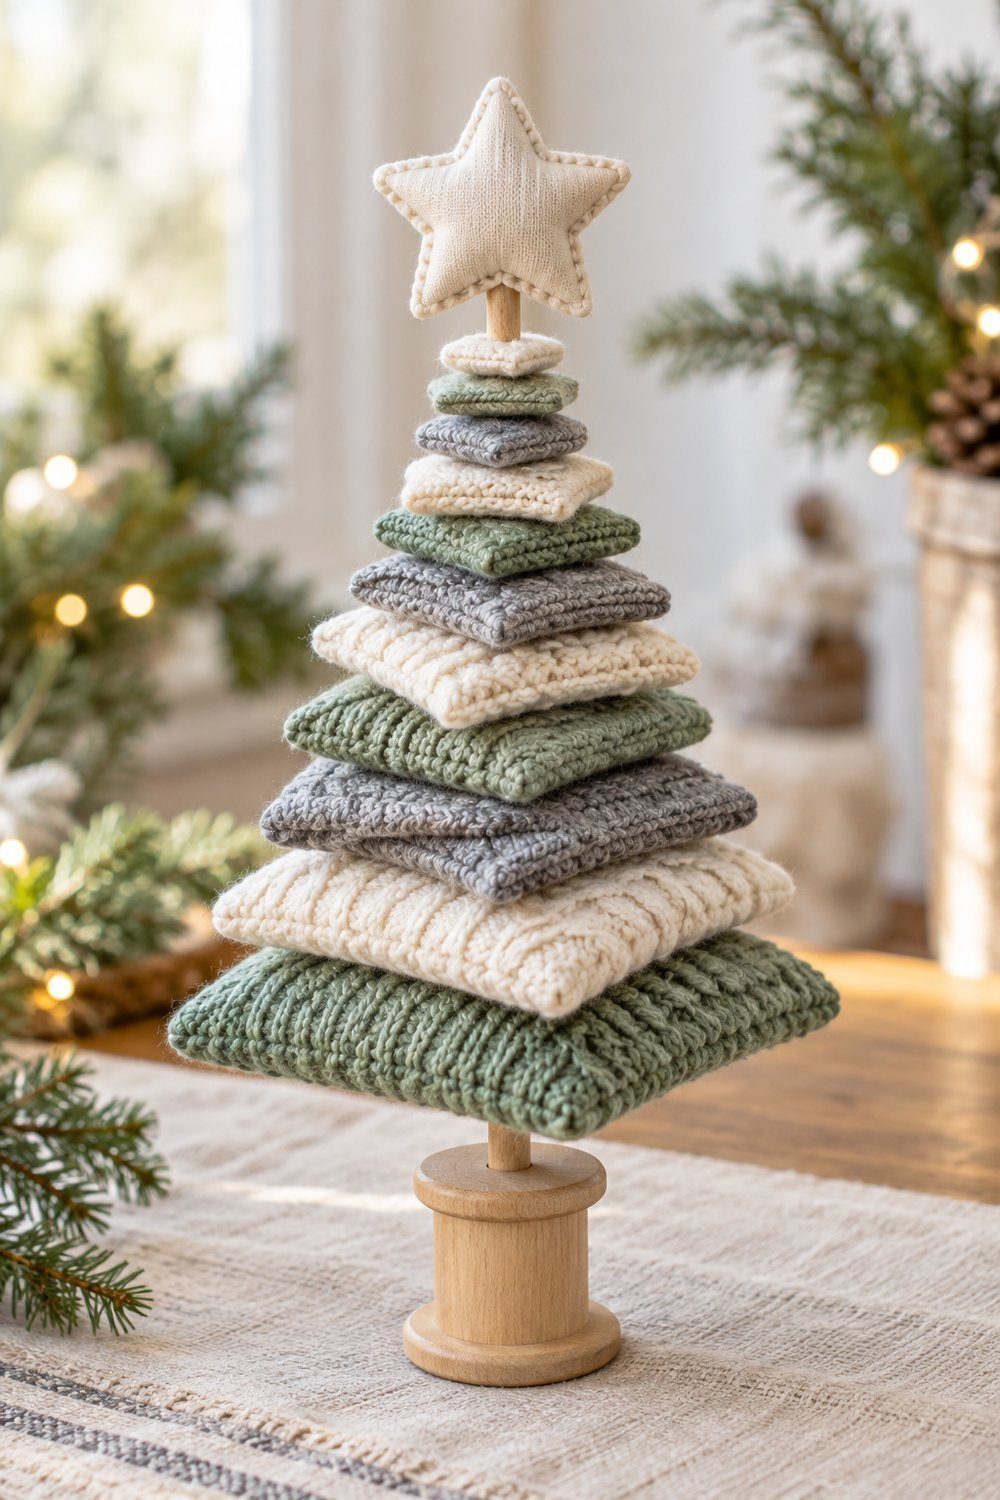
Make a softly layered sweater tree. Cut progressively larger fabric squares and snip a small opening in each center. Glue a dowel into a stable wood base, then slide on a cardboard support the size of your largest square. Stack the sweater squares from largest to smallest, rotating them as you go, and finish with a fabric star. Jenny’s example stands about 8 in (20 cm) tall, just right beside holiday cards.
Materials: Old sweaters, thin cardboard, dowel, wood base, glue, fabric star.
Cost: materials you likely have · Time not stated · Size about 8 in (20 cm) tall · Level easy
Tutorial: Jenny Leads, Refresh Living
11. Yarn-wrapped Christmas trees
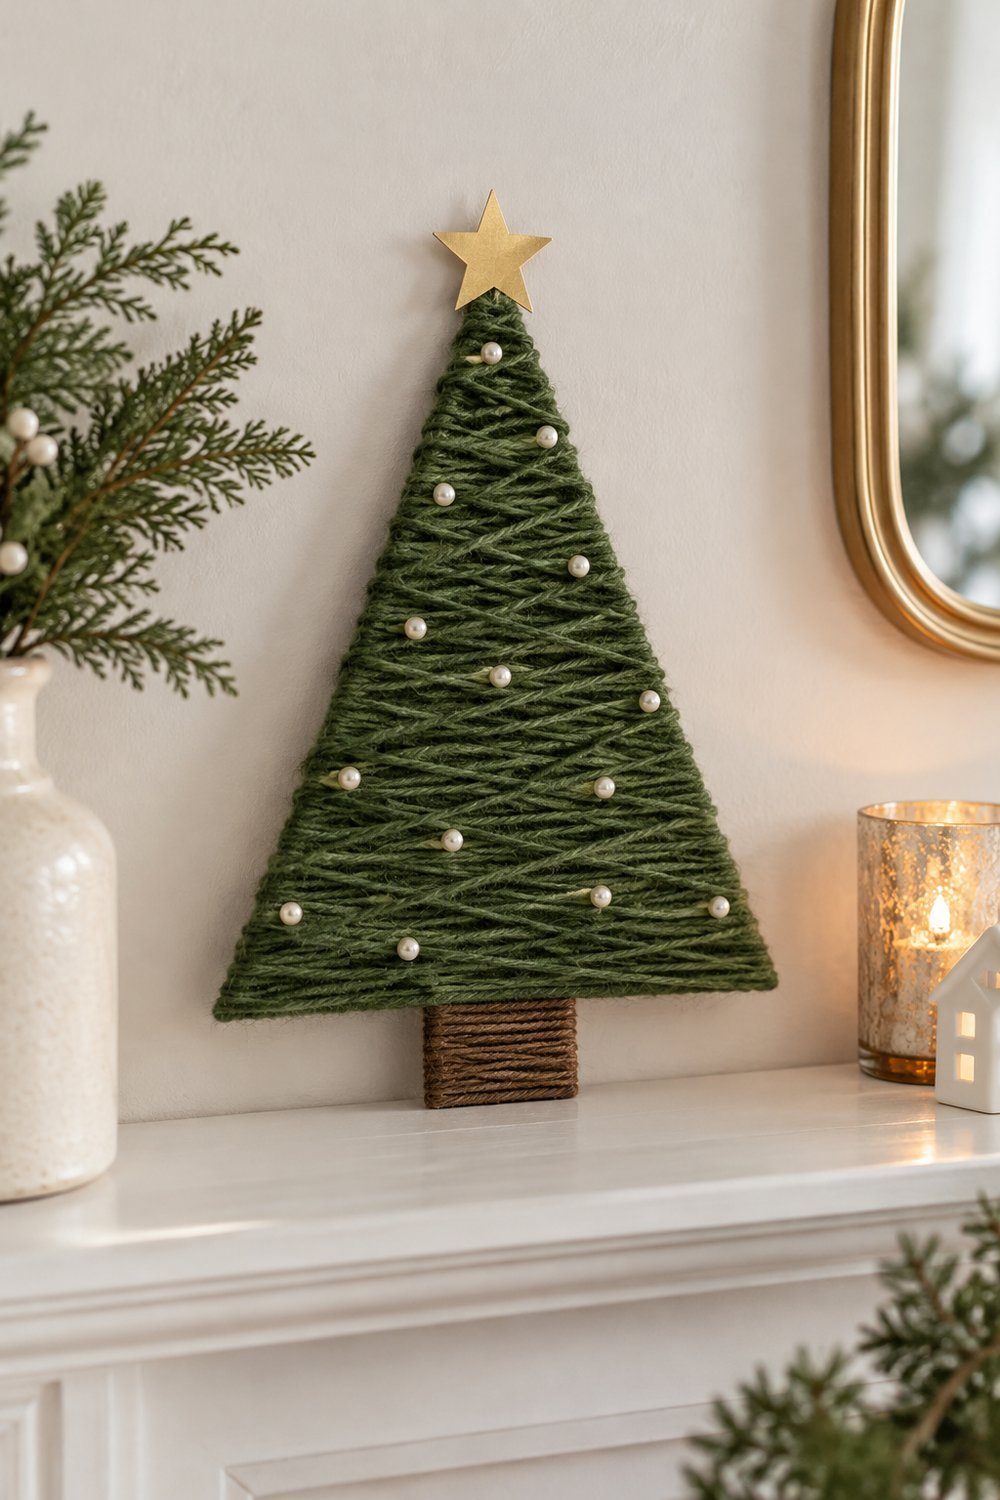
Lean this cozy flat tree against a mantel frame. Trace and cut the tutorial’s tree shape from cereal-box cardboard, then wrap the trunk in brown yarn. Secure green yarn at the back and wrap upward over the branches, anchoring slipping sections with glue. Add beads, a paper star and a hanging loop. Allow 20–30 min; later, hang it on a branch.
Materials: Green and brown yarn, cereal-box cardboard, beads, gold paper, ribbon, hot glue.
Cost under $2 · Time 20–30 min · Level easy
Tutorial: Muhaimina Faiz, Craftaholic Witch
12. Bottle brush forest centerpiece
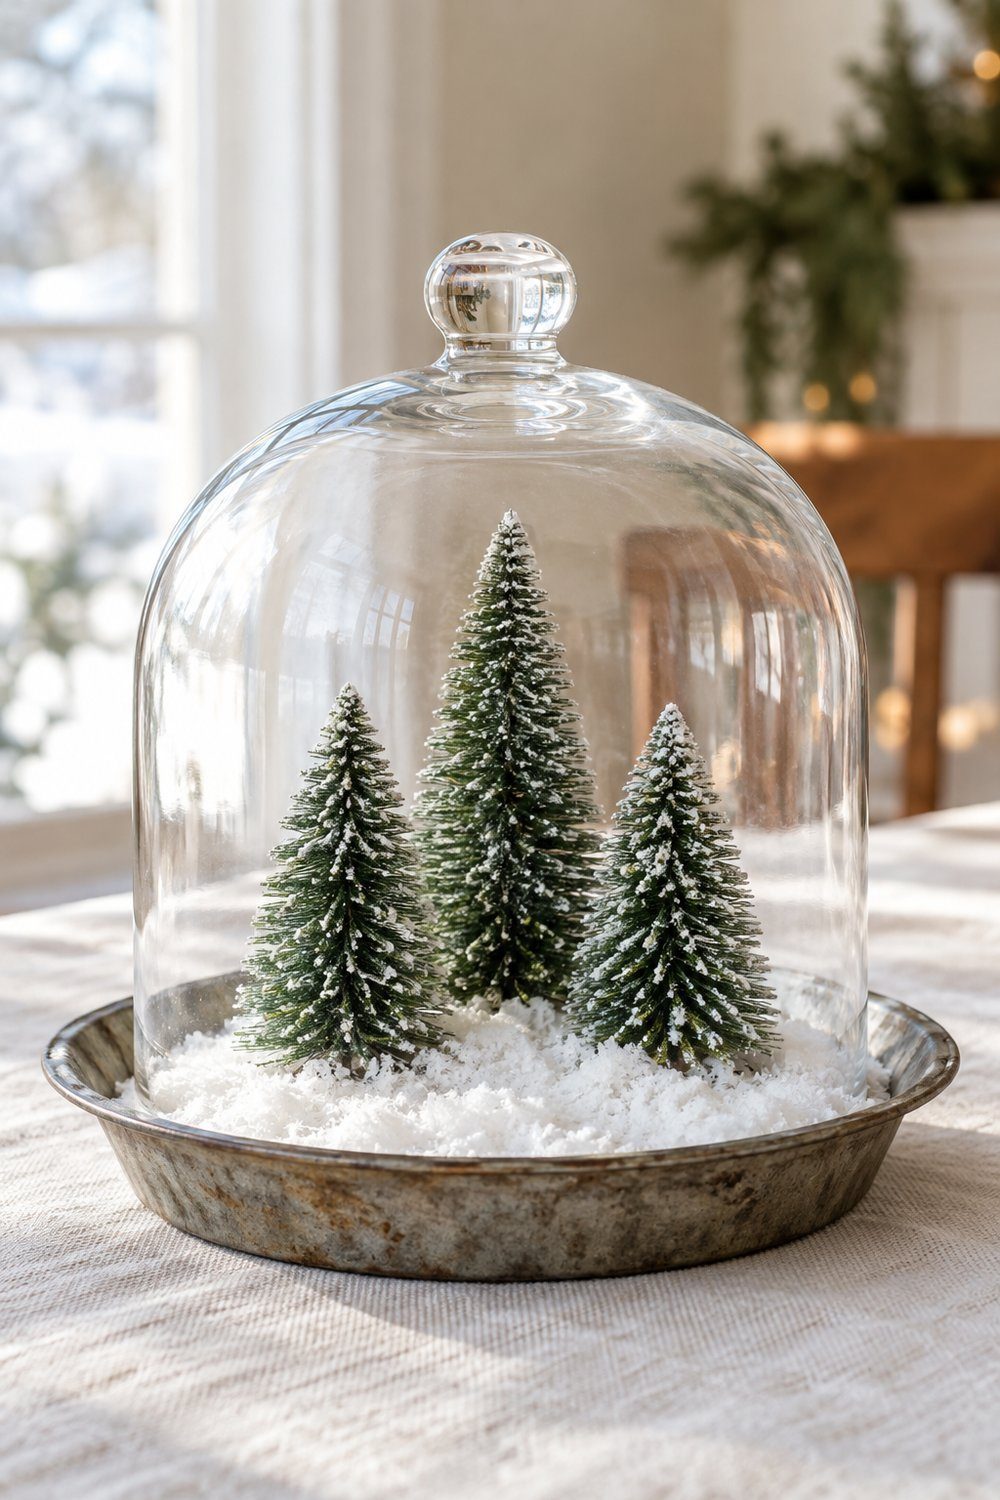
Gather miniature bottle brush trees into a snowy scene under a glass cloche. Trace the dome on white cardstock and cut the circle slightly inside the line so it fits the base. Spread white glue over the circle, pour faux snow slowly over it and press lightly. Set the trees on the snow, add a tiny house if you have one, weave a short string of battery lights through the scene and lower the dome gently over it. Tuck greenery and berries around the outside. Camila Rojas’s tutorial allows 10 min of prep, 35 min of crafting and 30 min of drying.
Materials: Bottle brush trees, glass cloche, white cardstock, faux snow, white glue, battery light string, greenery and berry stems.
Cost: materials you likely have · Time 1 h 15 min, including 30 min drying · Level easy
Tutorial: Camila Rojas, The Crafting Nook
13. Painted pasta trees
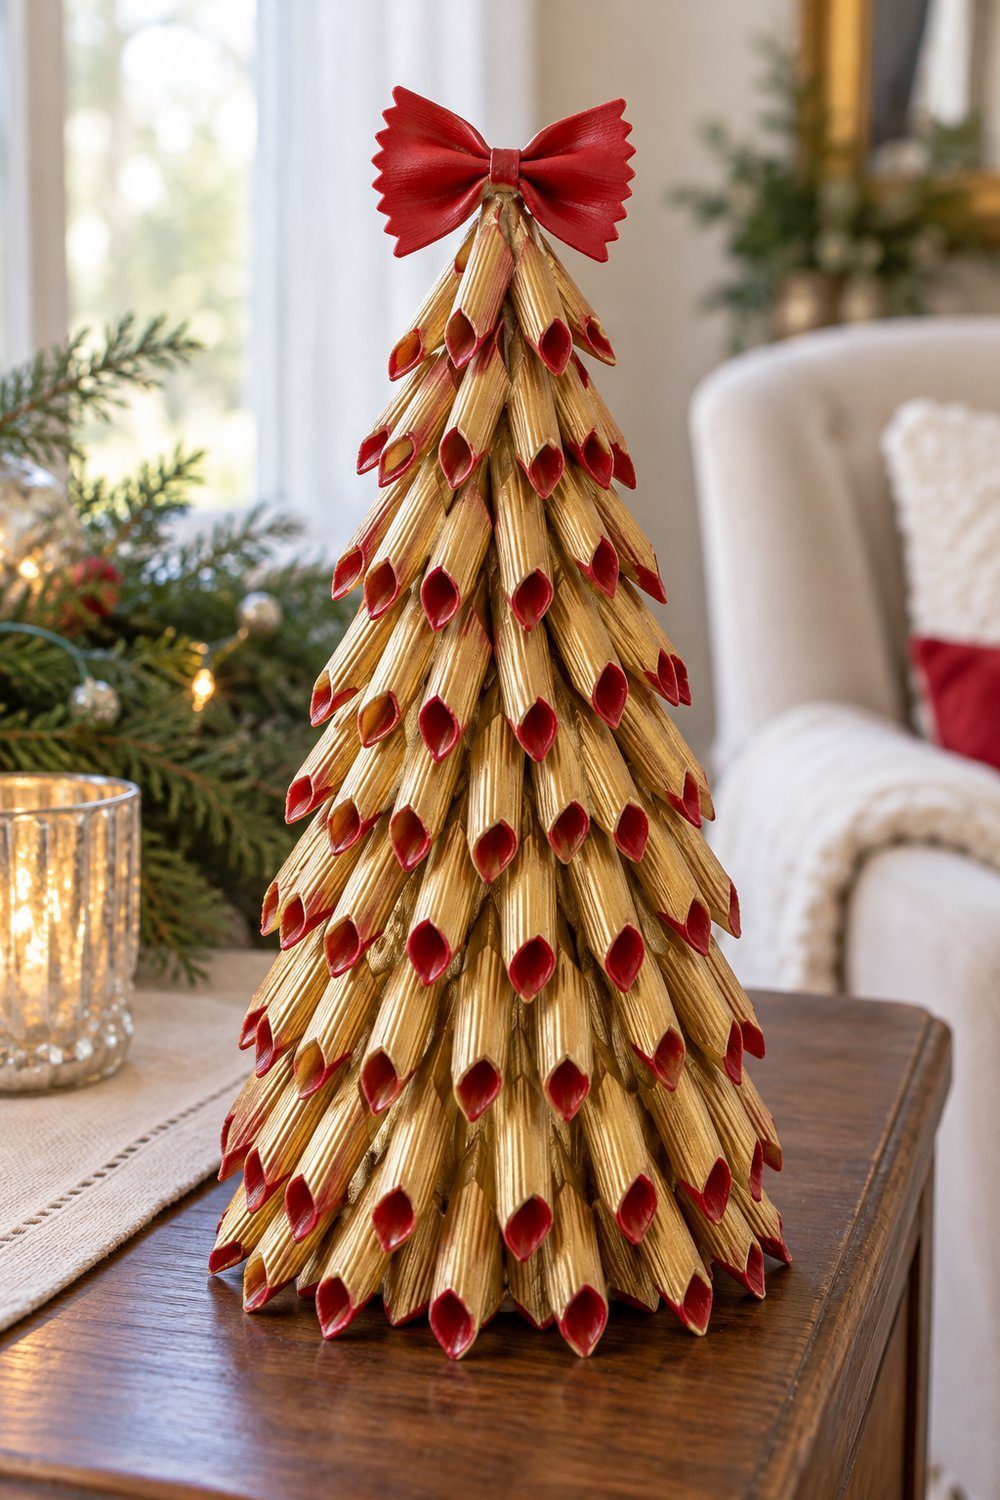
Turn pantry pasta into a gold Christmas centerpiece. Push penne into the bottom of a foam cone at a slight angle, then continue upward in staggered rows. Spray the tree gold outdoors according to the paint label, letting each coat dry. Paint the pasta openings red, then glue a red farfalle bow on top. Allow 60 min plus drying; the repeating pasta shapes give the tree its decorative texture.
Materials: Dry penne and farfalle pasta, foam cone, gold spray paint, red acrylic paint, craft glue.
Cost: materials you likely have · Time 60 min, plus drying · Level easy
Tutorial: attosa, My Frugal Christmas
Walls, doors and windows
14. Accordion paper window stars
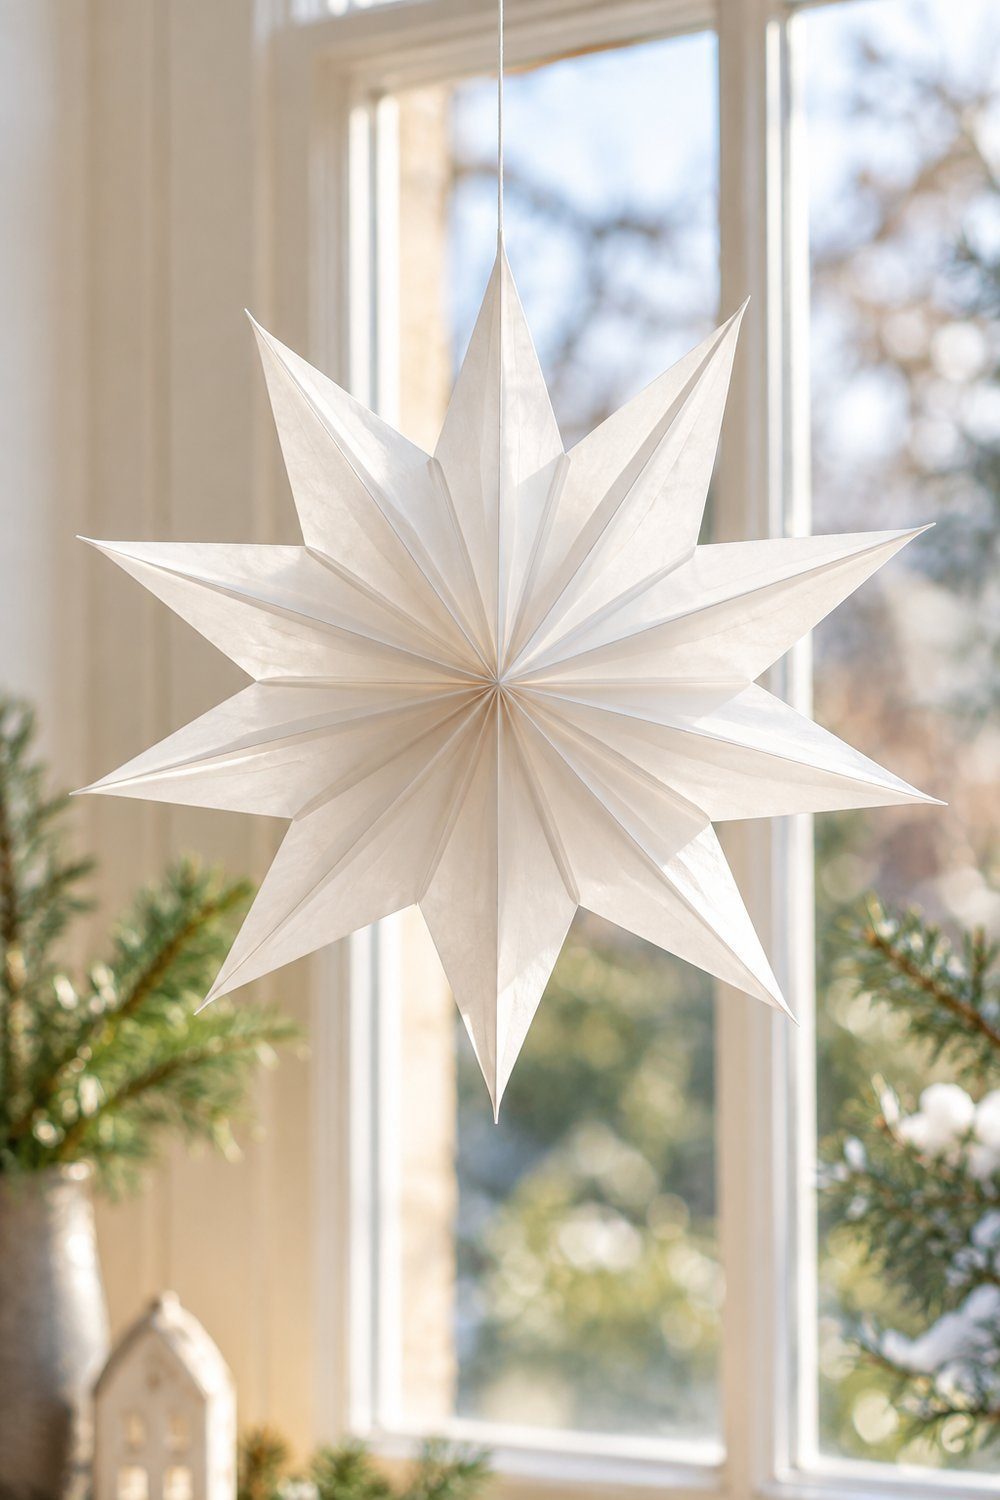
For the quickest project with a stated time, choose these folded paper stars: the tutorial calls them a 5 min craft. Accordion-fold a sheet of paper, fold the bundle in half and cut a pointed outline with a small center slit. Repeat for a matching bundle, then tie the centers together. Open the pleats and glue adjoining ends into a circle. Its pleated ridges catch daylight beautifully in a window.
Materials: Office paper, scissors, craft glue, string.
Cost: materials you likely have · Time 5 min · Level easy
Tutorial: Ananda, A Piece of Rainbow
15. Cardboard gingerbread houses
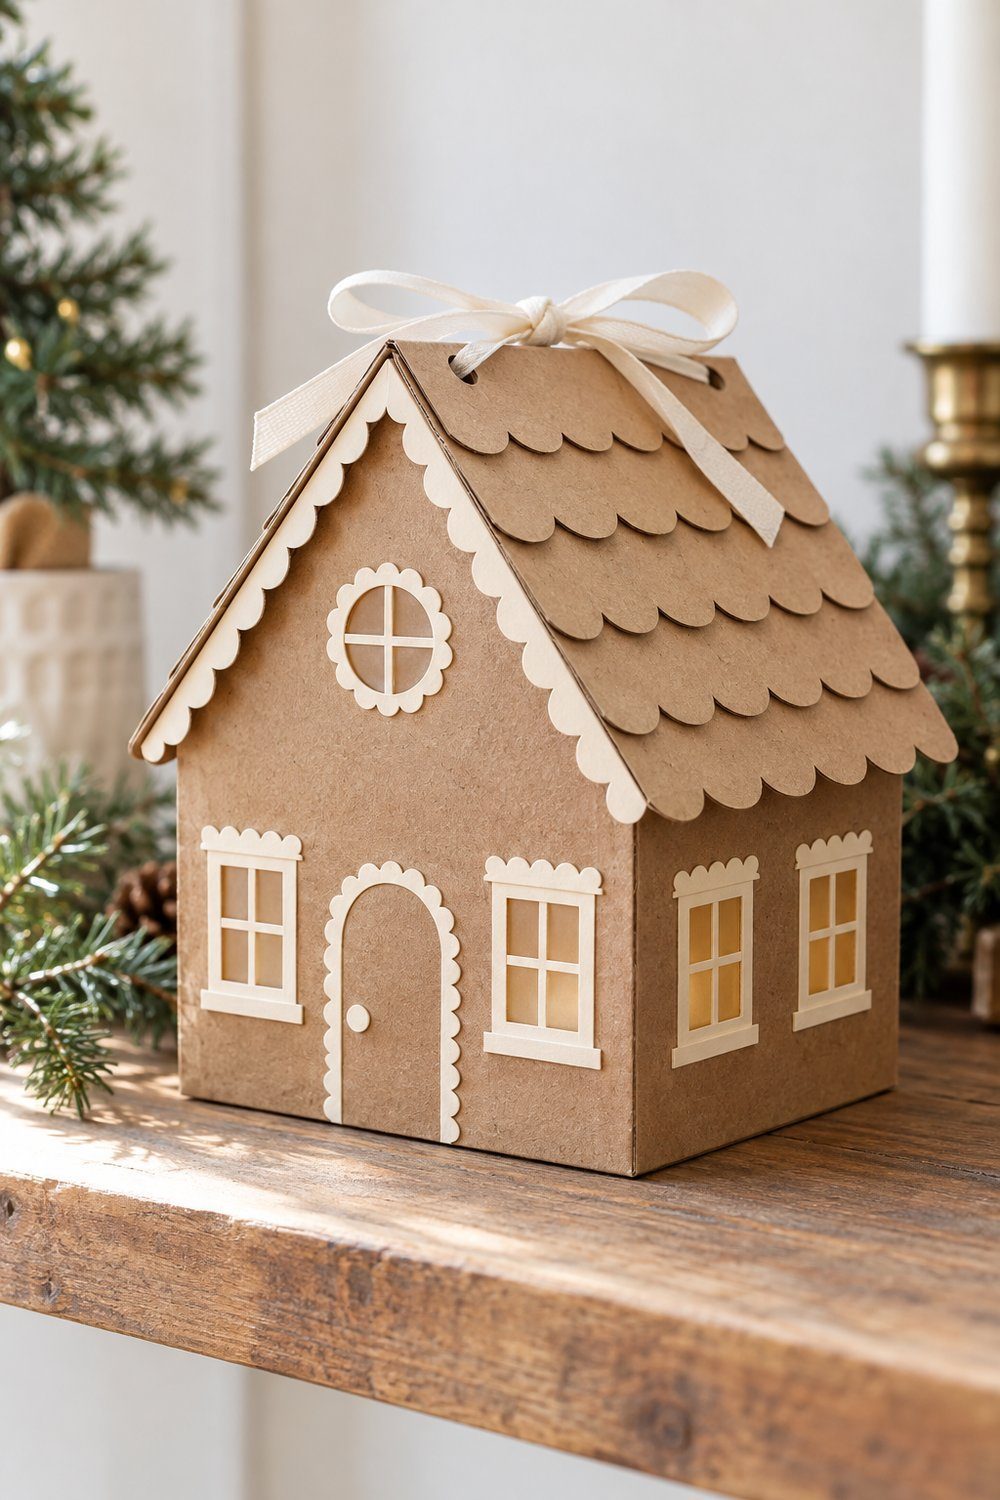
Build a little holiday house from a saved shipping box. Tape the bottom, then cut gables into the front and back flaps. Fold the side flaps into a roof, adding cardboard where needed, and cut windows and a hinged door. Glue scalloped kraft-paper strips over the roof and around the openings, then line the windows with decorative paper. Tie the roof closed with ribbon. Display it on a shelf.
Materials: Cardboard box, kraft paper, patterned paper, ribbon, button, tape, glue.
Cost: materials you likely have · Time 30–60 min · Level easy
Tutorial: Billie Lopez and Tootie Maldonado, Make:
16. Fresh evergreen door swag
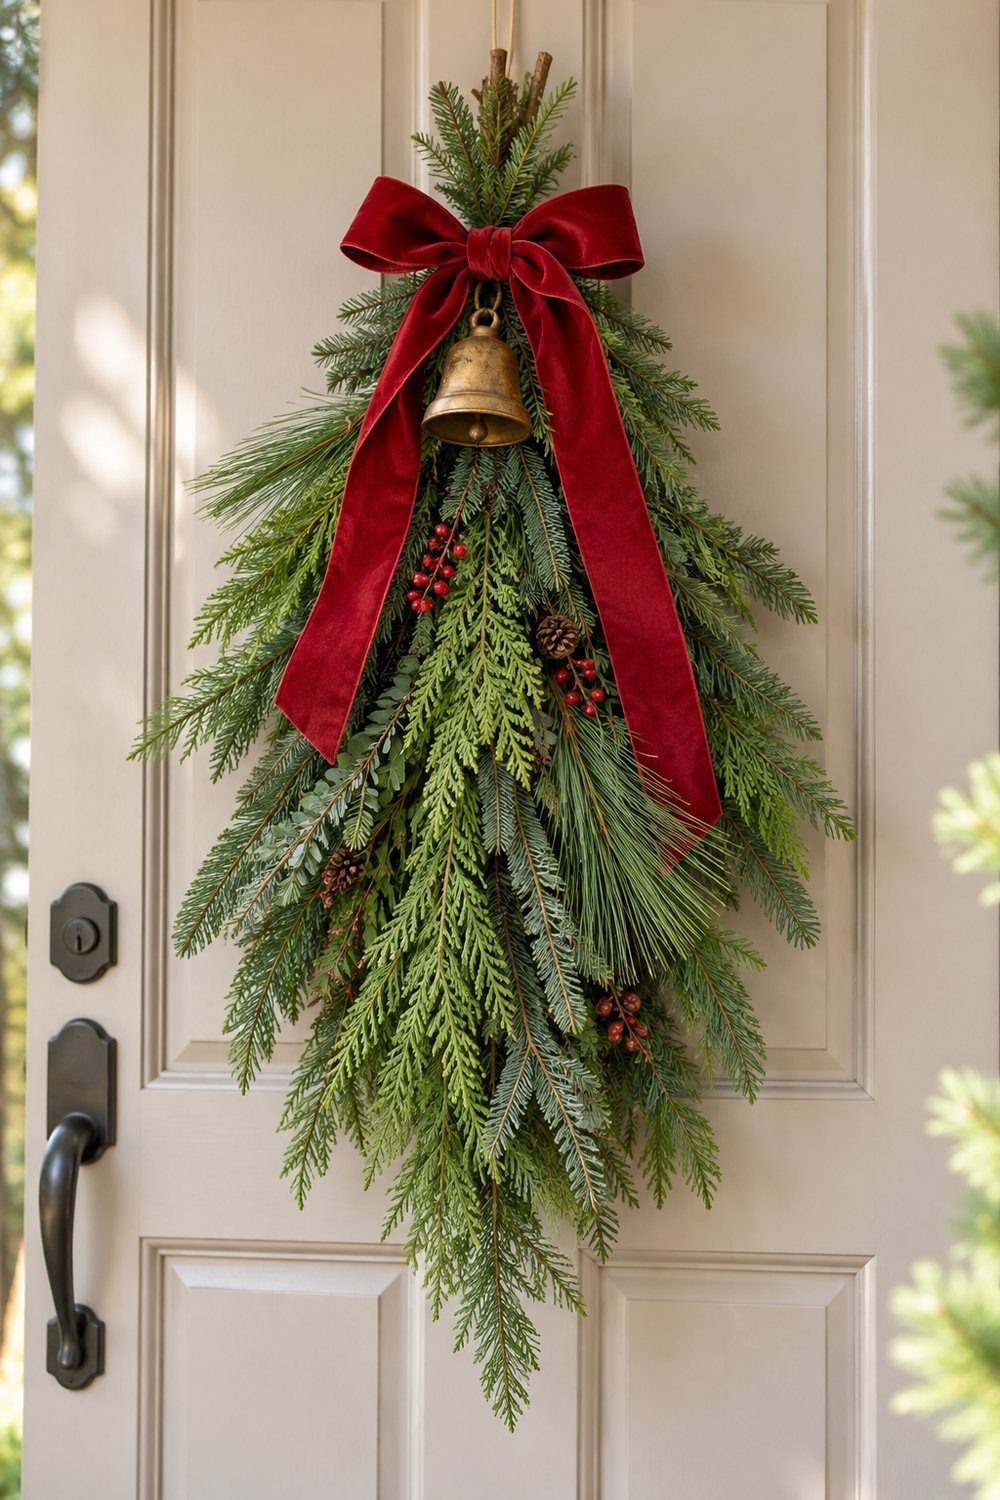
Choose this swag when you want fresh greenery with very little fuss. Lay fir branches together and wire the stems at the top. Layer cedar and pine over them, fanning the tips outward and securing each layer with more wire. Make a wire hanging loop, then hide the bound stems beneath a generous ribbon bow. Jo-Anna’s tutorial takes 15 min. Trailing ribbon gives it a welcoming finish.
Materials: Fir, pine and cedar branches, floral wire, wide ribbon, optional bell.
Cost: materials you likely have · Time 15 min · Level easy
Tutorial: Jo-Anna Rooney, A Pretty Life in the Suburbs
17. Clothespin snowflakes
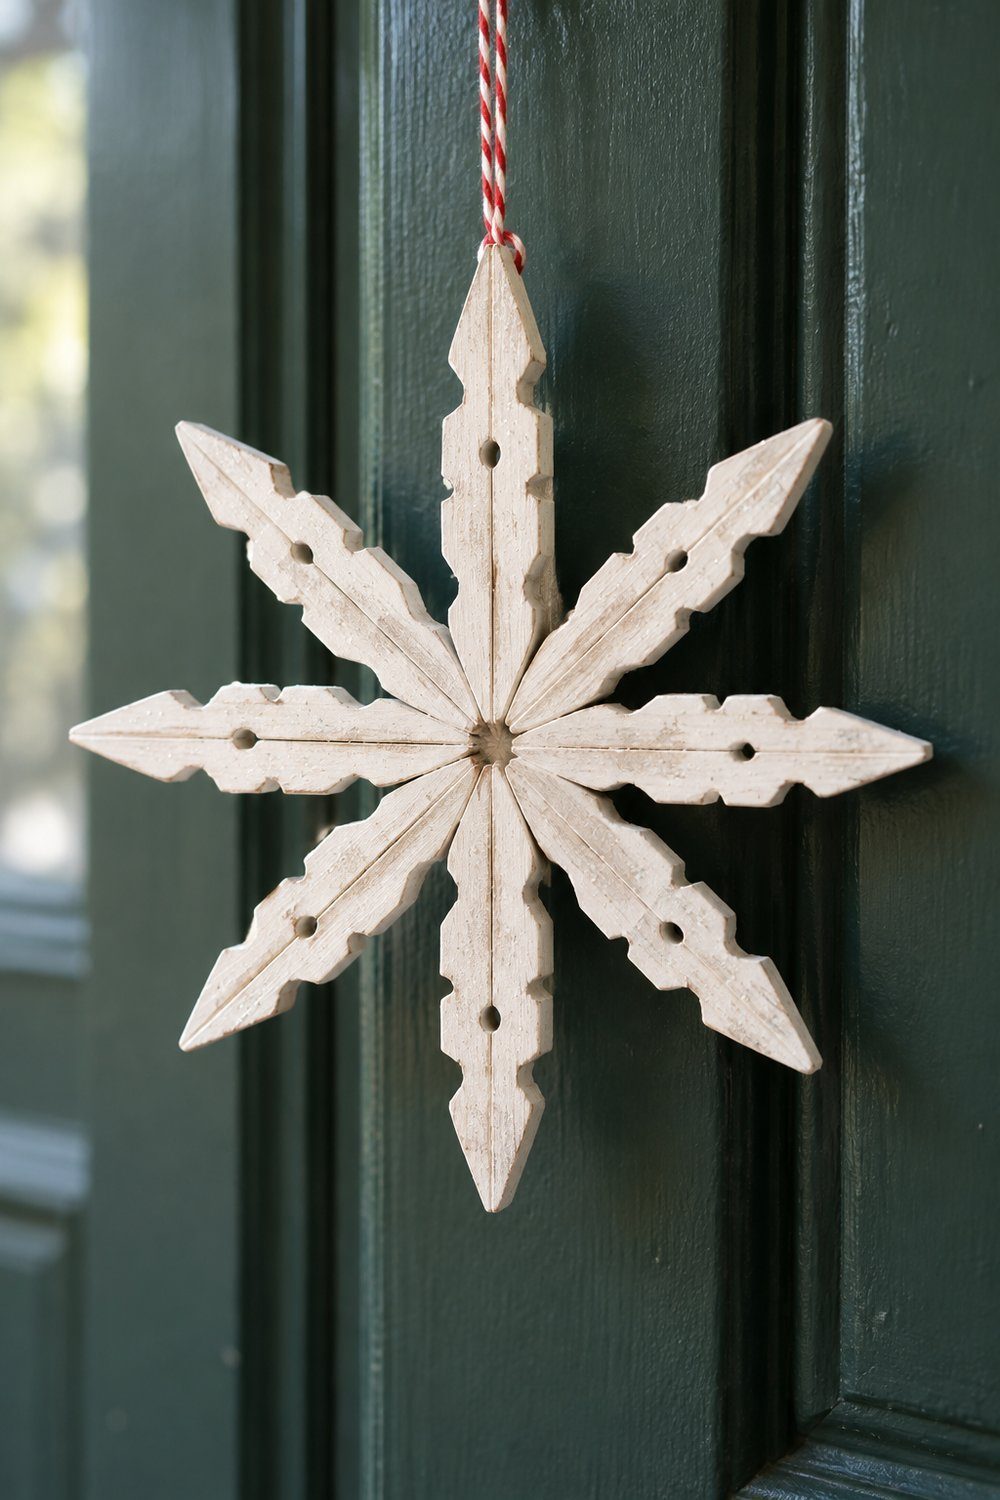
Make delicate winter shapes from clothespins: you need 8 clothespins for 1 snowflake. Separate the wooden halves from their springs (an adult does this part), then glue each pair flat sides together and let the pieces dry. Hot-glue 4 pieces into a cross first, then fit the other 4 into the open spaces. Once dry, paint the whole snowflake white and add rhinestones, pom poms or a dusting of glitter, then glue a twine loop to the back. Its pale spokes stand out against dark leaves on an interior door.
Materials: Wooden clothespins, white acrylic paint, glitter paint, rhinestones or pom poms, tacky glue, hot glue, twine.
Cost: materials you likely have · Time not stated, 8 clothespins per snowflake · Level easy
Tutorial: Kimberly McLeod, The Best Ideas for Kids
Gifts and candles
18. Twine star gift toppers
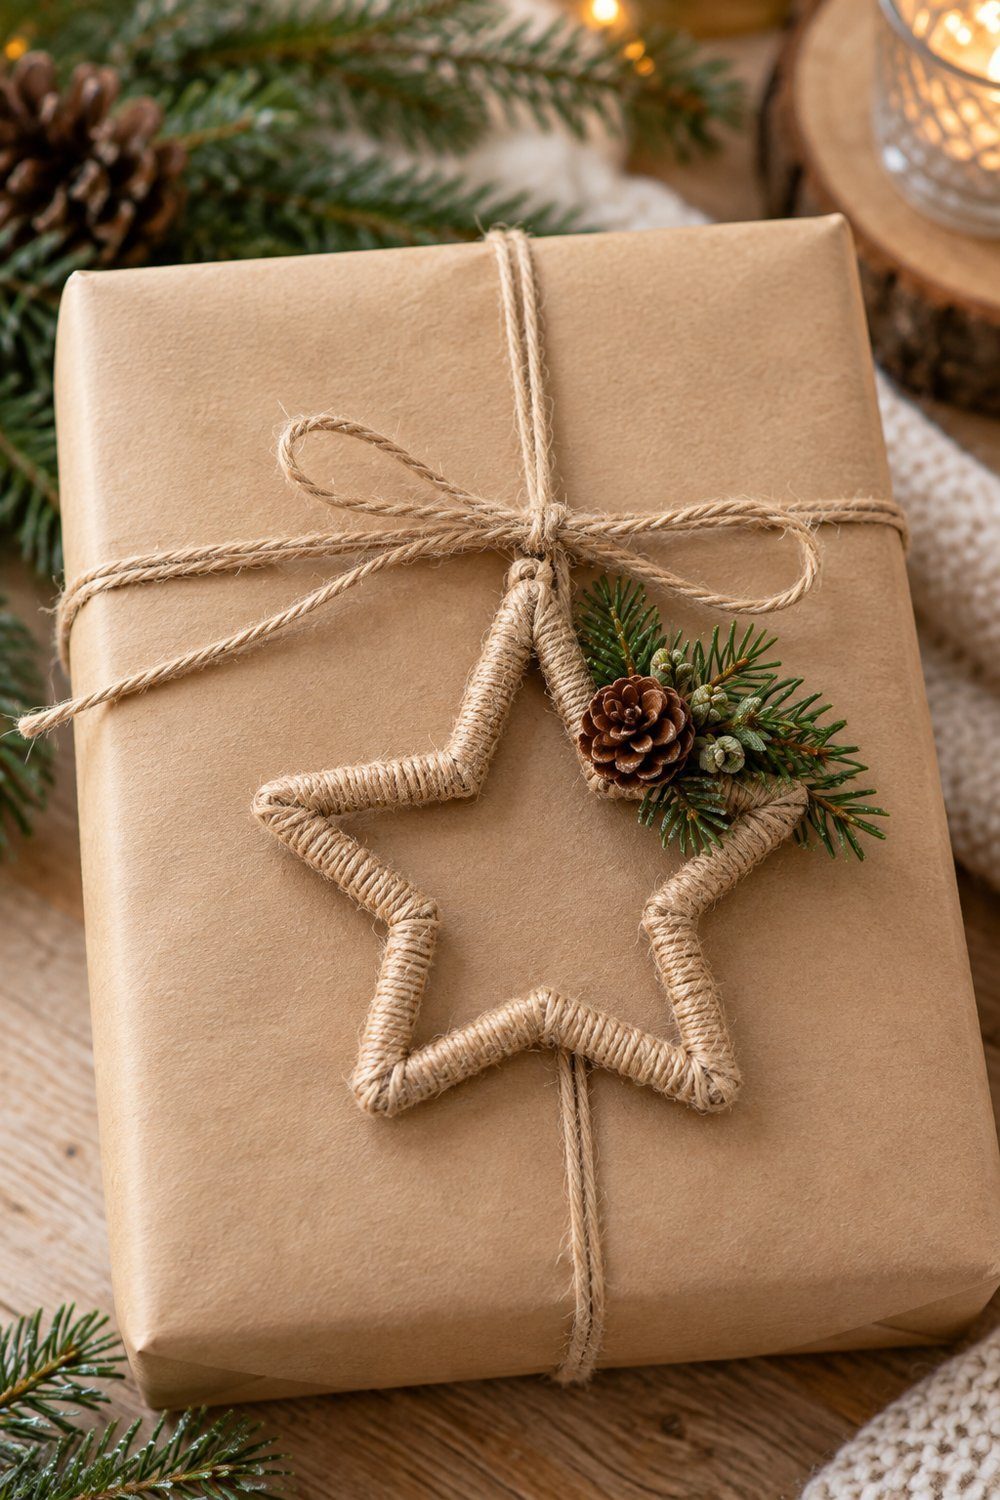
Dress a wrapped parcel with a star the recipient can hang up afterward. Draw a star on cardboard, cut it out and remove the center to leave an open frame. Glue the twine end to the back, then wrap the frame until the cardboard is covered, securing the turns as needed. Add a tiny greenery cluster and a hanging loop. The tutorial estimates $0 when using available supplies, a thrifty choice for your craft cupboard.
Materials: Twine, cardboard, small pinecone, greenery, berries, hot glue.
Cost ~$0 · Time 15 min · Level easy
Tutorial: Katie Hale, DIY & Crafts
19. Cinnamon stick tree toppers
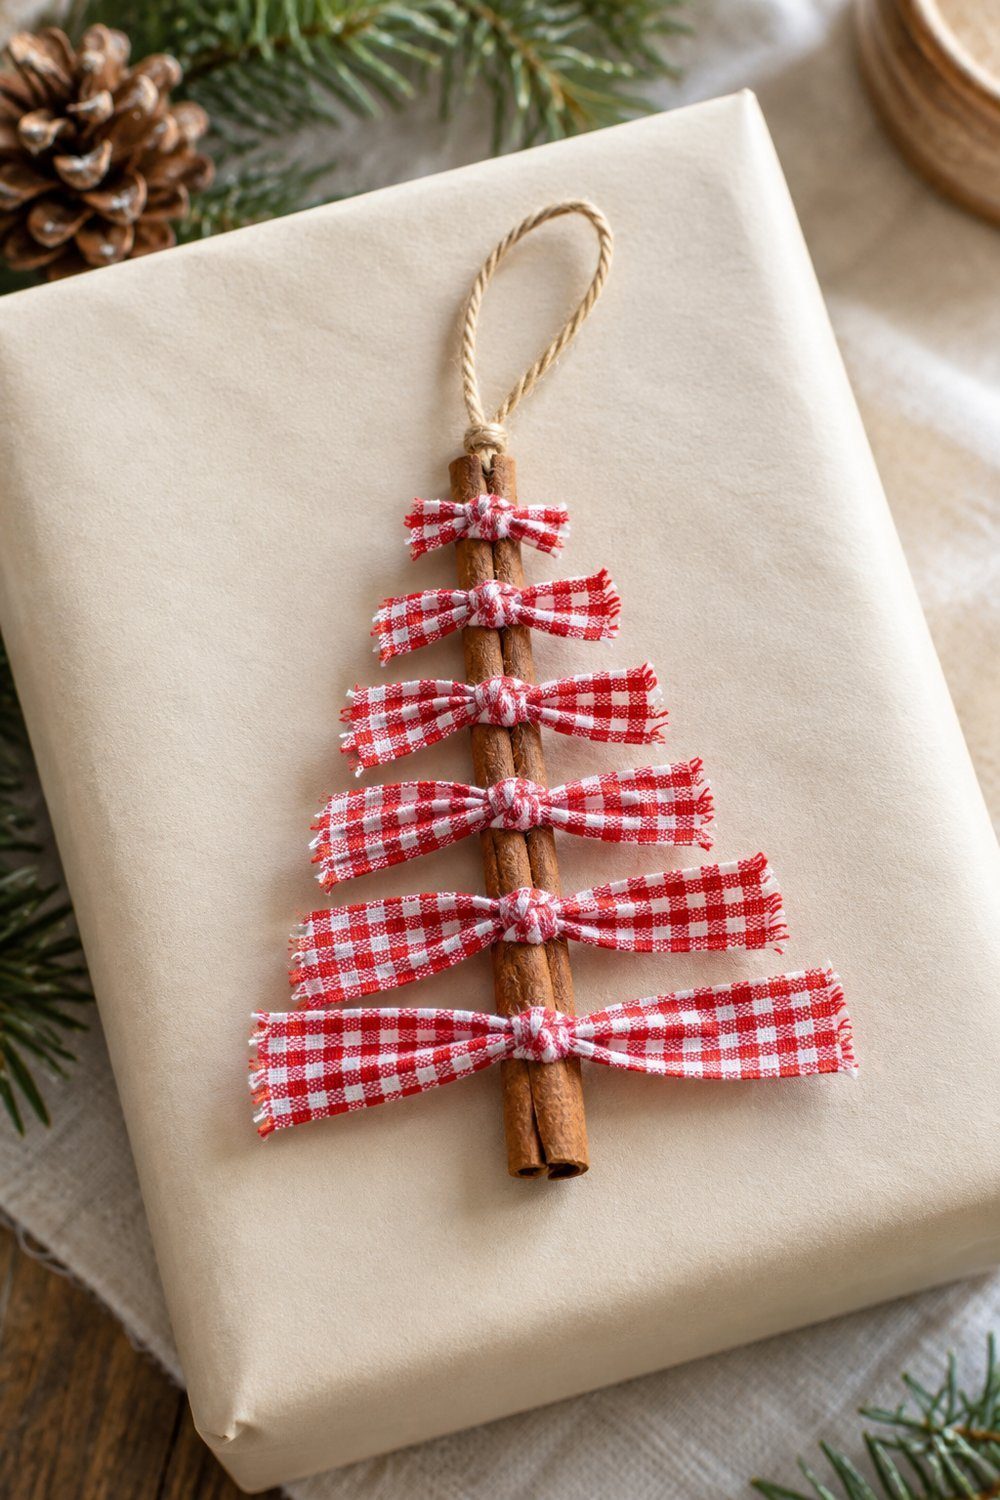
Tie a cinnamon tree onto a present for a fragrant finishing touch. Cut progressively shorter ribbon strips; press flat with optional stiffener. Knot the longest strip low on a cinnamon stick, then add shorter branches above. Glue a twine loop behind the top and slip it under your parcel ribbon. The tutorial lists 15 min for the whole tree.
Materials: Cinnamon sticks, fabric strips or ribbon, baker’s twine, hot glue, optional fabric stiffener.
Cost: materials you likely have · Time 15 min · Level easy
Tutorial: FDC, Factory Direct Craft
20. Snowy mason jar candle holders
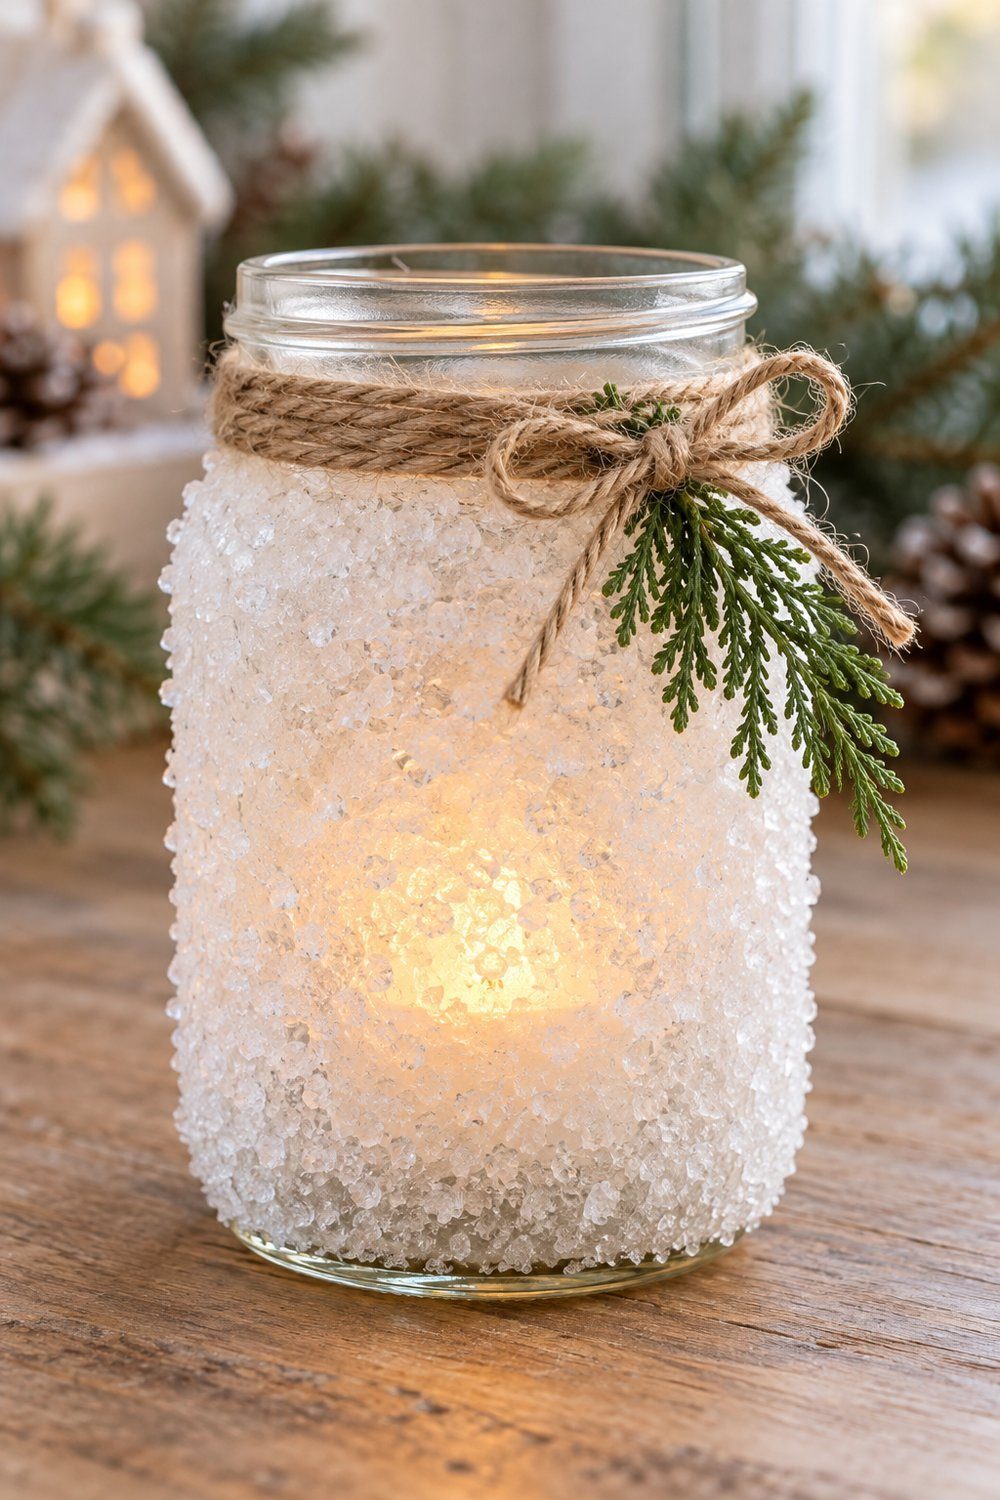
Frost a clean jar for your table. Mix Epsom salt with glitter on a plate, then brush Mod Podge over the jar’s outside. Roll the jar through the mixture and let the coating dry. Tie twine around the neck, add a small greenery accent and place a battery tealight inside. The source lists 15 min for making the jar; allow the coating to set before handling. The soft glow suits natural wood.
Materials: Mason jar, Mod Podge, Epsom salt, glitter, twine, greenery, battery tealight.
Cost: materials you likely have · Time 15 min · Level easy
Tutorial: Debbie Chapman, One Little Project
Which project fits your afternoon?
Times follow the tutorials; “not stated” means no total is supplied. Drying can add waiting time. Costs are source estimates using available supplies, rather than current shopping totals.
| # | Idea | Time | Cost | Level |
|---|---|---|---|---|
| 1 | Pinecone reindeer ornaments | not stated | Materials you likely have | Easy |
| 2 | Salt dough stars | 3 days to a week, drying | Materials you likely have | Easy |
| 3 | Wine cork angels | not stated | Materials you likely have | Easy |
| 4 | Craft stick sled ornaments | 35 min | ~$2 | Easy |
| 5 | Wood slice fox ornaments | 10+ min | Materials you likely have | Easy |
| 6 | Dried orange slice garland | 2–3 h, oven drying | Materials you likely have | Easy |
| 7 | Sculptural felt garland | not stated | Materials you likely have | Easy |
| 8 | Plaid ribbon bubble wreath | about 1 h | ~$13 | Easy |
| 9 | White button snow wreath | 30 min | ~$10 | Easy |
| 10 | Layered sweater trees | not stated | Materials you likely have | Easy |
| 11 | Yarn-wrapped Christmas trees | 20–30 min | Under $2 | Easy |
| 12 | Bottle brush forest centerpiece | 1 h 15 min | Materials you likely have | Easy |
| 13 | Painted pasta trees | 60 min, plus drying | Materials you likely have | Easy |
| 14 | Accordion paper window stars | 5 min | Materials you likely have | Easy |
| 15 | Cardboard gingerbread houses | 30–60 min | Materials you likely have | Easy |
| 16 | Fresh evergreen door swag | 15 min | Materials you likely have | Easy |
| 17 | Clothespin snowflakes | not stated | Materials you likely have | Easy |
| 18 | Twine star gift toppers | 15 min | ~$0 | Easy |
| 19 | Cinnamon stick tree toppers | 15 min | Materials you likely have | Easy |
| 20 | Snowy mason jar candle holders | 15 min | Materials you likely have | Easy |
Watch the shaping and assembly
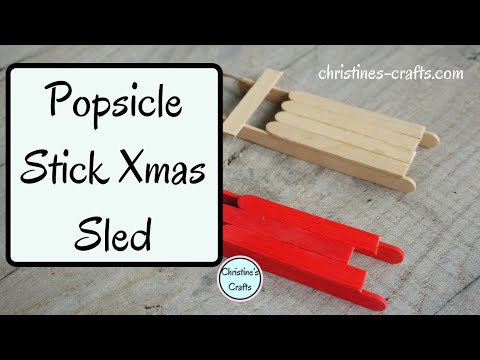
Christine’s Crafts shows how to assemble a miniature sled from craft sticks, including the supporting pieces beneath the seat. Watch the order of the joins before you open the glue, especially if you find the runner placement easier to understand in motion.
Hammons Nest demonstrates several approaches to wood slice Christmas ornaments, including stamping, decoupage and a snowman face. Use the video to explore finishes for another batch after your painted foxes; the close views help you see how the bark edge frames a small design.

Which easy Christmas crafts should you start with?
What can you make with supplies already at home?
Start with paper stars, cardboard houses or twine gift toppers. Sort paper recycling and ribbon scraps before choosing. The twine star tutorial estimates $0 using available materials; buying glue or embellishments changes your own total.
Which projects work well for a family craft afternoon?
Choose yarn wrapping, painting wood slices or decorating ready-dried salt dough stars. Let children wrap and paint while an adult handles hot glue, knife cuts and drilling.
How do you make different homemade decorations look coordinated?
Repeat ribbon against greenery, cream or natural wood. Use Christmas centerpieces using wooden boxes to group those natural textures.
How should you plan for drying time?
Start salt dough and orange drying before the gluing projects. Leave drying pieces on a clear tray.
What light should you use inside decorated jars?
Use a battery tealight for the snowy jar, particularly beside ribbon, paper or greenery. Stand the jar securely; switch it off when leaving.
Make it this weekend: checklist
- Choose your display spot and a project from the comparison table.
- Gather saved jars, cardboard, ribbon and craft supplies before shopping.
- Pick a ribbon color to repeat through the finished pieces.
- Begin projects with drying stages first.
- Set aside a protected work area for gluing and painting.
- Add hanging loops and let glued joins set before displaying.
- Pack spare supplies together for gift toppers later in the season.
Next: arrange your finished pieces with these rustic Christmas centerpiece ideas and Christmas table decorating ideas.