Christmas decorations made from plastic bottles


Use tops and caps for angels and flowers, bottoms for snowflakes, the body for rings and strips, and whole bottles for ready-shaped ornaments. Cut edges are sharp: adults cut, then sand or tape every edge; use no heat guns or open flame on PET. The quickest Christmas decorations made from plastic bottles are whole themed-bottle ornaments, listed at 2 minutes by their creator. Painted bottle-bottom snowflakes are the showpiece: clear plastic, white lines, and ribbon for the tree or window.
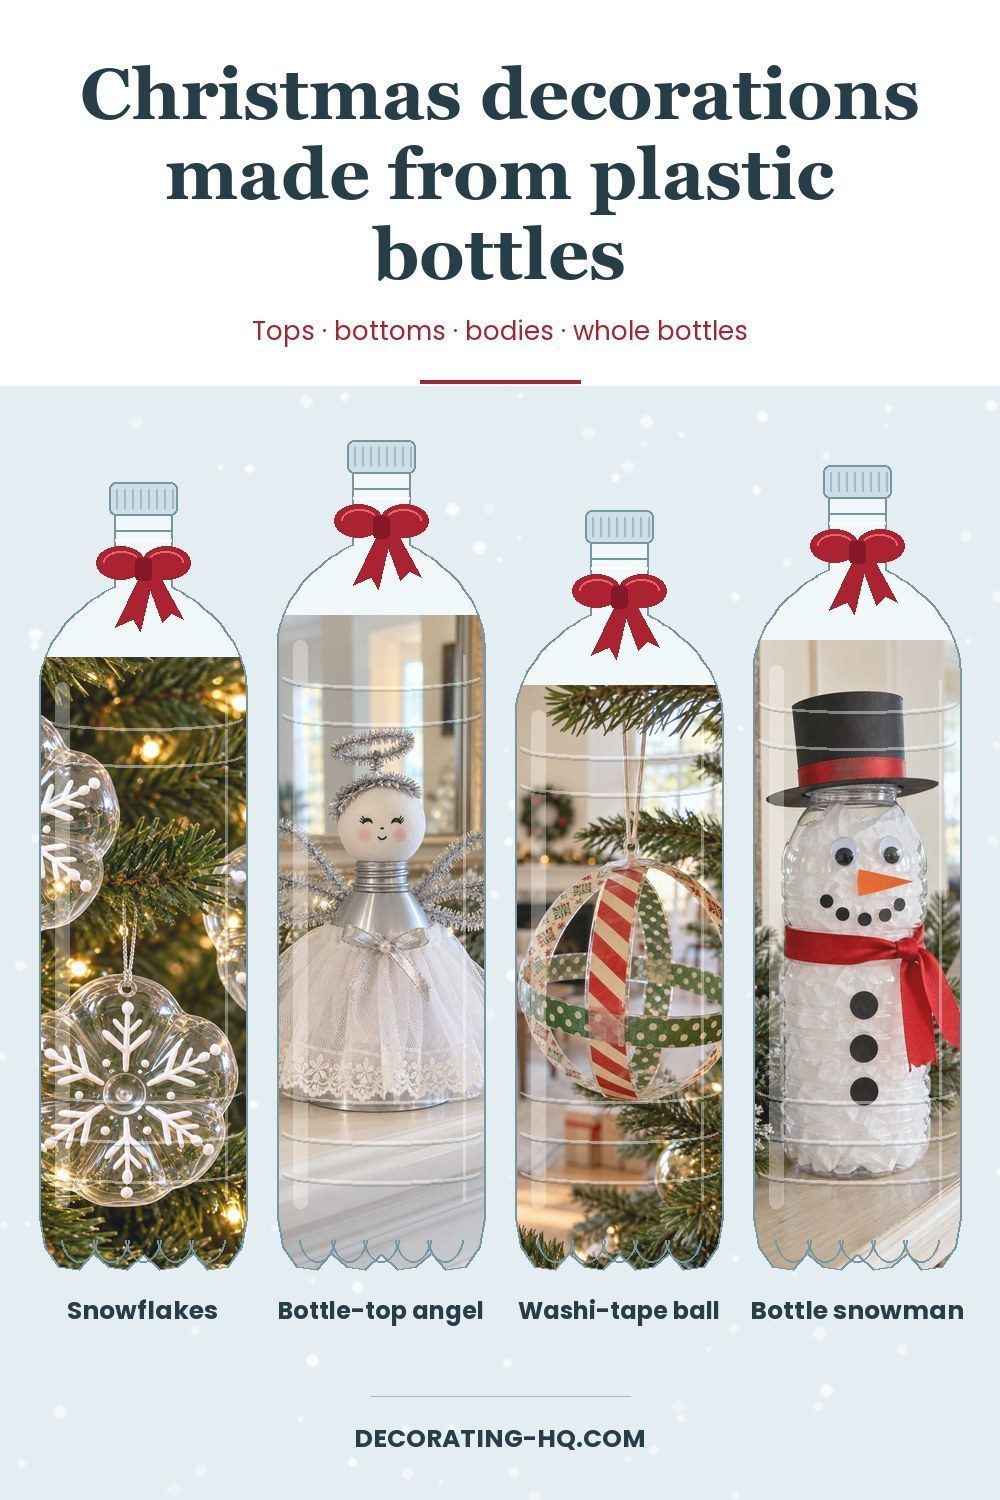
Prepping bottles before you cut
Wash and thoroughly dry bottles before starting, as Alicia Rodal directs in the strip-star tutorial below. Choose your project before separating the bottle: a poinsettia needs its cap attached, while the snowflakes use only the base. The table pairs bottle parts with projects and tools actually used in the linked tutorials. Leave the knife work and piercing to an adult, and finish every exposed edge before painting or threading.
| Bottle part | What it becomes | Tool | Source |
|---|---|---|---|
| Top and cap | Poinsettia with 8 petals | Scissors, hole punch | Mama Miss |
| Bottom | Painted snowflake | Craft knife, needle or hole punch | Lilac Daisies |
| Body | Ball made with 4 rings | Cutter, hot glue gun | My Frugal Christmas |
| Whole bottle | Tissue-filled snowman | Scissors, glue stick | Entertain Your Toddler |
Tops and caps
The shoulder gives these recycled bottle Christmas crafts their shape. Keep the cap and neck: the angel's foam-ball head sits on the opening, and the poinsettia's cap becomes its flower center. Save the remaining bottoms for the next section rather than cutting a fresh bottle for every decoration.
Tulle-skirt bottle-top angel
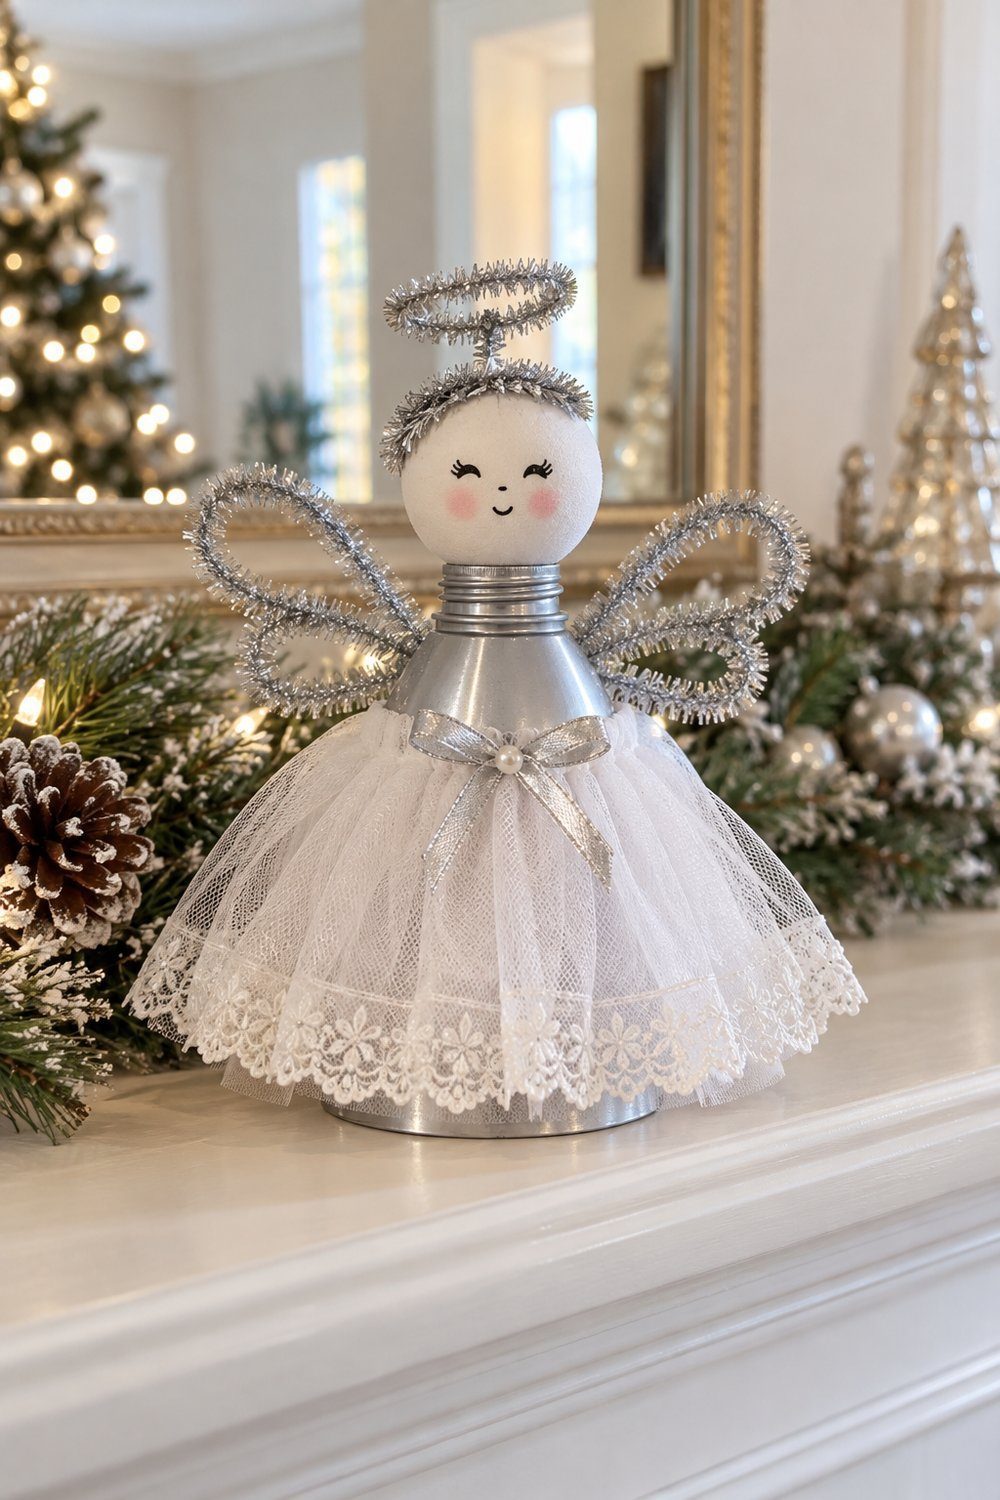
A silver bottle shoulder gives this angel a firm body beneath a soft tulle skirt. Cut off the top quarter, paint it, and gather tulle around the opening with lace along the hem. Add a foam-ball face, then form pipe-cleaner wings and a halo and finish with a ribbon bow. Katie Hale's tutorial lists 30 minutes total. Set the finished angel on a mantel or shelf.
You'll need: the top quarter of 1 plastic bottle, silver paint, tulle, lace, a foam ball, pipe cleaners, ribbon, thread, scissors, craft knife, and hot glue.
Tutorial by Katie Hale, DIY & Crafts
Red bottle-top poinsettia
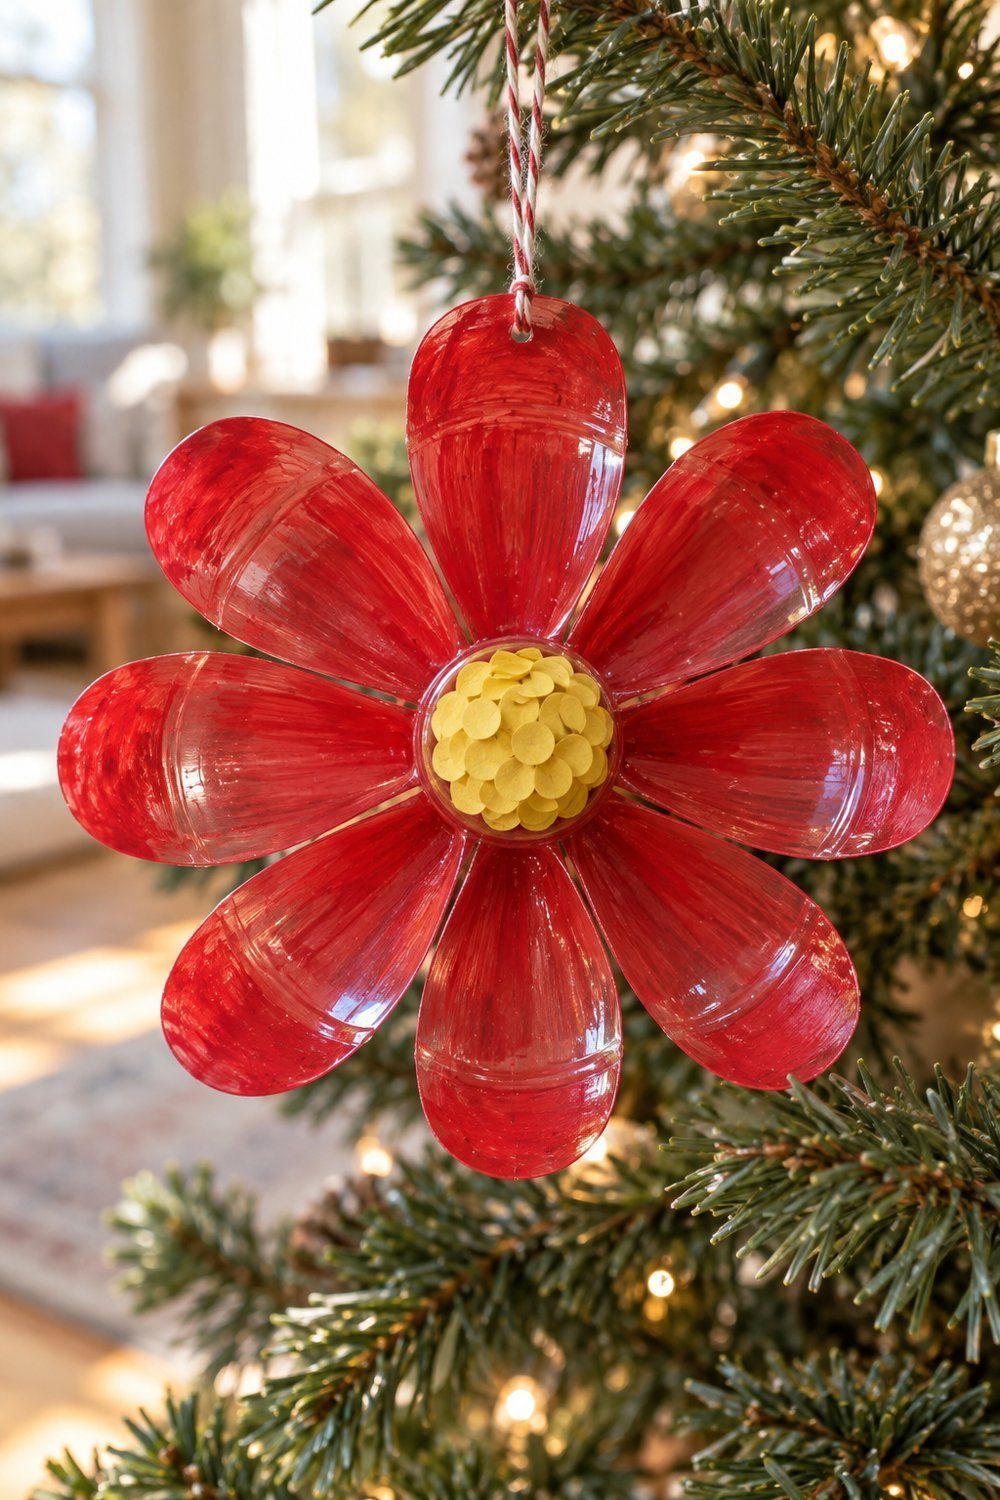
The attached cap becomes the yellow center of this bright red flower. Cut the upper half into 8 rounded petals, paint them with 2 coats, and glue overlapping yellow paper circles onto the cap. Punch a hole in the top and thread baker's twine through it for hanging. Melissa Klinker reports flaking paint and includes an optional sealant; follow that finish for the paint you choose. Hang the flower on the tree.
You'll need: a bottle's upper half with cap, red paint, yellow paper, a 3/8 in (1 cm) circle punch, twine, scissors, glue, and optional sealant.
Tutorial by Melissa Klinker, Mama Miss
Clear pom-pom window ornament
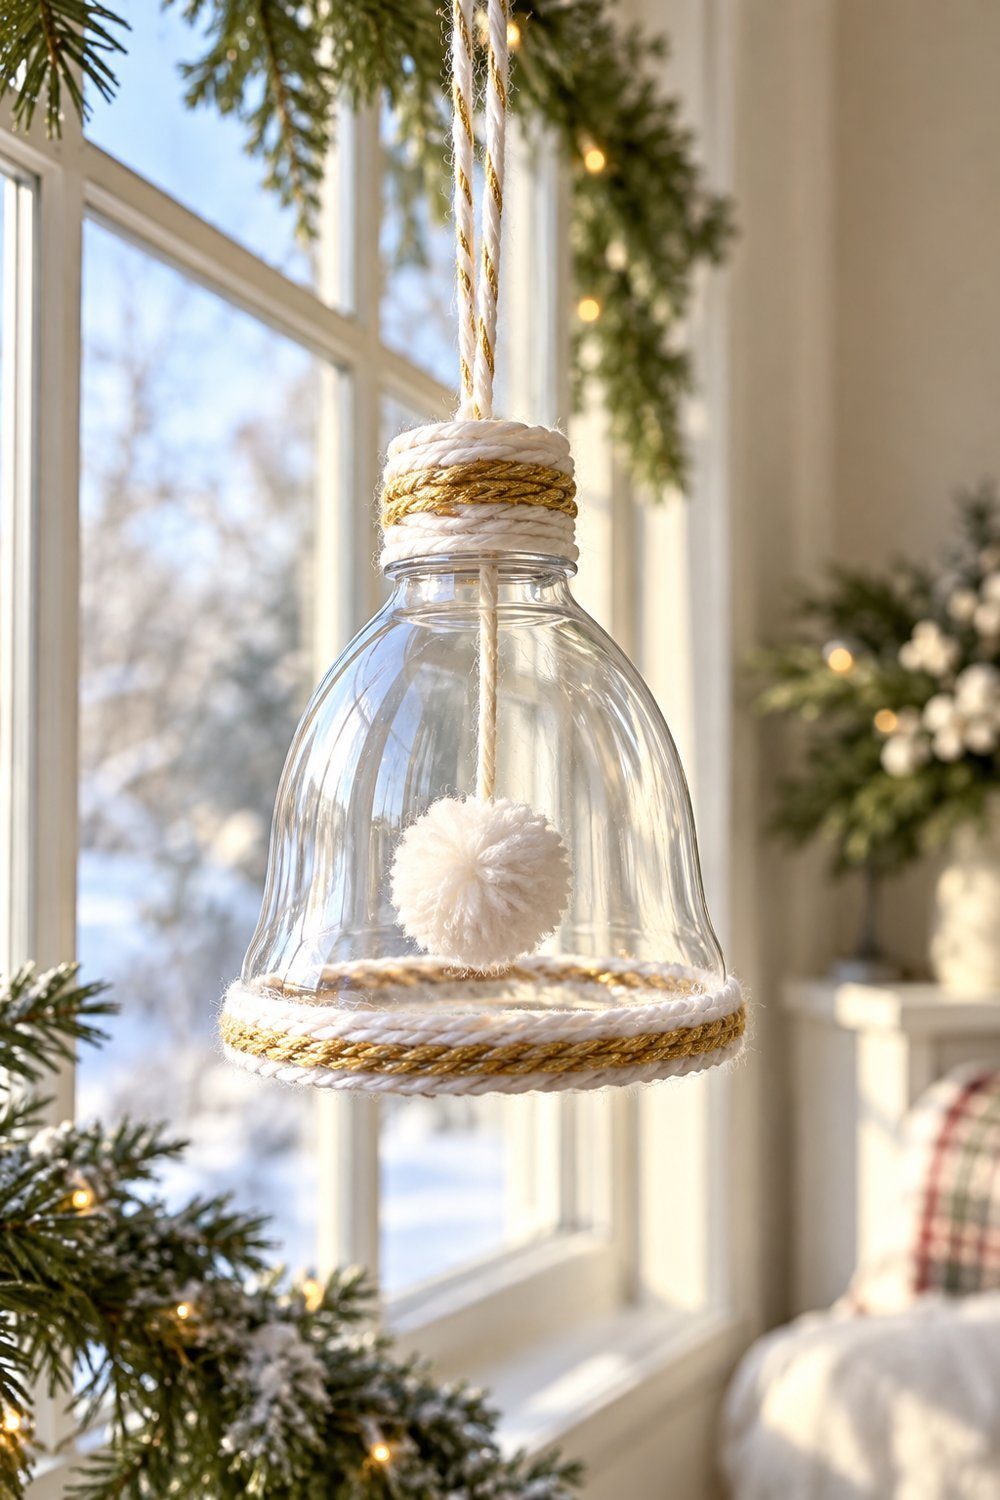
A yarn pom-pom hangs inside a clear bottle shoulder, giving this winter-hat-shaped ornament a soft center. Cut about 1 in (2.5 cm) below the neck and pierce the cap. Make a pom-pom, leaving its long tying ends attached; pass those ends through the cap and knot them into a hanging loop. Glue yarn around the lower edge and cap to finish. Courtney Constable displays these in a window, where the transparent middle leaves the little pom-pom visible through the shell.
You'll need: a small bottle top and cap, white and gold yarn, including about 8 in (20 cm) of yarn for the pom-pom, scissors, and a glue stick.
Tutorial by Courtney Constable, DIYS.com
Bottoms: snowflakes, stars and more
Bottle bottoms already have molded lines that can guide a painted design or a cut silhouette. Keep the clear surface visible for the snowflakes, trim it into points for the garland, or group the bases together for a snowy wreath. The painted version is the strongest place to start: the original shape does much of the decorative work, and the white design stays easy to read against the tree.
Painted bottle-bottom snowflake ornaments
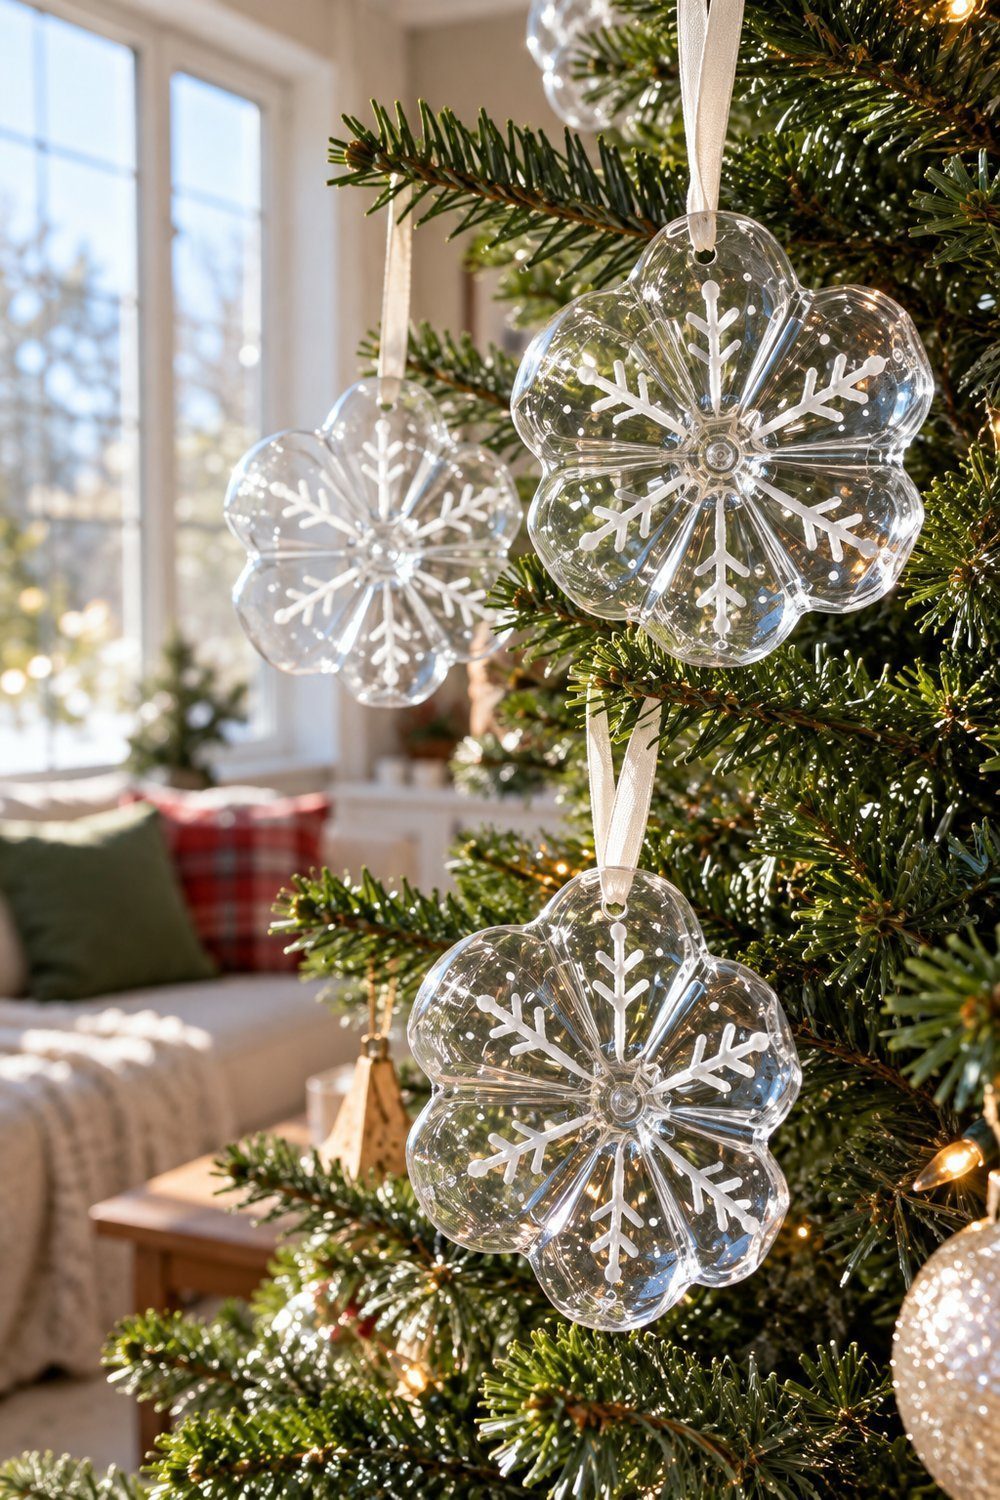
Tutorial by Emily M, Lilac Daisies
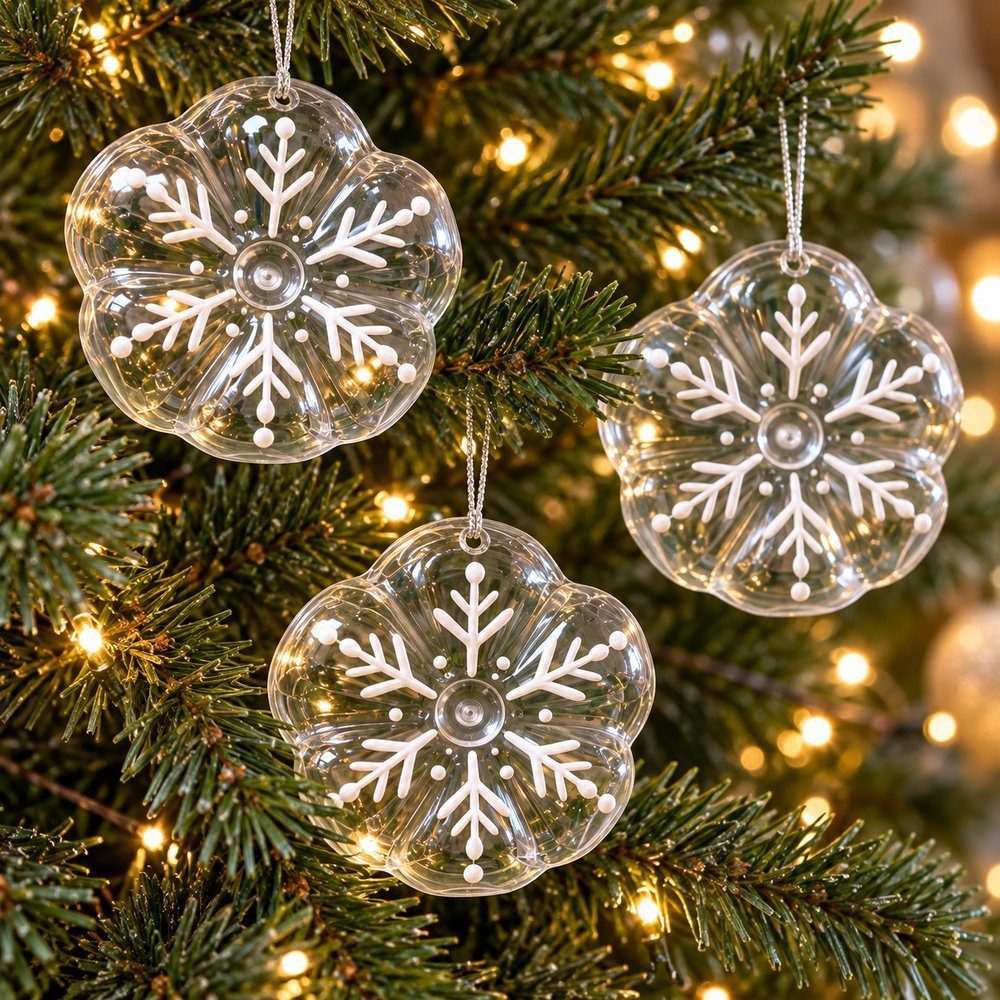
White snowflake lines follow the molded grooves of clear bases. Lilac Daisies, collaborating with Cece Luna, paints the inside before adding ribbon. Cut, paint, pierce, and hang on the tree or in a window. The expanded sequence separates those actions for photographing; sanding or taping every edge is the safety adaptation here.
You'll need: clear bottle bottoms cut about 1 1/4 in (3 cm) above the base, white paint, ribbon, craft knife, needle or hole punch; add sandpaper or edge tape.
- Clear bottles, white poster or acrylic paint
- Ribbon, brush, cutting and piercing tools
- Edge-finishing supplies
- Have an adult cut off clear bottoms and sand or tape every edge. Arrange them on a craft table.
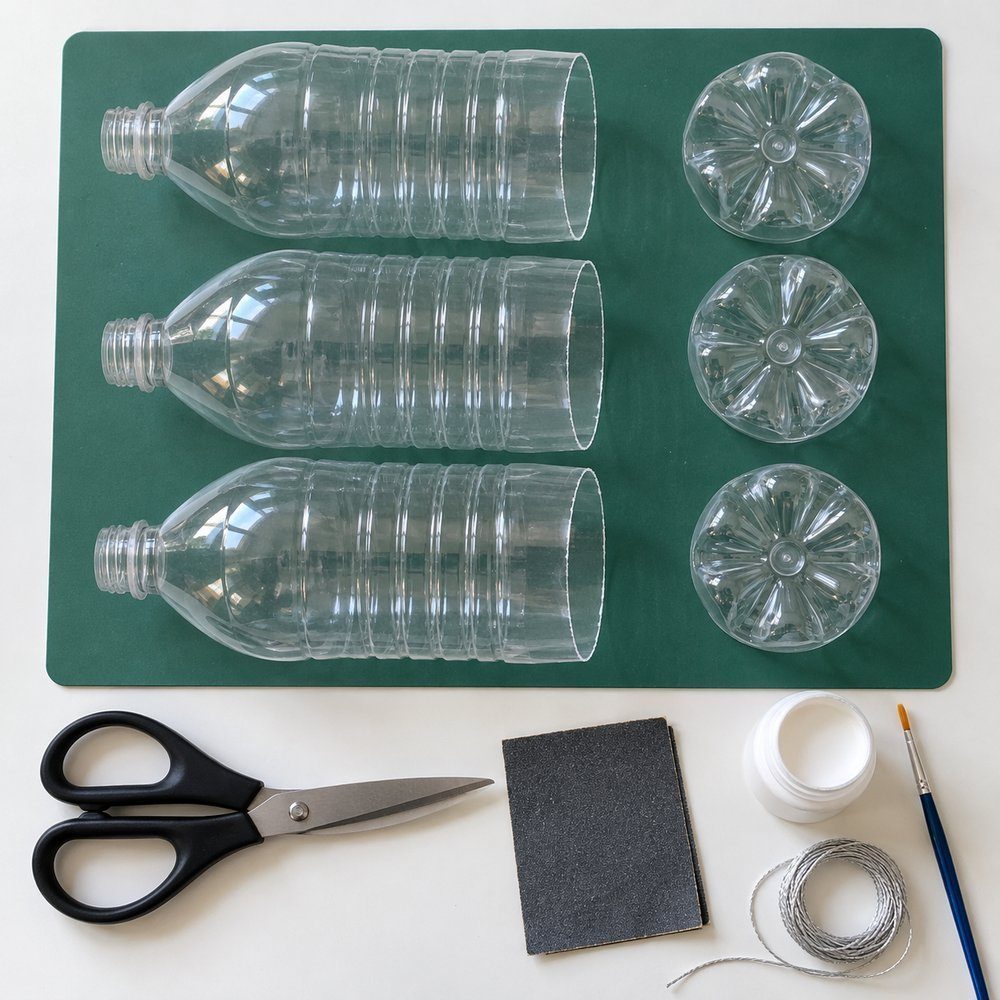
- Turn the bases inside upward.
- Paint white snowflake lines along the grooves.
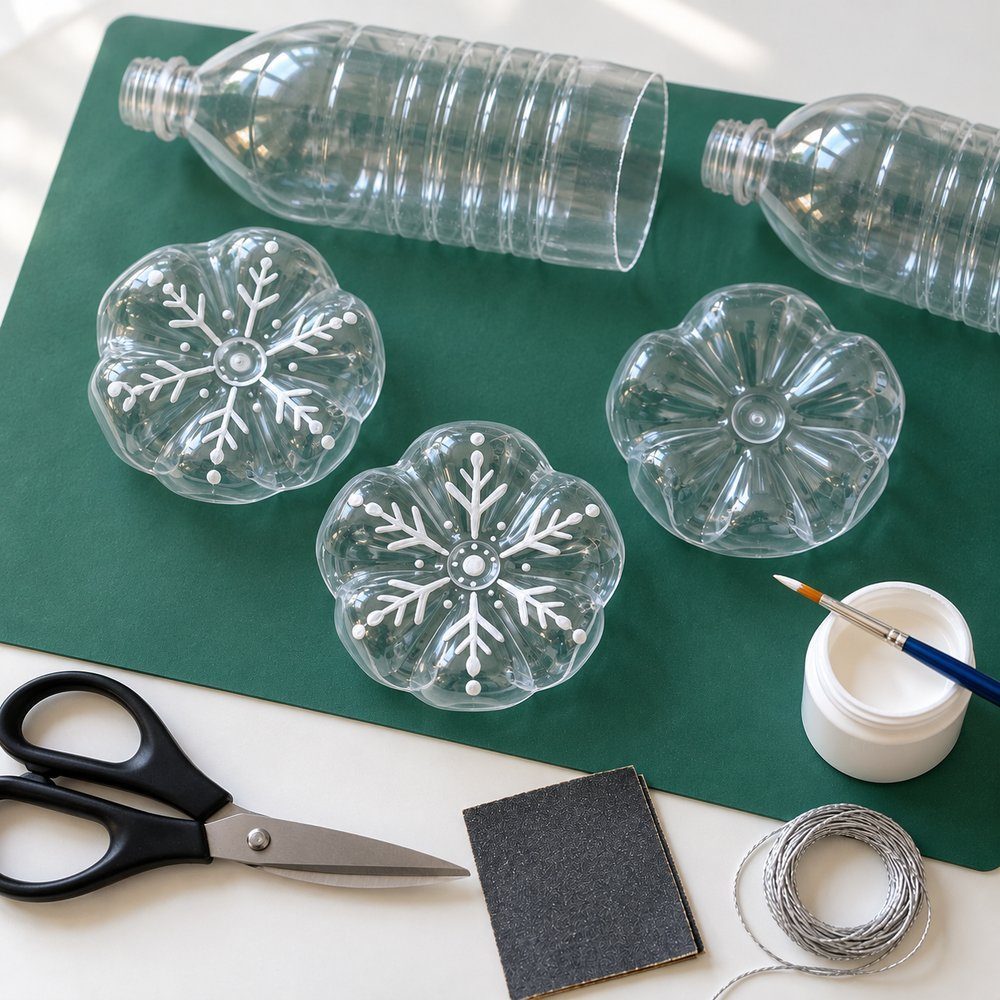
- Complete the symmetrical design.
- Let the paint dry.
- Have an adult pierce an edge hole.
- Knot the ribbon ends; thread the loop through.
- Hang on a Christmas tree or in a window.
For a related bottle-bottom star, watch Irene Gil's Spanish tutorial on the Manualidades On channel. Its star segment turns a bottle base into a painted tree topper with a snowflake design and wire attachment. This is a related cutting and painting demonstration; Emily's ribbon-hung snowflakes remain the project above.

Translucent star-and-bead garland
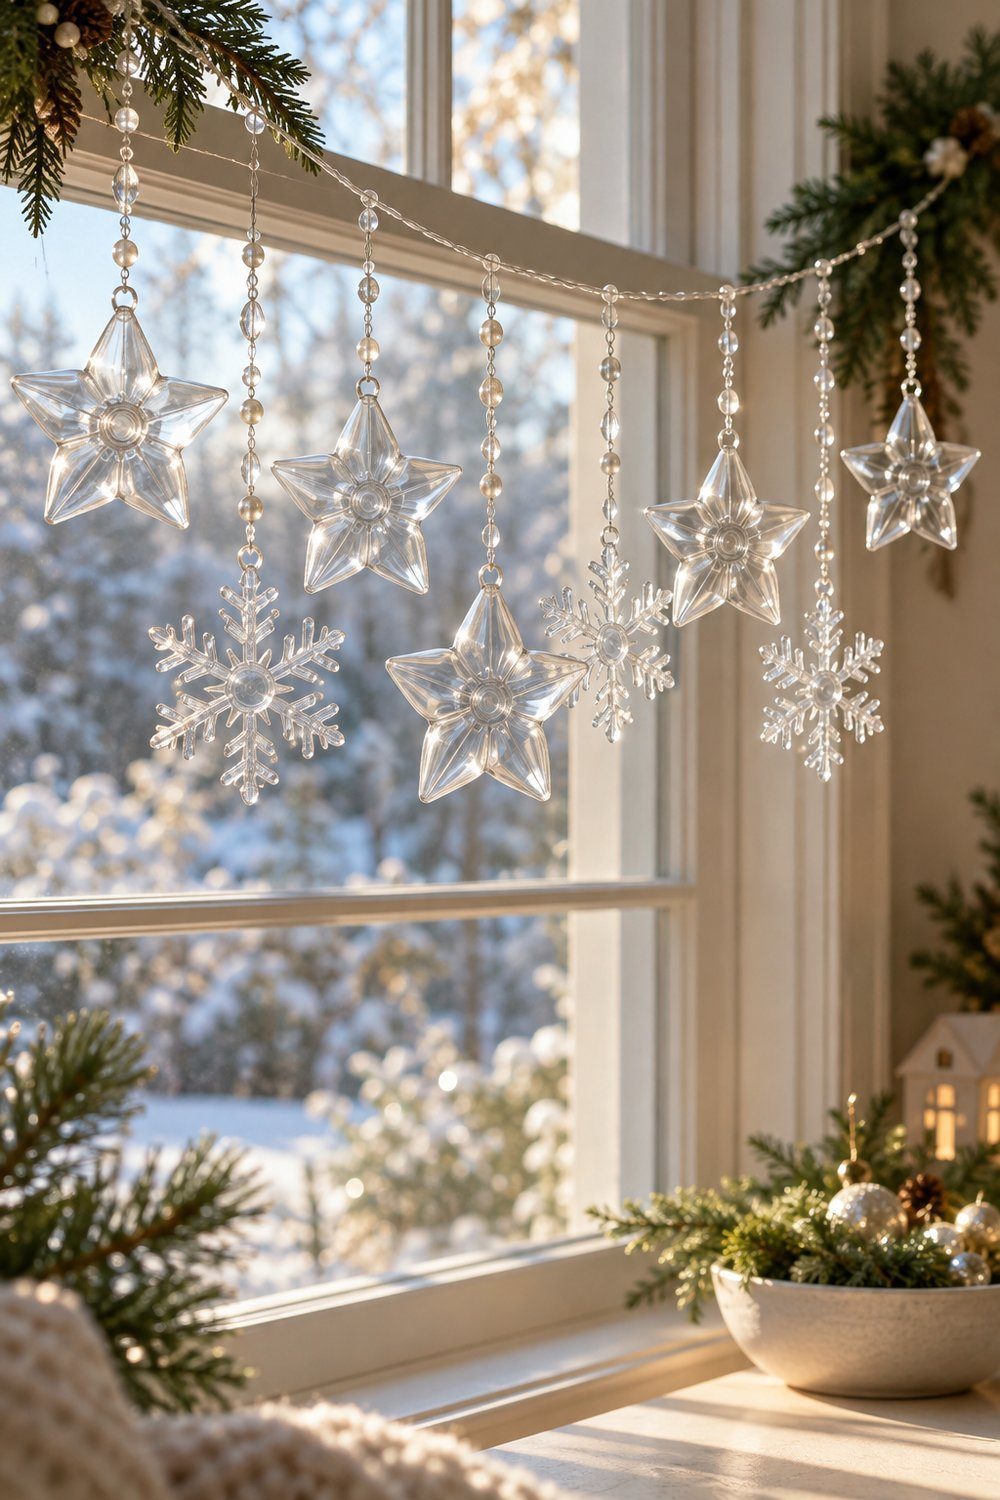
A French tutorial by Esprit Cabane combines 5 stars and 3 snowflakes cut from 8 bottle bottoms. Pierce a hanging hole in each shape. Thread a few translucent beads and the shapes onto a 1.5 m (5 ft) thread, knotting as you go. Vary the bead spacing as the tutorial suggests. Here, hang the finished garland across an indoor window: that placement is a styling adaptation of the source's hanging decoration.
You'll need: 8 plastic bottles, 1.5 m (5 ft) of thread, a few translucent beads, a cutting knife, scissors, and a needle or hole punch.
Tutorial by Esprit Cabane
Snowy bottle-bottom wreath
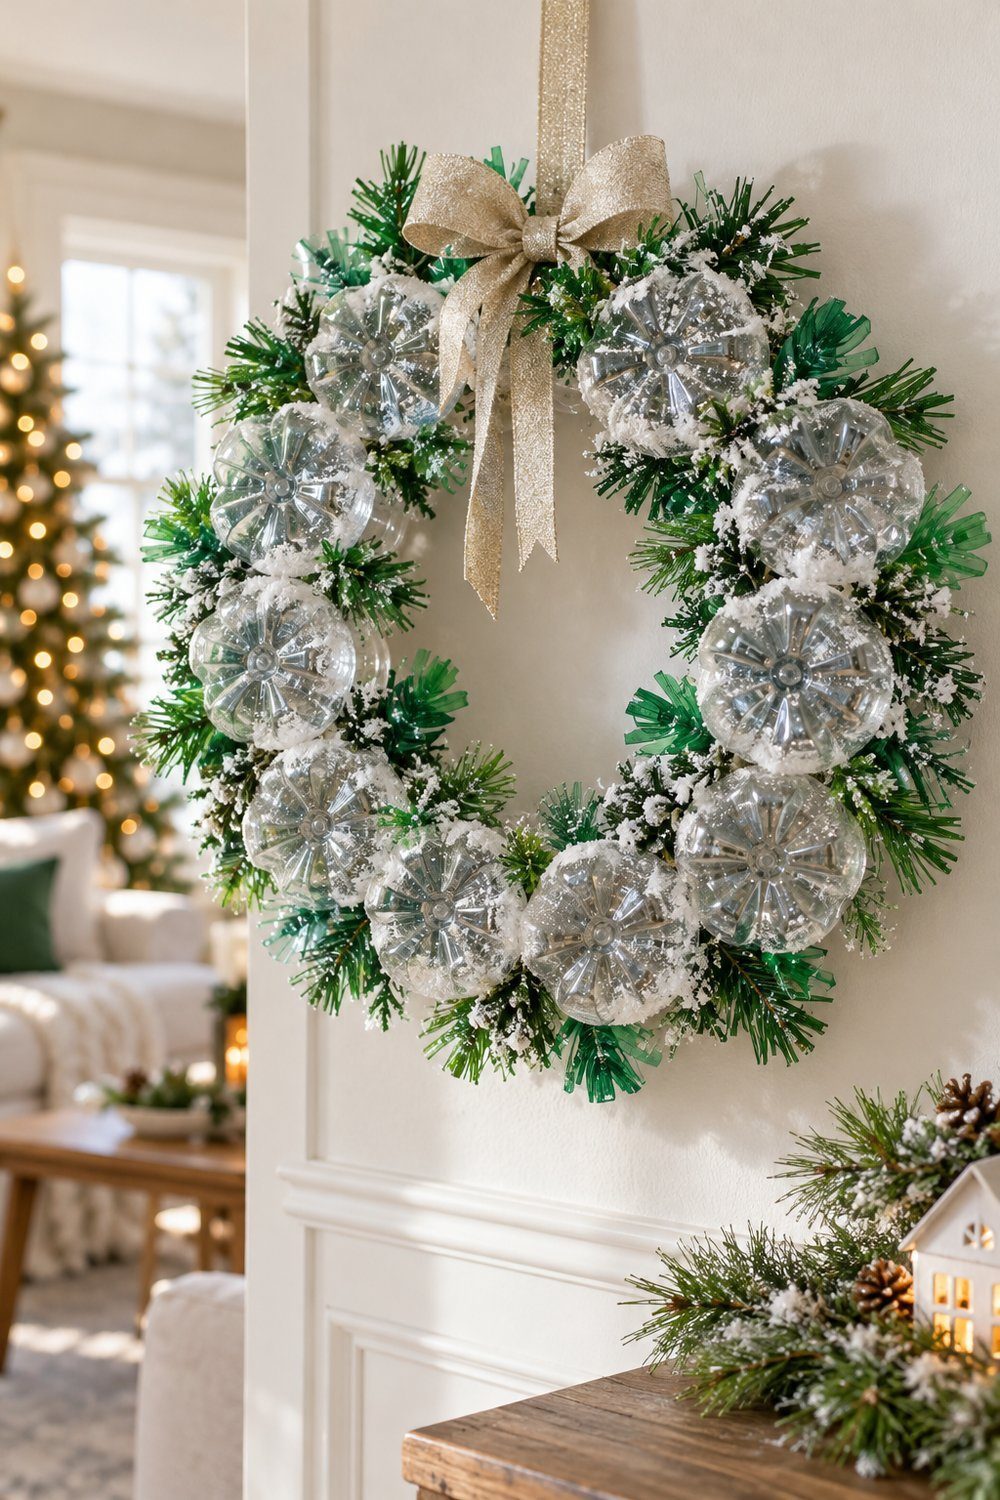
Bottle bases cluster over a wrapped cardboard ring to make this snowy wreath. Attach the bottoms, apply snow spray, and let the coating dry overnight. Cut green bottle plastic into pine-like branches, tape those accents in place, and hide the tape with ribbon. Judit reports that hot glue failed over the snow coating, so use her tape fix. The original includes a lightbulb snowman; here, omit that accent and display the ribbon-finished wreath on an interior wall as a declared adaptation.
You'll need: 20–30 plastic bottles, 2 green bottles, cardboard, white plastic wrapping, ribbon, snow spray, glue, and tape; the source recommends 1 night for drying.
Tutorial by Judit, Creatips@Hand
The body: rings and strips
The straight middle section supplies the flexible strips for the next projects. Wash and dry it before opening the cylinder, following Rodal's preparation method. Tape-covered rings create an airy ball, folded strips make a geometric star, and a shaped juice-bottle shell becomes a lantern.
Washi-tape ring ball
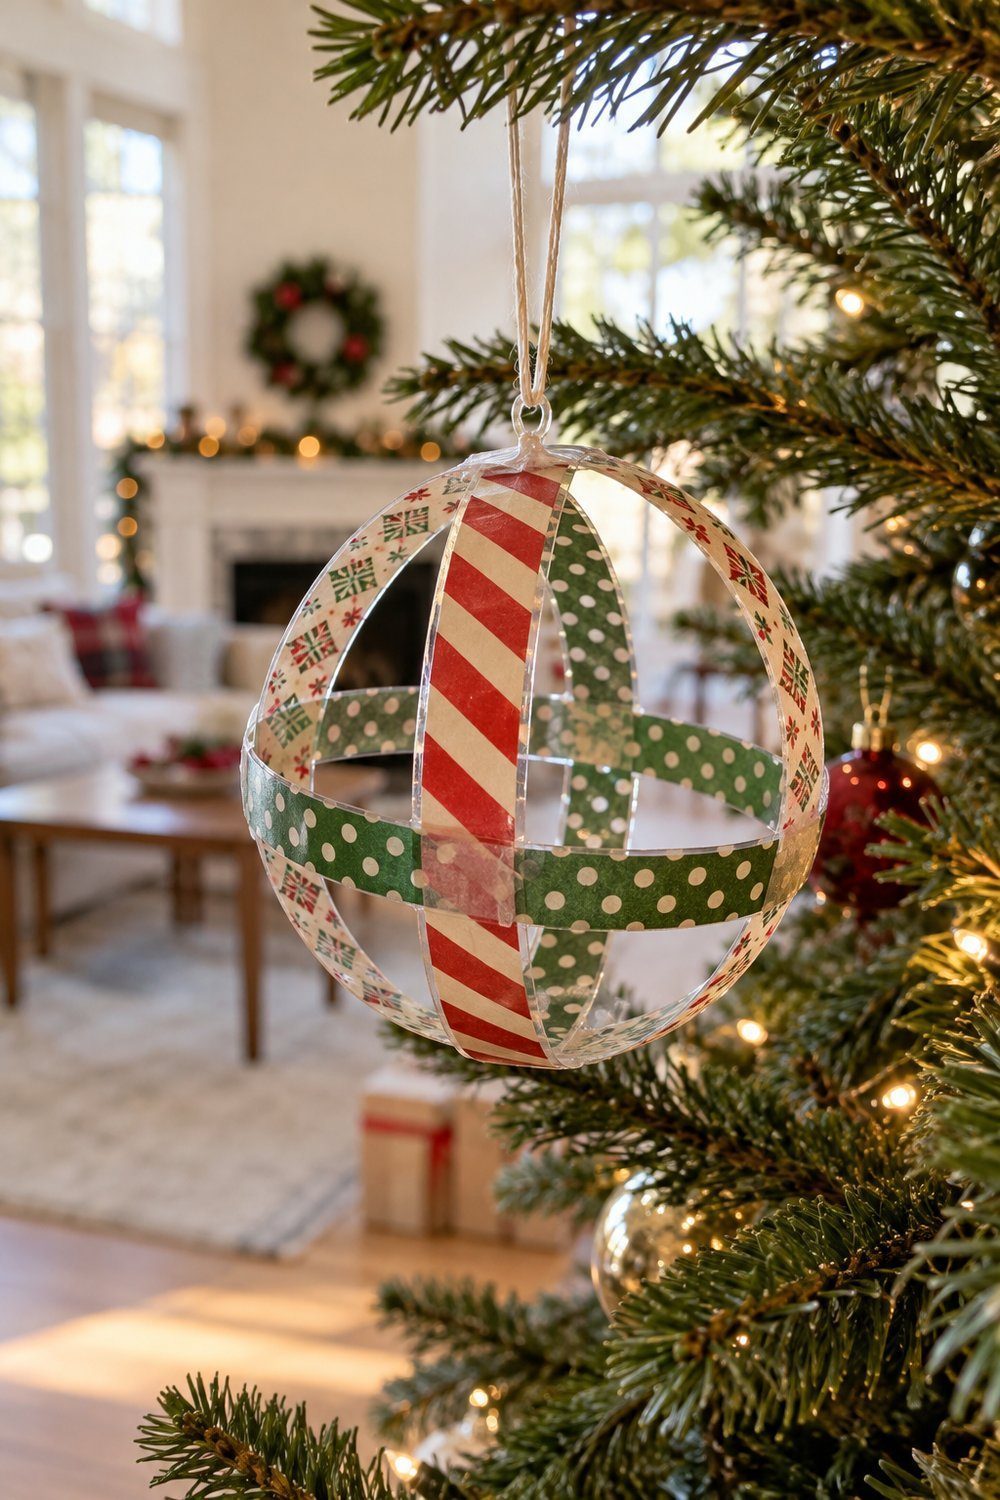
Open spaces between patterned rings make these plastic bottle Christmas ornaments look light and graphic. Wrap the bottle body in washi tape, open it lengthwise, and cut strips following the tape width. Close each strip into a ring with matching tape, then glue the rings across each other into a ball. Katrine2706 uses 4 rings, with 3 offered for a less crowded version. Attach a string or paper-strip hanger to one ring. Hang it from the tree by that loop.
You'll need: 4 bottle-body rings per ball, washi tape, a cutter, hot glue, and string or a paper-strip hanger; 3 rings are the source's alternative.
Tutorial by katrine2706, My Frugal Christmas
Diamond-point strip star
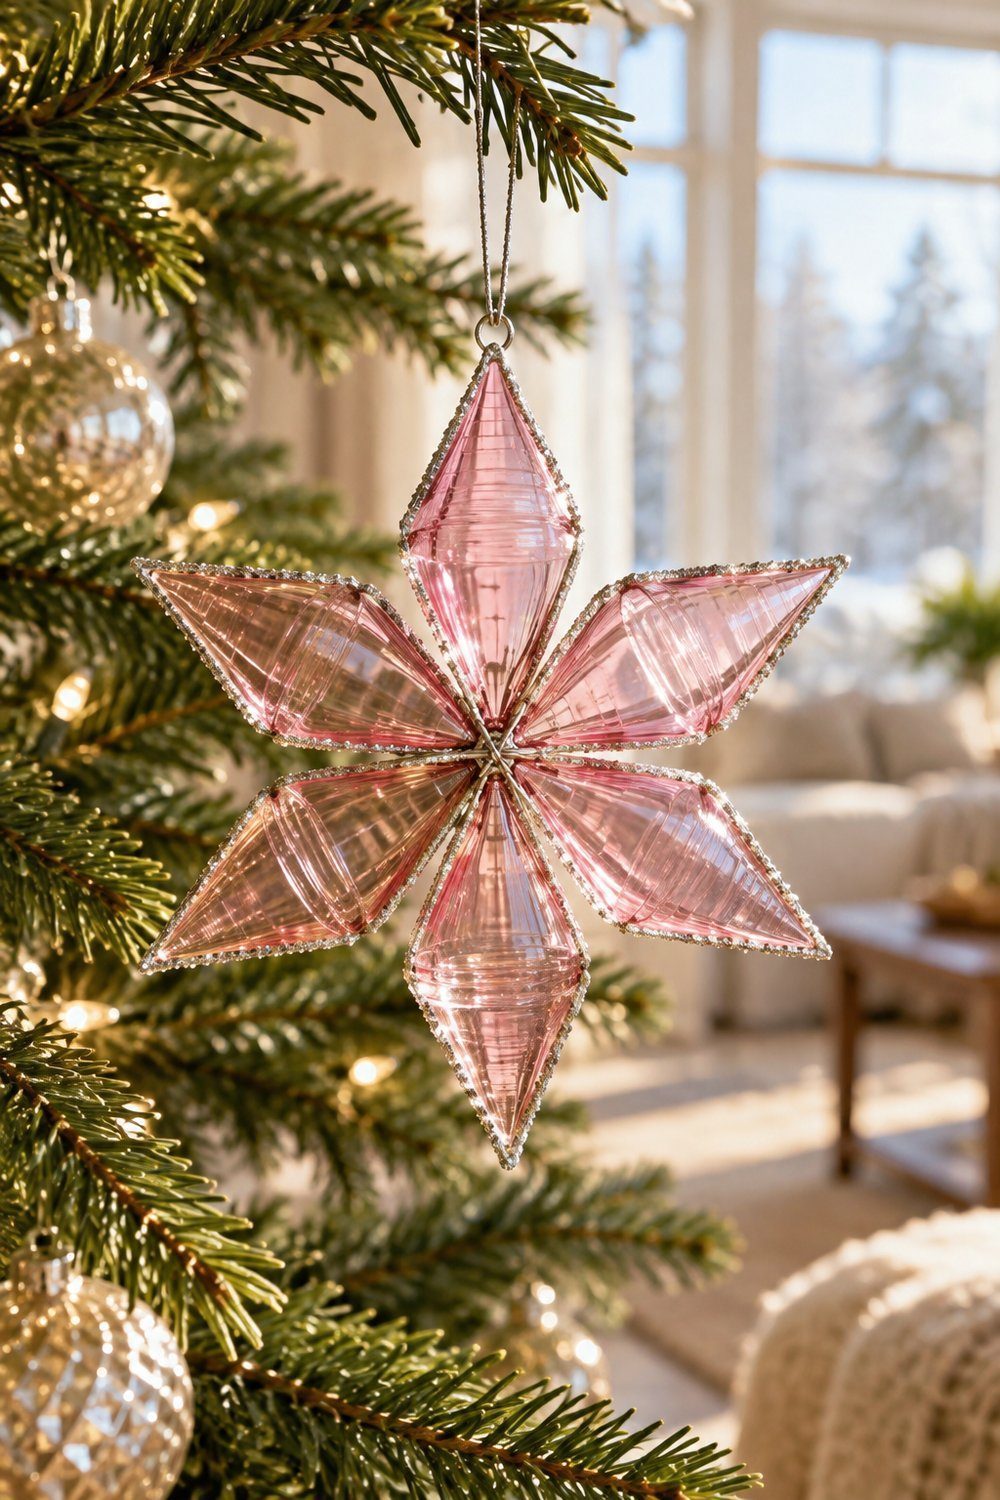
A Spanish tutorial by Alicia Rodal folds pink bottle plastic into a star with diamond-shaped points. Cut the straight body into strips about 3/8 in (1 cm) wide, then halve 3 strips to make 6 shorter pieces. Fold each strip in half twice into a diamond, then pierce the ends and join the pieces with fine wire or thread. Finish the edges with glue and glitter, then add a knotted hanger. Hang it on the tree.
You'll need: 3 plastic strips about 3/8 in (1 cm) wide, fine wire or thread, a needle, scissors, glue, glitter, and hanging thread.
Tutorial by Alicia Rodal, Crear y Reciclar
Metallic bottle lantern
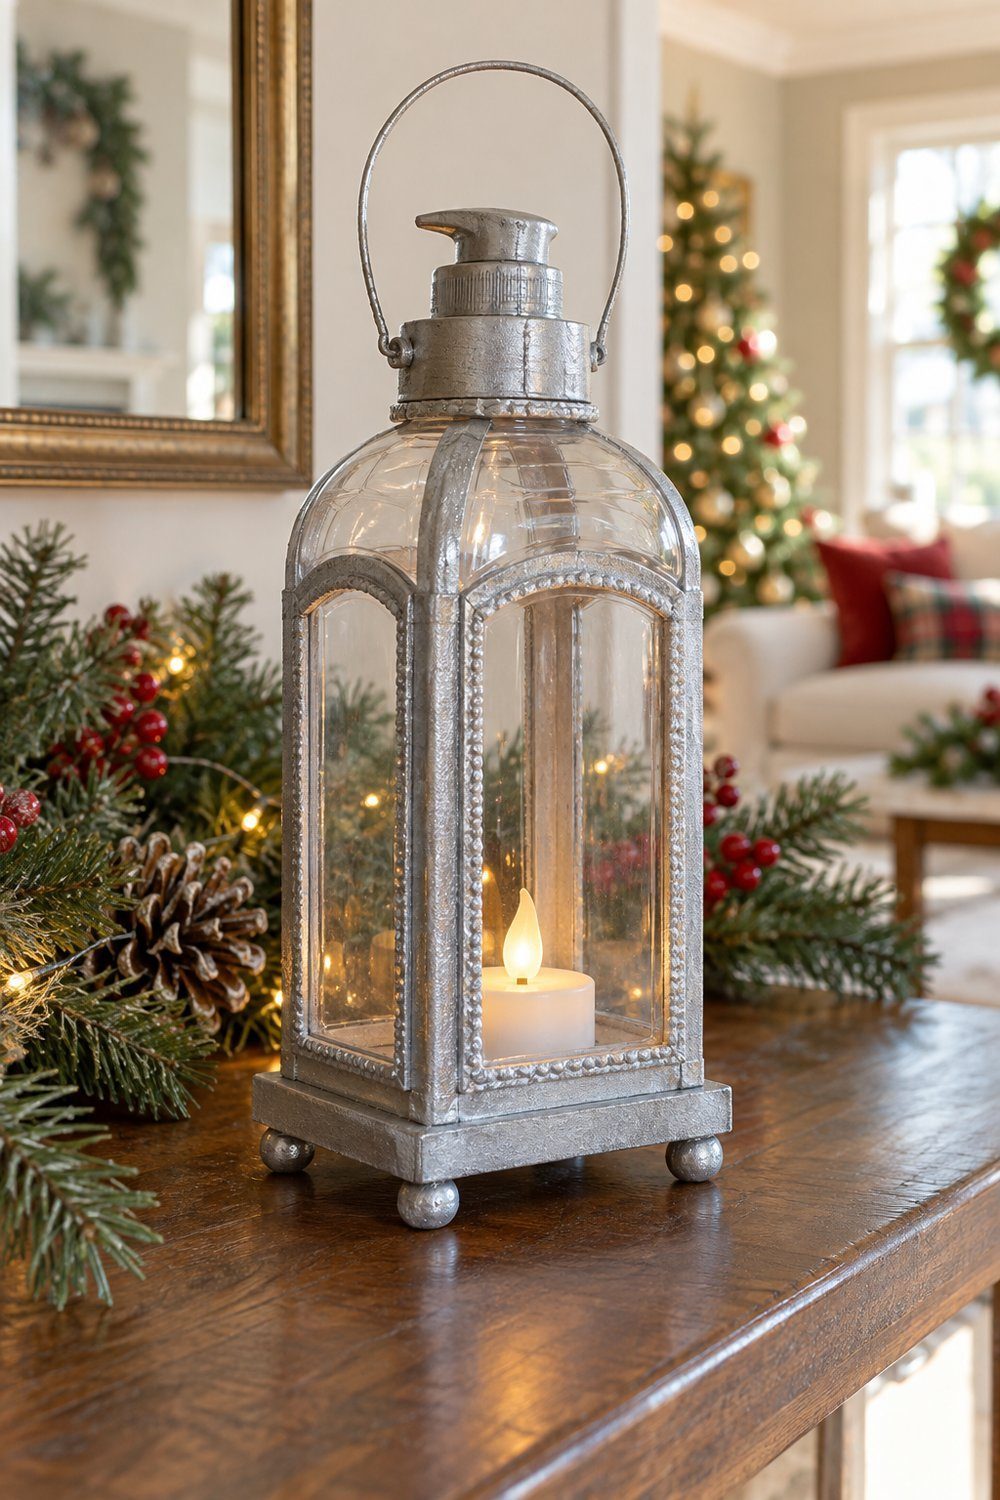
This lantern preserves clear panes within a metallic frame made from a juice bottle. Add a cardboard base and foam-strip feet, then build up trim with more foam and glue details. Attach the decorative top from a hand-wash bottle, mask the panes, and spray the frame with light coats. Home-Dzine specifies a small flashlight or battery tea light. Here, place the lantern on an indoor Christmas console; that placement adapts the source's festive display. An adult handles the knife, hot glue, and spray finishing.
You'll need: a juice bottle, a decorative bottle top, cardboard, masking tape, foam including 4 foot pieces, hot glue, metallic paint, wire, a toilet-paper tube, and battery lighting.
Tutorial by Home-Dzine
Whole bottles
A bottle with its own decorative shape can become an ornament while keeping the body intact. A plain clear water bottle can instead show the white tissue filling of a snowman. These projects suit different starting materials: choose the themed container for a hanging decoration, or save an ordinary water bottle for the standing figure.
Whole themed-bottle ornament
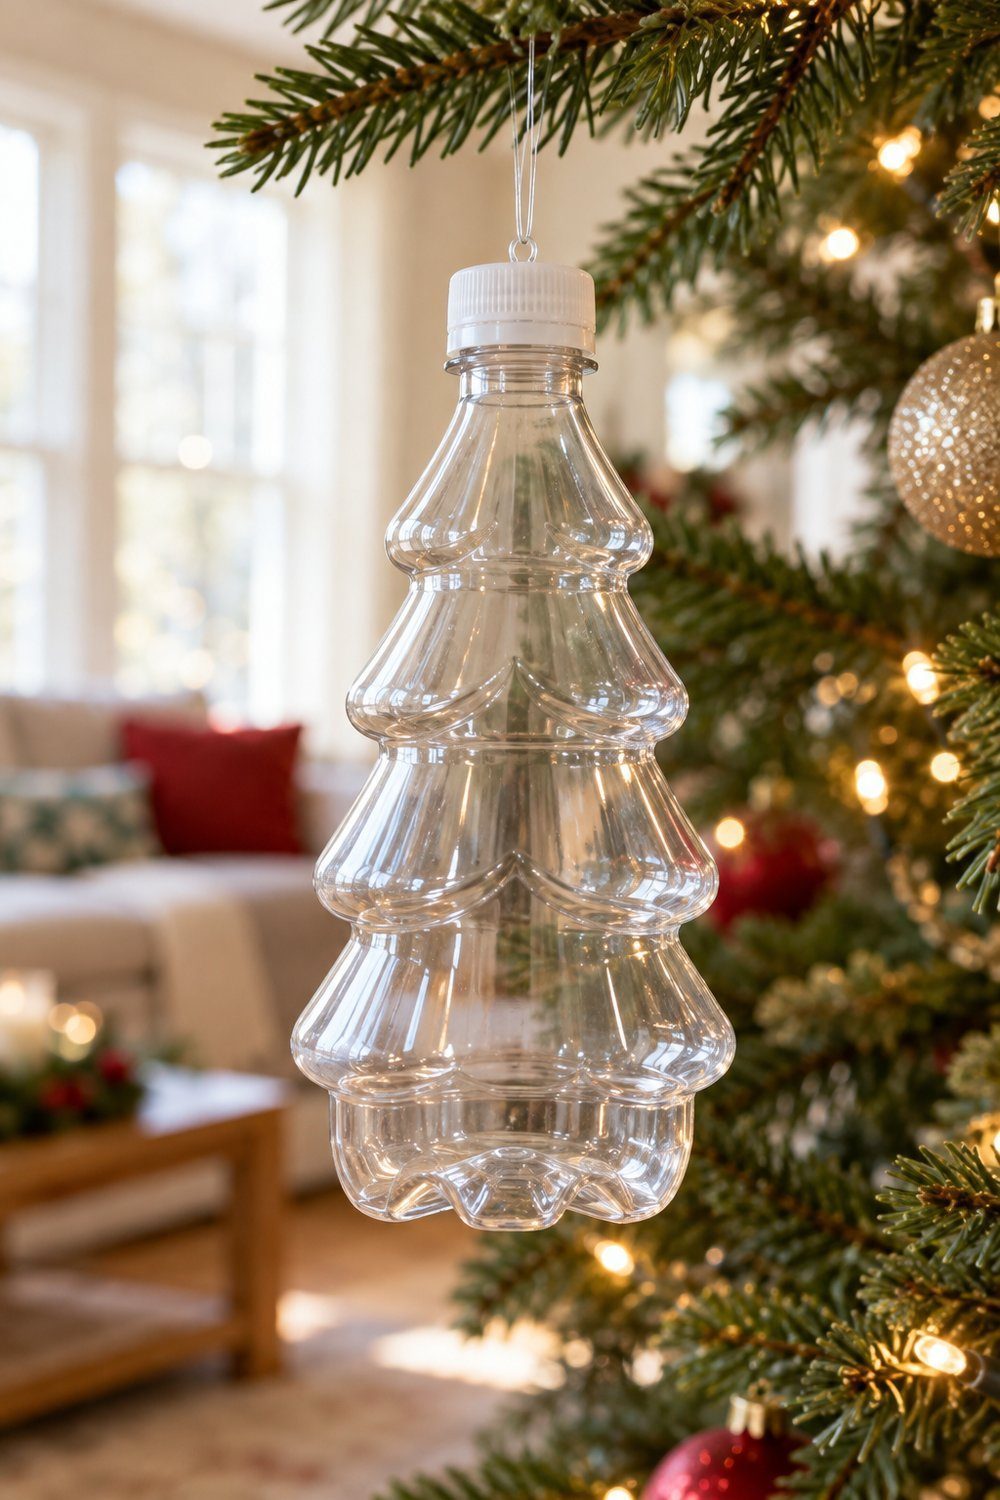
Keep the existing festive shape of a themed soda or flavored-water bottle for this quick hanging ornament. Yamari A. makes a cap hole, threads a loop through it, knots underneath, and screws the cap back on. The source uses a heated needle; here, use a hand awl (an adult does this) on the detached cap instead, a declared safety adaptation. Hang the empty bottle on the tree. The tutorial lists 2 minutes for its original method; the adapted piercing method has no verified time.
You'll need: 1 themed plastic bottle with cap and 7 in (18 cm) of fishing line; substitute a hand awl (an adult does this) for the source's heated needle.
Tutorial by Yamari A., Cut Out + Keep
Tissue-filled bottle snowman
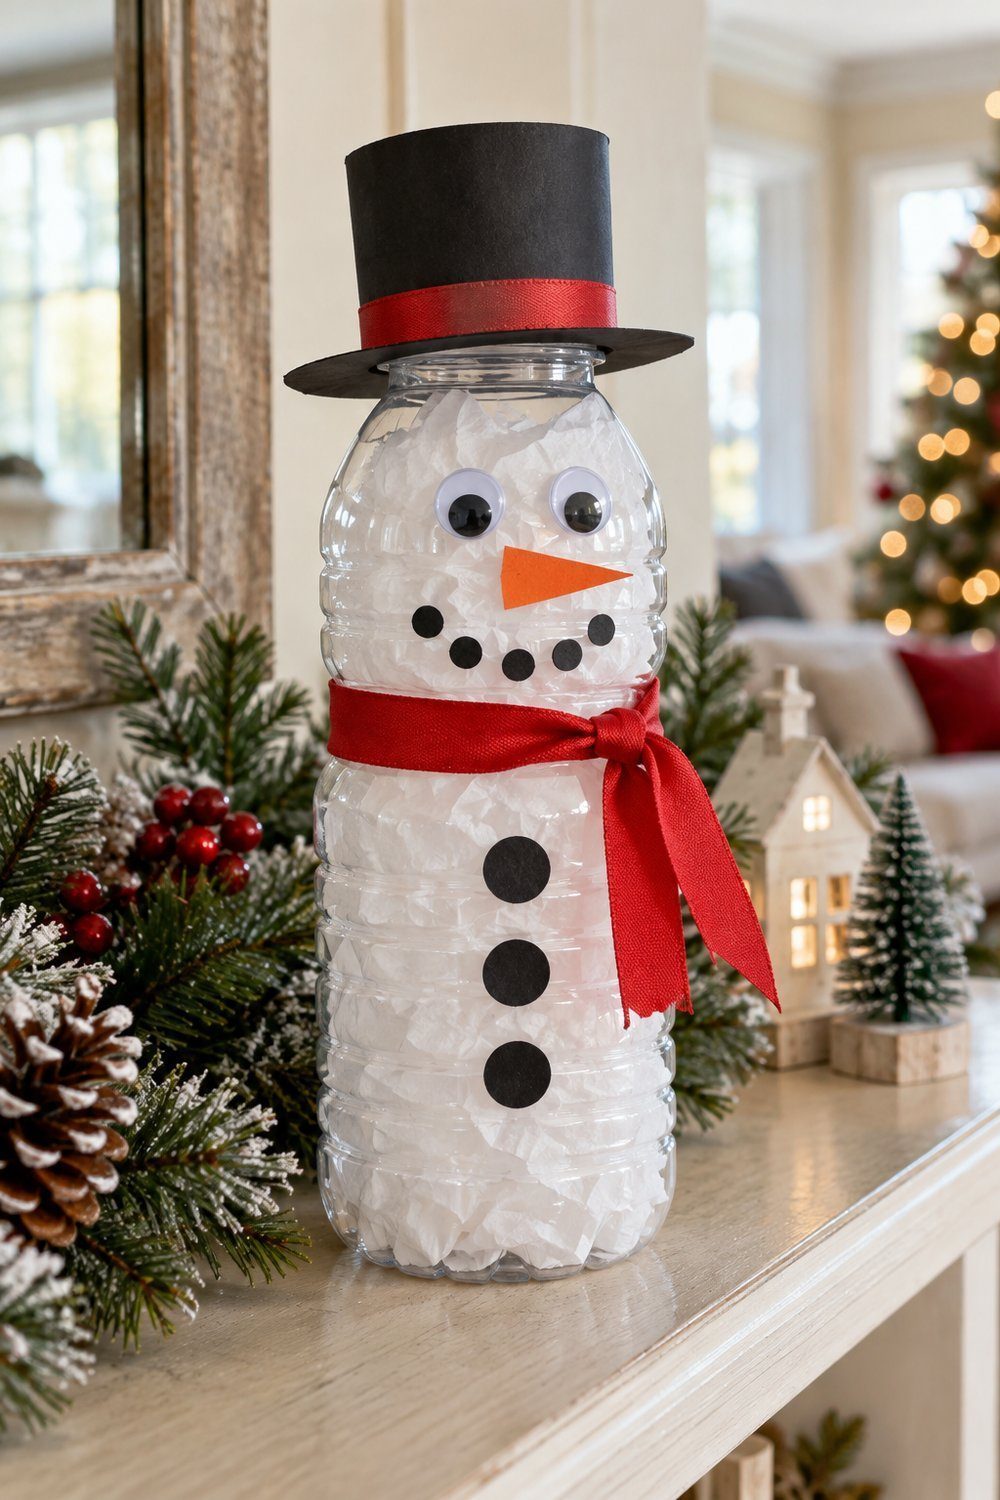
White tissue inside a clear water bottle supplies this snowman's snowy body. Glue on a paper hat, eyes, an orange triangle nose, and black paper dots, then tie a red ribbon scarf around the neck. Crumple tissue into small balls and fill the bottle through its opening. Karen presents the project as a winter feeding activity; here, the filled figure becomes Christmas shelf decor, a declared display adaptation. Keep the source's playful face and visible clear bottle outline for an unmistakably homemade finish.
You'll need: 1 clear water bottle, 2 googly eyes, 1 paper hat, 1 orange paper triangle, 3 black button dots plus facial dots, red ribbon, glue sticks, and white tissue.
Tutorial by Karen, Entertain Your Toddler
Storing them for next year
Use flat boxes lined with tissue for snowflakes, flowers, and the garland. Lay the shapes flat and tuck loose ribbon alongside them. Give the angel, lantern, and ring balls their own supported spaces so the tulle, foam trim, and open rings keep their shape.
Store the boxes away from heat and direct sun: PET can warp. Choose a cool indoor storage spot and keep heavier holiday decorations in a separate box.
Next step: Pair your finished pieces with walnut-shell Christmas decorations, explore Christmas decorations to make at home, or plan a display with a rustic Christmas centerpiece.