DIY Lace Christmas Decorations


You can make lace Christmas decorations with cotton doilies, lace trim, lace fabric or thrift-store curtains. These 13 projects climb four rungs: glue and wrap, starch and shape, use lace as a stencil or texture, then sew. The quickest is the lace jar luminary, which takes about 5 minutes; the showpiece is a hollow lace bauble. Start with the lace you already have, and move up when you want to learn the next technique.
Collect Lace That Suits the Technique
Look for sturdy cotton doilies, scraps of trim and curtains with useful stretches between stains. Choose expendable finds for vintage lace Christmas crafts; keep family treasures for reversible display. Cotton is the practical choice for starching: Shores Cleaners explains that polyester holds starch differently from cotton. Save synthetic curtain lace for the wrapped, knotted or stenciled projects. For more ways to sort a mixed basket, see Doily Crafts That Use the Ones Nobody Wants Anymore.
Wash sound, washable lace gently, rinse and dry it supported and flat before cutting. For ordinary modern trim, press through a cloth at its care-label setting. Treat genuinely antique or fragile lace separately: the V&A’s textile guidance explains how drying can distort lace and ironing can damage it. Choose another piece if the fibers split; faded ivory is often lovely as it is.
- Lace ribbon at least 3/4 in (2 cm) wide for the layered bow.
- A 19 in (48 cm) foam wreath for the wrapped doily project.
- White craft glue and water for the shaped pieces.
- Cornstarch, a mixing bowl and rust-resistant pins for flat motifs.
- Scissors, hot glue with a finger protector, and thread for finishing.
Rung 1: Glue and Wrap (No Sewing, No Drying Time)
The garland needs only knots; the other three projects use hot glue. Wash and dry your lace before you start. Arrange the patterns before committing to glue.
Lace Mason-Jar Luminary
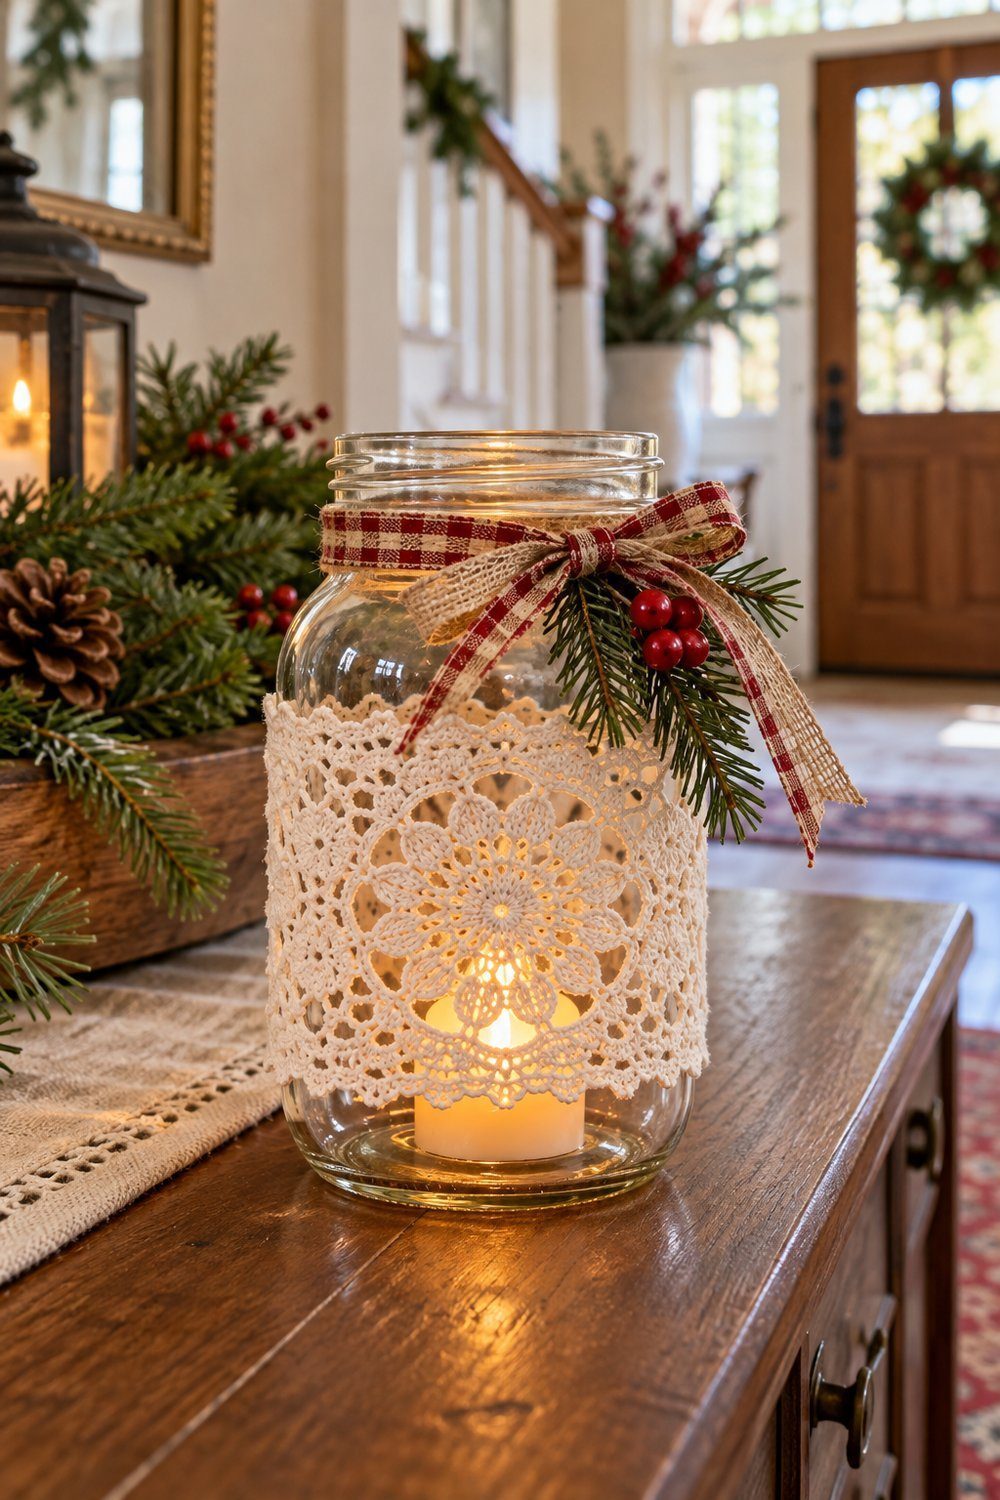
A band of lace turns an ordinary jar into a softly patterned Christmas light. Cut lace to fit around the middle of a clean, dry mason jar, then hot-glue the ends in place. Tie ribbon around the neck and set a battery-operated tea light inside. Keep the lace outside the glass and use an LED for this version. Place your finished lantern on an entry table, where the openwork reads clearly against the glow. The whole project takes about 5 minutes.
You need: lace, small glass jar, ribbon, LED tea light, scissors and hot glue; total time 5 minutes; jar size n/s.
How-to: Vanessa Beaty, DIY & Crafts
Layered Lace Gift Bow
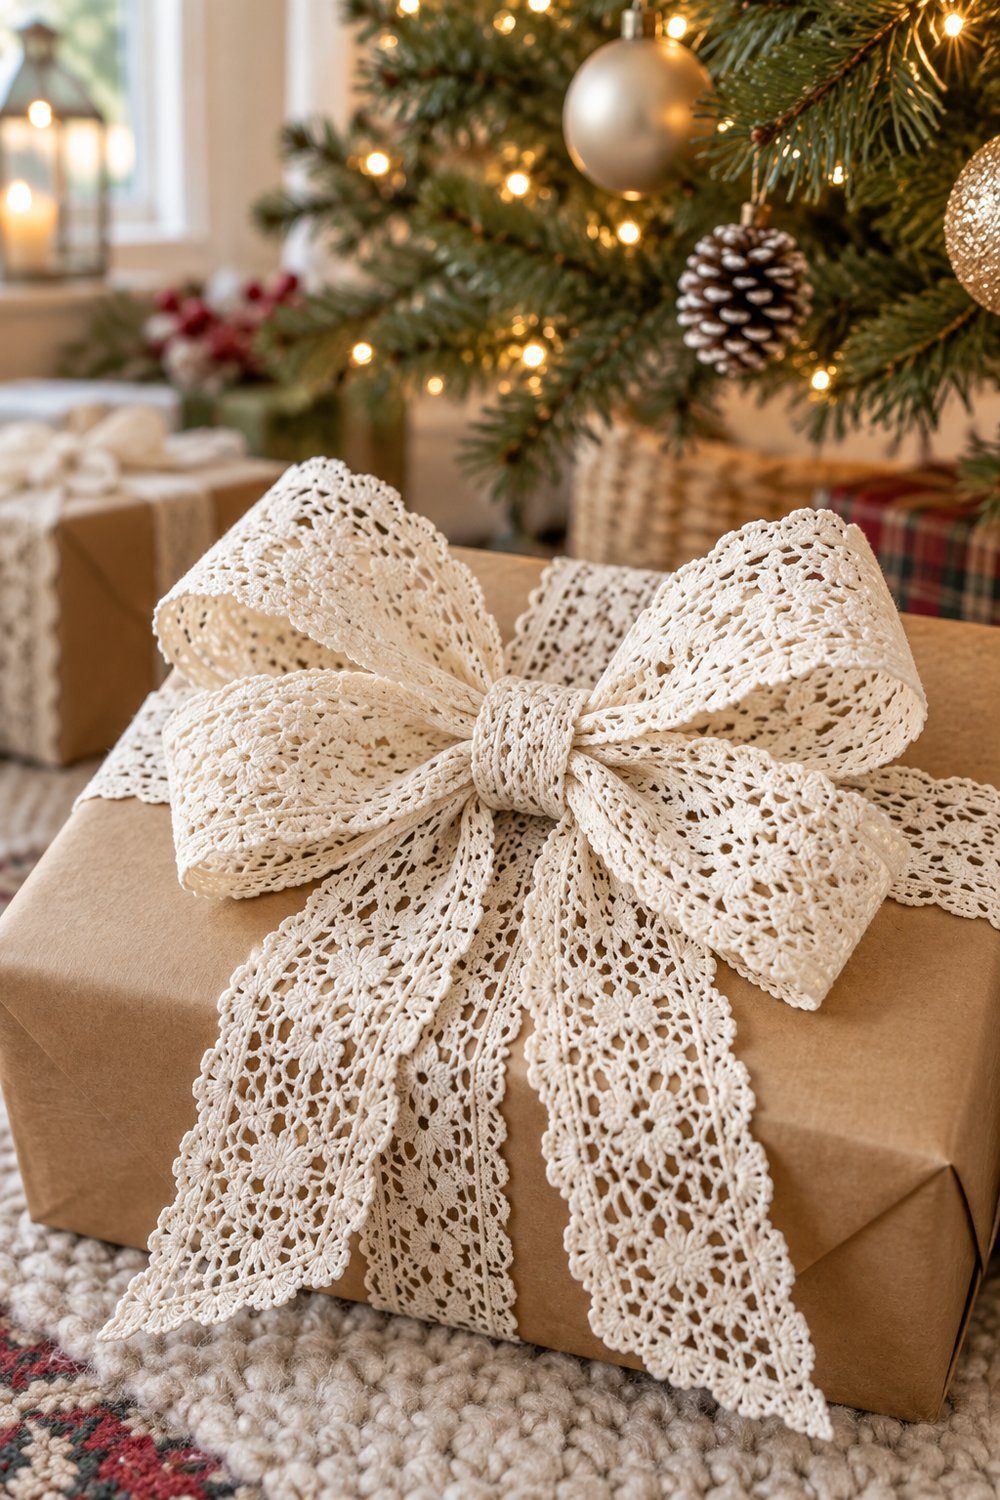
This layered bow looks like the familiar gift-shop rosette, softened by lace loops. Cut the ribbon lengths in Maria’s tutorial, twist the longer strips into figure-eight loops, and hot-glue their ends at the center. Stack the larger loops under the smaller ones, then glue a short ribbon ring over the middle. Use a silicone finger protector when pressing open lace into hot glue. Attach the bow to a wrapped Christmas gift, or nestle it in a mantel arrangement with the lace facing forward.
You need: lace ribbon at least 3/4 in (2 cm) wide, ruler, scissors and hot glue; assembly time n/s.
How-to: Maria, A Homemade Living
Knotted Lace Tree Garland
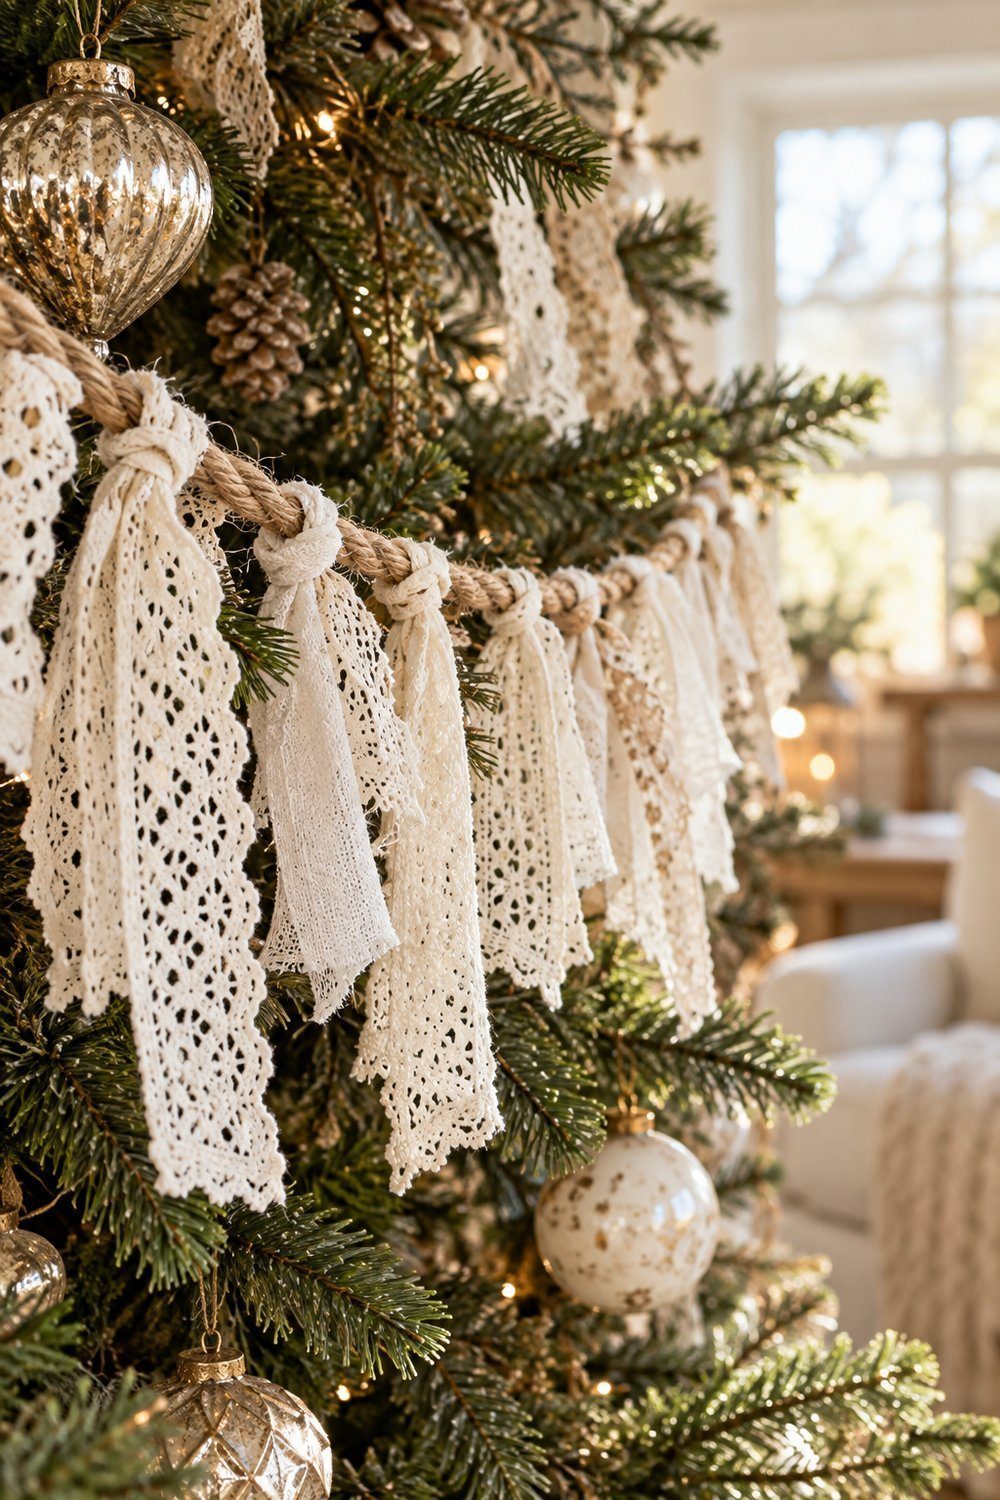
A knotted garland gives mismatched curtain lace a common purpose. Cut your washed lace into strips, then tie each strip over rope with a square knot: left over right, followed by right over left. Slide the knots together as you work, mixing dense and open patterns for a gently ruffled strand. Drape the finished garland around the tree or along a banister. Lynn Muir adds ornaments for Christmas; you can keep the lace plain when your tree already carries plenty of vintage treasures.
You need: lace curtain or tablecloth, rope and scissors; strips 8–10 in (20–25 cm) long and 2–3 in (5–7.5 cm) wide; tying time n/s.
How-to: Lynn Muir, Deseret Industries
Cotton Doily Wreath
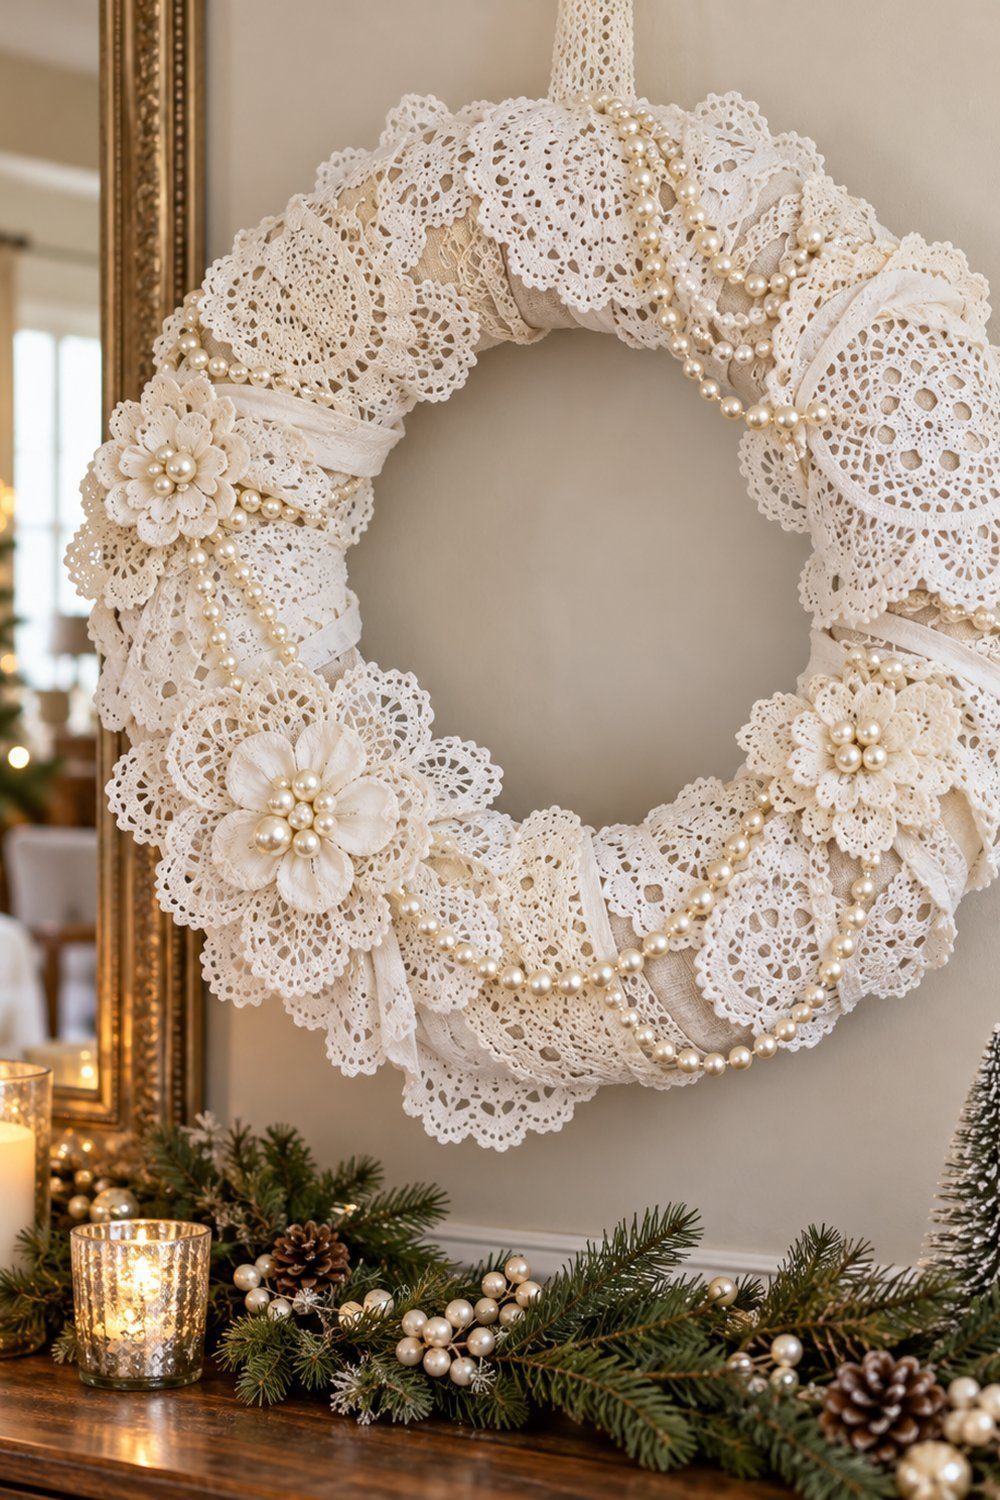
This wreath keeps the doilies soft, so their scallops can fold around the base. Wrap a foam wreath in muslin, securing the ends with hot glue. Arrange the doilies around it, gluing their wrapped edges at the back; gather spare doilies into flowers and fasten them with floral pins. Add pearl strands if you like the vintage jewelry effect. Hang it indoors above a console for Christmas, with a simple ivory ribbon that lets the crochet patterns carry the decoration.
You need: doilies, muslin, hot glue, floral pins, optional pearls and a 19 in (48 cm) foam wreath; assembly time n/s.
How-to: Barb Lewis, The Shabby Tree
Ready for the next rung? You’ll add wet shaping: saturating lace, supporting it on a form and waiting for it to become rigid.
Rung 2: Starch and Shape
Flat snowflakes teach you to spread and pin a pattern; bowls and baubles teach you to support curved fabric. Display these pieces indoors, where damp weather is less likely to soften them. Use craft lace you won't need again, because glue is permanent.
Lace Christmas Stars

Stiff white lace stars bring small, clear silhouettes to dark Christmas branches. Start with ready-made crocheted stars rather than cutting points from a round doily. Following Sharon Williams's method, spread each star flat on a protected foam board and pin its points into shape. Spray starch over the entire motif and leave it until completely dry. Remove the pins carefully, then add a fine thread hanger through a strong outer loop. Space the stars apart on the tree so you can see their openwork.
You need: crocheted lace stars, spray starch, straight pins, wax paper, foam board and hanging thread; dry at least 12 hours.
How-to: Sharon Williams, Hobbies on a Budget
Starched Lace Snowflake
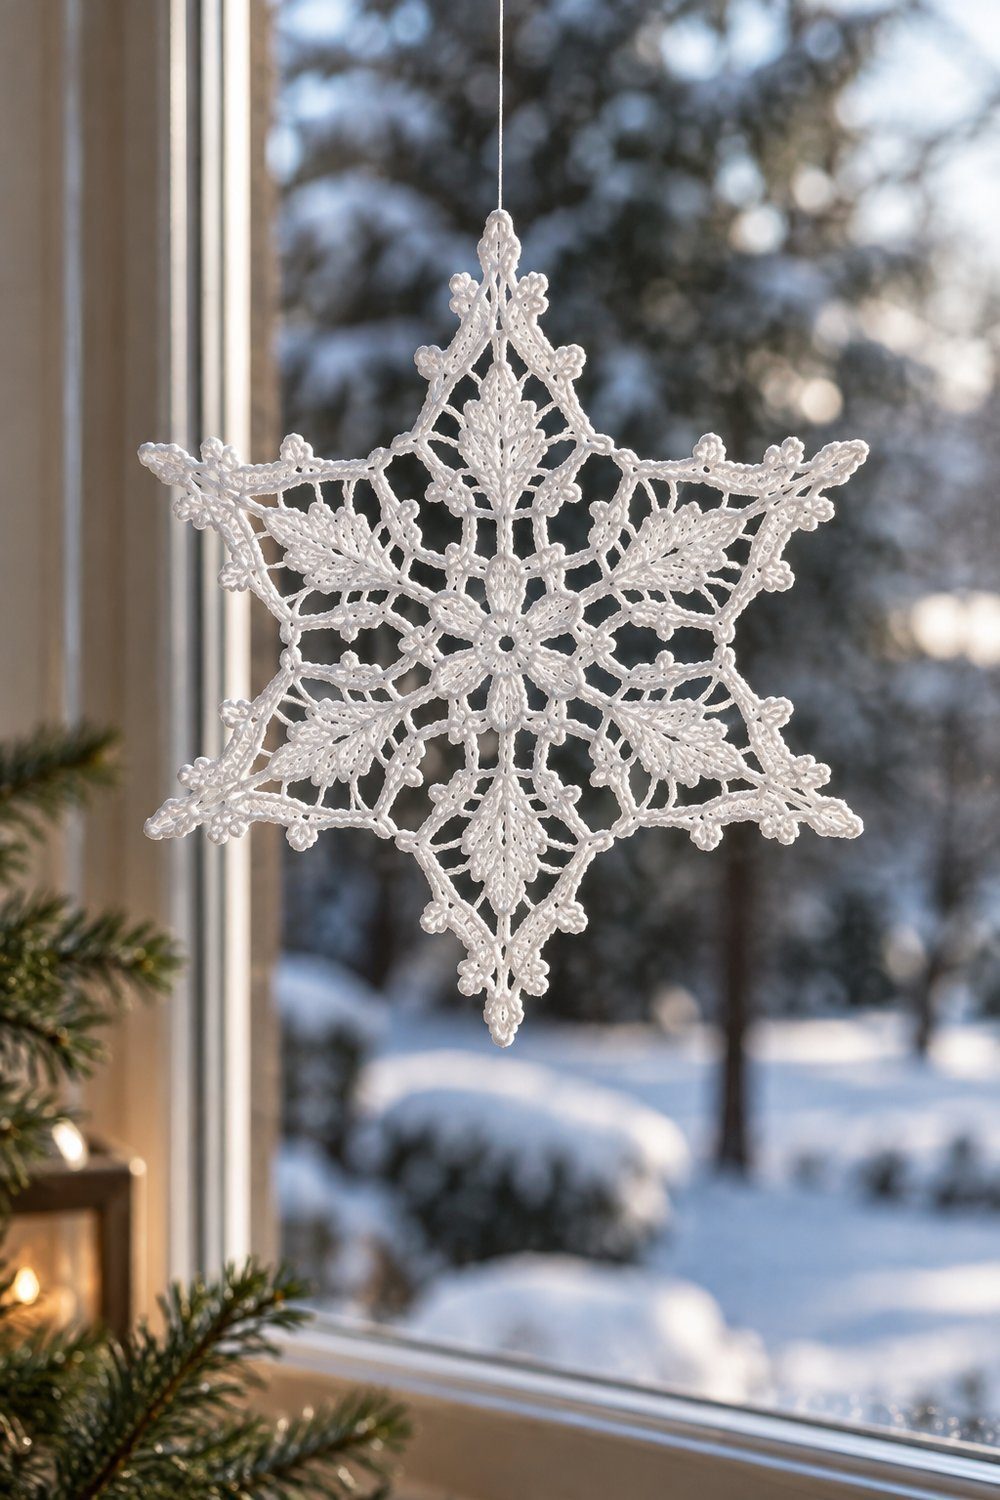
A pointed lace motif becomes a convincing snowflake when you pin its arms out evenly. Mix the cornstarch and water specified by Yarnbending, heat until near boiling, and let the mixture cool to a comfortable handling temperature. Soak the motif, let the excess drip away, then pin it to shape on a folded towel and air-dry completely. Add a thread hanger through a strong outer loop. Hang the snowflake in front of a window or dark cabinet so its tiny holes remain visible.
You need: cotton lace snowflake motif, 1 cup (240 mL) water, 1 tablespoon (15 mL) cornstarch, bowl, towel and pins; soak 3–5 minutes; drying time n/s.
How-to: Yarnbending
Doily Snowflake Bowl

A shallow doily bowl gives your lace Christmas decor a place on the coffee table. Mix equal parts white glue and water, and drape a doily evenly over a supported balloon. Brush the mixture into the fibers, smooth the scallops, and leave it to dry overnight or longer. When the lace is rigid, gently loosen it while keeping the balloon intact, then lift the bowl away. Display lightweight ornaments inside, or leave it empty to show the snowflake-like pattern across the base.
You need: 9 in (23 cm) crocheted doily, balloon, white glue, water, brush and support cup; dry overnight or longer; balloon about a large cantaloupe in size.
How-to: Susan Wasinger, Cut Out + Keep / GMC Publications
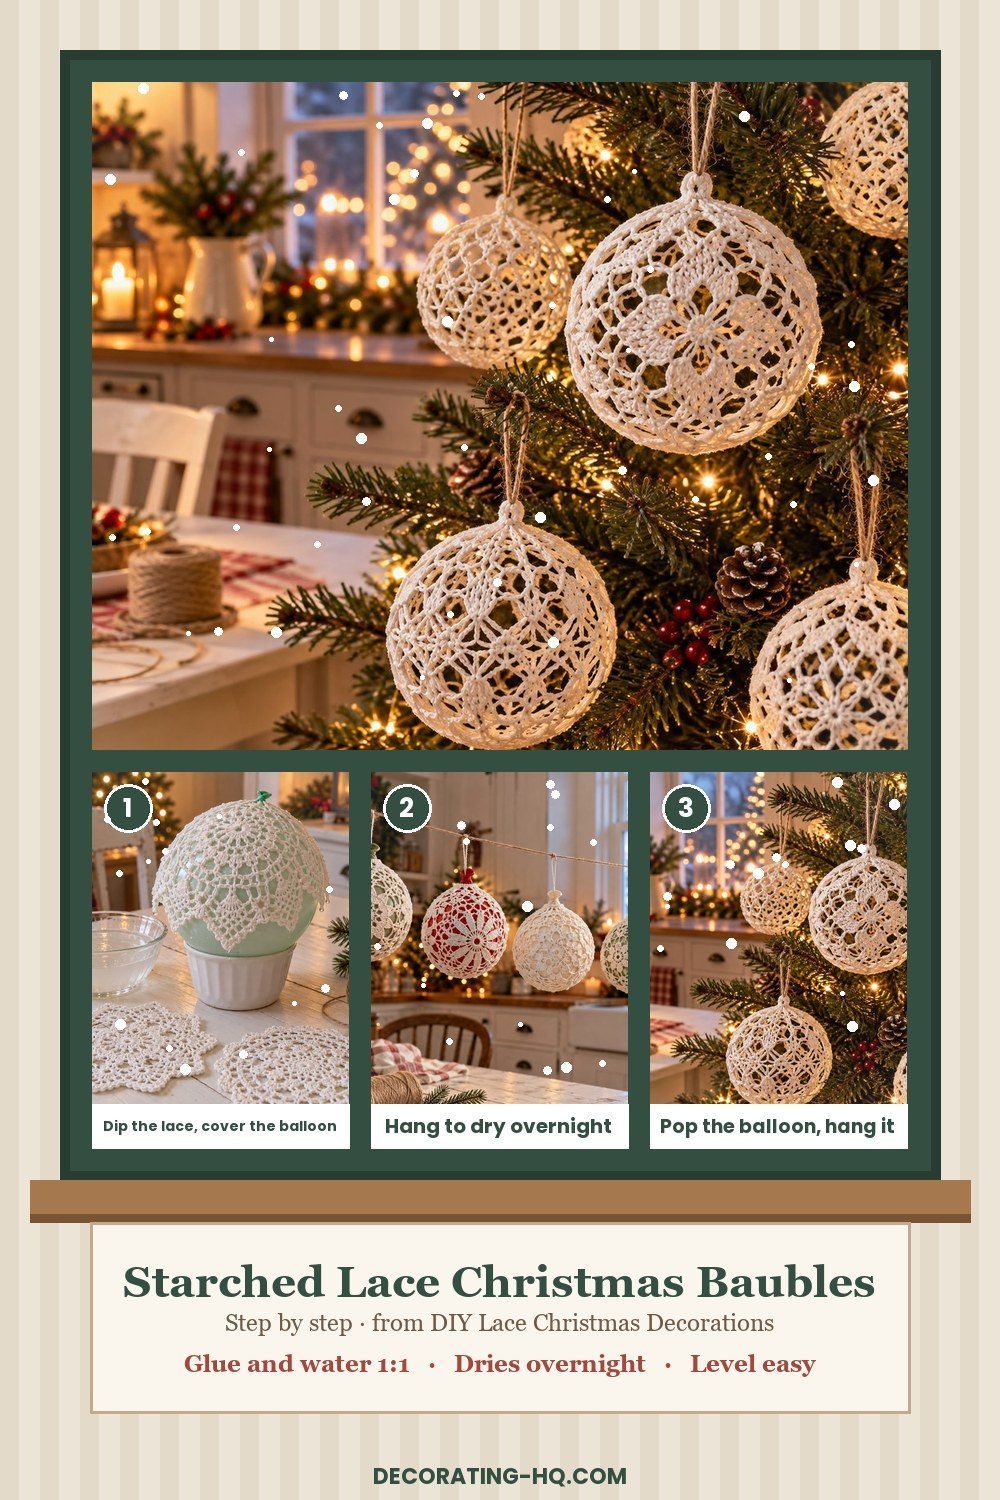
How to make a starched lace bauble
“Starched” describes the stiffened look here; this version uses craft glue. It adapts Mira Joensuu’s balloon-shaped bauble method for ready-made lace, with overlapping motifs in place of her joined crochet shell. Susan Wasinger’s bowl demonstrates wet lace supported over a balloon. Secure overlaps hold these doily Christmas ornaments together after the form comes out.
- Sturdy cotton lace motifs or pieces that overlap.
- A small balloon.
- White craft glue and water, mixed at a 1:1 ratio.
- A bowl, soft brush, scissors and thread or ribbon.
- Protect the table and inflate the small balloon until round, sized so your lace pieces cover it with overlapping edges.
- Mix equal parts craft glue and water. Dip the lace until saturated, letting surplus liquid run back into the bowl.
- Lay the wet lace over the balloon, smoothing from the middle outward. Overlap the pieces into a connected shell, leaving an opening around the knot for removing the balloon.
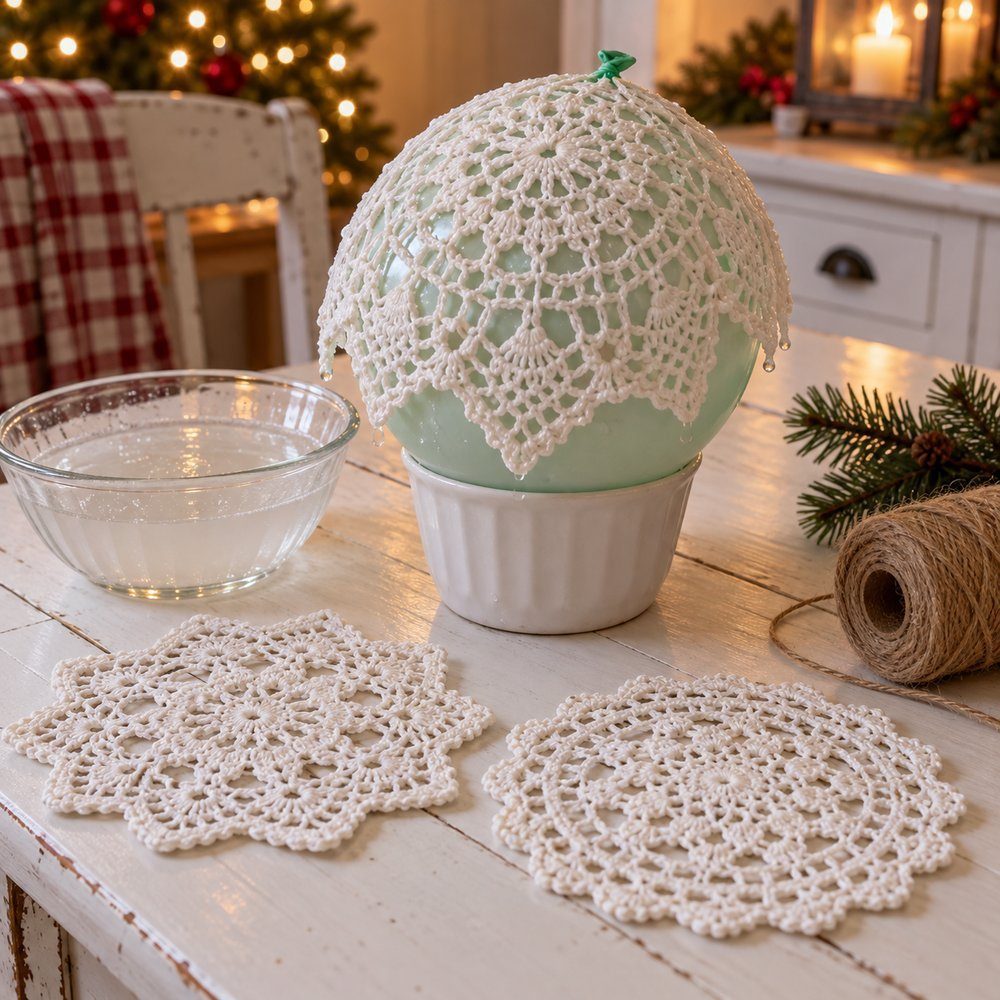
- Brush the overlaps together and clear glue films from the openwork. Support or suspend the balloon by its neck so the wet lace keeps its rounded shape.
- Leave it hanging in a ventilated spot overnight, as Joensuu directs. Continue drying until every overlap feels fully dry and stiff; a cool, damp patch needs longer.
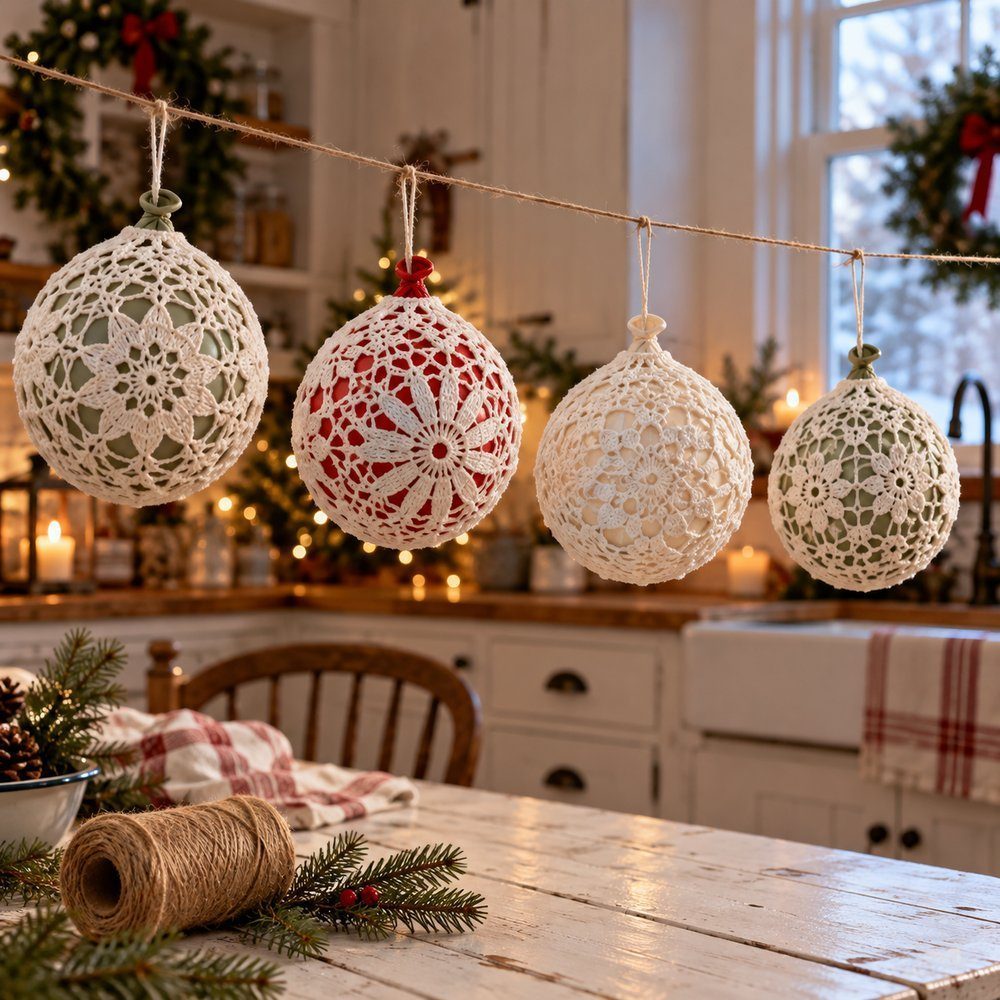
- Ease the dry lace away from the balloon. Deflate it slowly and remove it through the opening while supporting the shell.
- Thread a hanger through a strong joined area near the top and tie it securely. Hang the finished bauble where its silhouette and open pattern are easy to see.

For a visual companion, watch Joanna Wajdenfeld of DiY Art Ideas make a lace bauble on a balloon. Her demonstration helps you see how lace follows the curved form and how a hollow decoration takes shape. Use the written method above for this article’s ready-made-lace adaptation.

If you enjoy shaping lace over a form, Doily Lace Bowl Stiffened Over an Ordinary Balloon takes the same family of techniques toward tabletop decor. A shallow open bowl releases differently from a closed shell, so keep its removal instructions with it.
Ready for the next rung? You’ll use lace to transfer a pattern, controlling paint or pressure while the textile acts as your tool.
Rung 3: Lace as a Stencil or Texture
Choose a lace pattern with obvious spaces between the threads: broad openings make a clearer impression than tightly packed details. Hold lace still while you paint or roll, and lift it cleanly. Keep paint-work lace separate from clean sewing lace.
Lace-Stenciled Glass Ornament

Paint carries the lace pattern onto the surface, leaving a smooth ornament you can handle. Wrap a plain glass ornament in a rectangle of lace and join the fabric ends with a small dab of hot glue, keeping the glue on the fabric. Suspend the ornament by yarn and apply a light spray of contrasting paint outdoors, following the paint label. Let the coating dry, lift away the lace sleeve, and add a tulle hanger. Place it near plain ornaments so the patterned band stands out.
You need: glass ornament, 1 piece of scrap lace, hot glue, spray paint, yarn and tulle; ornament size and drying time n/s.
How-to: Megan & Stephanie, Do It Yourself Divas
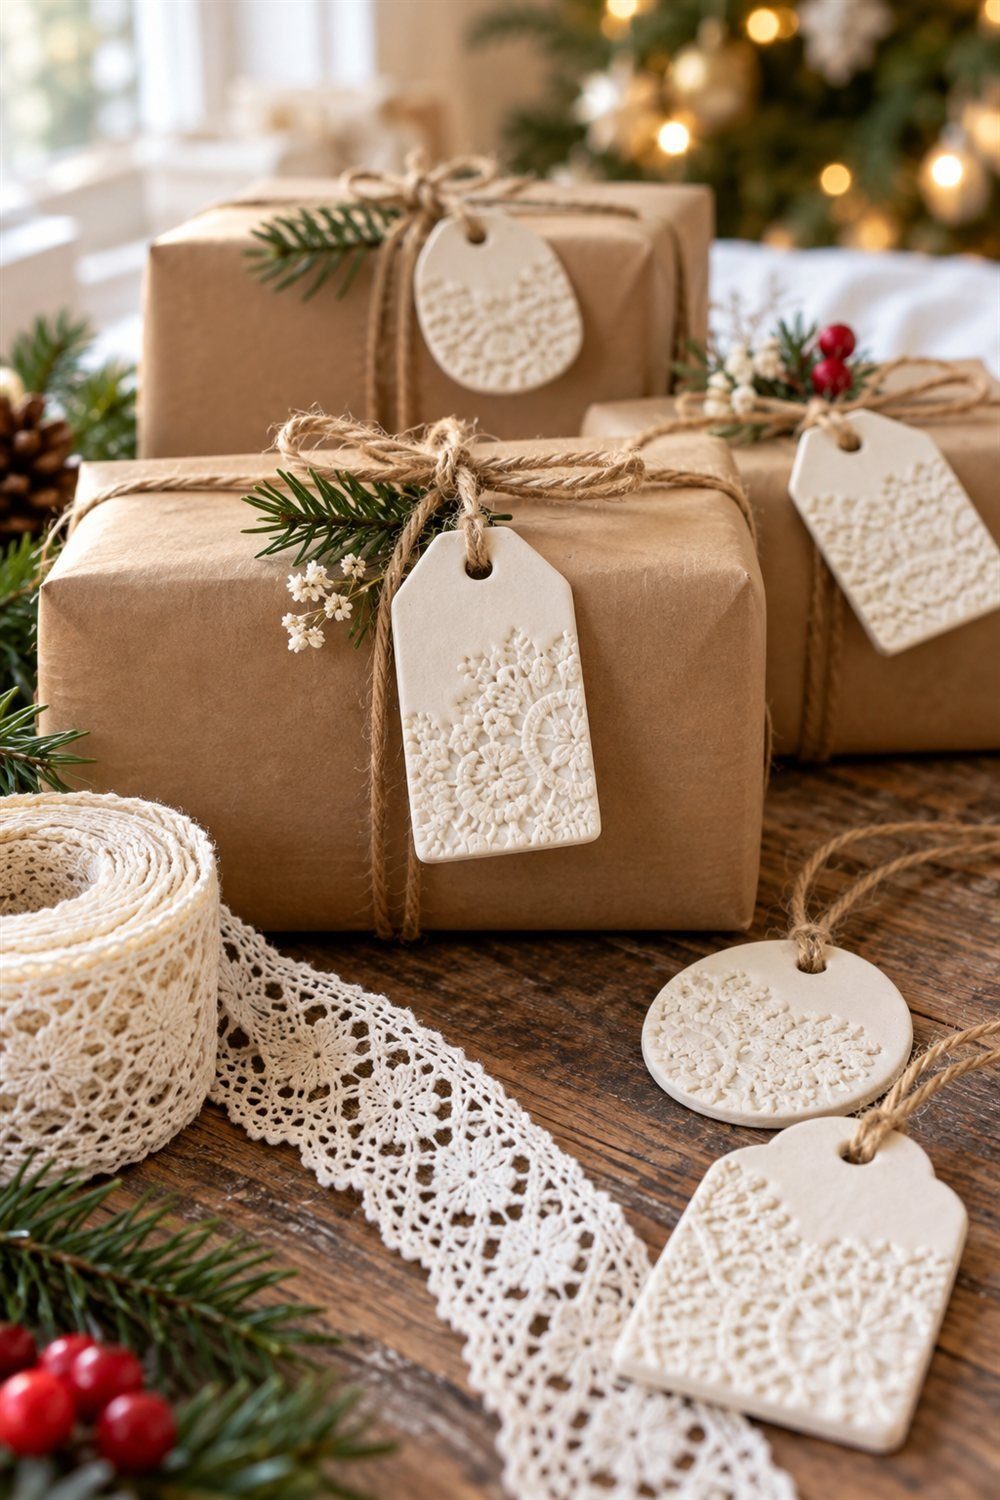
A pressed lace pattern turns simple clay tags into decorations worth keeping after the gifts are opened. Roll oven-bake clay on parchment, press lace into the surface with a rolling pin, then peel the fabric away. Cut shapes, pierce a hanging hole, and bake according to the clay package before cooling. Thread string through the holes and tie the tags onto packages beneath the tree. Write the recipient's name on the back, so the lace pattern stays visible on the front.
You need: oven-bake clay, lace ribbon, parchment, rolling pin, cutters, skewer and string; roll to 1/4 in (0.5 cm) thick; baking time follows the clay package.
How-to: Catherine Therrien, Canadian Living
Lace-Patterned Mantel Panel
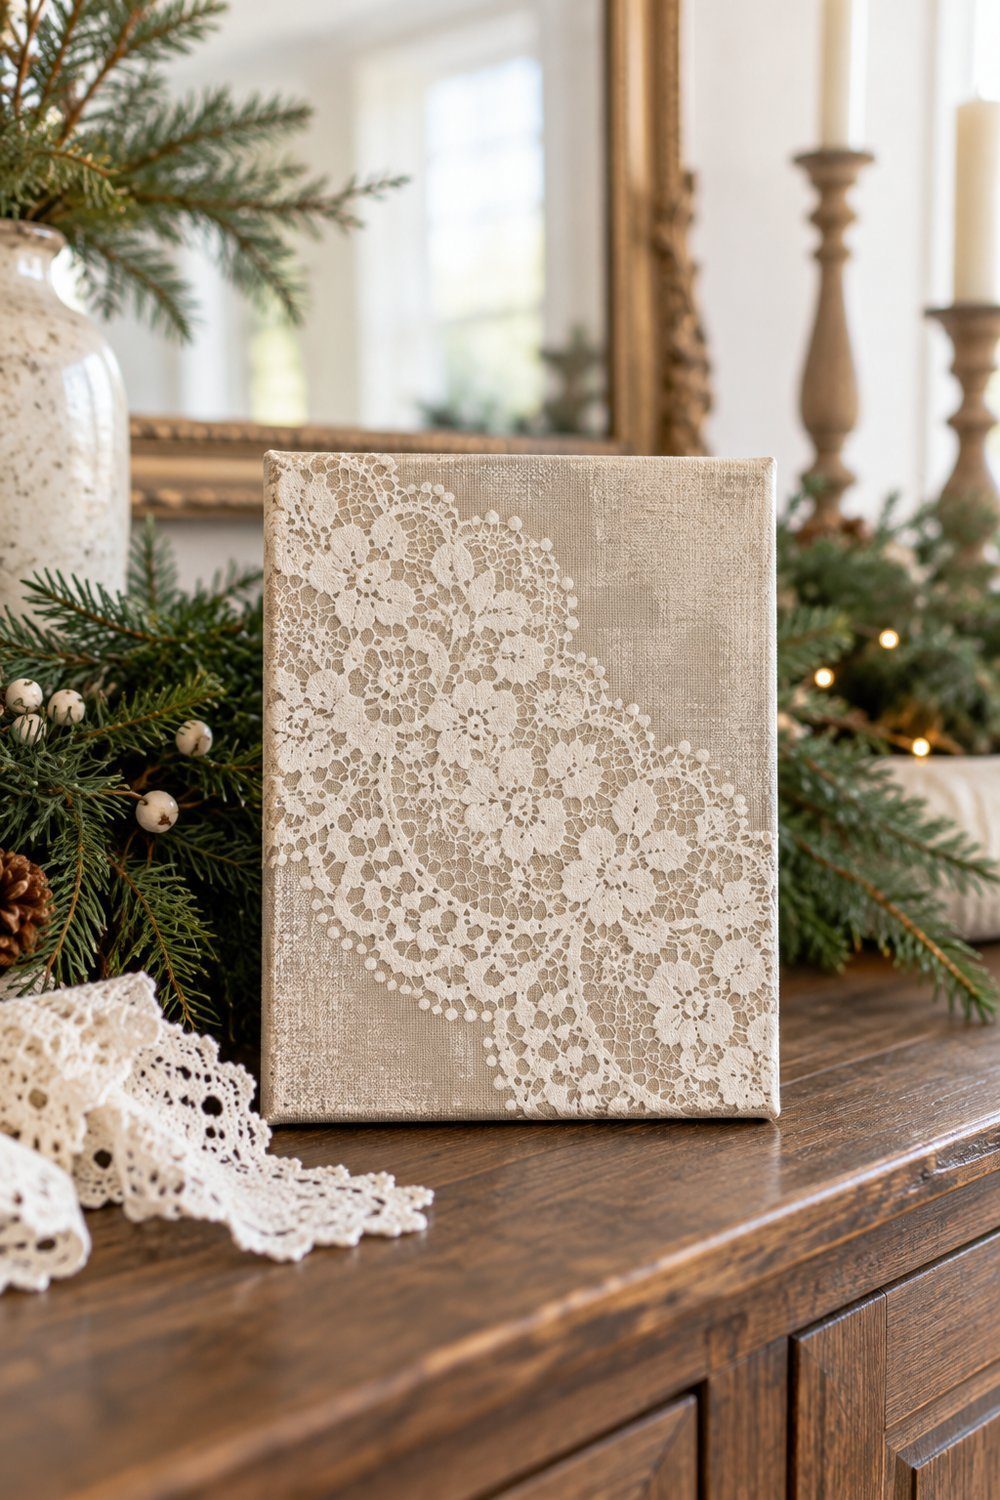
A lace-painted canvas adds a larger pattern behind small Christmas decorations. This holiday version adapts Mandee’s canvas technique with a quiet winter palette. Stretch lace tightly across a plain canvas, wrap it around the edges, and tape it at the back. Spray lightly with contrasting paint in a well-ventilated work area, then let it dry before removing the lace. Lean the panel securely against the wall on a console, with a doily wreath nearby to connect the painted pattern to real cotton texture.
You need: canvas, lace, tape and spray paint; allow at least 30 minutes before lifting the lace; canvas size n/s.
How-to: Mandee Rae, Mandee Made
Ready for the next rung? You’ll add stitching, learning to attach lace securely and finish seams while preserving its soft drape.
Rung 4: Sew with Lace
Begin with the felt stocking, move to the pillow for an overlapping closure, then tackle the tree skirt’s larger curves. Pin the lace before stitching to judge how the scallops fall. Let the lace trim a sturdy base fabric.
Lace-Cuff Felt Stocking

A felt stocking introduces sewing without the extra work of turning a woven-fabric lining. Cut matching boot shapes from felt and pin lace along the upper edge. Stitch the lace in place, then sew the stocking shapes together around the sides and toe, leaving the mouth open. Sew on a lace-ribbon hanging loop and hang the stocking on a secure hook. Choose a plain felt color that shows through the cuff; the lace becomes the detail you see from across the room.
You need: felt, lace, lace ribbon, pins, needle and matching thread; allow about 30 minutes according to the author’s written instructions; finished size n/s.
How-to: Kristina H., Cut Out + Keep
Lace Envelope Pillow Cover
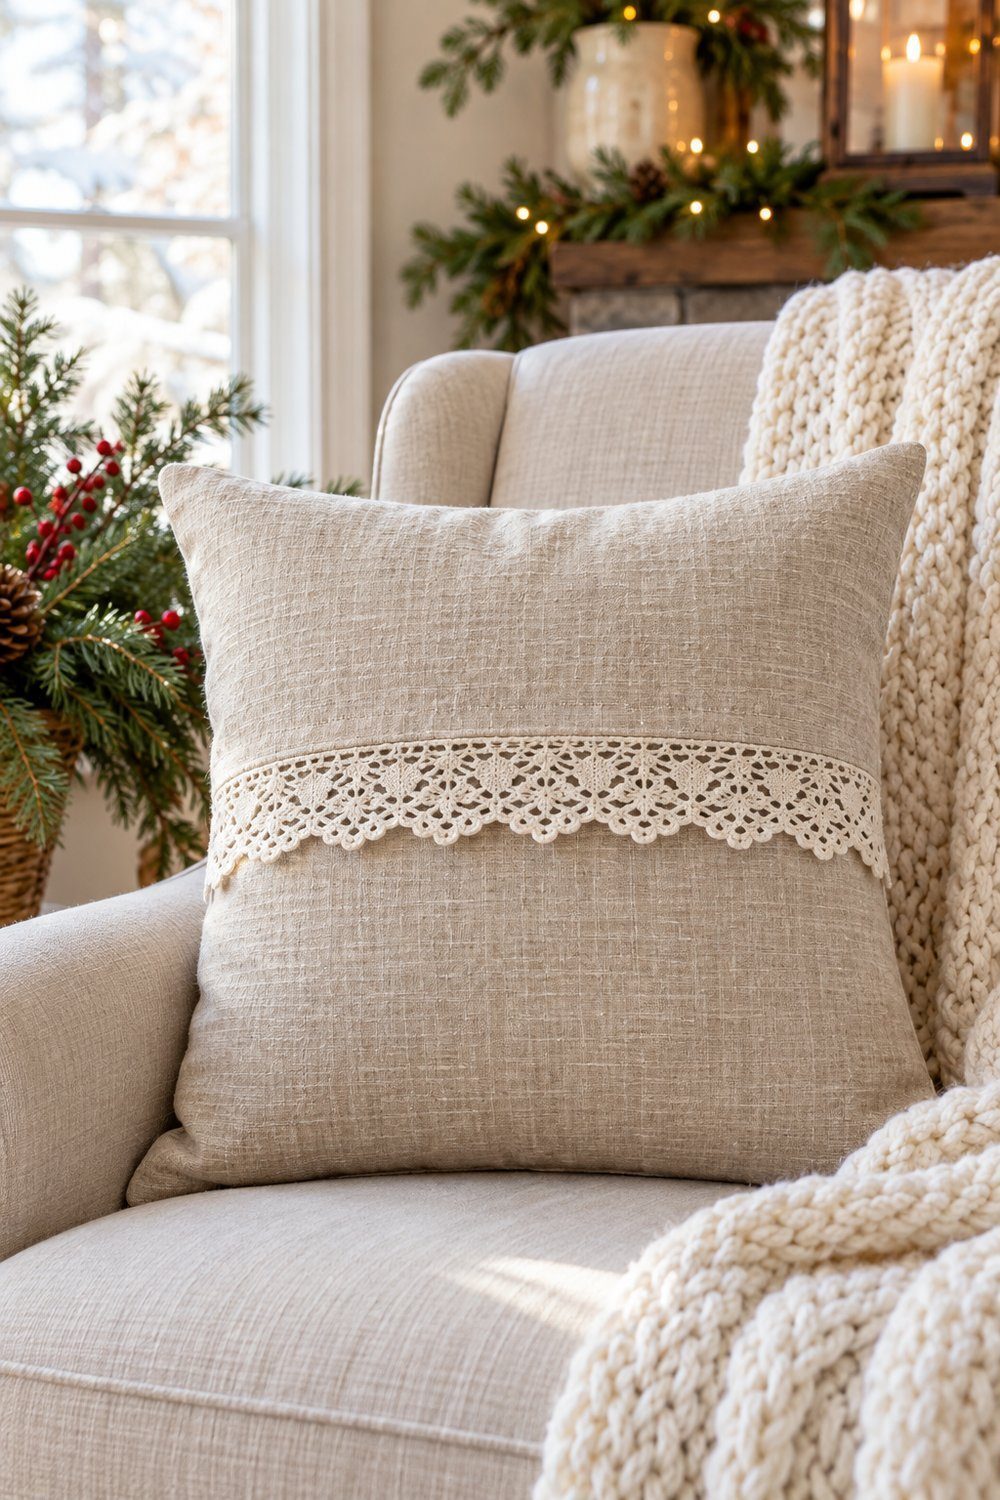
An envelope cover makes lace part of your Christmas seating while letting you remove the insert later. Cut the fabric rectangle, hem its short ends, and sew lace across an end. Fold the fabric right sides together with the lace edge inside the overlap, then stitch the side seams. Turn the cover right side out and insert the pillow. Set it on a reading chair beside a Christmas quilt; the same neutral cover can stay in place when the holiday decorations come down.
You need: fabric, lace, thread, sewing machine and a 20 in (51 cm) square insert; cut fabric 20 × 46 in (51 × 117 cm); sewing time n/s.
How-to: Anita, Cedar Hill Farmhouse
Lace-Edged Tree Skirt
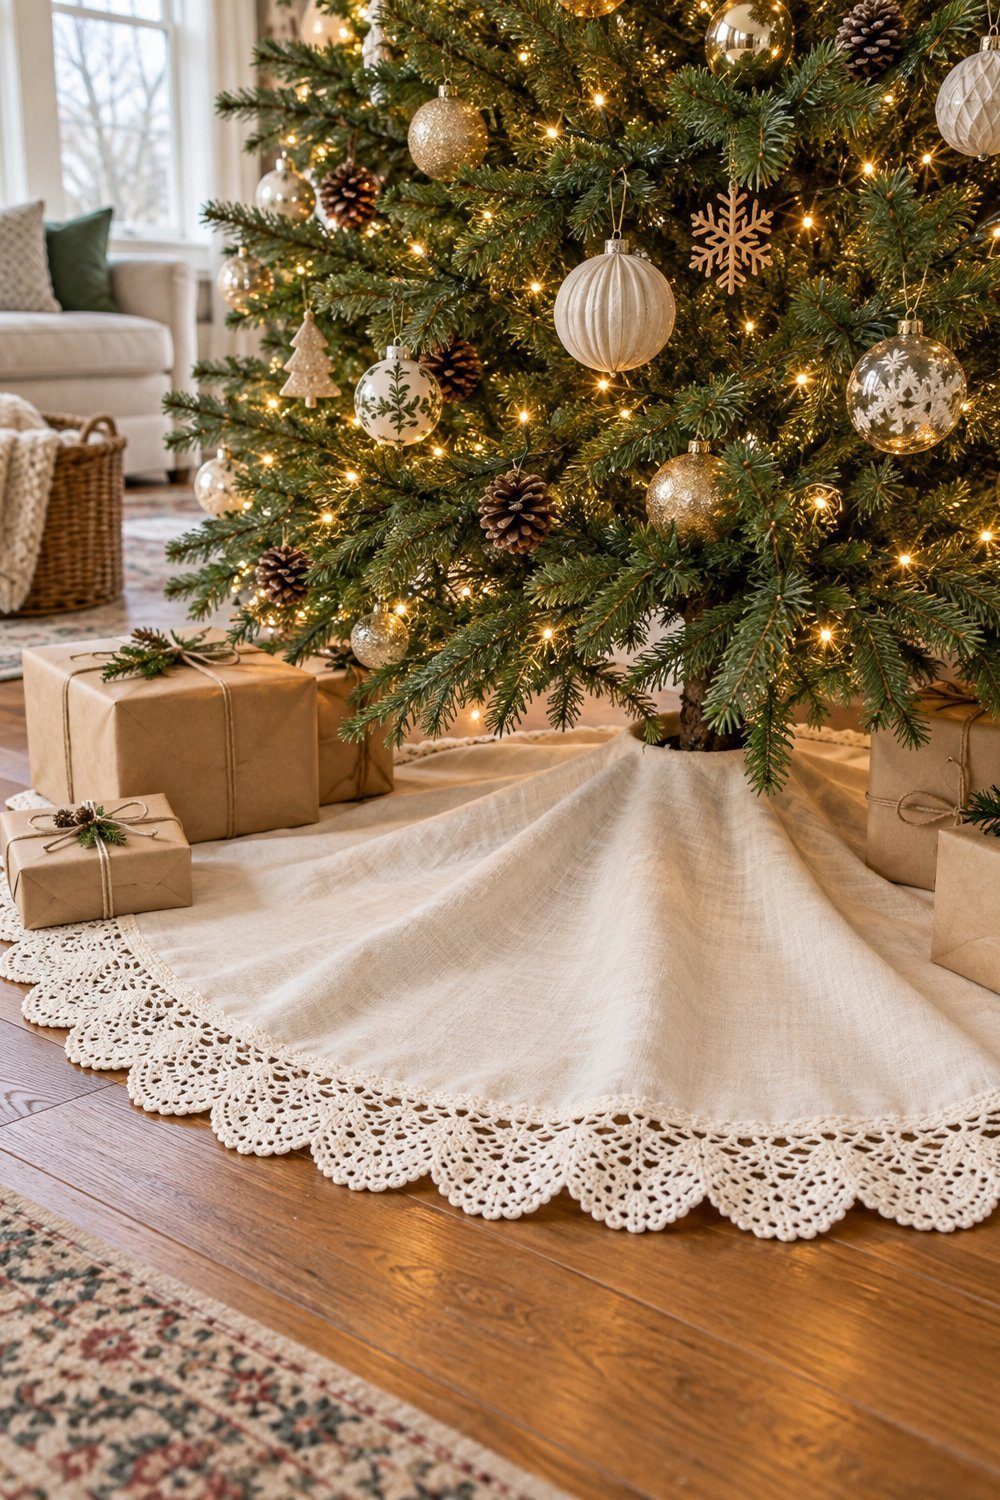
A lace-edged skirt is the largest sewing project here, and it gives salvaged trim a generous sweep. Cut matching circles for the top, batting and backing, including a center opening and a slit to the edge. Sandwich the layers with the lace pointing inward between the right sides, then sew around the edges, leaving a turning opening. Turn, press and close that opening. Spread the finished skirt beneath your Christmas tree, arranging the scallops where they can show between wrapped gifts.
You need: top fabric, batting, backing, lace, pins, thread and sewing machine; a common medium diameter is 48 in (122 cm); sewing time n/s.
How-to: Melissa, Hymns & Home
Choose Your Starting Rung
Times below repeat tutorial figures where available; relative labels are planning guides, not source timings. With children helping, choose sorting and arranging bow loops, and give an adult the heated tools, sprays and oven work.
| If you have… | Start with | Time | Mess level |
|---|---|---|---|
| A small jar and a scrap of lace | Lace mason-jar luminary | 5 minutes total | Low; watch hot glue |
| A doily and white glue | Doily snowflake bowl | Overnight drying | Medium; glue-water drips |
| Scrap lace and spray paint | Lace-stenciled glass ornament | An afternoon | High; protect against overspray |
| Kids helping | Layered lace gift bow; adults handle hot glue | Short | Low; small scraps |
| A sewing machine | Lace envelope pillow cover | An afternoon | Low; thread and fabric scraps |
Store Lace Decorations So They Stay White
Let each decoration dry completely before packing it away. Use white, unbuffered acid-free tissue between pieces, cushion the hollow shapes, and store them in a clean box away from direct contact with wood or ordinary cardboard. The Smithsonian’s tissue guidance explains that acidity can transfer from paper and discolor textiles. Lay soft sewn pieces flat with gently padded folds, keeping heavy ornaments in their own compartment.
Choose a cool, dry, dark interior closet with steady conditions. Humidity and trapped moisture can encourage mildew; heat, light and acidic packing contribute to deterioration and discoloration. The Smithsonian recommends clean, unstarched storage for washable heirloom textiles. Support rigid craft decorations separately. Keep treasured antique doilies unstiffened and accept their natural ivory tones.
Next: Christmas Decorations to Make at Home: 20 Easy DIY Ideas and Holiday Decorating with Natural Elements Made Easy.