DIY Snow Globes from Jars


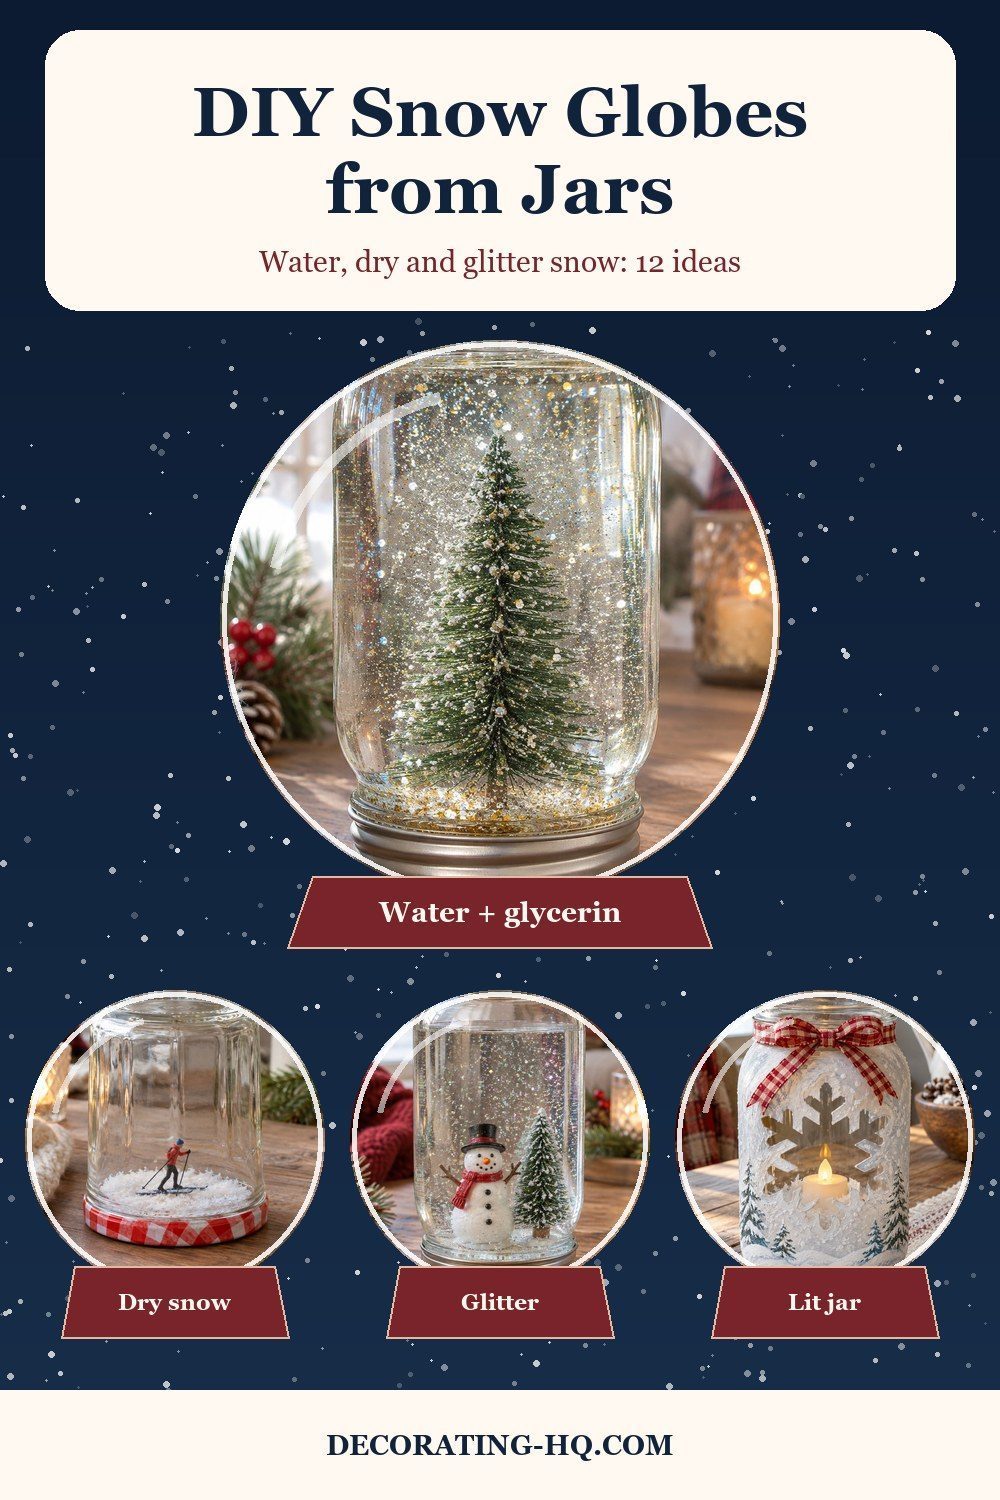
DIY snow globes can get their snow from water and glycerin, dry flakes, glitter suspended in glue or oil, or a snowy coating outside the glass. For the quickest route, choose a dry jar with a ready-made figurine; for a globe kids can shake, try the small toy jar below with its lid secured and an adult alongside. The bottle-brush tree is the classic Christmas choice, while a skier, snowman, or glowing pinecone jar gives the same little-world feeling a different setting.
Before you start: the jar, the seal and the snow
Start with the jar and scene together: the lid becomes the floor in an upside-down globe. Christina’s tree tutorial uses waterproof E6000, distilled water, and glycerin to slow the glitter; follow that combination for the showpiece. Keep each other project’s liquid and seal together, too. A dry globe needs loose snow and a closed lid, while a luminary keeps its opening for the light. If you are choosing containers from the recycling bin, browse these glass jars for Christmas for more ways to dress the glass.
| Globe | Jar | Snow | What seals it | Source |
|---|---|---|---|---|
| Bottle-brush tree | Mason jar | Water, 2–3 drops glycerin, mixed glitter | E6000 at lid and ring | Christina |
| Small toy | Small glass jar | Water, glycerin, 1–2 tsp glitter | Screw lid; optional glue | PBS KIDS |
| Skier | 13 oz jelly jar | Dry fake snow | Screw lid | House of Hawthornes |
| Blue-glitter tree | Large mason jar | Clear glue, warm water, blue glitter | Screw lid | Love, Jaime |
| Baby-oil miniature | Baby food or other glass jar | Baby oil, 1–2 tsp glitter | Aquarium glue on rim threads | eHow |
| Glitter-frosted snowman | Upcycled jar | Glitter glue outside | Twist-on lid | Crayola |
Snow that floats: water and glycerin
This is the familiar shake-and-watch version: a scene fixed to the lid, with glitter drifting through liquid around it. The recipes below use different glycerin quantities, so treat each as its own tutorial. For a traditional mason jar snow globe, the little evergreen is the strongest starting point: its simple shape stays easy to see through sparkling glass.
Bottle-brush tree in a mason jar
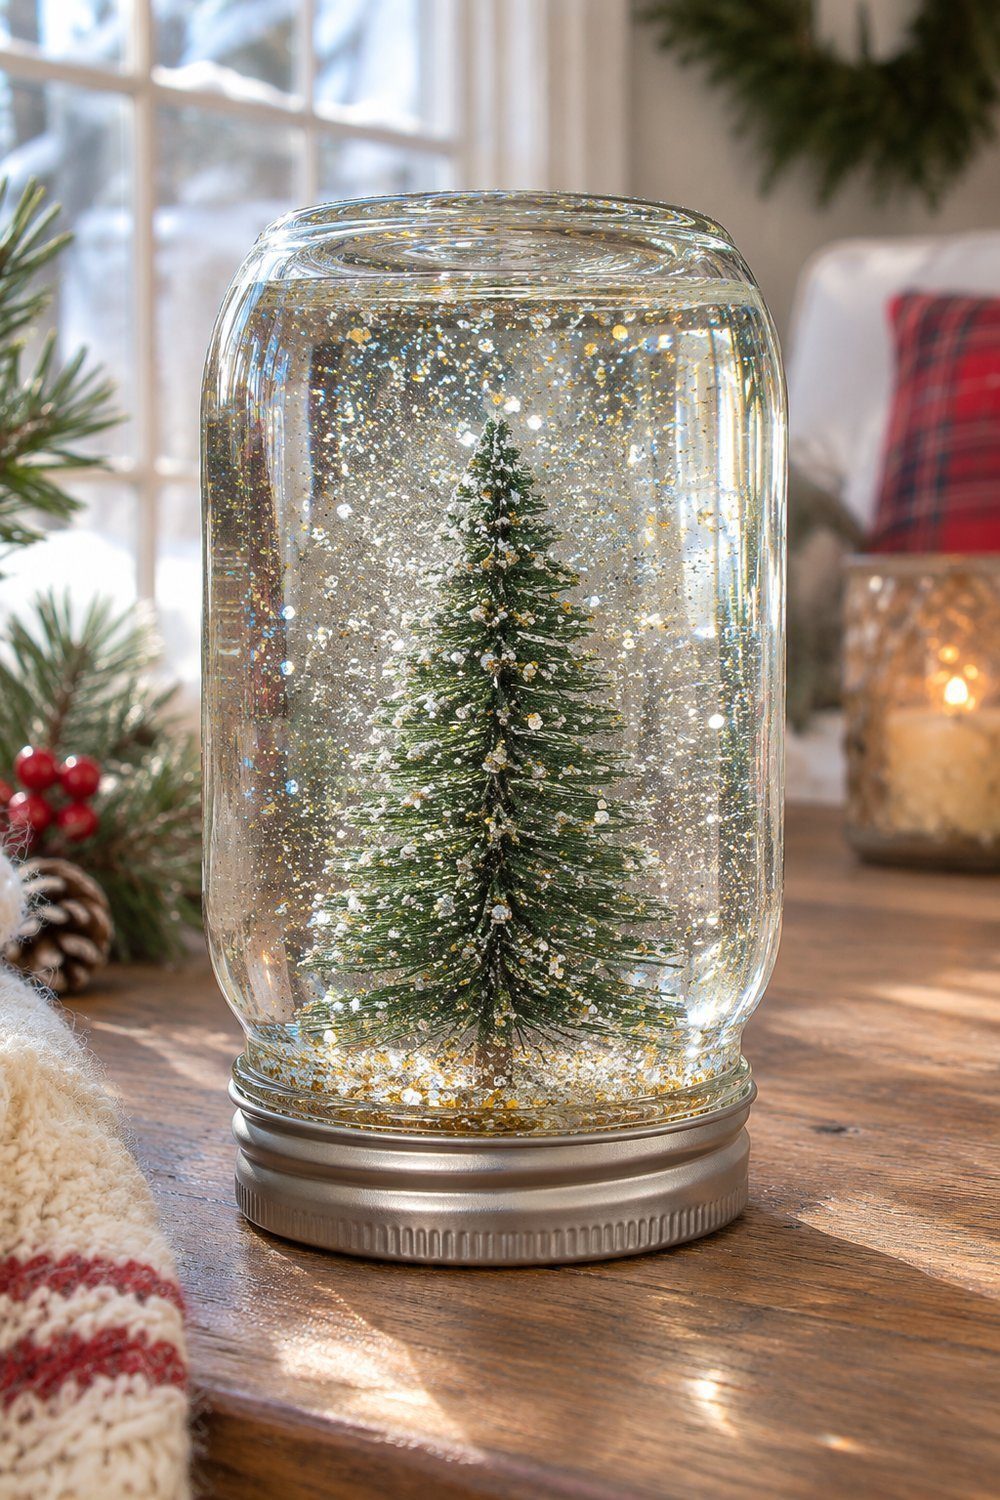
Tutorial by Christina, Christina Maria Blog
A single bottle-brush tree gives this homemade snow globe its familiar Christmas silhouette. White glitter mingles with silver and gold around the branches, adding both snowy flecks and sparkle. Glue the tree to the lid, let the attachment set, then build the liquid mixture before securing the jar. The finished globe suits a mantel beside greenery, where the little tree can be the focus. Christina uses a single tree, so the glitter has room to move.
- Mason jar, lid, and metal ring, sized around the tree.
- Bottle-brush tree and E6000 for attachment and sealing.
- Distilled water, initially filling about three-quarters of the jar.
- 2–3 drops glycerin; white, silver, and gold glitter in unmeasured amounts.
- Glue the tree to the inside of the lid.
- Leave the attachment to set for 24 hours.
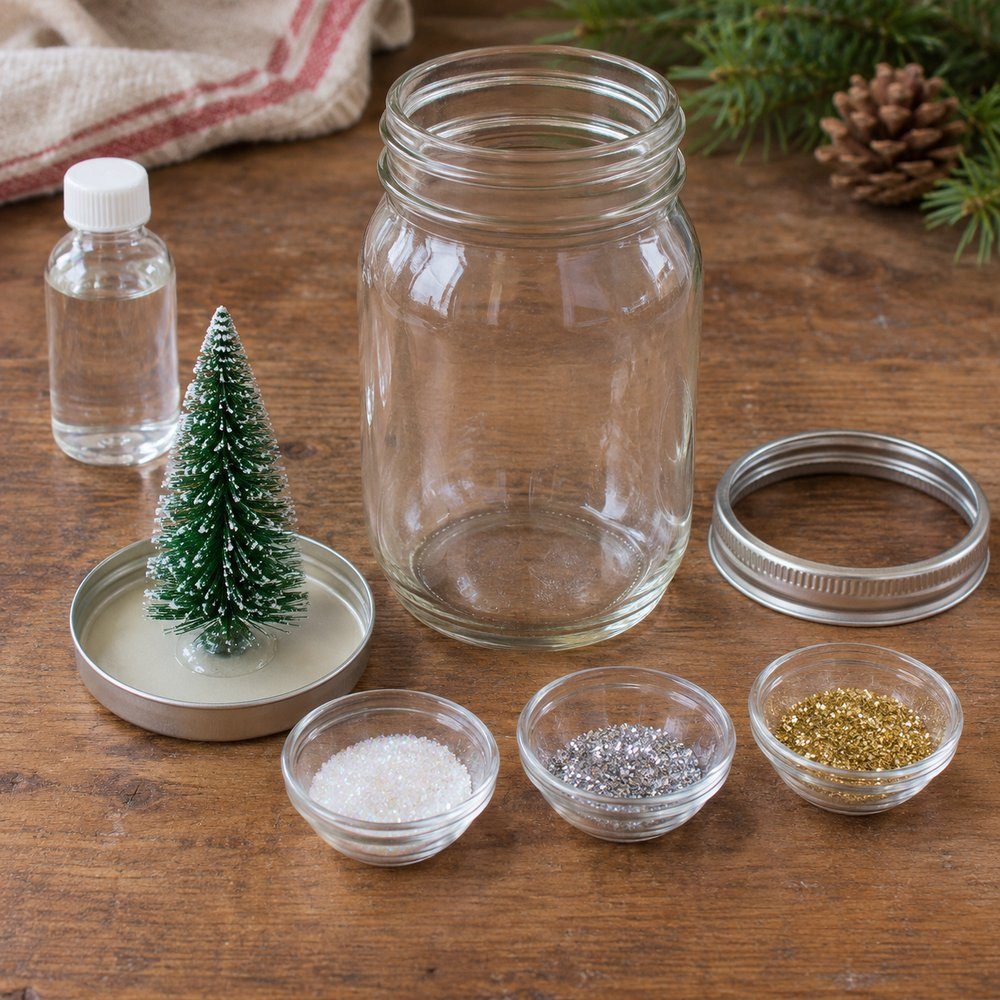
- Fill the jar about three-quarters full with distilled water.
- Add the glycerin, followed by the glitter.
- Top up with distilled water to almost the rim.
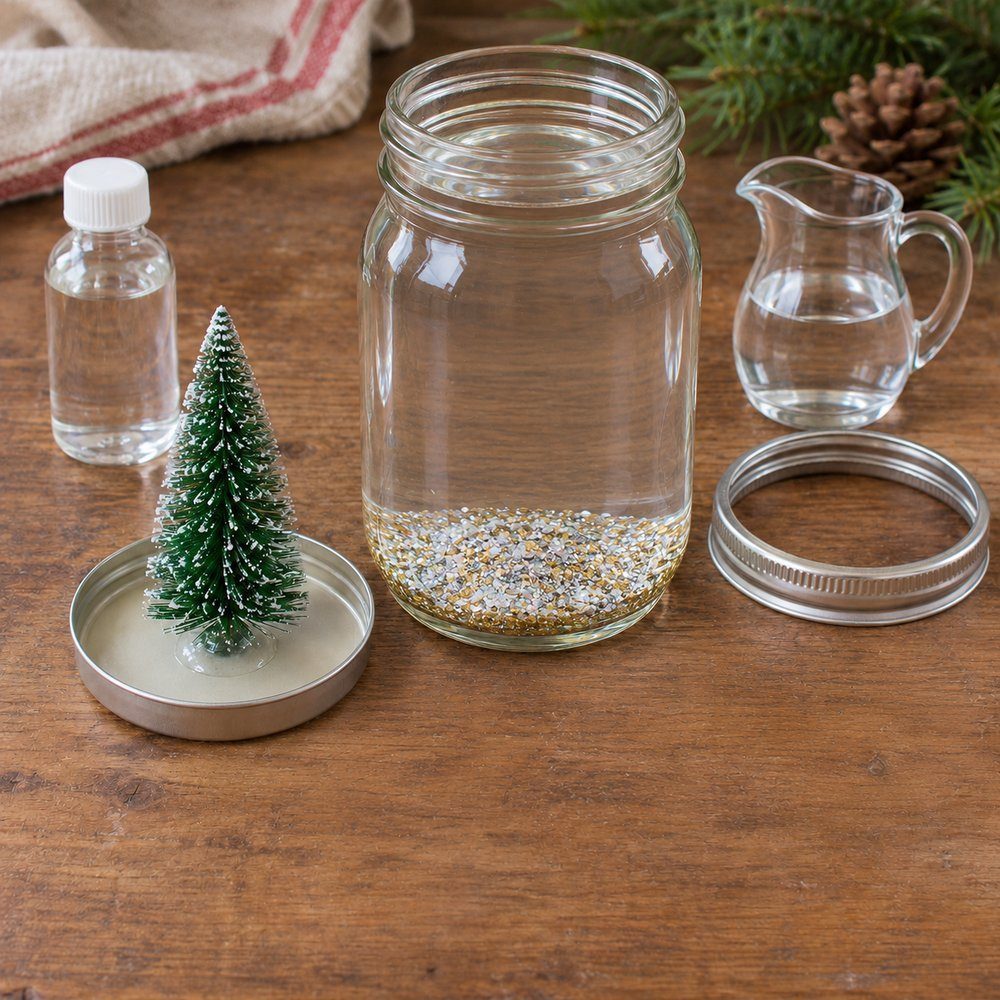
- Use E6000 to secure the lid to the glass.
- Secure the metal ring to the jar with E6000, completing the closed globe.
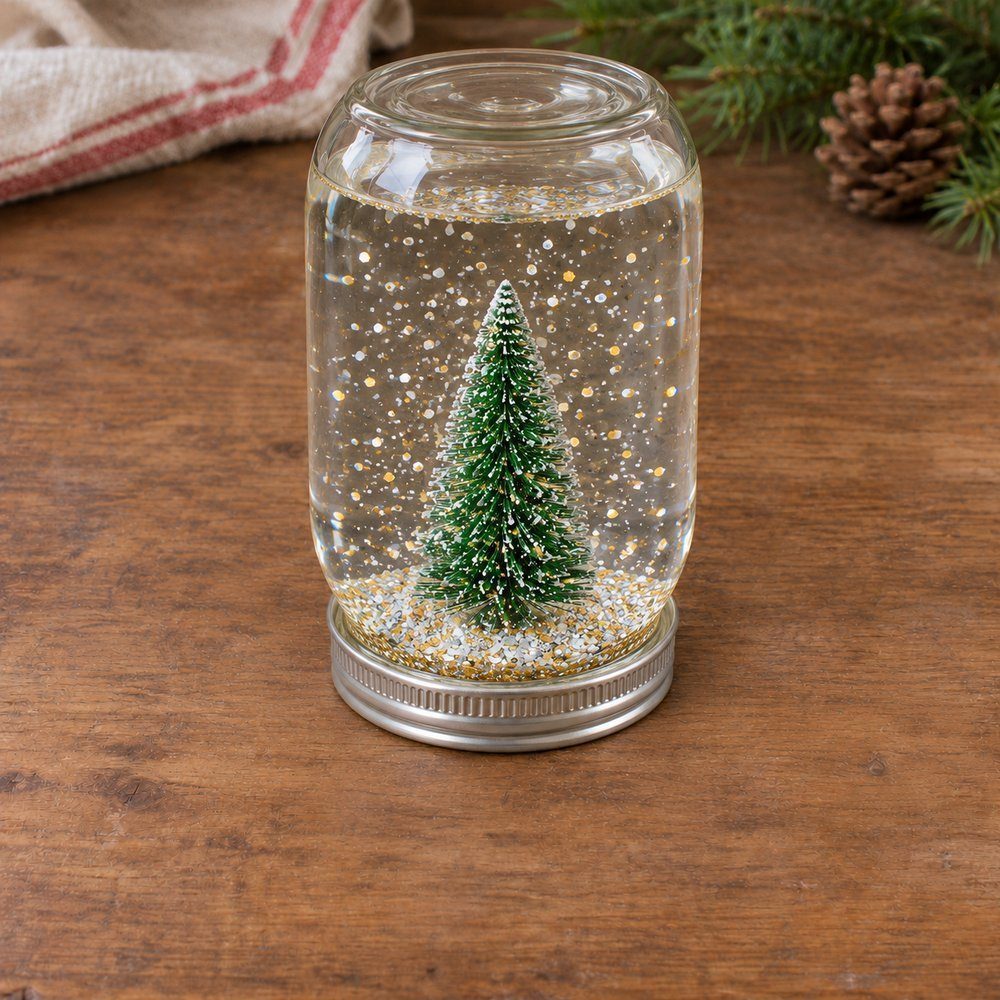
For a moving demonstration, Lincraft Australia’s jar snow globe video shows a decoration attached inside the lid, followed by glitter, glycerin, water, and a glued seal. Watch how the lid-mounted scene enters the jar. Its recipe and drying instructions belong to that demonstration; keep the written tree recipe above together when making this version.

Gingerbread holiday scene in a pickle jar
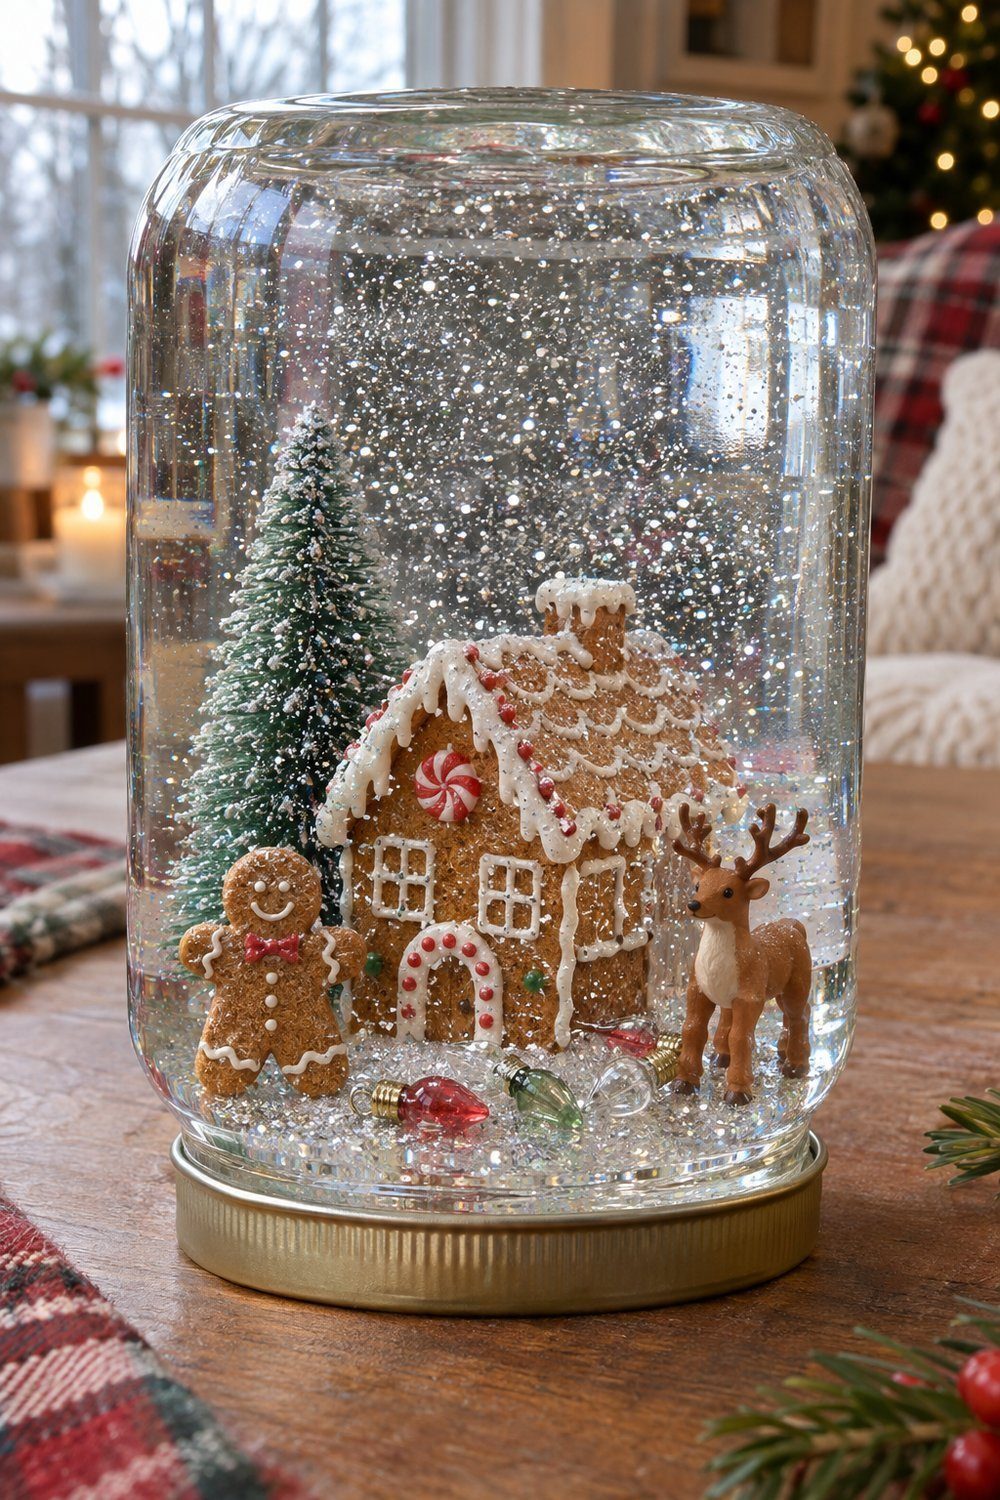
A reused pickle jar frames a busy holiday scene: a bottle-brush tree, a gingerbread house, a gingerbread man and miniature lights. Lisa’s assembly instructions describe lowering the decorated lid into the liquid. Let the glued scene dry for 24 hours, cover the bottom of the jar with glitter, add distilled water without filling it to the top, stir in the glycerin, then lower the lid in and seal it with hot glue. Her kids added a small Disney figure to theirs, which makes this the playful choice for a holiday display.
You'll need: A clean pickle jar, waterproof epoxy or Super Crazy Glue, miniatures, distilled water, white glitter or plastic snow, 4 tsp (20 ml) glycerin, and hot glue for the lid; allow 24 hours for the scene attachment.
Tutorial by Lisa Cameron, Adventures in Familyhood
Small toy snow globe
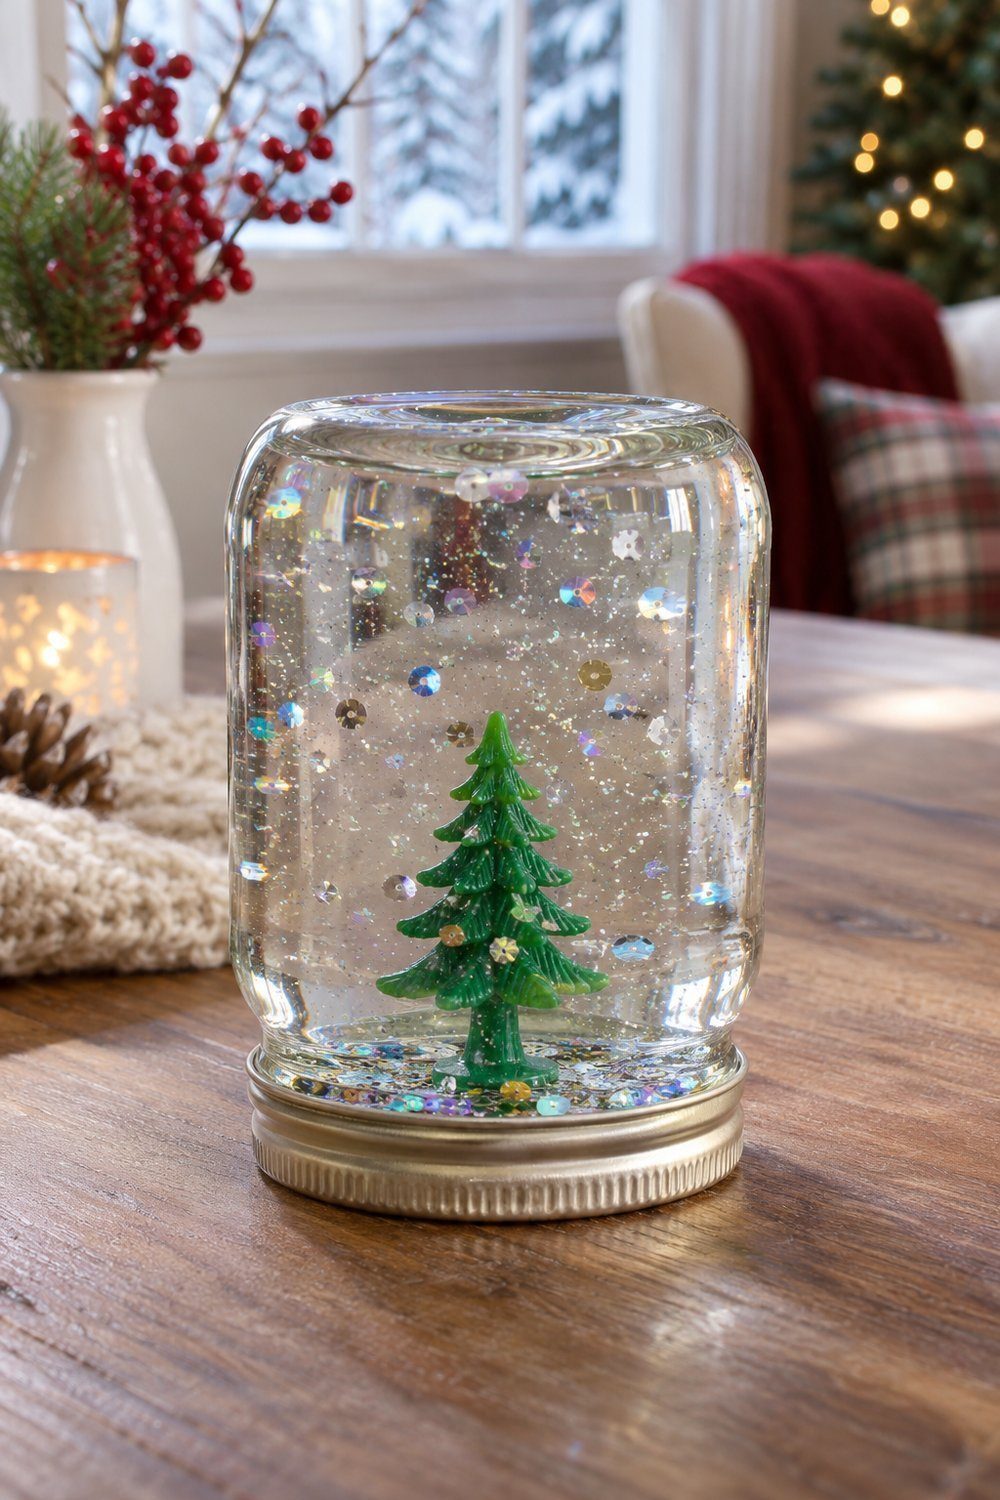
Turn a small glass jar into a home for a plastic figurine or LEGO piece. Glue the toy inside the lid, fill the jar with cold water, and stir in glitter before adding a few drops of glycerin. Screw the lid closed; the tutorial offers glue as an extra closure when a child might open it. This is a good family craft because choosing the tiny resident is part of the fun. Keep an adult alongside children handling glass.
You'll need: A small glass jar, plastic toy, water, 1–2 tsp (5–10 ml) glitter, glycerin, a spoon, and superglue or a hot glue gun.
Tutorial by Caroline Gravino, PBS KIDS for Parents
Snow that stays put: dry globes
A waterless snow globe puts the emphasis on the miniature scene and its snowy floor. Loose flakes can move when the jar turns, but the display settles into a small winter landscape. These dry projects also make a natural next stop after other recycled Christmas crafts: a saved food jar becomes the frame, and the lid becomes a tiny stage.
Cross-country skier in a gingham-lid jelly jar
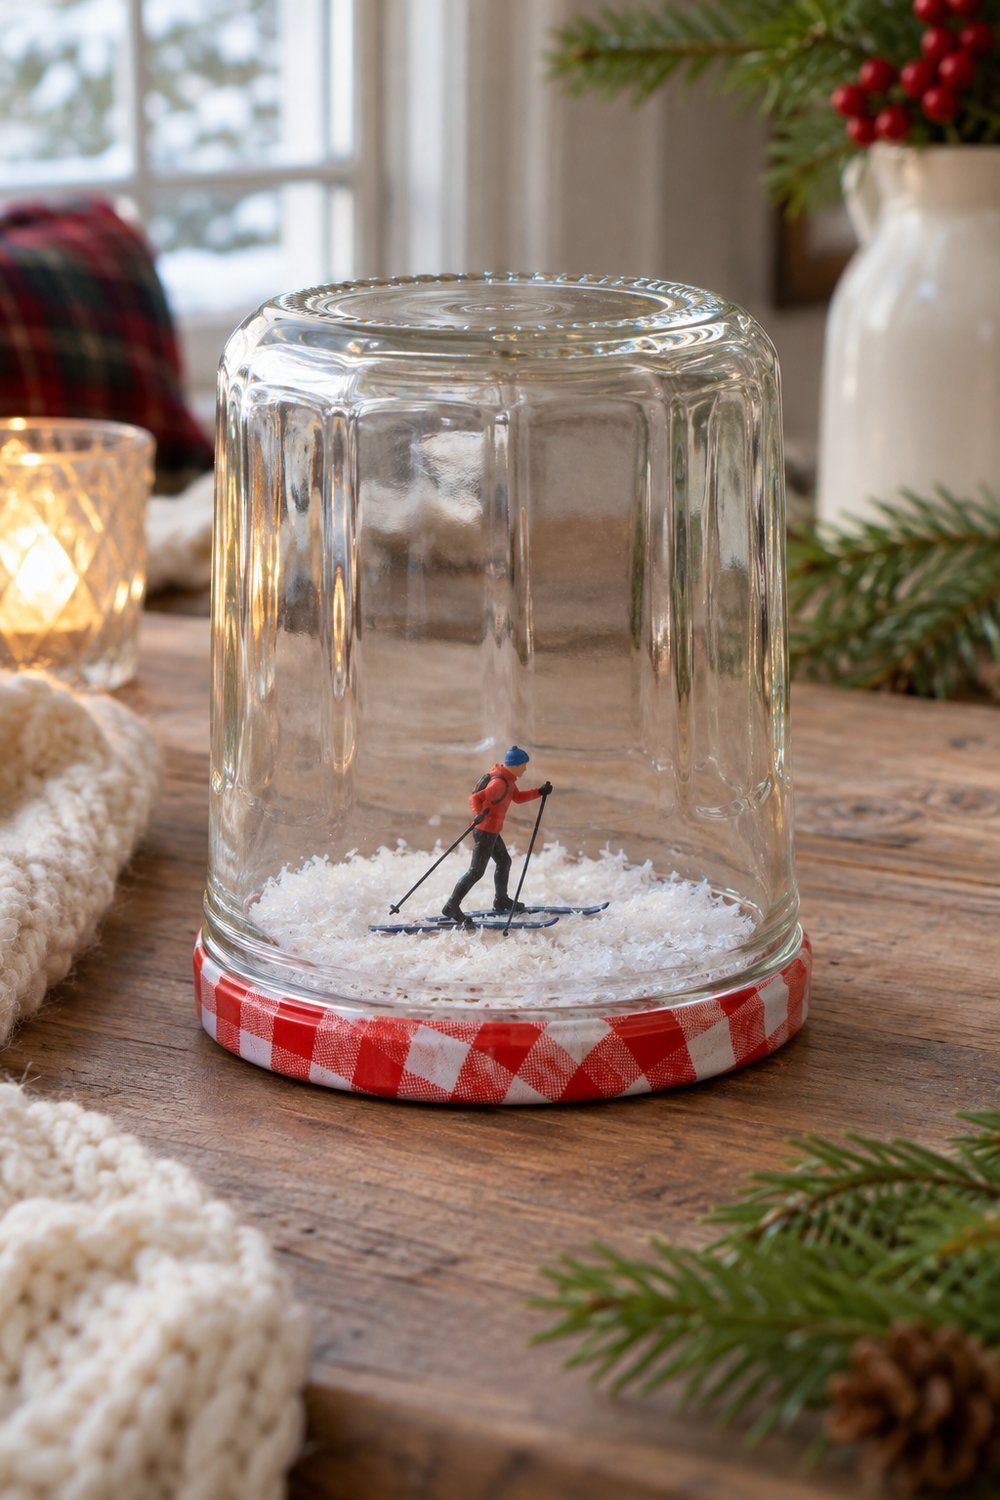
The red gingham lid gives this miniature skier a cheerful base. Pam uses a Bonne Maman jelly jar with straight sides and a roomy mouth. Dry the cleaned jar, spoon fake snow into it, and attach the skier inside the lid with glue dots or hot glue. Close the jar and turn it over so the flakes fall around the skier. Set this little sporting scene on a shelf where its poles and skis remain easy to see.
You'll need: A 13 oz Bonne Maman jelly jar, a skier figurine, about 2 tsp (10 ml) fake snowflakes, and glue dots or hot glue.
Tutorial by Pam Kessler, House of Hawthornes
Snowman and tree on a silver-glitter lid
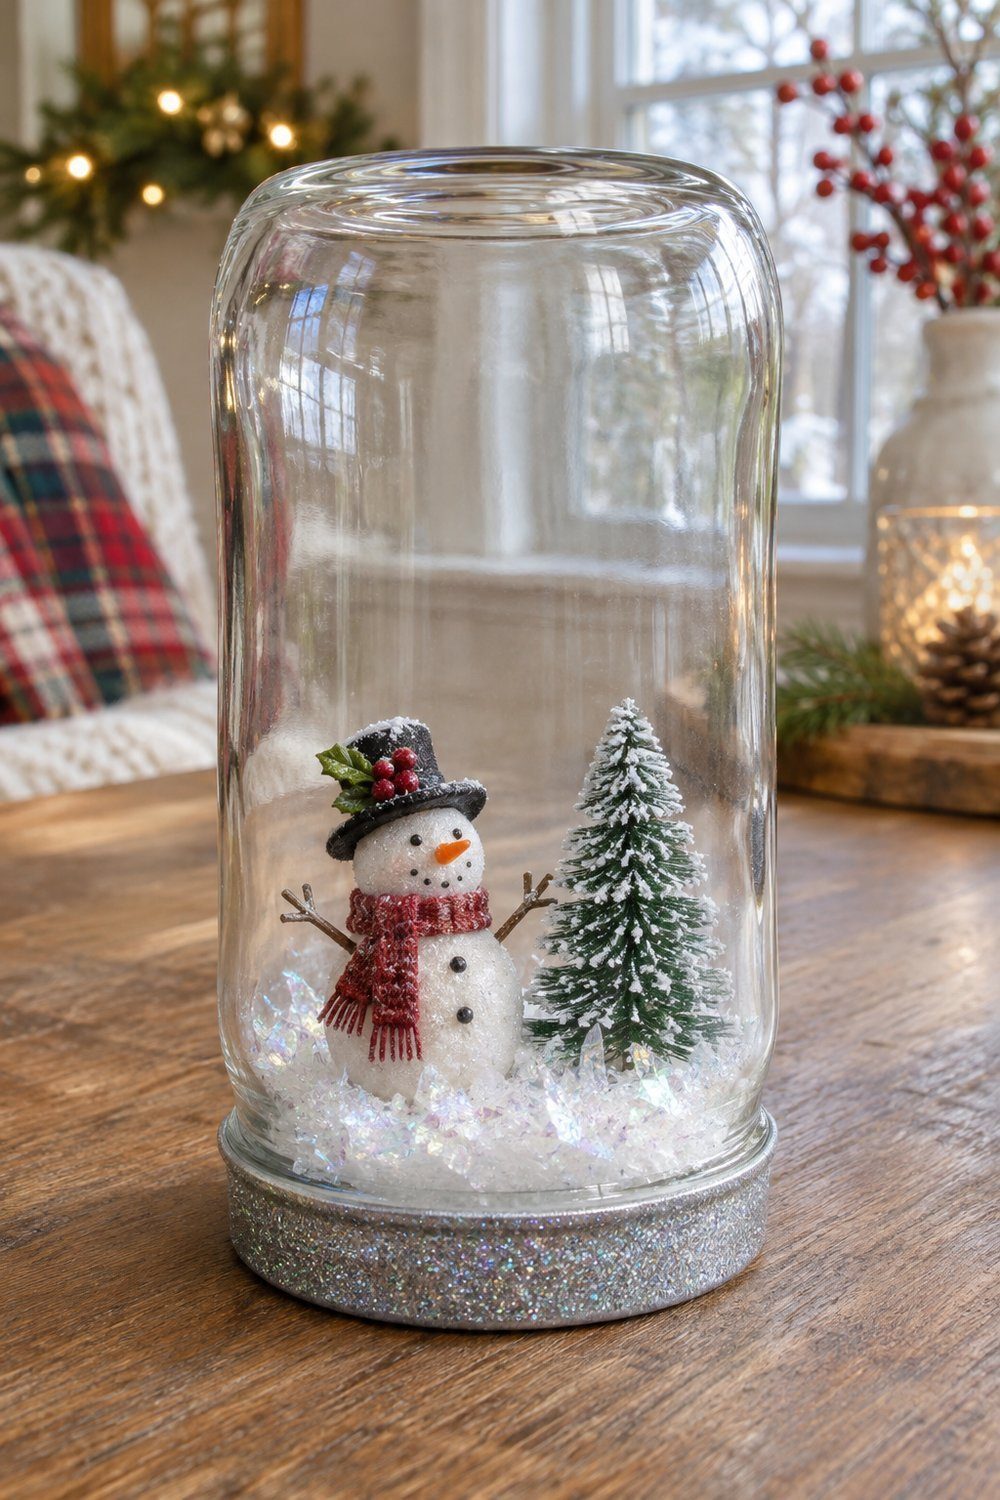
A miniature snowman beside a tree makes a friendly dry scene, with a silver-glitter lid giving the base a finished look. Spray-paint the lid and let it dry, then hot-glue the miniatures inside it. Add enough artificial flakes to cover the base once inverted, screw the jar closed, and turn it over. Cheryl also glues canning-lid pieces together. Choose this arrangement for a holiday centerpiece when you want the snowman and tree to read as a pair.
You'll need: A glass jar, miniature snowman and tree, Snow Flakes or Twinkle Flakes, hot glue, and silver glitter spray paint; the project lists 30 minutes active time and 30 minutes additional time.
Tutorial by Cheryl, TidyMom
Ribbon-finished dry tree jar
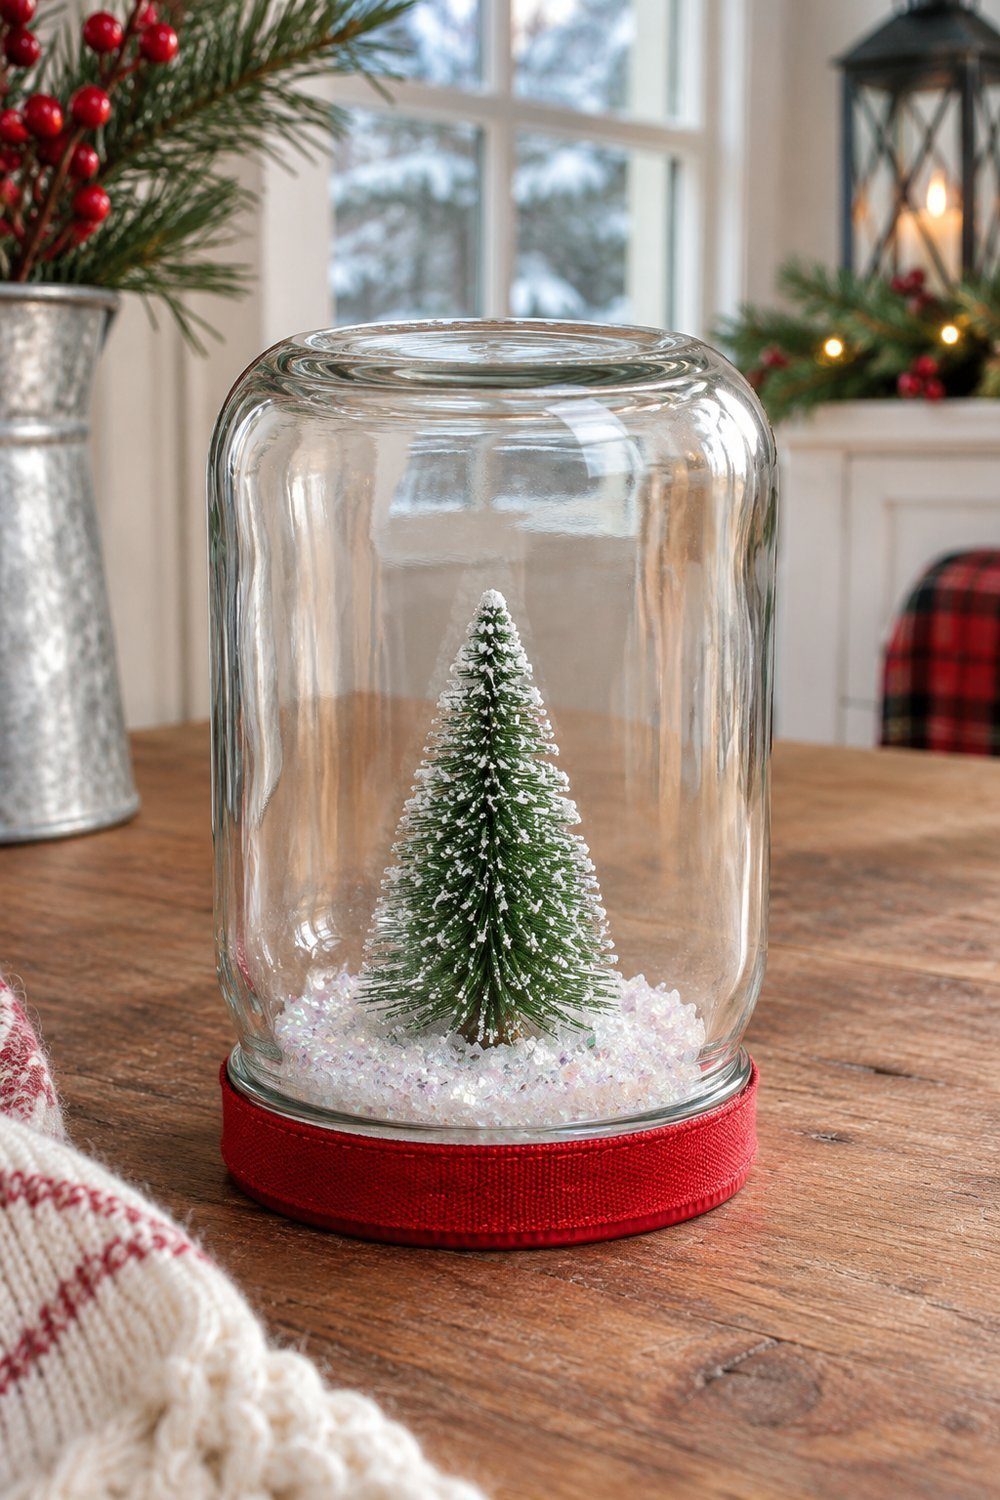
The Portland Museum of Art’s version keeps the scene spare: a miniature tree or figurine, artificial snow, glitter, and an optional ribbon around the lid. Glue the miniature inside the lid and let it dry completely. Add a shallow covering of snow and glitter to the jar, then screw on the decorated lid and invert it. This is the simplest-looking dry option here, especially if you want a modest little tree with plenty of clear glass around it.
You'll need: A jar with lid, miniature tree, B–7000 super glue, artificial snow, glitter, and optional ribbon; allow at least 5 hours for the glued miniature to dry.
Tutorial by Portland Museum of Art education tutorial, Portland Museum of Art
Glitter that swirls
For a snow globe without glycerin, these tutorials use clear glue mixed with water or unscented baby oil. The glitter still supplies the sparkle, while the liquid becomes part of the recipe. Pick the scene first, then follow its maker’s quantities: a blue-glitter tree, a movie character, and a baby-food-jar miniature each have a different character.
Snowman globe with clear glue
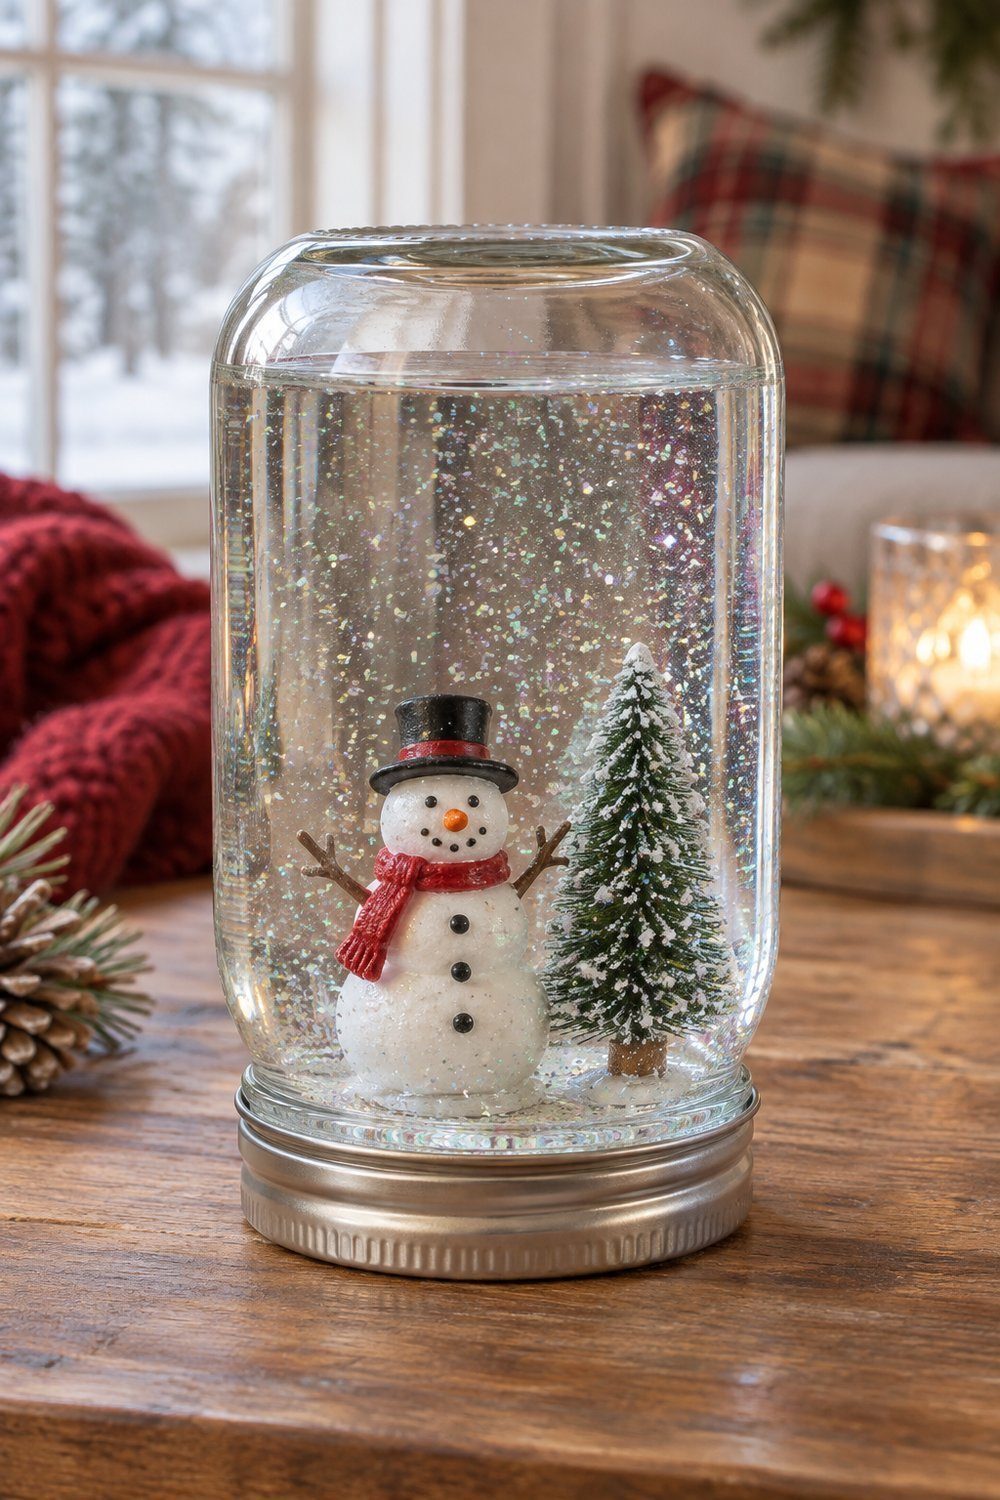
A small snowman figure and a tree fill this mason jar. Her tutorial shows character-and-tree scenes, with clear glue stirred into distilled water to thicken the mixture. Hot-glue the focal objects to the lid, half-fill the jar with water, then stir in clear glue and glitter. Top up while leaving room for the scene and screw the lid tight. The result suits a family craft afternoon, when each child picks a favorite toy for the jar.
You'll need: A mason jar, a water-safe snowman figure and tree, distilled water, clear glue, hot glue, and 1–2 tsp (5–10 ml) glitter.
Tutorial by Shelly, Welcome To Nana’s
Wire tree with blue-glitter flurries
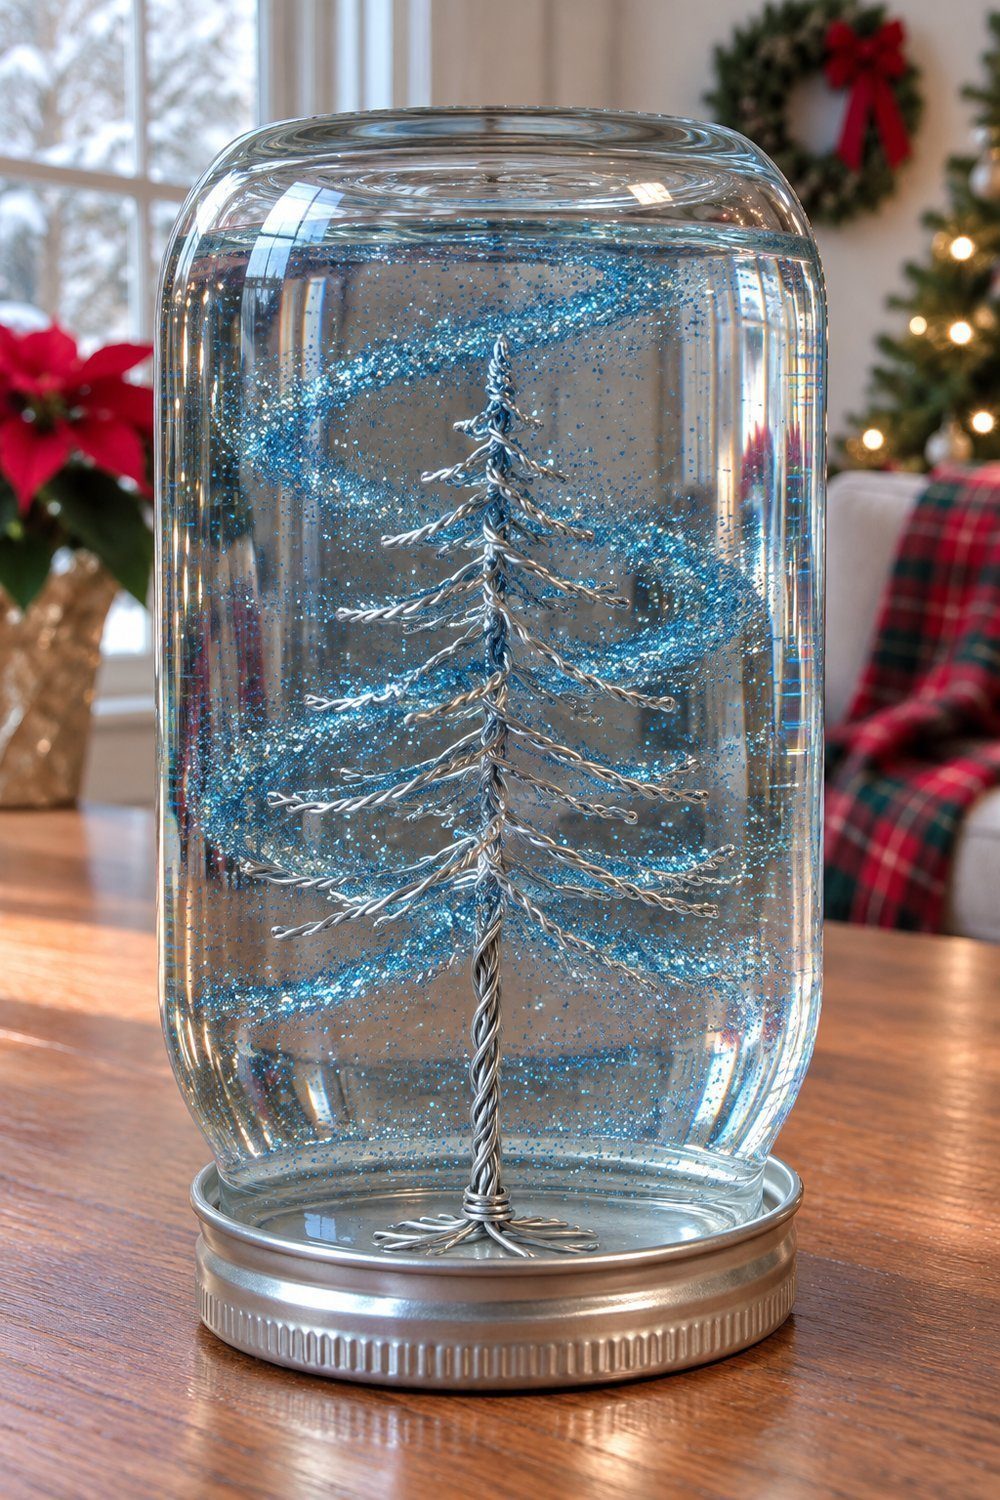
Blue glitter gives this tree globe a cooler palette than the white-and-gold classic. Jaime fixes a wire Christmas tree to the lid, using Mod Podge followed by superglue, and lets it dry fully. Pour clear glue into the jar, add warm water, stir, and sprinkle in blue glitter. Fit the tree lid and shake over a sink to check for leaks. Put this version among blue ornaments or silver decorations when you want a wintry accent with a little color.
You'll need: 1 large mason jar, 1 wire Christmas tree, blue glitter, clear glue, warm water, superglue, and Mod Podge.
Tutorial by Jaime, Love, Jaime
Baby-food-jar miniature in baby oil
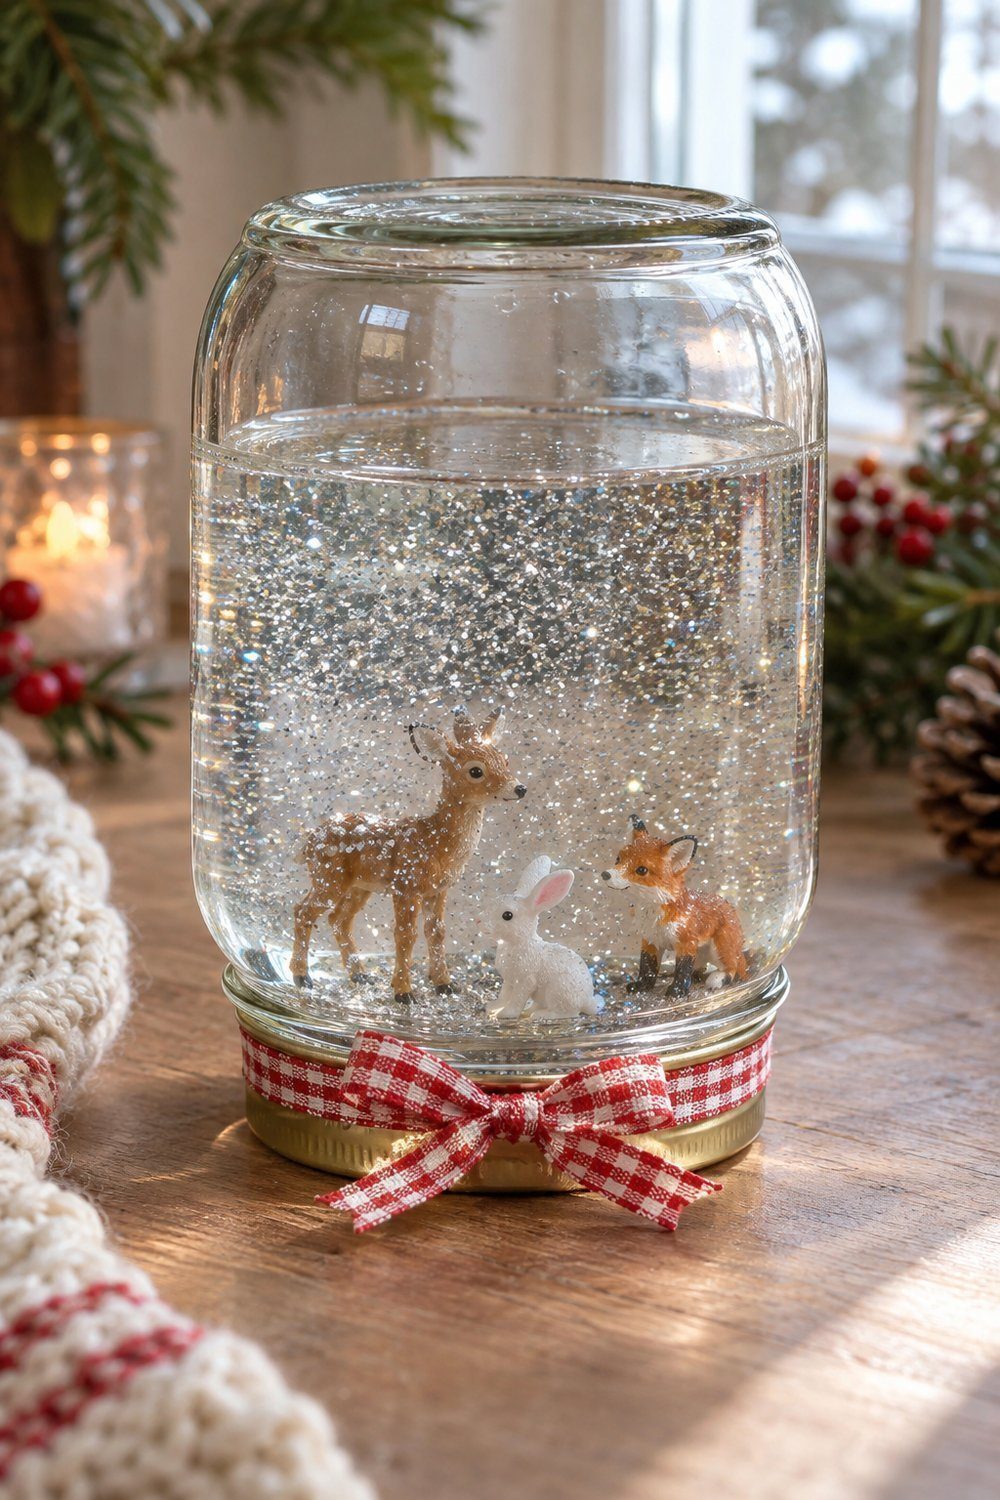
A baby food jar makes a compact frame for small plastic figures, with silver glitter floating through unscented baby oil. Attach the figures inside the lid with aquarium glue and let them dry. Fill the jar three-quarters full with oil, add glitter, and run aquarium glue around the rim threads before closing. Let the seal dry before inverting. A ribbon hides the lid edge, giving the tiny scene a dressed-up base for a small gift or shelf display.
You'll need: A baby food jar, plastic figures, unscented baby oil, aquarium glue, ribbon, and 1–2 tsp (5–10 ml) silver glitter; allow 24 hours for each glued stage.
Tutorial by Jenny Harrington, eHow
Snow on the outside of the jar
Here the snow becomes a surface treatment: glittered dots, textured paint, or a painted winter motif. The snowman is enclosed like a globe; the candle jars are open luminaries with snowy scenery. For more softly glowing glass treatments, see these frosted mason jars.
Glitter-frosted jar around a clay snowman
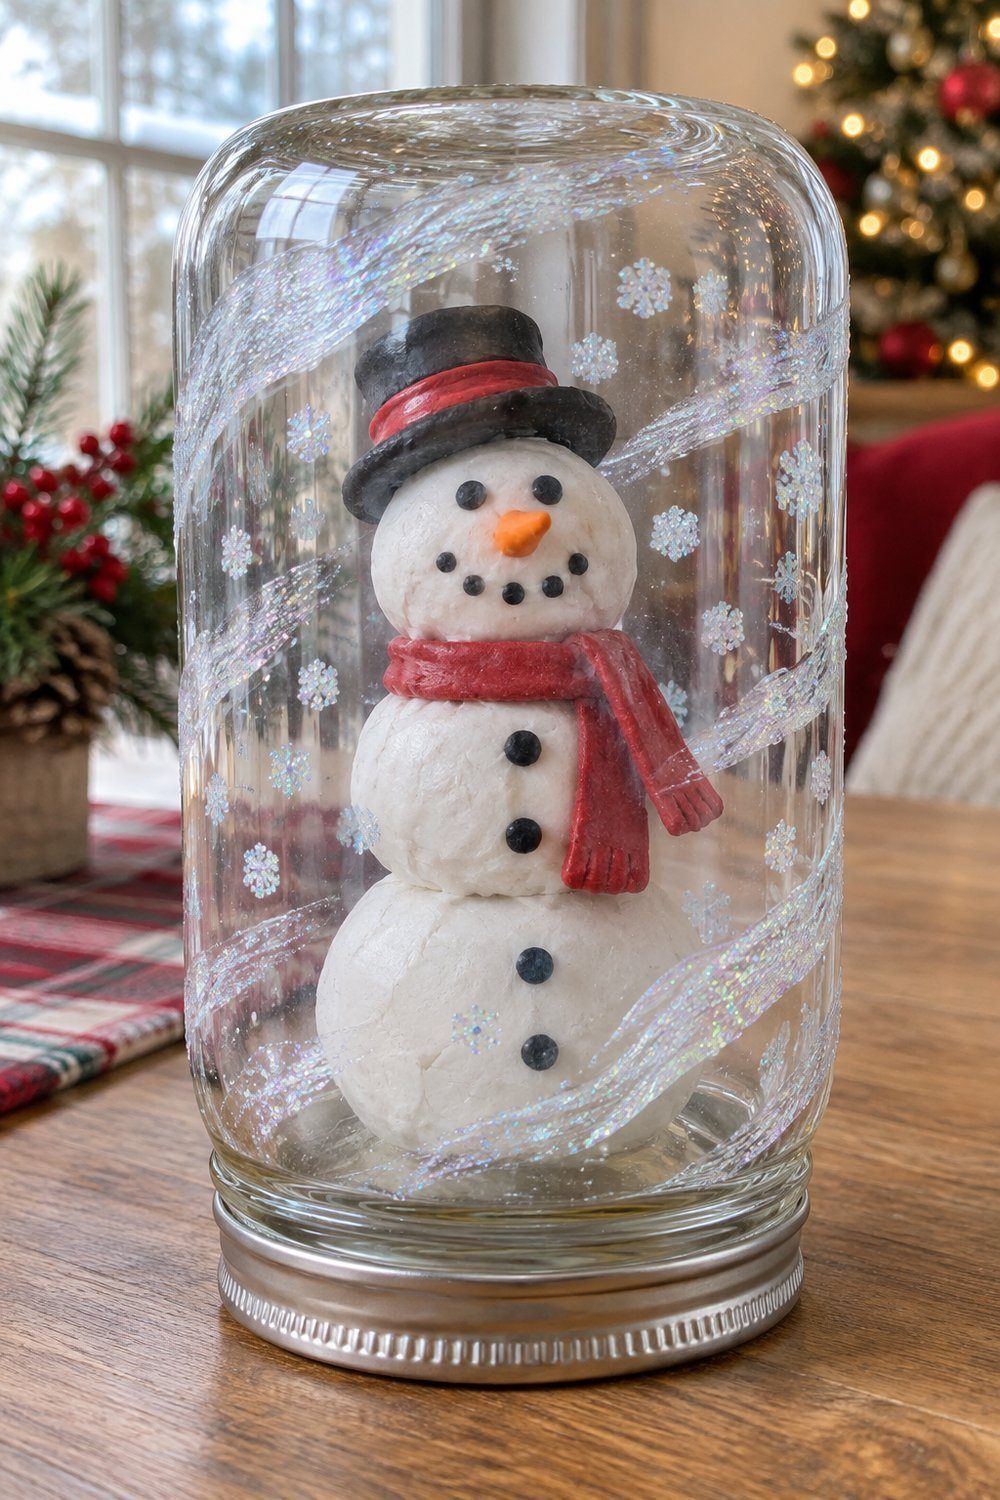
Crayola puts the shimmer outside the glass around a dry Model Magic snowman. Stack small, medium, and large balls into the figure, add its features, and let it dry overnight. Brush glitter glue over the jar, adding snowy dots or snowflake details, then let the coating dry. Set the snowman in the upside-down lid and twist the jar into place. The figure stays visible behind a sparkling surface, making this a cheerful display for a child's handmade holiday scene.
You'll need: An upcycled jar, Model Magic, glitter glue, and a paintbrush; allow 3–4 hours for the outside glitter details to dry.
Tutorial by Crayola CIY staff, Crayola
Snowy pinecone candle jar
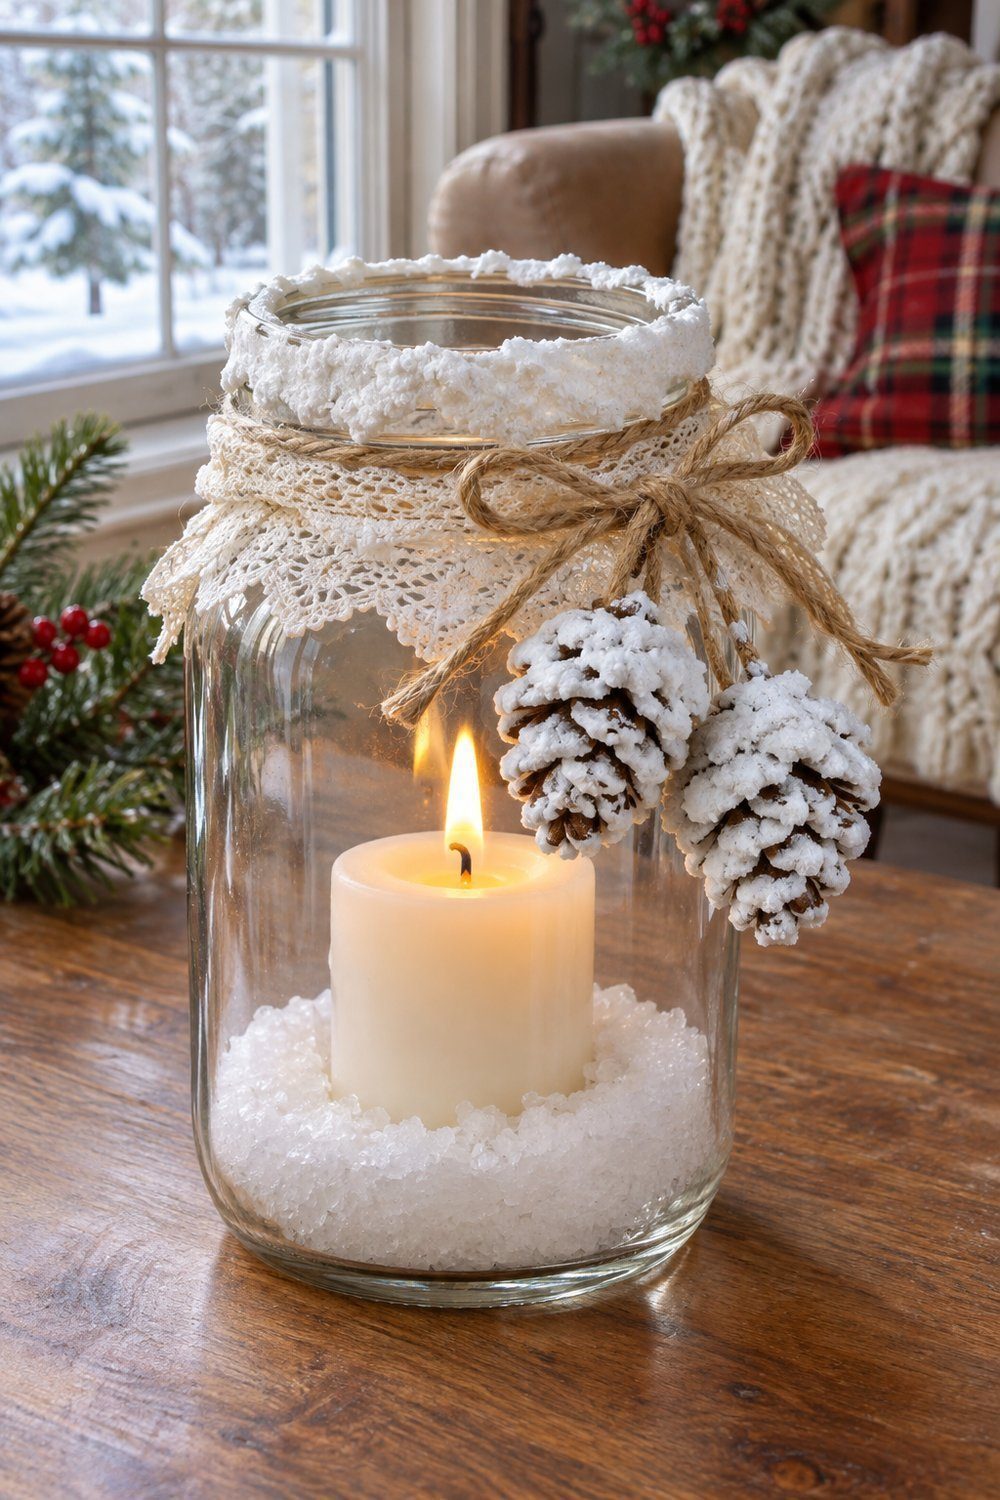
Snow-Tex gives the rim and pinecones a raised coating that looks like fresh snowfall, while salt creates a white floor inside. Glue lace around the jar’s rim, add twine and pinecones, then apply the texture paint. Add the Epsom salt and candle and let the snowy finish dry. This upright, open jar makes a glowing companion to enclosed globes on a holiday table. The lace and twine soften the glass, and the pinecones carry the winter scene onto the outside.
You'll need: A glass jar, 2 pinecones, lace, twine, hot glue, Snow-Tex, a candle, and about 1 in (2.5 cm) Epsom salt inside; the tutorial allows about 1 hour for drying.
Tutorial by Amanda Davis, Crafts by Amanda
Painted snowflake-window jar with a tea light
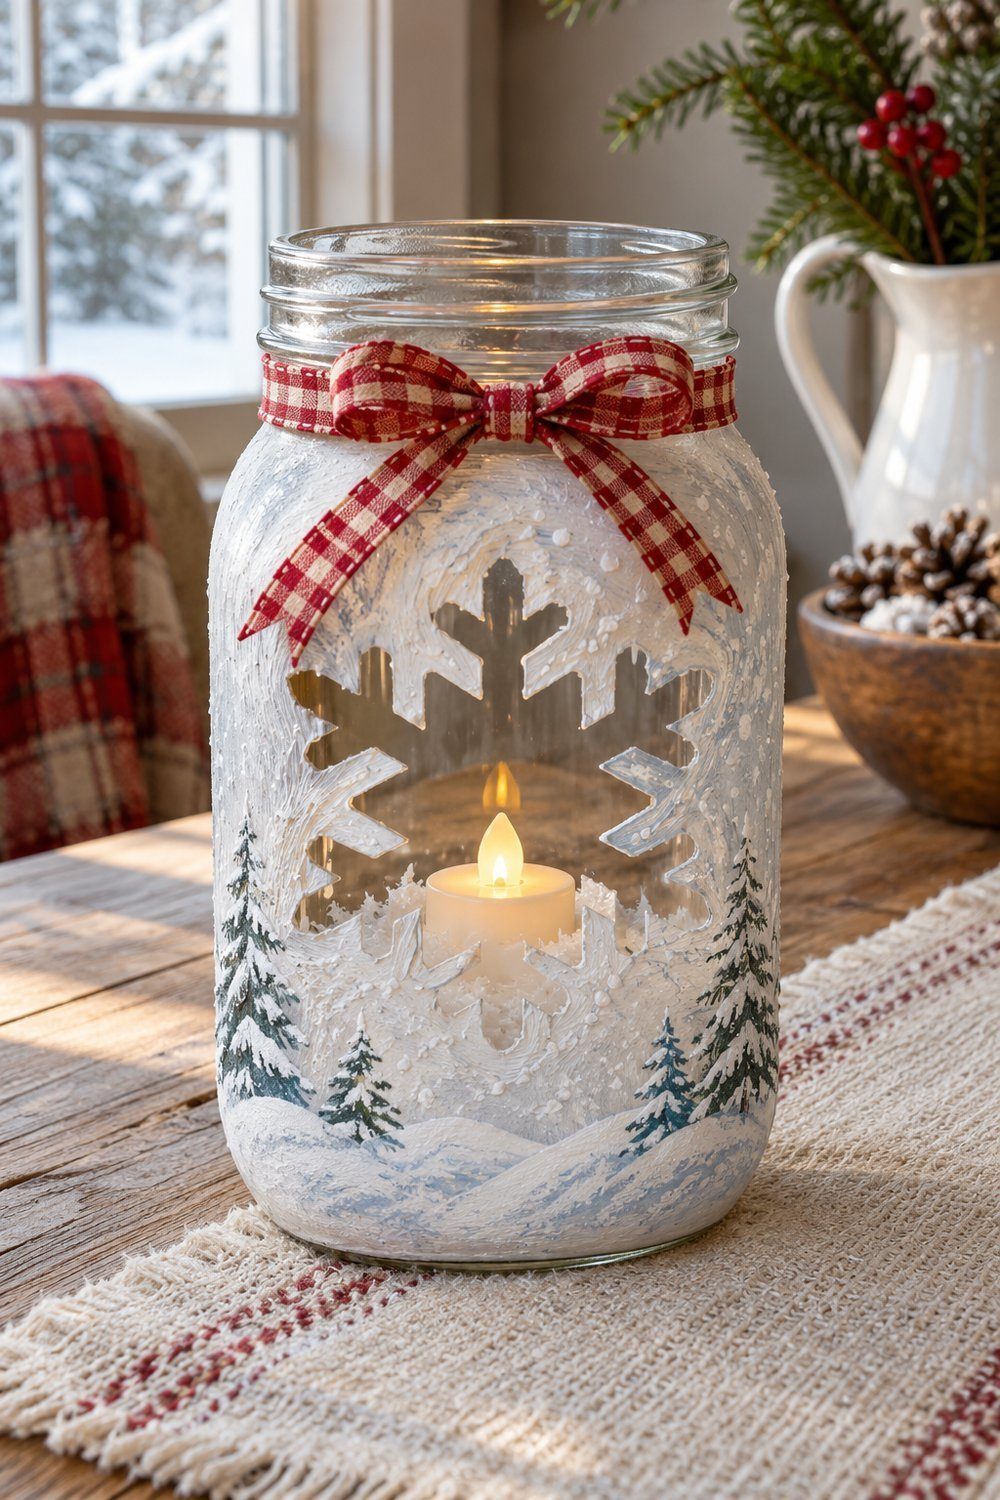
A clear snowflake window interrupts the painted outside of this upright mason jar, revealing the light and fake snow within. Angie uses a vinyl shape as a mask: press it onto clean glass, paint the jar, and let the coating dry before removing the shape. Finish the neck with ribbon, sprinkle fake snow inside, and add a battery-operated tea light. The snowflake becomes the scene itself, making this open luminary a useful choice for a glowing winter shelf.
You'll need: A 1 pint (473 ml) mason jar, vinyl snowflake, craft cutter, glass paint, ribbon, hot glue, fake snow, and battery tea light; the maker used 2 coats of paint.
Tutorial by Angie Holden, Crafts by Amanda
Sealing, gifting and storing
Finish the seal the way your chosen maker does: E6000 for Christina’s tree, aquarium glue for Jenny’s oil jar, or an optional glued closure for the museum’s dry globe. For the Disney scene, Lisa recommends soaking decorations overnight first because their dye may color the water. Shelly uses distilled water to avoid mineral debris and suggests a glued lid when children might open it. Let the glue dry before the finished jar changes hands.
For a gift, use the museum tutorial’s ribbon around the lid or Jenny’s ribbon-covered base. Plaid’s cookie-jar tutorial also suggests an optional gift tag.
Keep going: try quick Christmas decorations or pair your jars with these winter centerpieces.