DIY Advent Calendar Ideas


A wall, a tree or branch, the stairs, door or mantel, and a table or shelf can each become your December countdown. These DIY advent calendar ideas give you a place to begin before you buy supplies. The cardboard-tube boxes are the quickest timed option at the fast end of their author's range; the envelope-and-dowel wall hanging is the showpiece, with its soft cascade of numbers and greenery. Choose the container around the surprise: a flat activity note, a tiny ornament, or a wrapped treat.
Before you start: 24 spots, fillers and numbers
Plan 24 dated spots for a Christmas Eve finish, then choose the fillers before assembling the calendar. Keep the numbers visible as the display empties. The measurements below describe the source projects; “not stated” means the tutorial leaves that detail open. A paper cutting size describes the material, rather than the finished space inside it. Making times are the authors' figures, and the month listed for the sewn ornament calendar is a planning allowance. For a homemade advent calendar you can bring back next December, reusable bags and fabric pockets are especially appealing.
| Calendar | Container | Size of each spot | Time to make | Source |
|---|---|---|---|---|
| Envelope wall hanging | Envelope | Not stated; hanging dowel is 18 in (46 cm) long | Not stated | The Merrythought |
| Felt ornament hanging | Cut from 5 in (13 cm) squares | Allow a month; active hours not stated | The Craft Patch | |
| Paper cone tree | Cone | Not stated | Not stated | Hi Sugarplum! |
| Cardboard-tube boxes | Box | Not stated; trim about 3/4 in (2 cm) from each tube | 30–60 min | Now That's Peachy |
| Stamped muslin garland | Bag | About 3 × 5 in (8 × 13 cm) | Not stated | The Sweetest Digs |
| Marble-film jars | Jar | Mixed sizes; dimensions not stated | 30 min, plus 10 min preparation | d-c-fix |
On a wall
A wall gives the countdown its own place in the room. Let the hanging shape do the decorating: a cascade of envelopes, a soft fabric panel, or a neat rectangle of little drawers. The envelope design is the strongest showpiece here because its greenery and staggered strings turn ordinary stationery into a seasonal focal point.
Envelope-and-dowel wall calendar
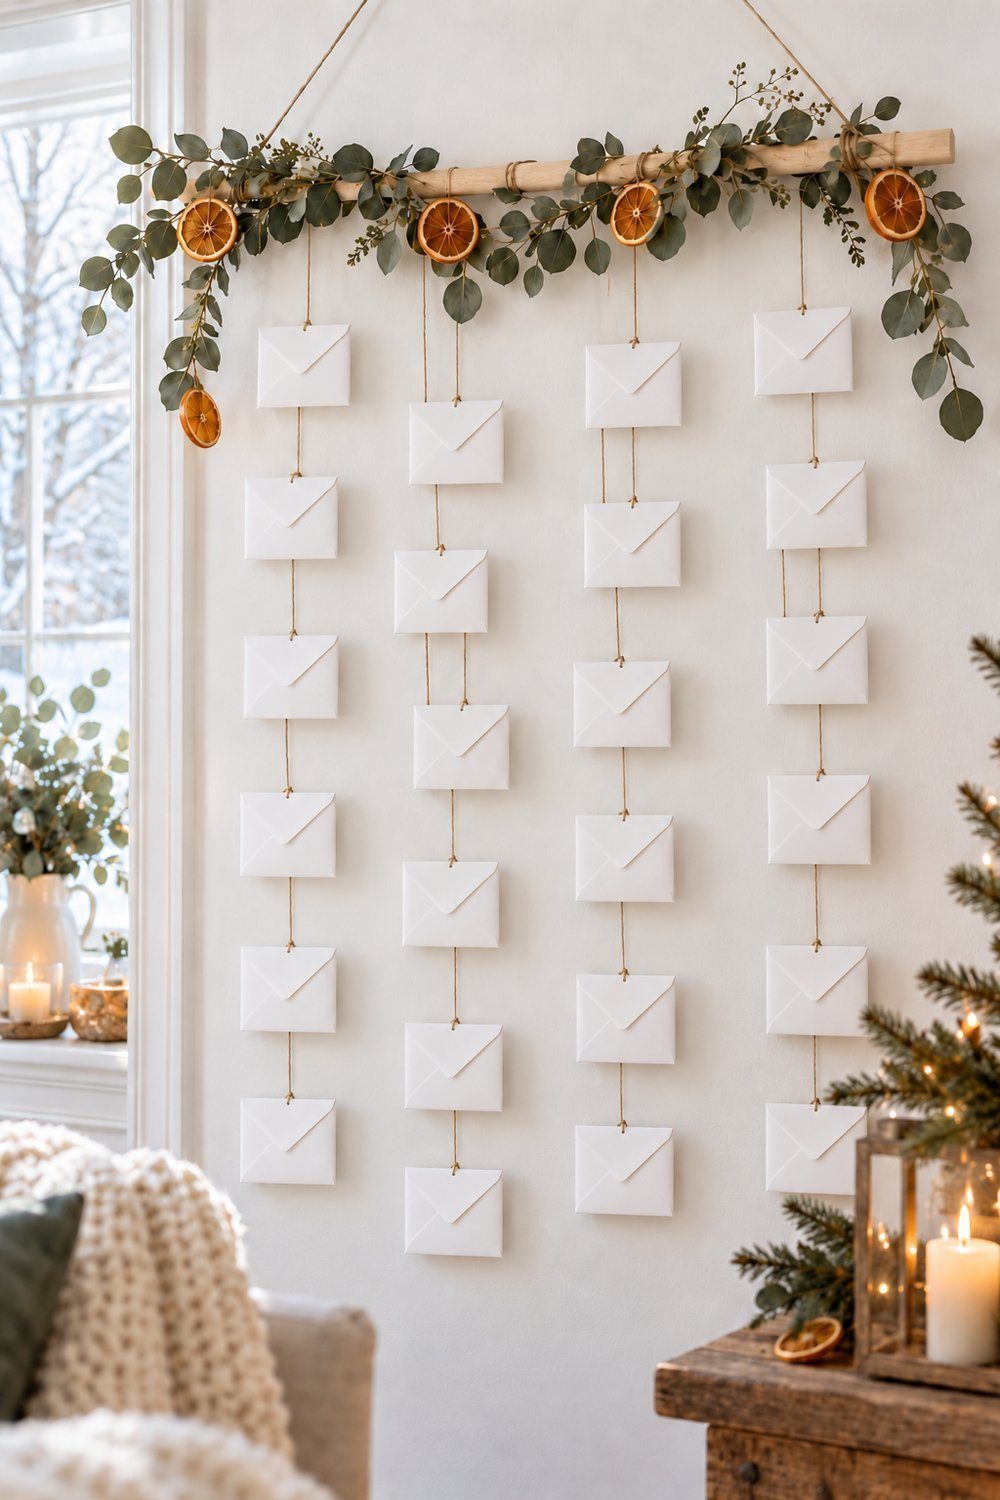
Tutorial by Manda, The Merrythought
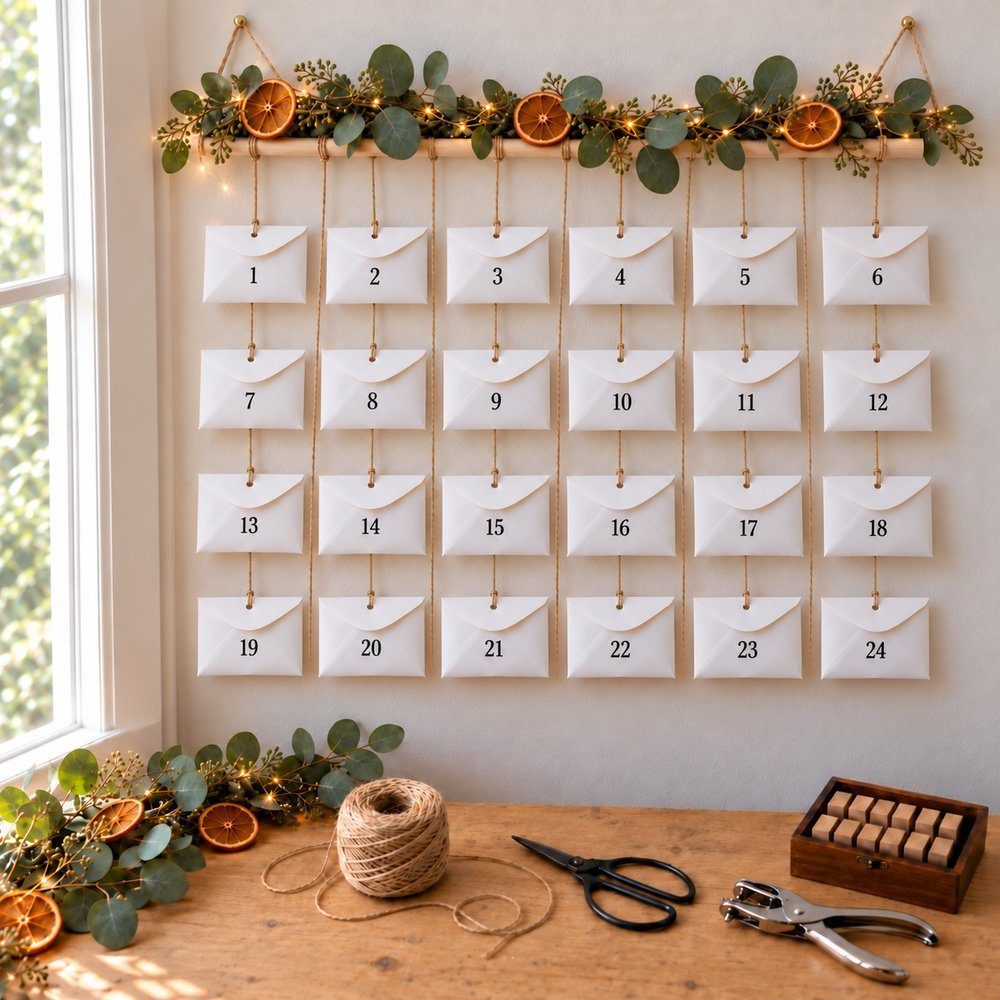
White envelopes hang beneath eucalyptus and dried orange slices in this light, airy DIY advent calendar. Stamp the dates, punch the flaps, and suspend the envelopes at different lengths. Slip an activity card into each one. The concealed holes keep the front tidy, while the wall placement saves surface space. This is an advent calendar to make when shared activities are the main attraction.
You'll need: A 1/2 in (13 mm) square dowel, cut to 18 in (46 cm), plus these supplies:
- 24 small envelopes, with sizes chosen by you.
- String, scissors, a hole punch, and number stamps or stickers.
- Activity cards, eucalyptus, and a dried orange garland.
- Cut the dowel to the source length.
- Tie a hanging string to its ends.
- Stamp or sticker dates onto the envelopes.
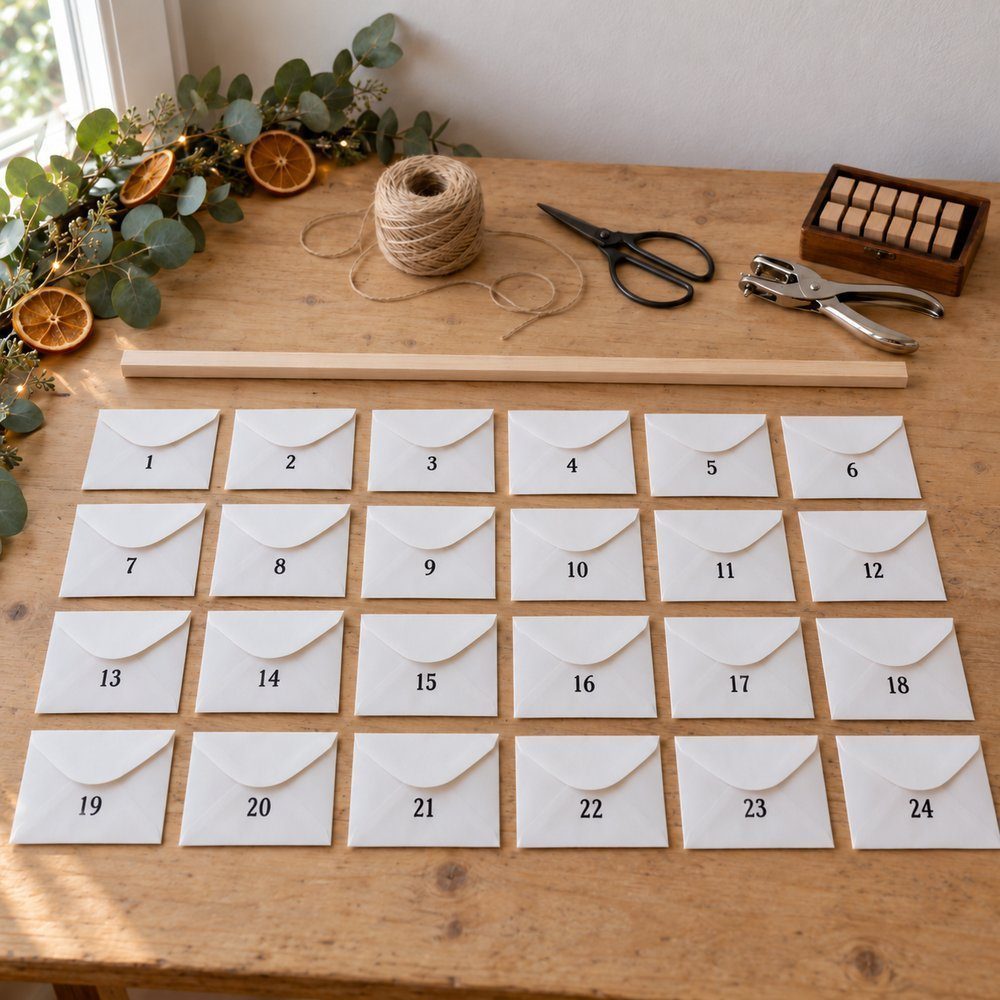
- Punch each envelope flap, keeping the hole behind the front.
- Add activity cards and pass string through the flap holes.
- With the dowel hanging, tie the envelopes at staggered heights.
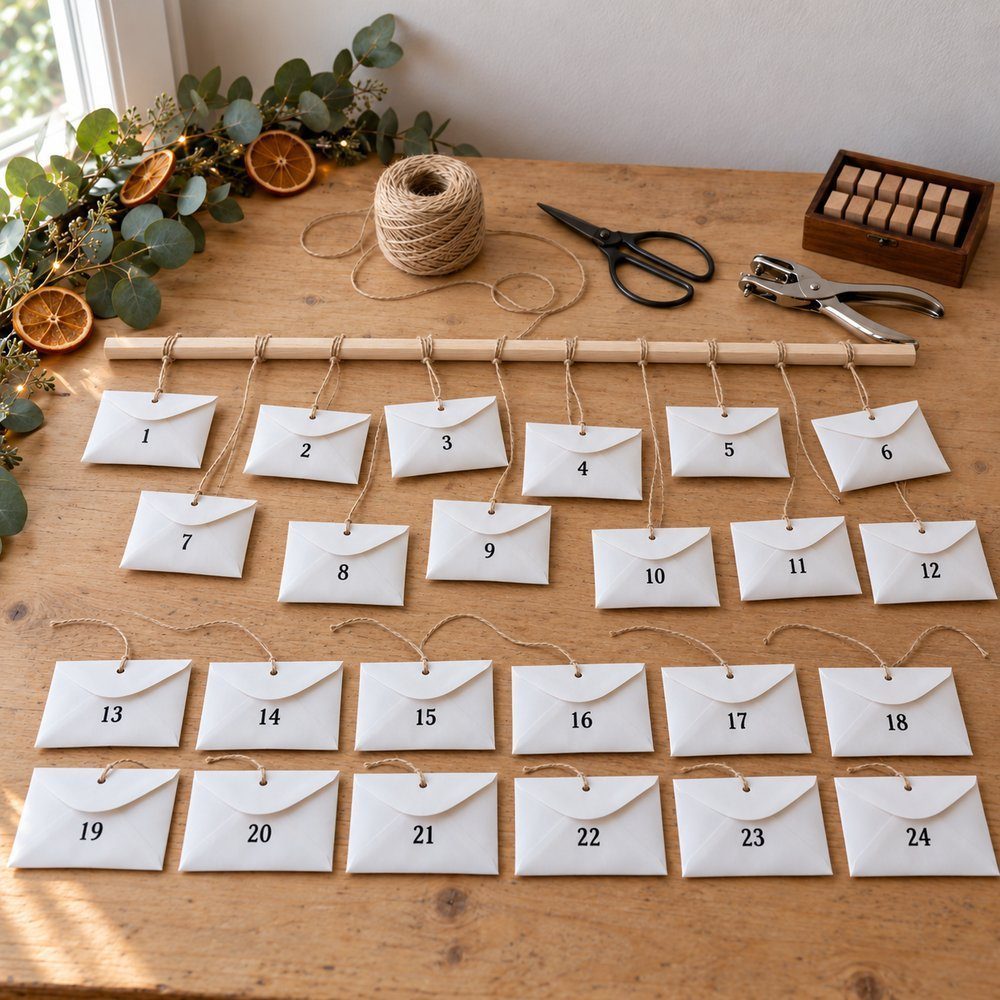
- Tie eucalyptus and orange garland over the dowel.
- Leave the envelope openings accessible for changing the activity cards.
For another handmade approach, Creative Fnk demonstrates an origami Christmas tree advent calendar in the video below. The creator folds little trees and boxes, then joins them into individual treat holders. Watch it for a paper-folding alternative to the hanging-envelope project described above.

Felt tree with ornament pockets
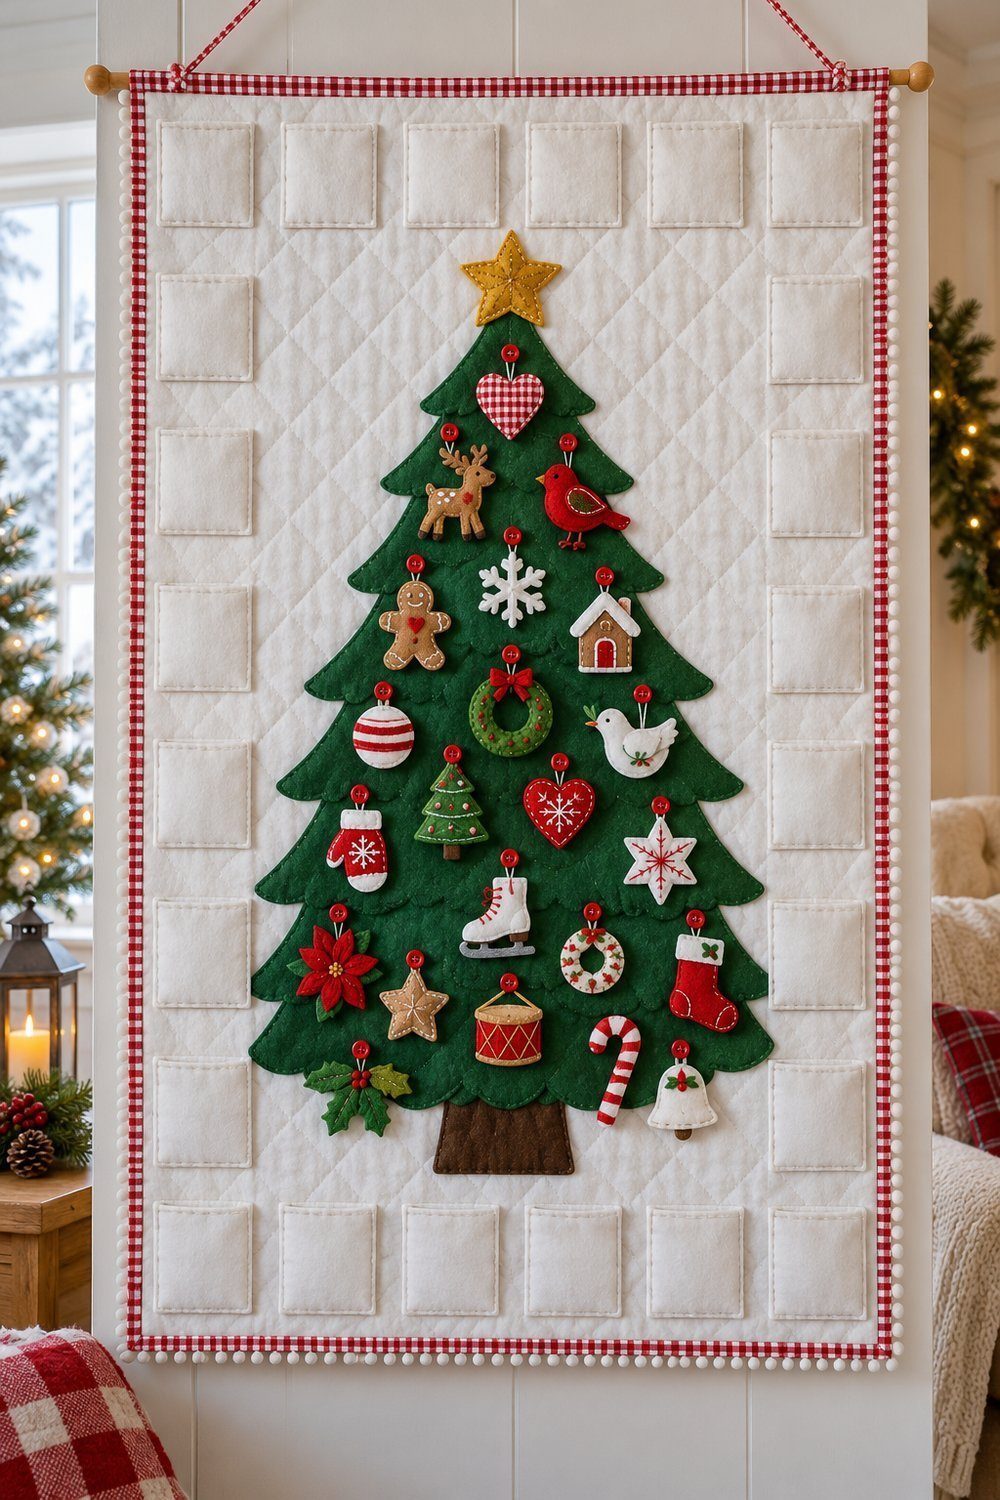
A green tree sits inside a border of white pockets on a quilted background, with red dates and buttons adding little points of color. Make the felt ornaments first, then cut and number the pockets. Attach the pockets along their sides and bottoms, add the tree and its buttons, and finish the edge with binding. Each day, an ornament moves from its pocket onto the tree. Choose this reusable advent calendar when sewing and handwork are part of the pleasure; the author recommends allowing a whole month.
You'll need: A roughly 42 × 52 in (107 × 132 cm) quilted background, 24 pockets cut from 5 in (13 cm) felt squares, green felt, red numbers, buttons, binding, a dowel, and ornaments.
Tutorial by Jennifer, The Craft Patch
Magnetic matchbox wall calendar
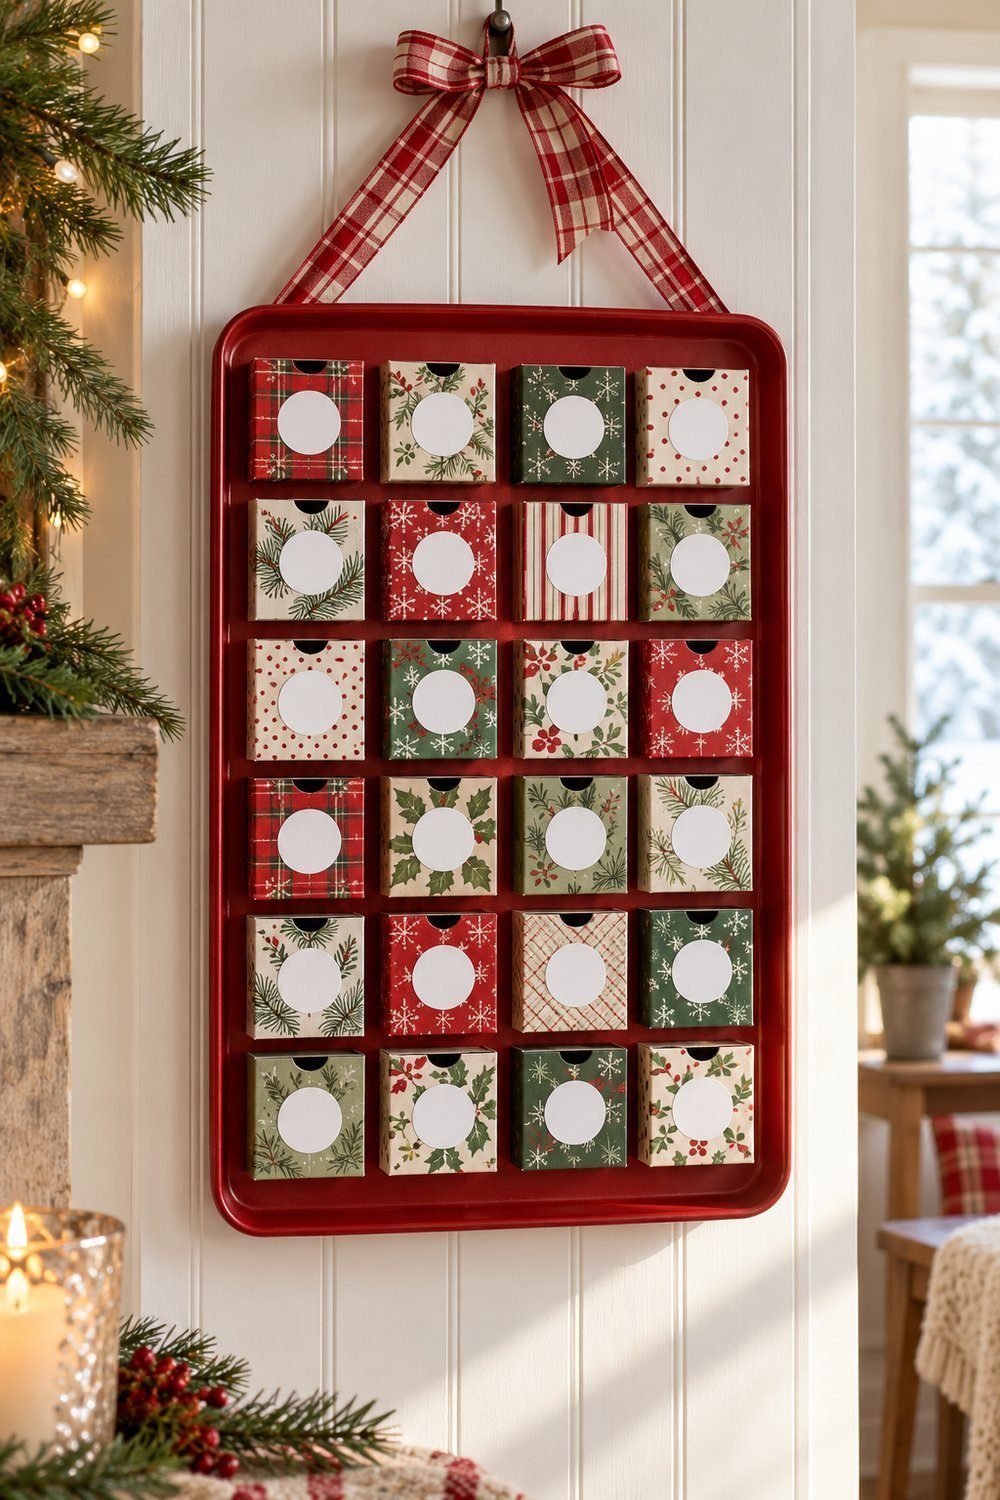
Patterned matchboxes become small drawers against a painted metal cookie sheet. Drill hanging holes and paint the sheet, then cover the emptied boxes with scrapbook-paper bands. Add numbered circles and magnets, reinforcing the magnet adhesive with hot glue as the author did. A ribbon completes the hanger. The compact arrangement suits a wall where you want a colorful, orderly countdown, and the separate drawers hold either a tiny candy or a folded activity slip. Empty the matches into suitable storage before starting the craft.
You'll need: 24 empty matchboxes, paper bands cut to 2 1/8 × 4 1/2 in (5.4 × 11 cm), a 1 in (2.5 cm) circle punch, magnets, adhesive, ribbon, and a metal cookie sheet.
Tutorial by Jennifer, The Craft Patch
On the tree or a branch
Hanging containers can become the ornaments themselves. These projects offer quite different silhouettes: open paper cones, closed cardboard boxes, and soft denim stockings on a branch-built tree. Choose the shape you enjoy repeating, then work through the cutting, numbering, and hanging in batches. For another paper project beside the display, try paper Christmas stars.
Scrapbook-paper cone tree
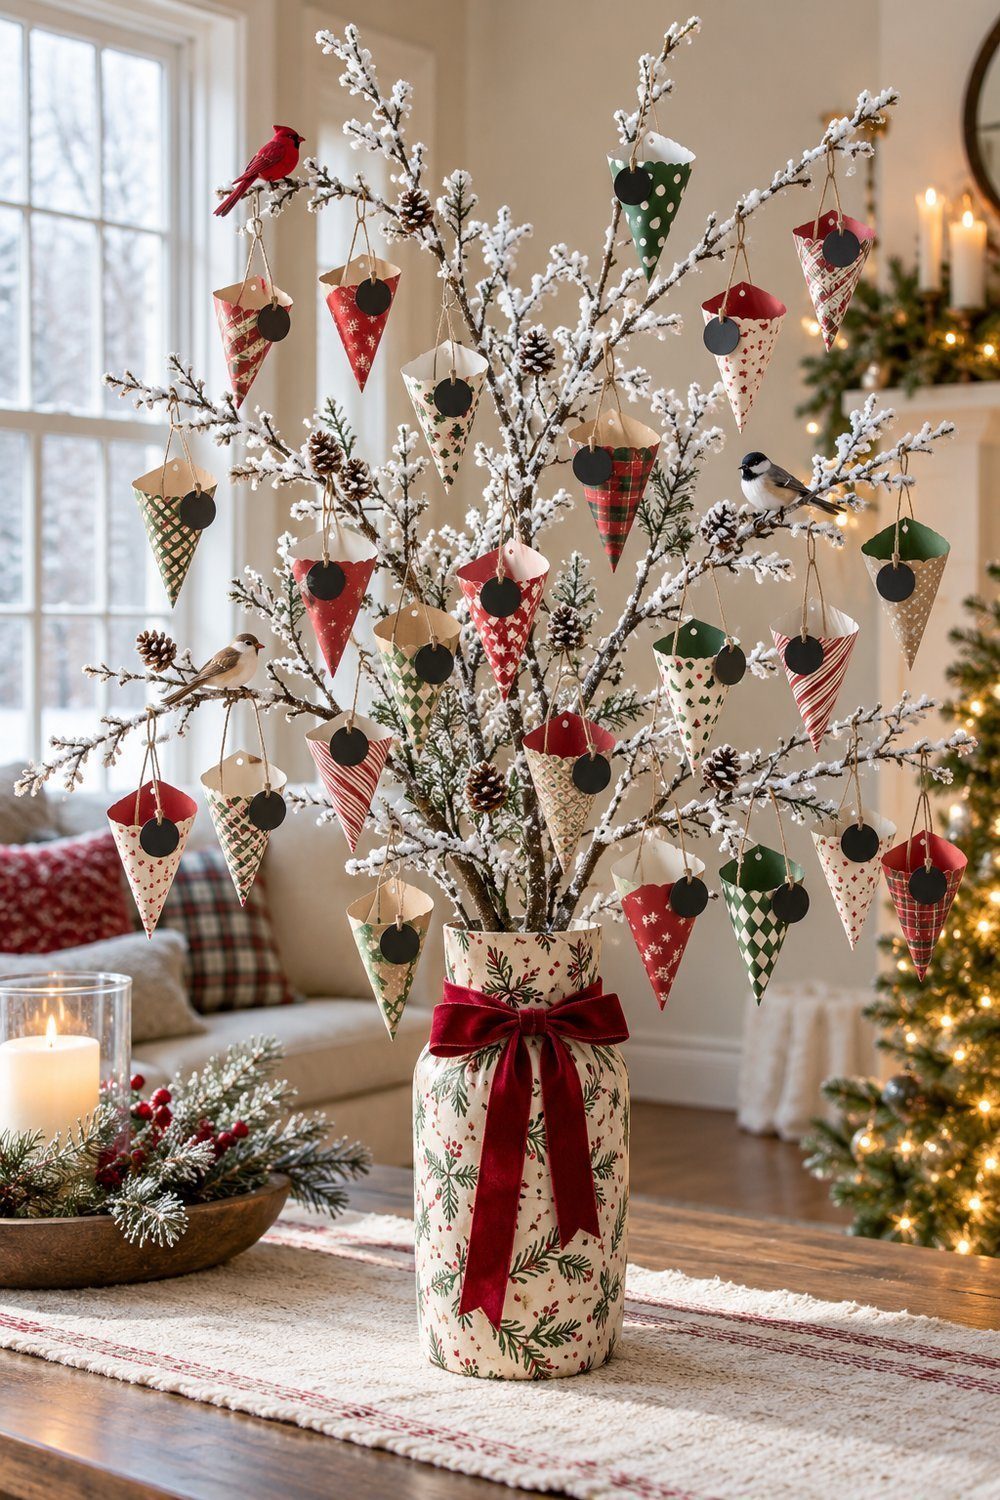
Snowy stems in a vase carry a lively collection of patterned paper cones. Fold scrapbook paper diagonally and cut it into triangles, then form and secure the cones using the tutorial's pictured method. Punch a hanging hole in the back and attach a number label before tying each cone onto the stems. The open tops show a hint of the surprises inside. This small tree suits a corner where the vase can stand, with the cones hanging freely around it instead of lying across a surface.
You'll need: Paper for 24 cones, twine, a hole punch, number labels about 1 in (2.5 cm) across, a vase, snowy stems, and ribbon.
Tutorial by Cassie, Hi Sugarplum!
Cardboard-tube boxes with tassels
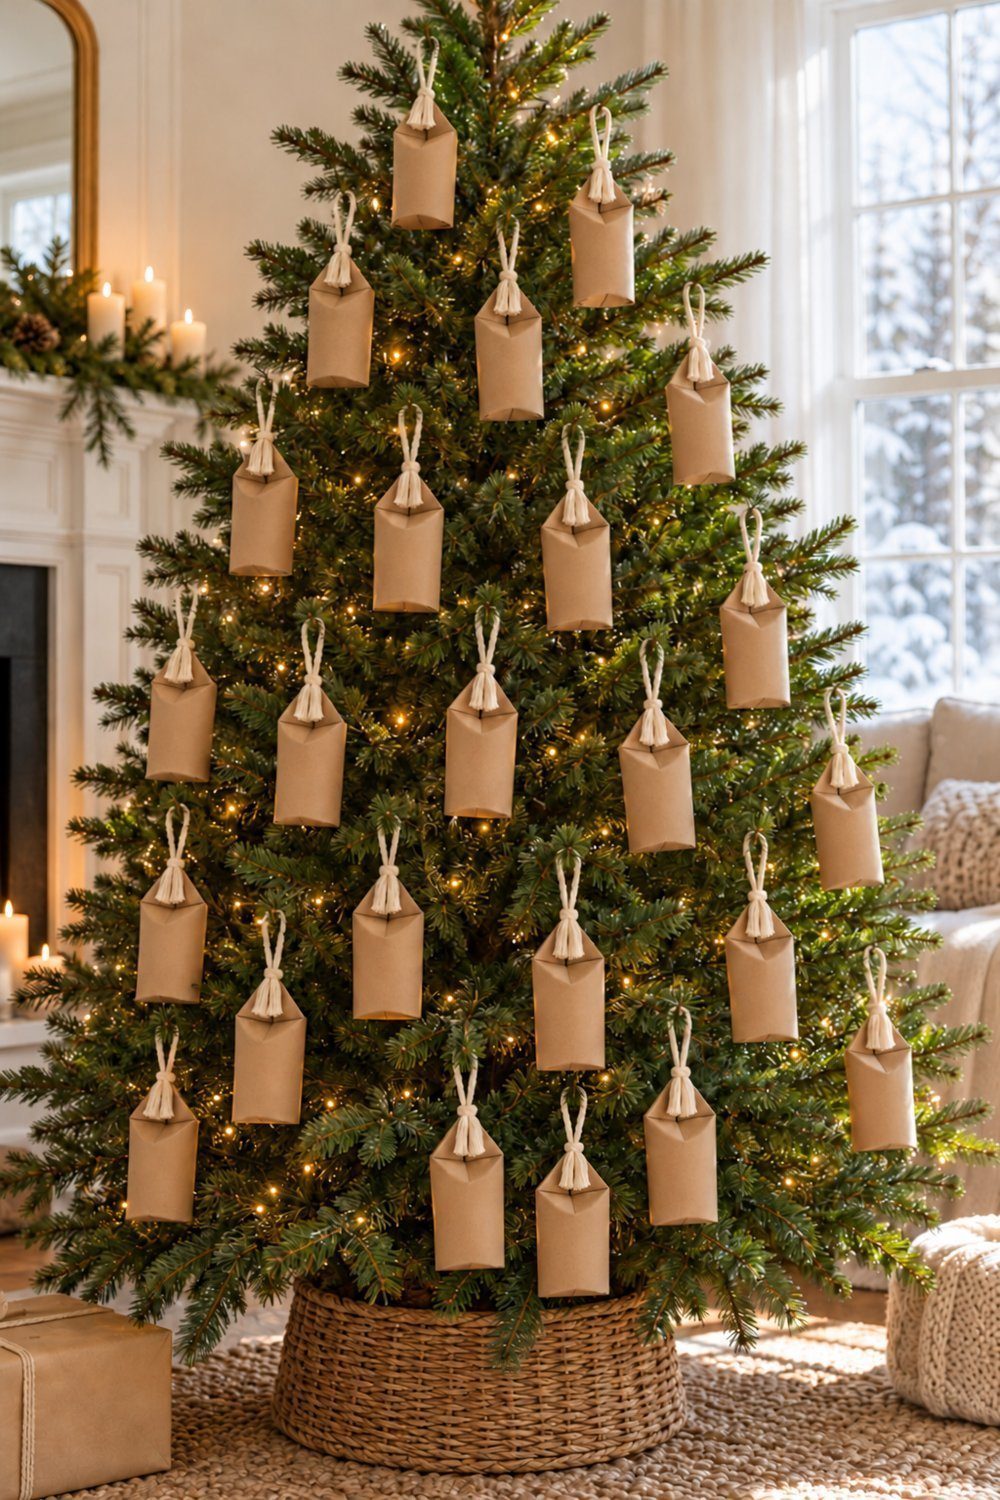
Plain cardboard, black handwritten dates, and cotton tassels give these little hanging boxes a quiet, natural look. Trim the tubes, flatten and staple the bottoms, then squeeze the top edges in the opposite direction to form a triangular package. Add the surprise before stapling a rope loop into the top. Fray a short piece of rope into a tassel beneath the loop. The tutorial suggests hanging the boxes on a Christmas tree or branch; open each day's package from the bottom to reach the treat.
You'll need: Cardboard tubes, cotton rope, a black marker, and a stapler. Trim about 3/4 in (2 cm) from each tube; the published making range is 30–60 min.
Tutorial by Now That's Peachy editorial team, Now That's Peachy
Denim stockings on a branch tree
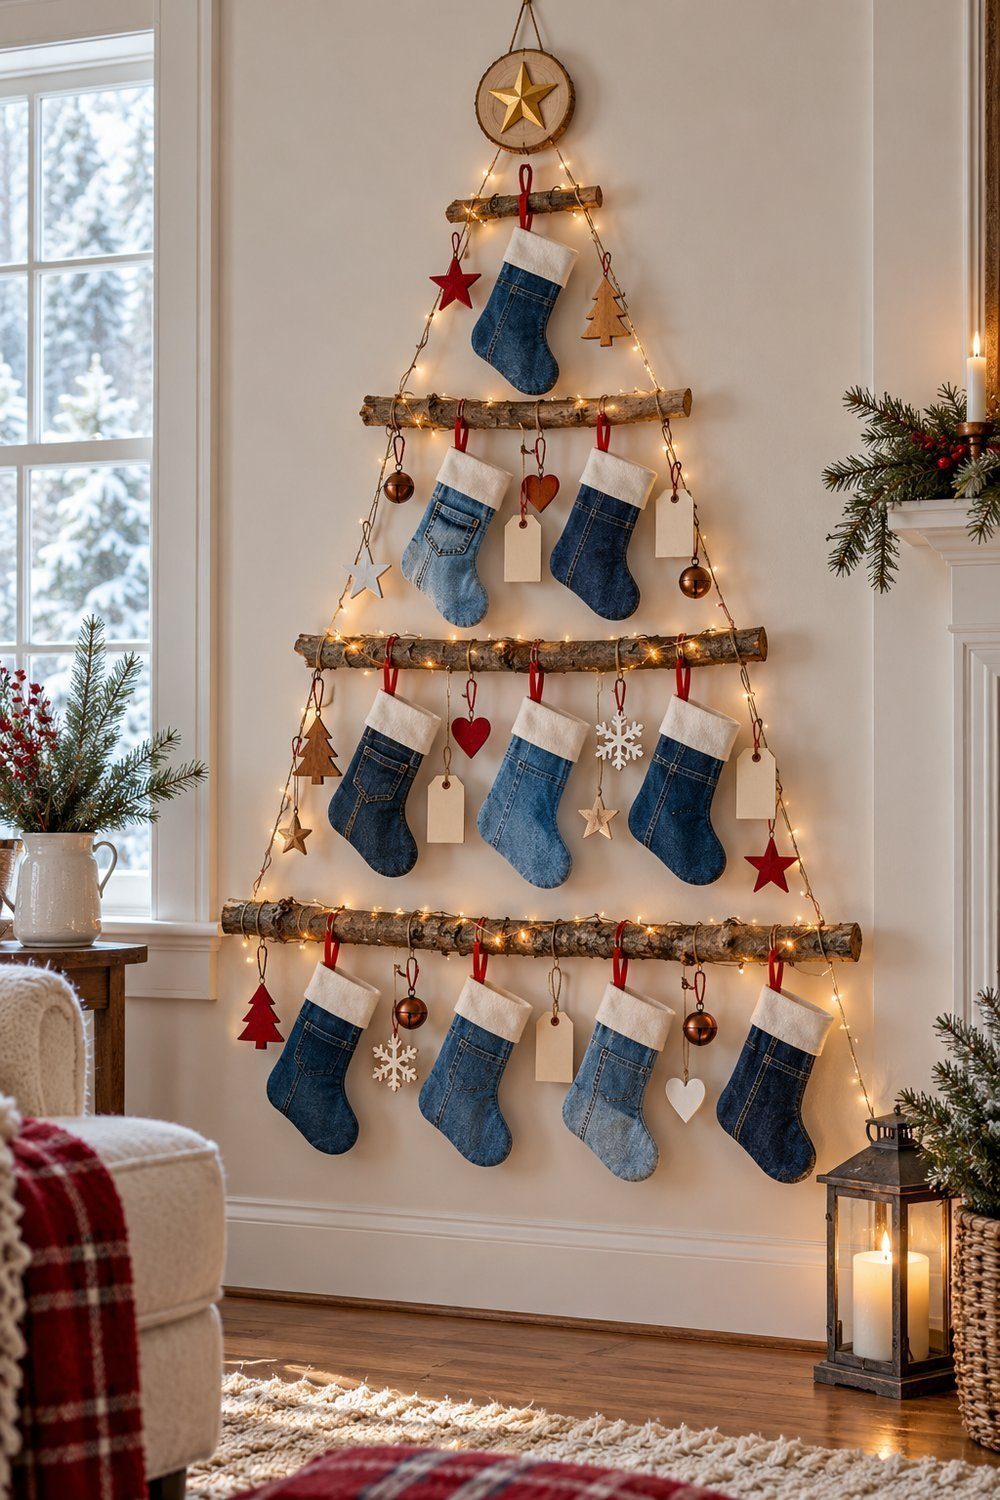
Old jeans provide a collection of blue shades for this branch-tree calendar, finished with white cuffs, red hanging loops, and little wooden decorations. Sew the cuffs onto denim strips, add ribbon loops, and stitch paired stocking shapes before turning them right side out. Cut branches into graduated lengths and connect them with wire to create the tree. Hang the stockings from its branches with numbered luggage tags. The mix of faded denim and pale wood suits a relaxed room where the handmade texture can stand out.
You'll need: Denim, white webbing, stocking templates, numbered tags, branches, wire, and ribbon loops cut from 7 in (18 cm) lengths; the wooden decorations are about 1 in (2.5 cm) across.
Tutorial by Vicky Myers, VickyMyersCreations
On the stairs, a door or the mantel
A familiar part of the house can carry the countdown without a separate stand. Here, a string of bags follows the mantel, a pocket organizer uses the height of a door, and paper bulbs make a festive garland. Choose the position before assembling so that opening a day's container feels like part of the morning routine.
Stamped muslin bag garland
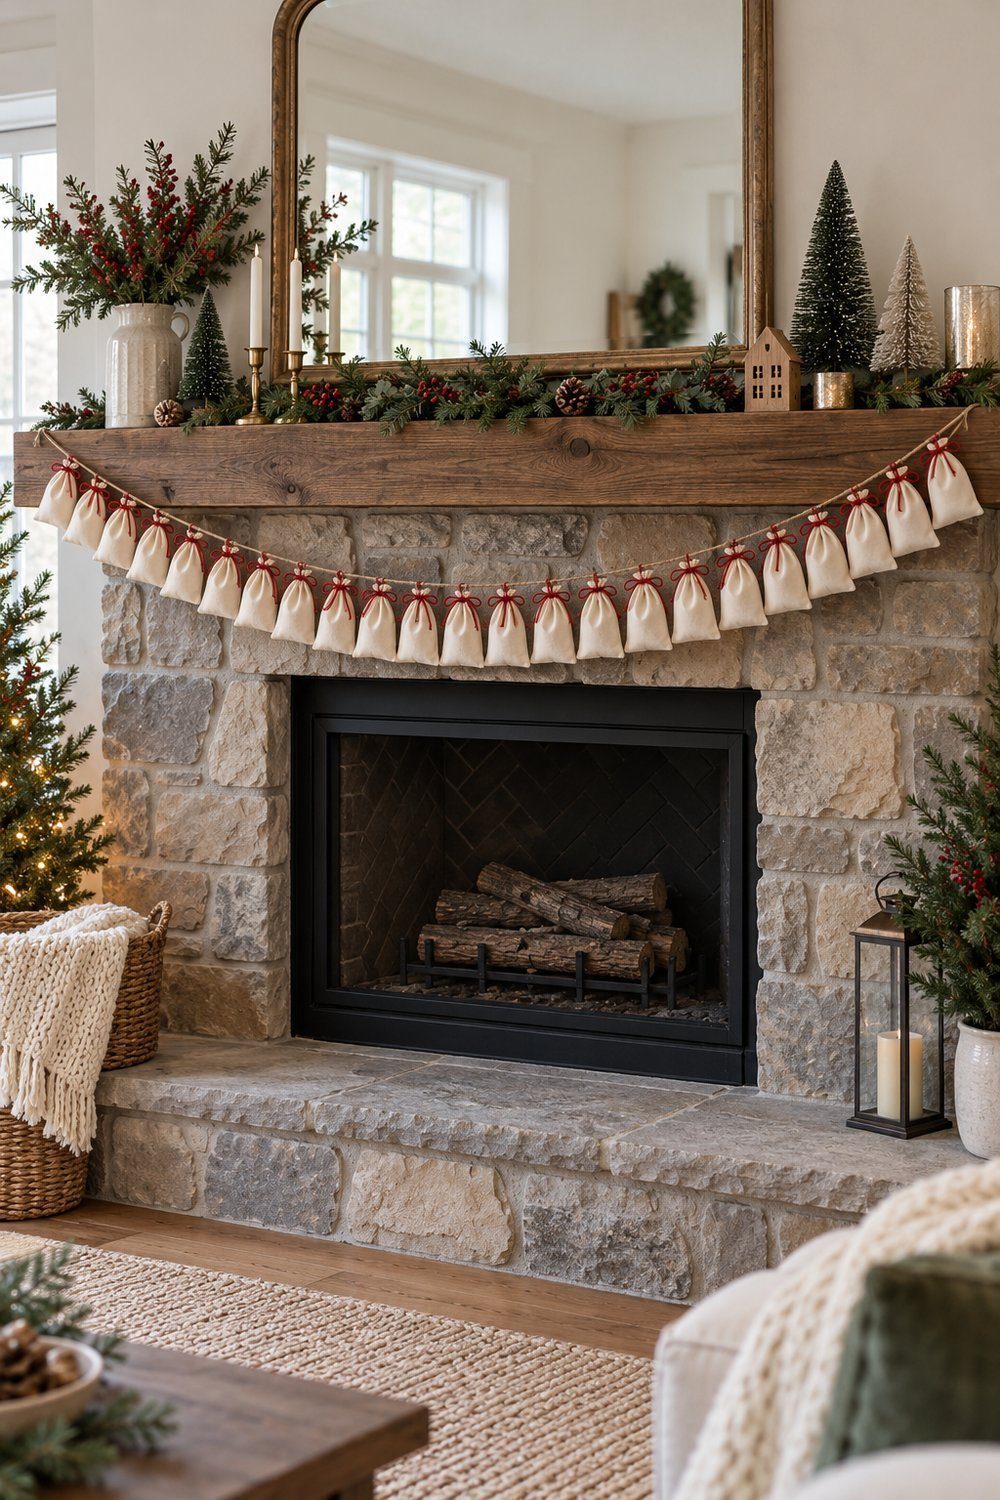
Cream muslin bags with red drawstrings and stamped dates make a soft garland along the mantel. Lay out the bags, stamp the numbers in batches, and tie them onto a long string. The source uses dates through Christmas Day; use the first 24 bags for a Christmas Eve finish. Permanent ink and fabric bags make this a practical choice for packing away and refilling. Follow the author's fireplace practice by lifting the garland onto the mantel when a fire is burning.
You'll need: Muslin bags about 3 × 5 in (8 × 13 cm), number stamps, an acrylic stamping block, permanent ink, twine, and scissors.
Tutorial by Gemma, The Sweetest Digs
Gold-numbered door pocket calendar
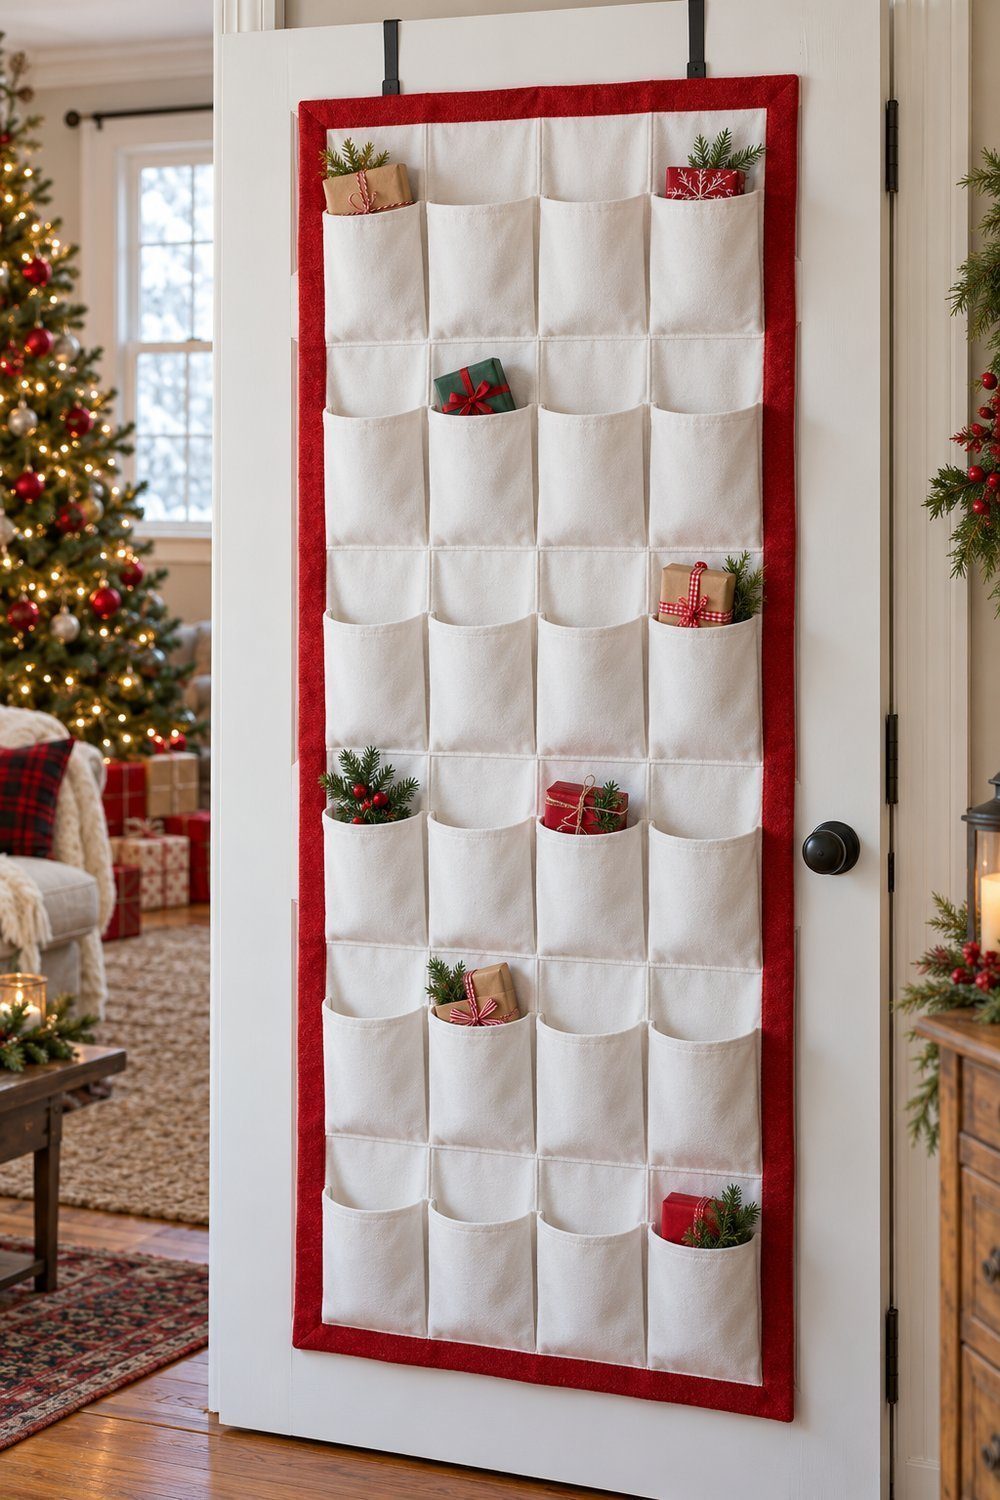
A white over-the-door shoe organizer becomes a generous calendar with gold numbers and a broad red wool border. Stencil the dates onto the pocket fronts, cut strips of wool, and glue them around the edges before trimming the border neatly. Fill the pockets with concealed packages or family activity notes. This is the choice for a door where a long vertical display fits naturally. The handmade work is in the painted numbers and fabric finish, while the ready-made organizer supplies the pockets.
You'll need: A white 24-pocket organizer, gold paint, reusable number stencils, a spouncer, hot glue, and 4 red wool strips about 5 in (13 cm) wide.
Tutorial by Emily, Elizabeth Joan Designs
Colorful paper lightbulb garland
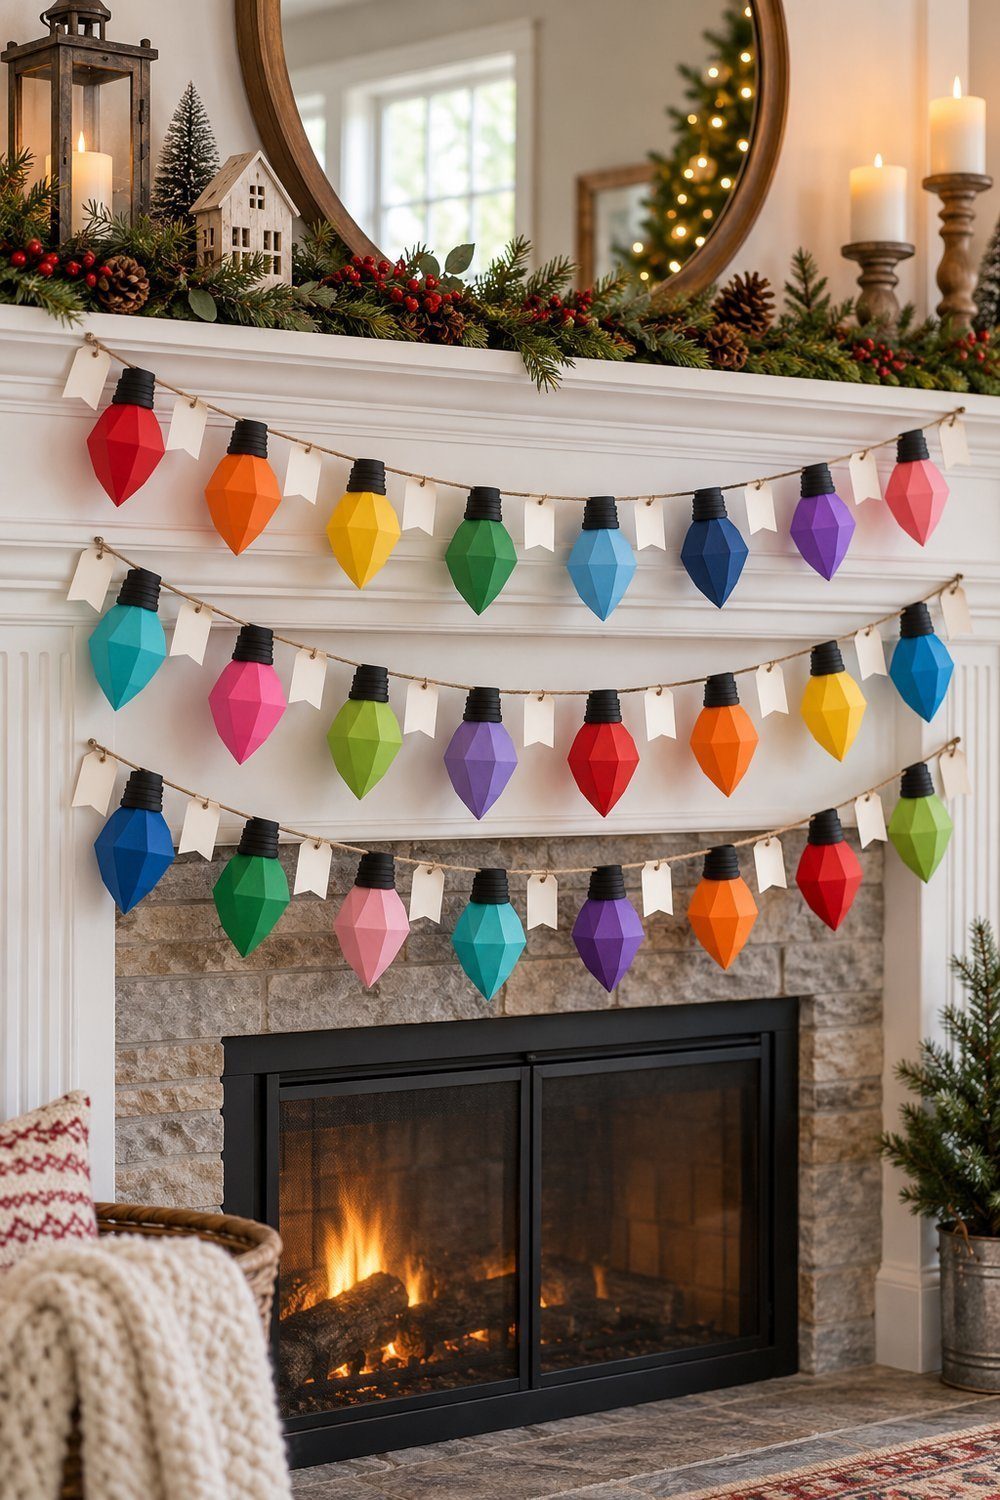
Faceted paper bulbs with black caps turn small treat boxes into a bright garland. Cut and score the bulb shapes, glue the side tabs, and draw their tops together with twine. Add the black caps and string the bulbs with their numbered flags. The written tutorial permits hanging the finished strand around the home; a mantel is a cheerful place to display it. Its instructions are free to read, while the linked bulb-and-flag template is sold separately. Choose this project when bold color is the attraction.
You'll need: Colored and black paper, the bulb and flag templates, glue, scissors, a scoring tool, a hole punch, and twine lengths of 6 in (15 cm) for closing the bulbs.
Tutorial by Brittany Jepsen, The House That Lars Built
On a table or a shelf
A surface display keeps the daily surprises together and gives each little container a stage. Paper houses form a village, a baking tray supplies a grid, and covered jars create a collection of different heights. Choose the project that fits the surface already available, with enough room to lift the day's lid or cover comfortably.
Kraft-paper advent village
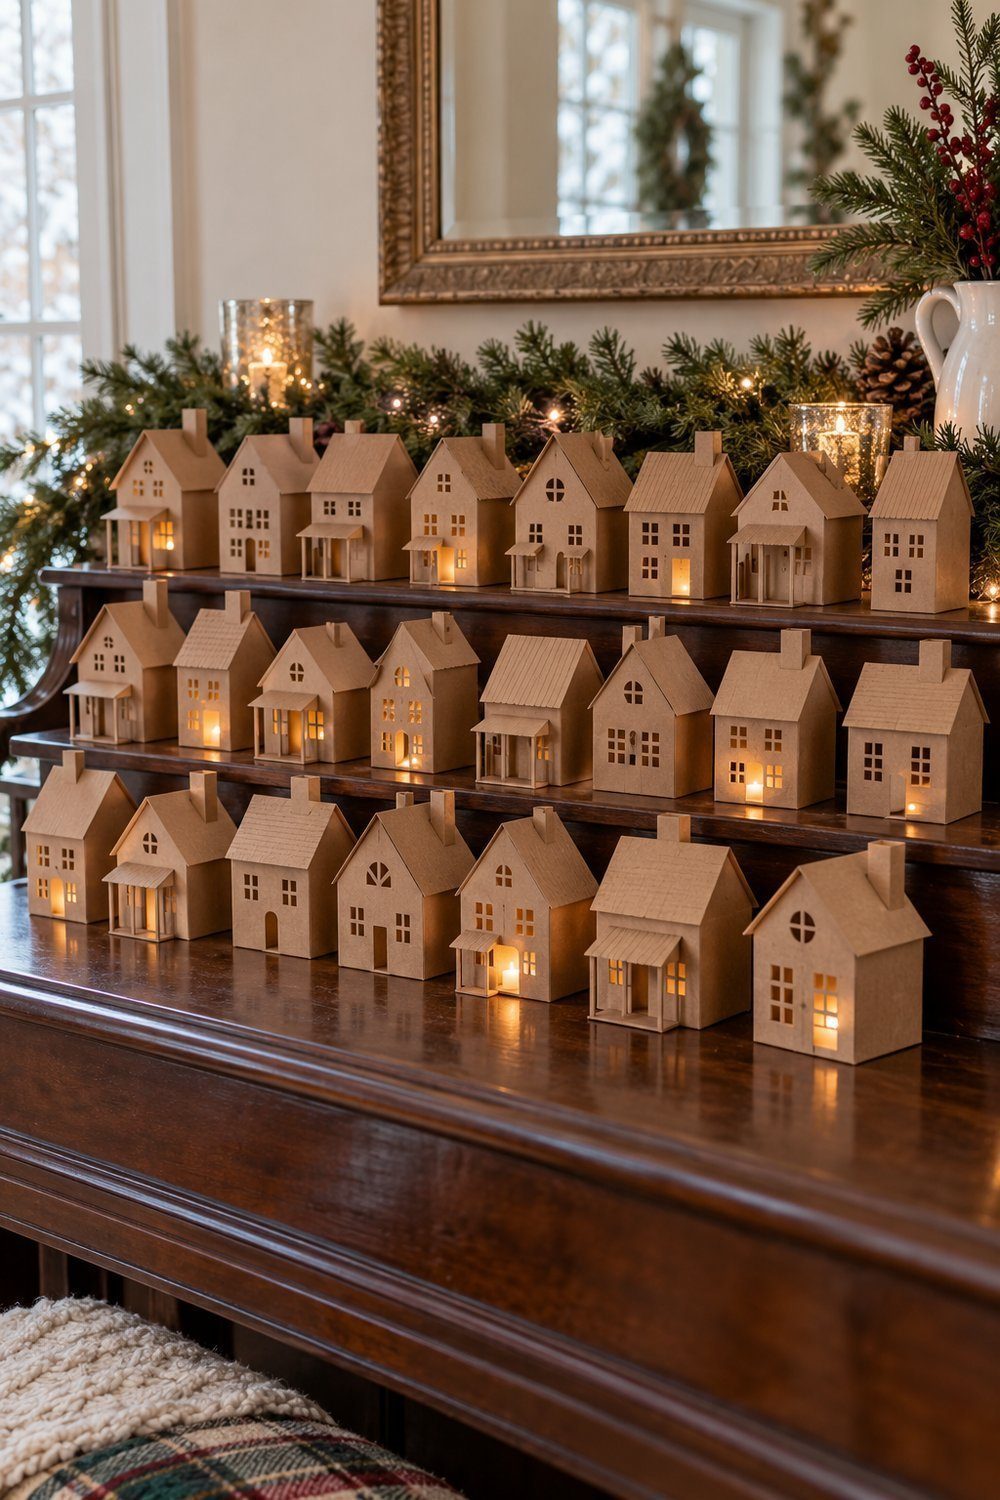
Small kraft-paper houses bring a quiet village scene to a shelf or piano top, the position planned by their designer. Download the cutting files, cut and release the pieces, then fold and glue their tabs. The machine files include cutout dates; the alternative PDF houses take added numbers. The source supplies a Christmas Day set, so select the first 24 numbered houses for a Christmas Eve countdown. Tuck a small candy or a scripture slip beneath each house, or follow the author's flameless-light display.
You'll need: Kraft cardstock measuring 8 1/2 × 11 in (22 × 28 cm), the free house files, a cutting machine or the alternative PDF, and a low-temperature glue gun.
Tutorial by Delia, Delia Creates
Magnetic muffin-tray calendar
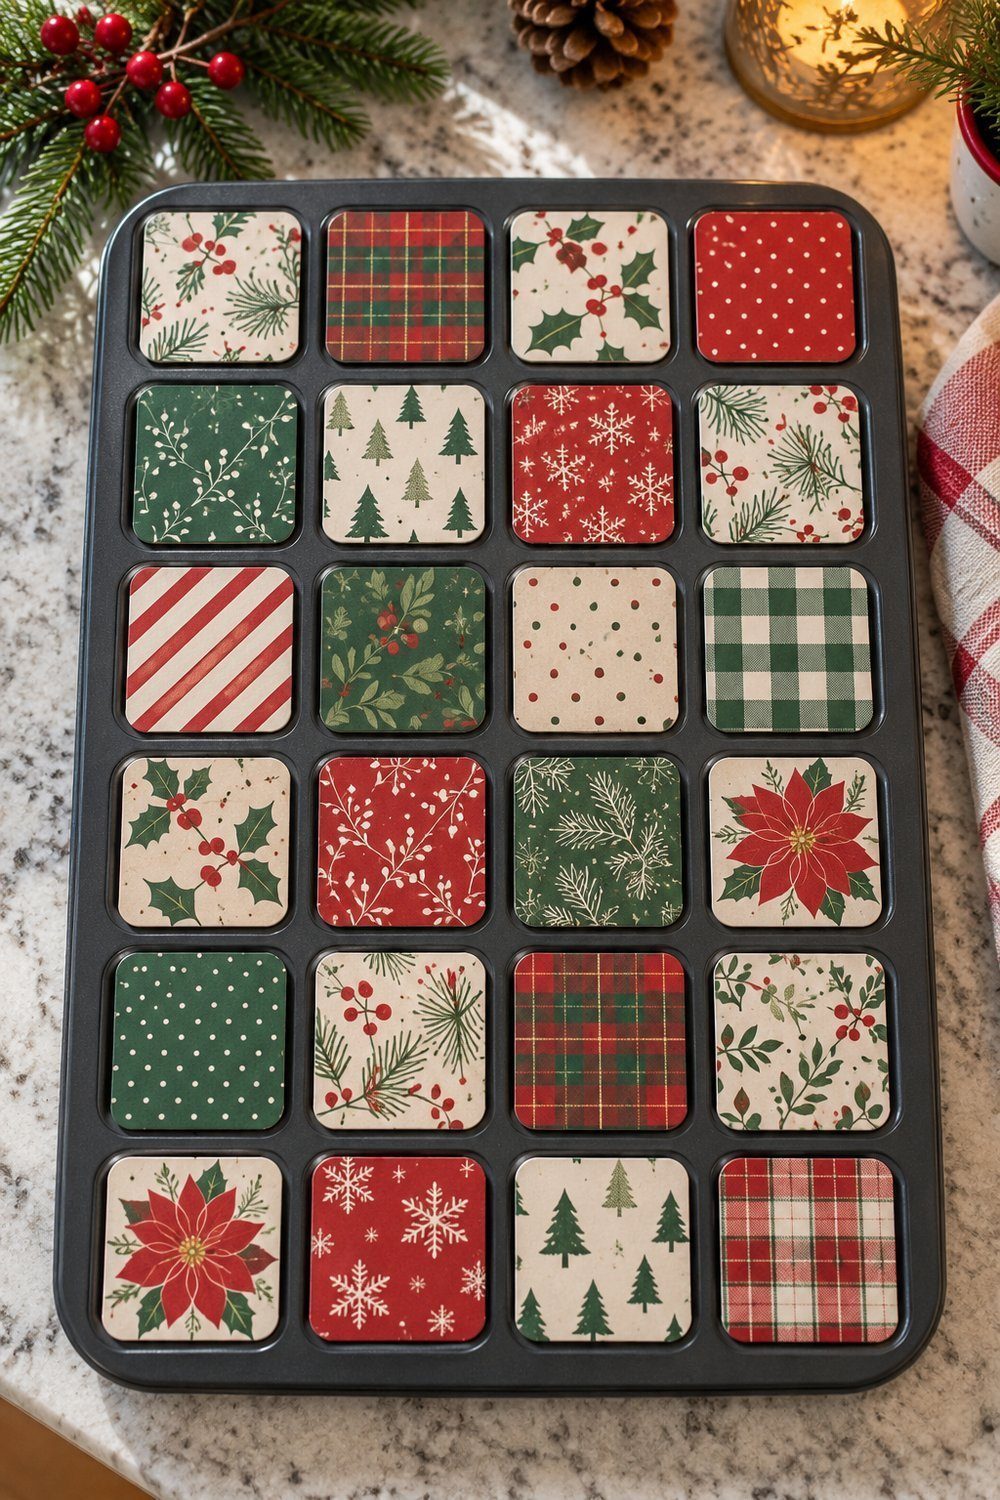
A mini muffin pan supplies a tidy grid of spaces behind patterned, numbered paper covers. Cut the paper squares, decorate or number them, and attach adhesive magnetic backing. Fill the wells and place the covers over them. Display the tray flat on the counter or on a small stand, as the tutorial suggests. The individual covers make a satisfying daily reveal, and the metal pan provides the structure. Choose the printable covers or make your own to suit the colors already in the room.
You'll need: A 24-well mini muffin tin, 24 cardstock squares sized to cover its wells, adhesive magnetic backing, scissors, and markers or number stickers.
Tutorial by Family Fun in Omaha editorial team, Family Fun in Omaha
Marble-and-gold jar calendar
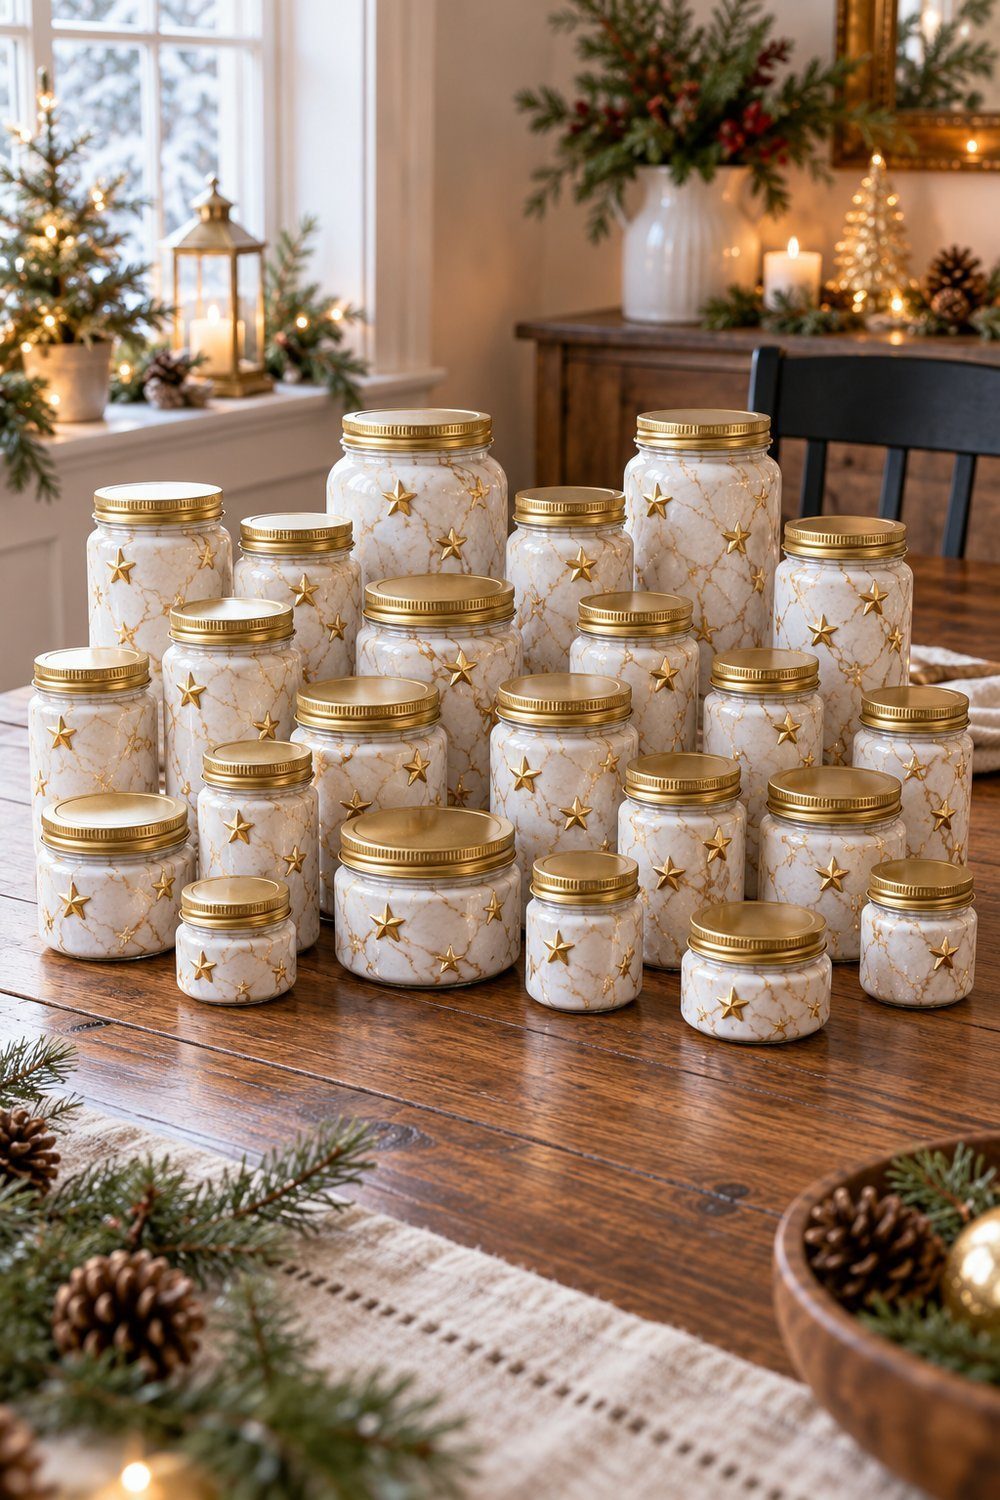
Recycled screw-top jars look like a coordinated collection once wrapped in white marble-pattern film and gold dates. Clean away labels and grease, measure each jar, then cut film rectangles with a little extra for overlap. Smooth the film around the glass with a scraper and finish with gold numbers and stars. The mixed jar sizes give this tabletop calendar its varied outline. Choose it when you already have a collection of jars and want a polished finish with a published making time.
You'll need: 24 screw-lid jars, marble and metallic gold adhesive films, a measuring tape, scissors, and a scraper. The source lists 30 min making time plus 10 min preparation.
Tutorial by d-c-fix editorial team, d-c-fix
What to put inside
Match the surprise to the container. The tutorials above use small candies, tiny toys, activity notes, and ornaments. The envelope project suggests making Christmas cards, a hot chocolate and popcorn night, paper snowflakes, and a drive to see lights. The felt-pocket hanging makes the ornaments themselves the daily surprise, gradually decorating its fabric tree.
For non-food days, borrow the muslin calendar's ideas of making a card or finding a toy to donate. The door organizer also holds family activities, so a slip of paper can carry the day's plan. Keep going: try DIY lace Christmas decorations, explore walnut-shell Christmas decorations, or plan another making session with Christmas decorations to make at home.