Paper Christmas stars: easy origami ideas


Make paper Christmas stars in four groups: one sheet or strip, two squares, a handful of folded or woven pieces, and paper bags. The lucky star takes under 5 minutes; Red Ted Art also describes a paper-bag star made in less than five minutes. For the showpiece, choose the 3D eight-point star from two squares: folded points give it depth, and glue joins the halves. Start with the paper count, then choose the shape that suits your tree, window, or garland.

Paper, size and tools
Match the paper to the tutorial rather than buying a single stock for everything. Paula Wilson recommends lightweight paper for her dimensional star, Jean Miller uses translucent kite or tissue paper for windows, and the woven German star needs long strips. The table gives starting materials for a selection of projects; sizes describe the paper, rather than a promised finished ornament size. Gather the cutting and joining tools listed with your chosen project. An adult should handle craft knives and scoring. For another handmade texture alongside your stars, explore DIY lace Christmas decorations.
| Star | Paper | Size | Source |
|---|---|---|---|
| Lucky star | Paper strip | 9 x 0.4 in (23 x 1 cm) | Origami.me |
| Accordion fan star | Lightweight plain paper | 6 x 11 in (15 x 28 cm) | Education.com |
| Dimensional eight-point star | Lightweight paper squares | 5 or 6 in (13 or 15 cm) | Thoughts & Whimsy |
| Children's joined star | Matching squares; sticky notes suggested | 5 cm or 3 in (7.5 cm) | Origami Guide |
| Froebel star | Paper strips colored on both sides | 1/2 x 12 in (1.5 x 30 cm) | Origami Resource Center |
| Window star | Kite or tissue paper squares | 6 in (15 cm) | Art of Homeschooling |
One sheet or one strip
These projects keep the paper count low while giving you quite different silhouettes. Choose a puffy miniature, a folded pentagon, or an accordion fan. A low sheet count describes the starting material; the pentagon still calls for careful folding, while the fan adds cutting and fastening.
Puffy lucky star

A little inflated star brings a rounded shape to the collection. Tie a loose knot in the strip, flatten it into a pentagon, wrap the long end around the edges, then tuck and pinch to puff it up. Kelly Tan labels this beginner level and gives a folding time under 5 minutes. Display the tiny stars in a jar, or use them as small accents among your paper star ornaments. The jar is a styling suggestion here, rather than a hanging method from the tutorial.
You'll need: 1 paper strip; the recommended-paper box gives 9 x 0.4 in (23 x 1 cm). Its introduction suggests a different strip size; this version follows the box.
Tutorial by Kelly Tan, Origami.me
Pentagon-folded star
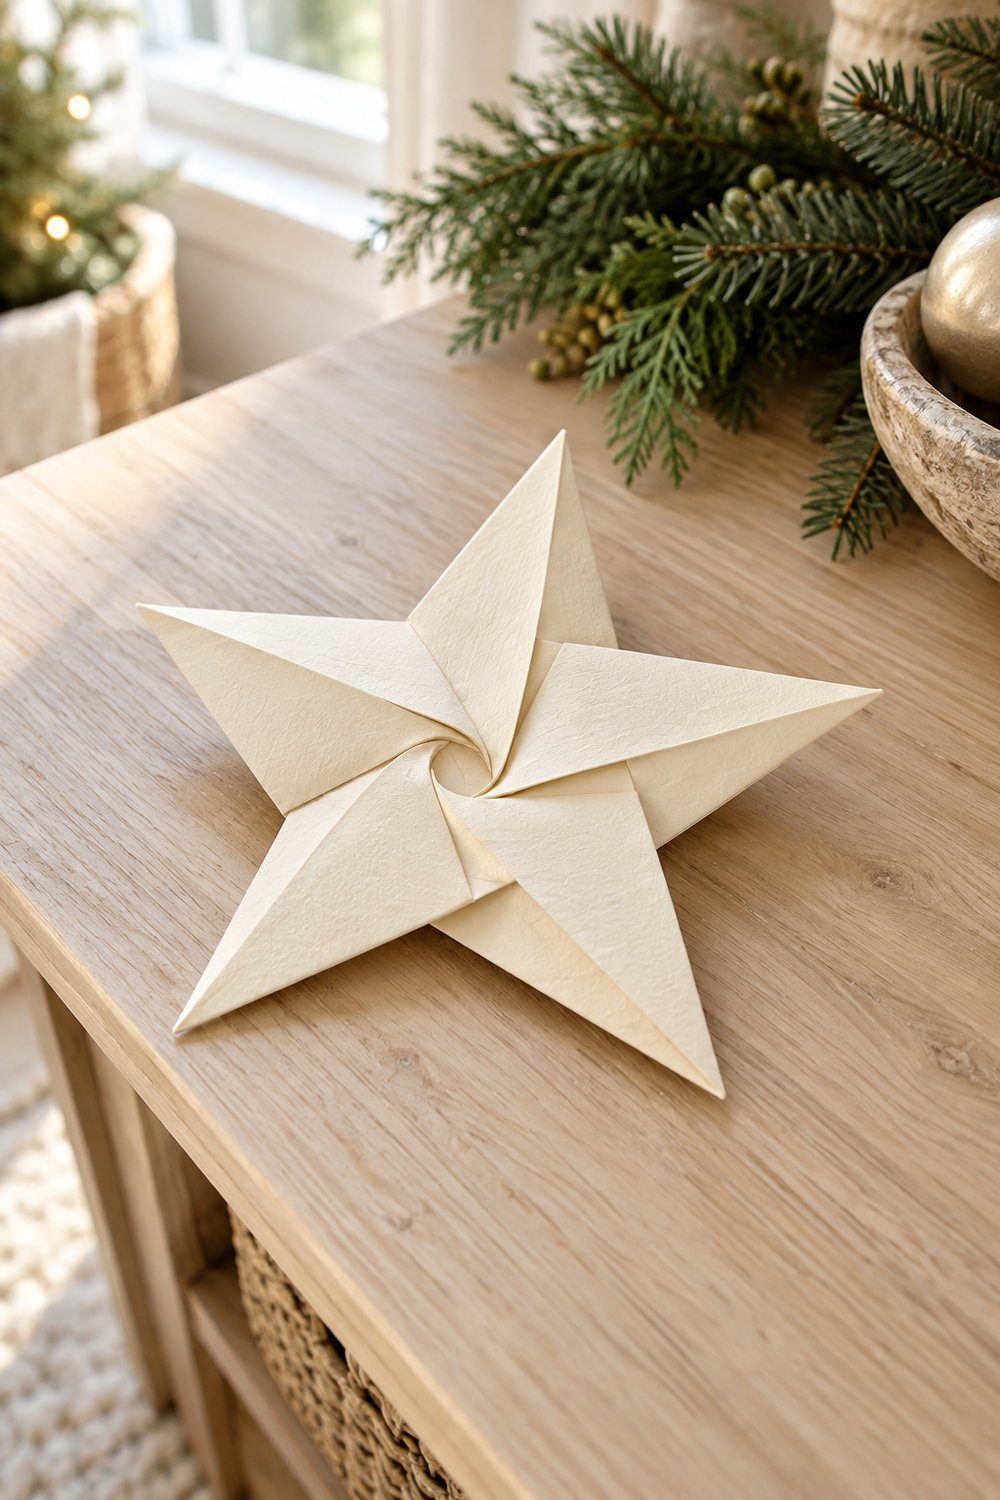
Christine's folded star has a crisp, overlapping center and a familiar five-point outline. Begin with a paper pentagon, crease through its points, fold the sides, and collapse the prepared folds before finishing the center. Her page gives illustrated instructions but leaves the difficulty unrated. Use the photographs for the collapse, where the paper changes shape. The tutorial mentions a Christmas tree-topper use; here, the same folded shape is shown as a small tree accent, with its paper size left open.
You'll need: 1 paper pentagon with 5 points. Pentagon preparation is linked separately by the author; this tutorial begins with the prepared shape.
Tutorial by Christine, Christine's Crafts
Accordion fan star
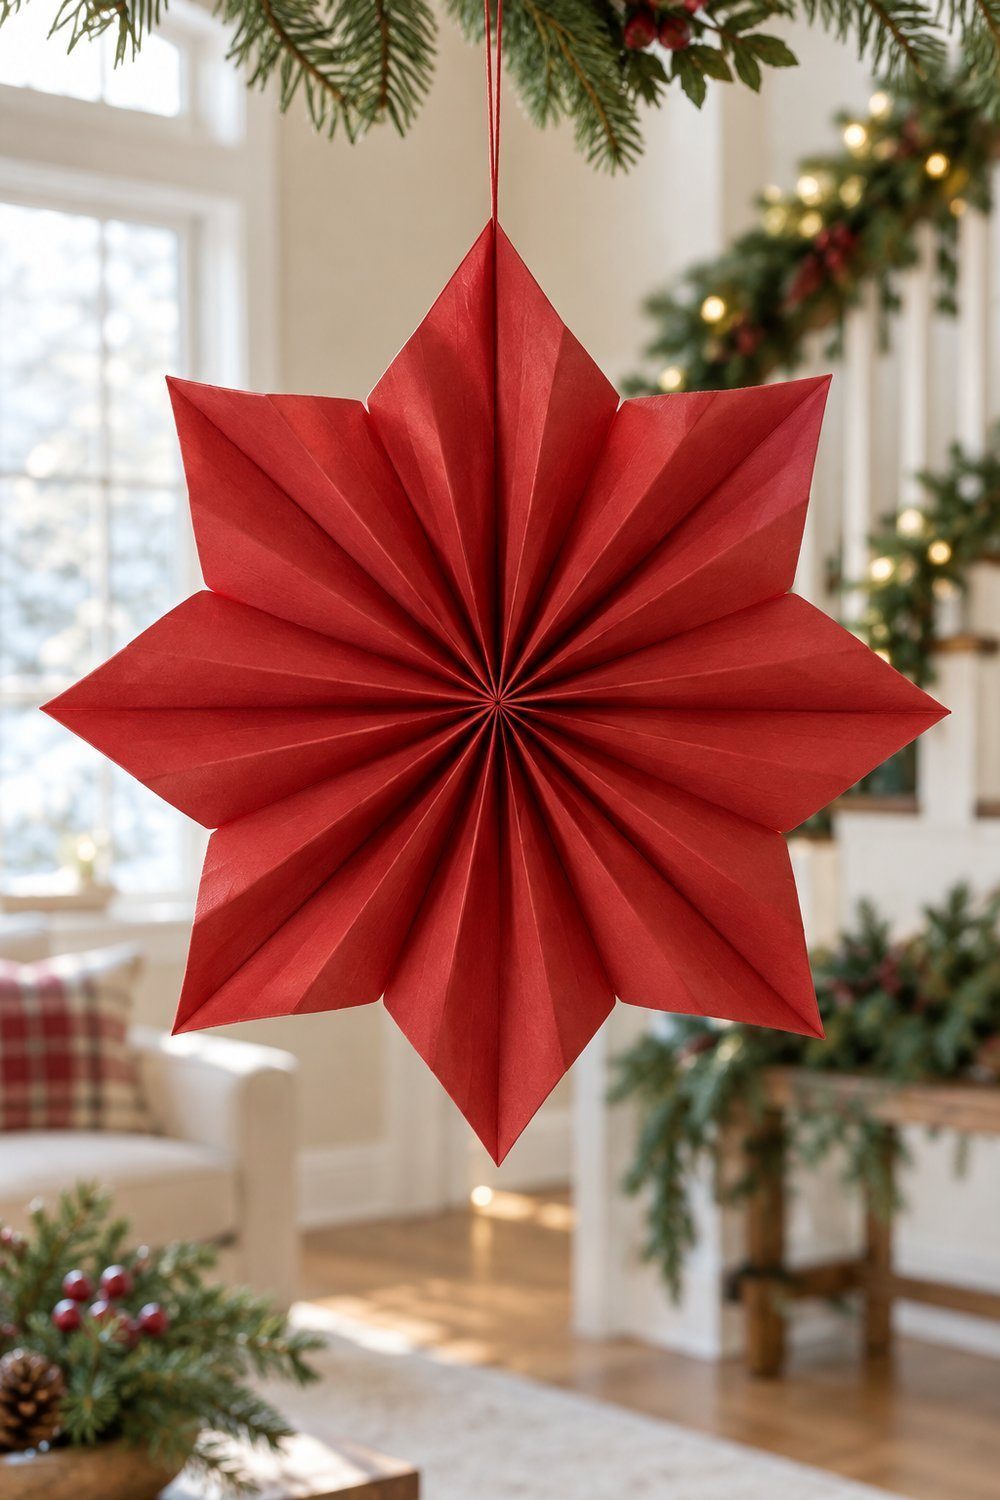
Pleated paper opens into a round, pointed fan with a visible accordion rhythm. Trim the sheet, fold it back and forth, staple the middle, then angle-cut the ends and spread them into a circle, securing the meeting edges with tape. Education.com presents this as a third-grade activity rather than assigning a difficulty rating. The tutorial uses patriotic colors and explicitly suggests red and green for Christmas; here, use that Christmas adaptation. Hang individual fans or link the punched points into a garland.
You'll need: 1 lightweight sheet trimmed to 6 x 11 in (15 x 28 cm), scissors, ruler, pencil, stapler, tape, hole punch, and string.
Tutorial by Education.com
Two squares: a 3D star step by step
The eight-point star is the strongest showpiece choice here: its hollow points create a sculptural outline from a modest paper count. Follow the cut-and-fold method below, then consider the flatter joined star or the five-point tree topper. These projects each start with two squares, but use different folds and joins. Keep each tutorial's method together, especially when forming the topper's glue flaps. The showpiece uses cutting and glue as well as folding, despite the origami wording in the original title.
Dimensional eight-point star
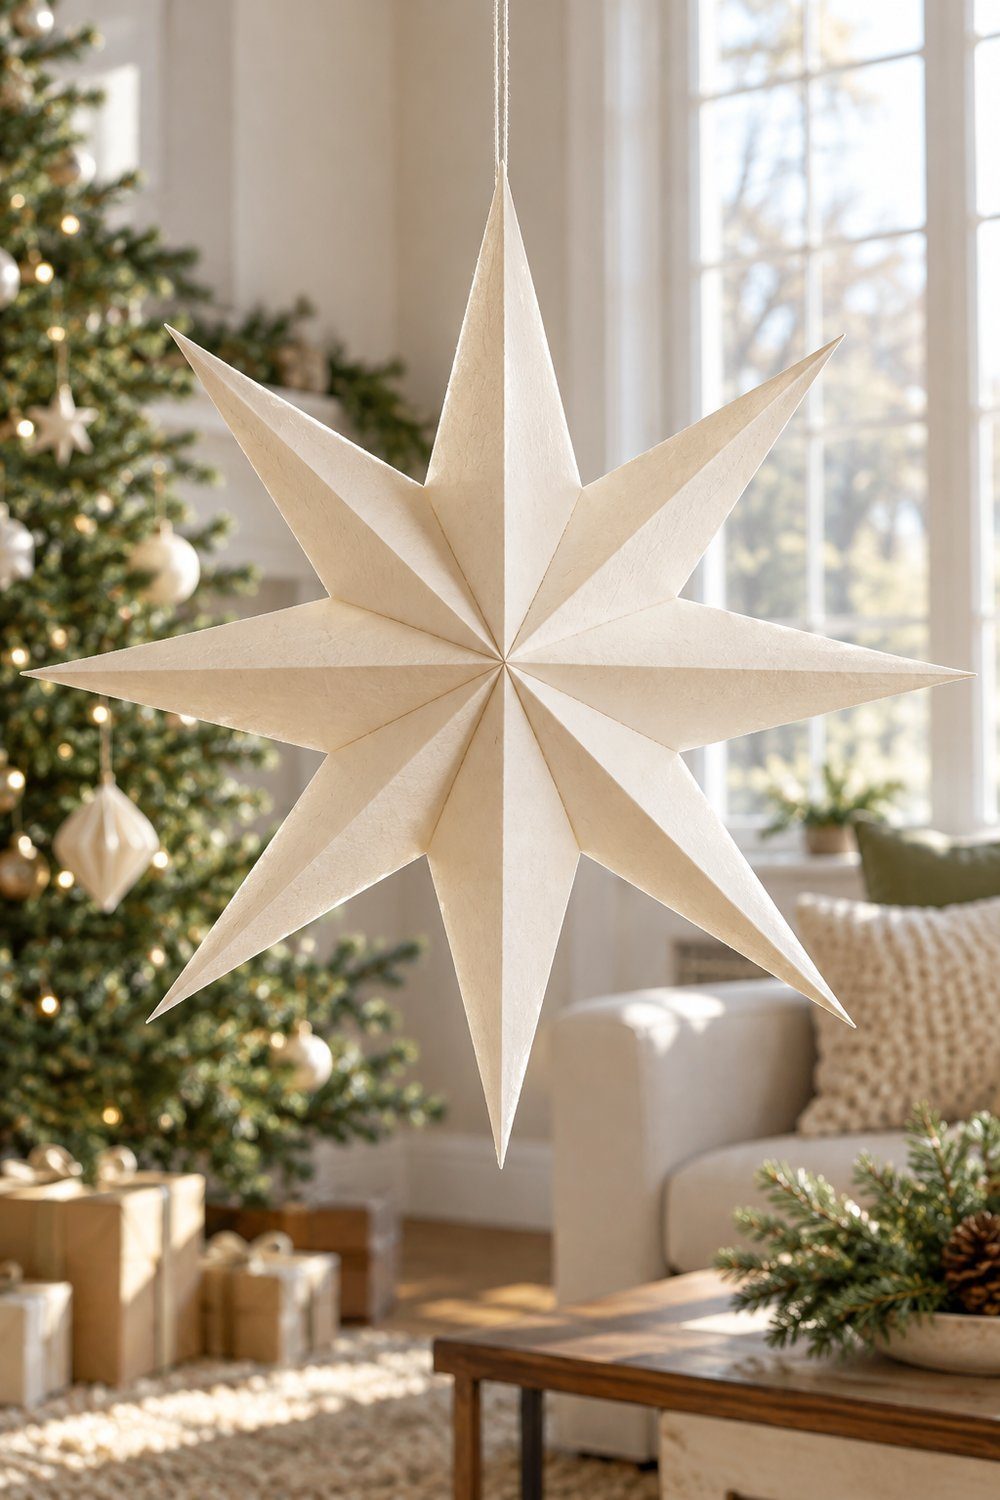
Tutorial by Paula Wilson, Thoughts & Whimsy
Raised points make this star look substantial while the lightweight paper keeps its folds manageable. Crease each square, cut along the side folds, glue the folded flaps into hollow points, and join the completed halves. Wilson recommends starting with 5 or 6 in (13 or 15 cm) squares and calls the stars 'a cinch to make'. Her display suggestions include a window or a glass bowl. The tutorial presents year-round decorations after the holidays; here, the same construction becomes a Christmas hanging star.
You'll need: 2 lightweight paper squares and the source's joining and hanging materials below, plus scissors for its cutting step.
- 2 squares of lightweight paper, initially 5 or 6 in (13 or 15 cm) across.
- Glue.
- Ribbon or twine for hanging.
- Optional complementary paper designs for the halves.
- Fold a square edge to edge in each direction, opening it between folds.
- Crease along both diagonals and open the square again.
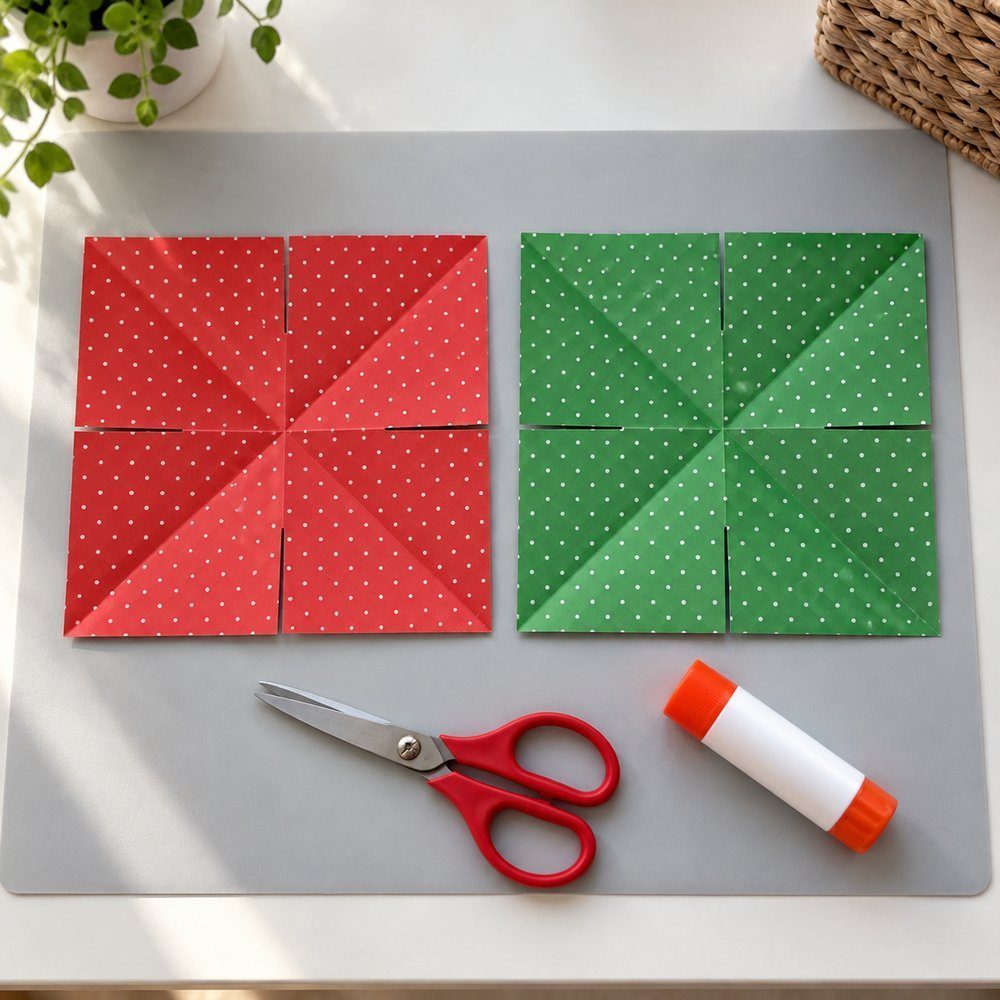
- Cut inward along the side creases, stopping just short of halfway to the center.
- Bring the newly cut edges toward the diagonal creases to outline the points.
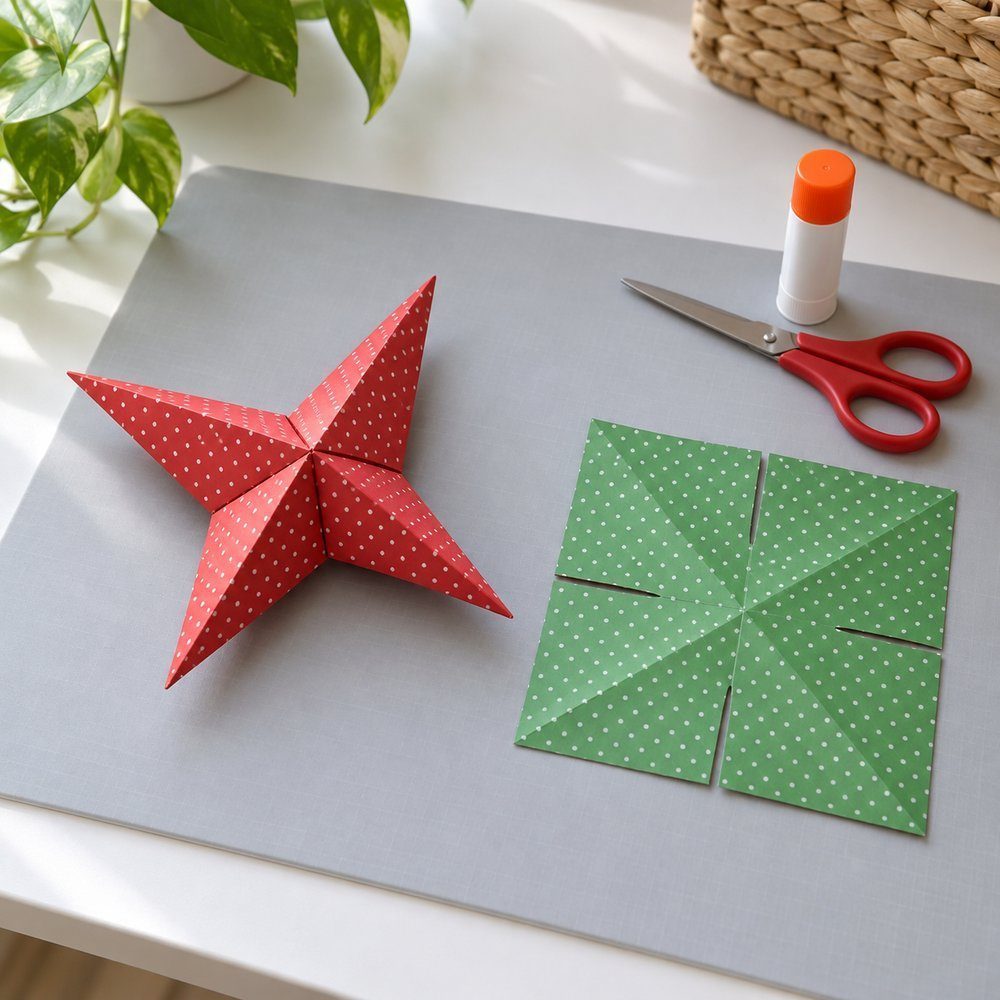
- Overlap and glue the flaps at each corner to raise the hollow points.
- Repeat the folding, cutting, and gluing with the remaining square.
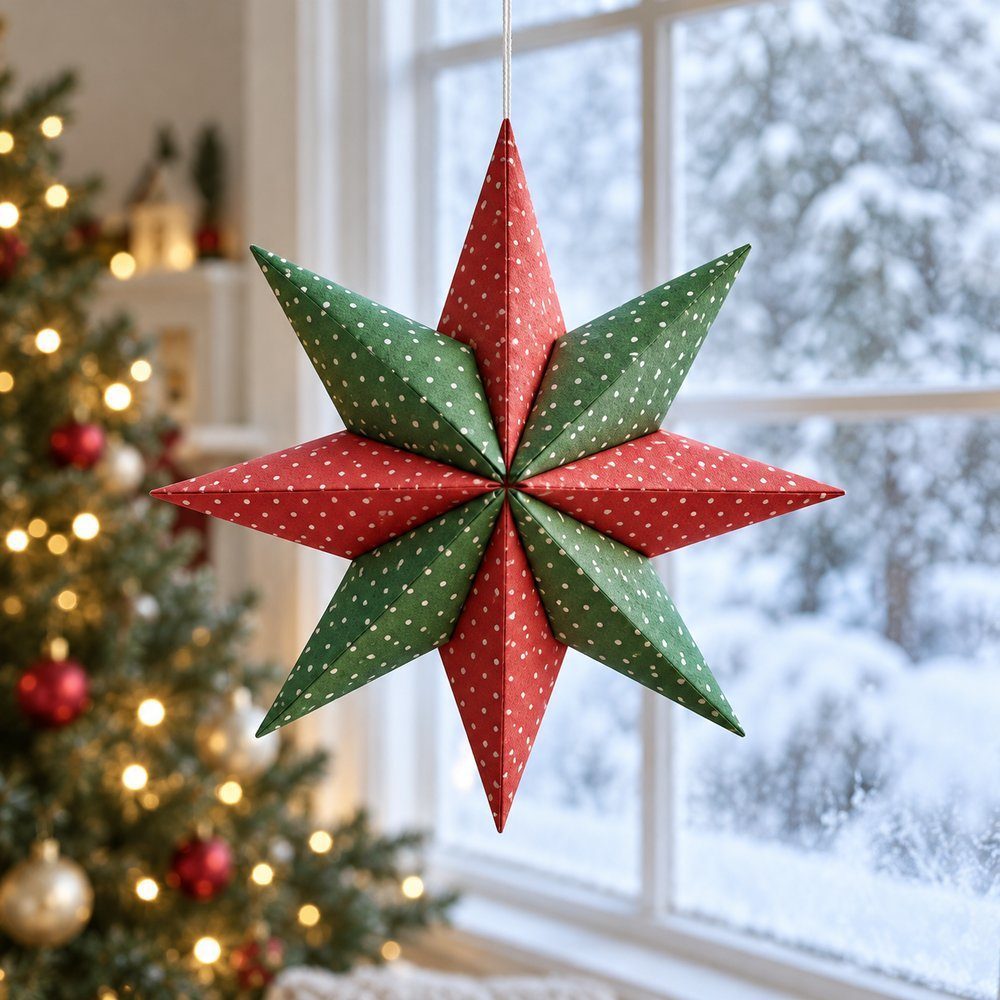
- Glue the two stars together, adding glue if they do not fit snugly. Add the hanging ribbon or twine.
The sequence above separates the cutting and shaping into shorter actions while retaining Wilson's construction. Choose complementary paper designs if you want the front and back to feel related while remaining easy to distinguish during assembly.
Watch Anukriti Crafts fold, cut, and glue a dimensional star from matching paper squares. The demonstration shows a hollow pointed half, repeats it, and joins the halves into an eight-point ornament. Use the moving view to understand the raised shape, while following Paula Wilson's written sequence and supply choices for the project above.

Children's joined five-point star

This flatter star combines a folded pointed section with a triangle, giving you a simple silhouette for a tree branch or hanging display. Fold the first square into its pointed shape, fold the other into a triangle, then join the two folded squares as the tutorial shows. Origami Guide rates the project easy and specifically suggests it for children at Christmas. Sticky notes are among its suggested papers. Keep the squares the same size so the joined parts follow the photographed model.
You'll need: 2 equal paper squares; the page suggests small squares such as 5 cm or 3 in (7.5 cm).
Tutorial by Origami Guide
Hollow five-point tree topper
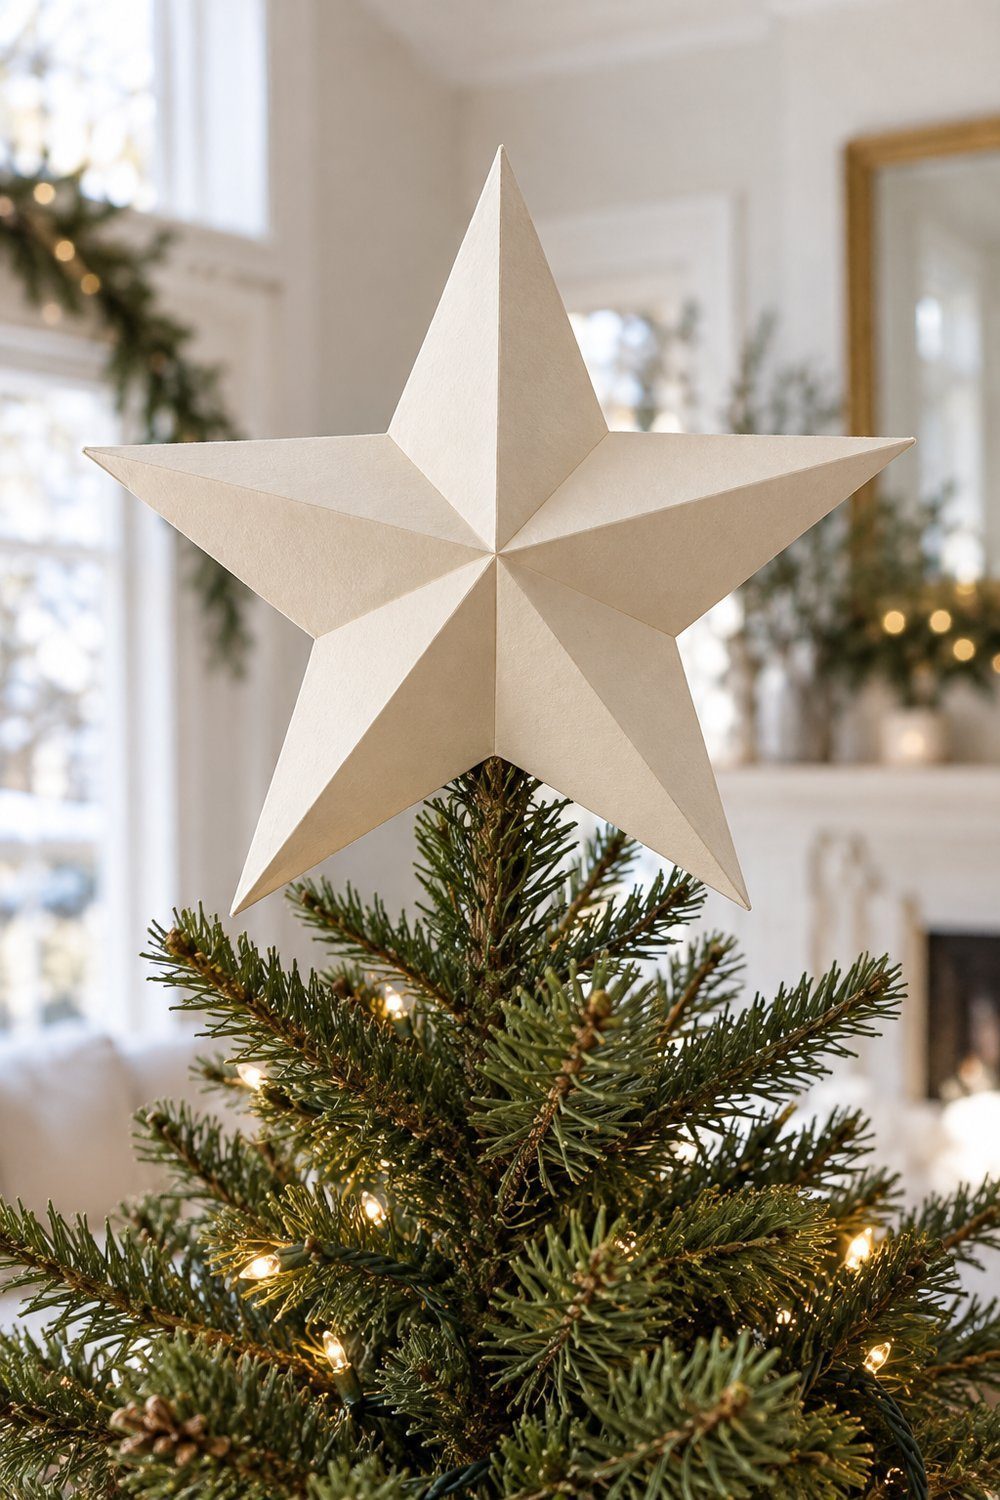
Matching five-point faces make a hollow topper with a defined ridge down each point. Fold and cut the faces, create the edge flaps, then join them while leaving the bottom open for the tree. Janice's tutorial includes photographed assembly but gives no overall difficulty rating. The page joins the faces with spray adhesive, finds white glue too slow, and discusses reinforcing seams with glue. Follow the adhesive label and apply sprays outdoors or with very good ventilation; an adult should handle hot glue. Decorative paint and glitter are optional in the original.
You'll need: 2 squares of paper or cardstock, scissors, spray adhesive and/or a glue gun, and white glue or Mod Podge; the large example uses 12 in (30 cm) squares.
Tutorial by Janice, 5 Minutes for Mom
A handful of pieces: modular, woven and window stars
Set out the full paper count before beginning this group. Repeated units give the window and book-page stars their outlines, while interwoven strips build the Froebel star from a central square. Choose the translucent version for glass, the woven version for raised detail, or the book-page version for a modular ornament. Their shared feature is repetition: finish the matching parts before bringing the whole star together.
Woven Froebel star
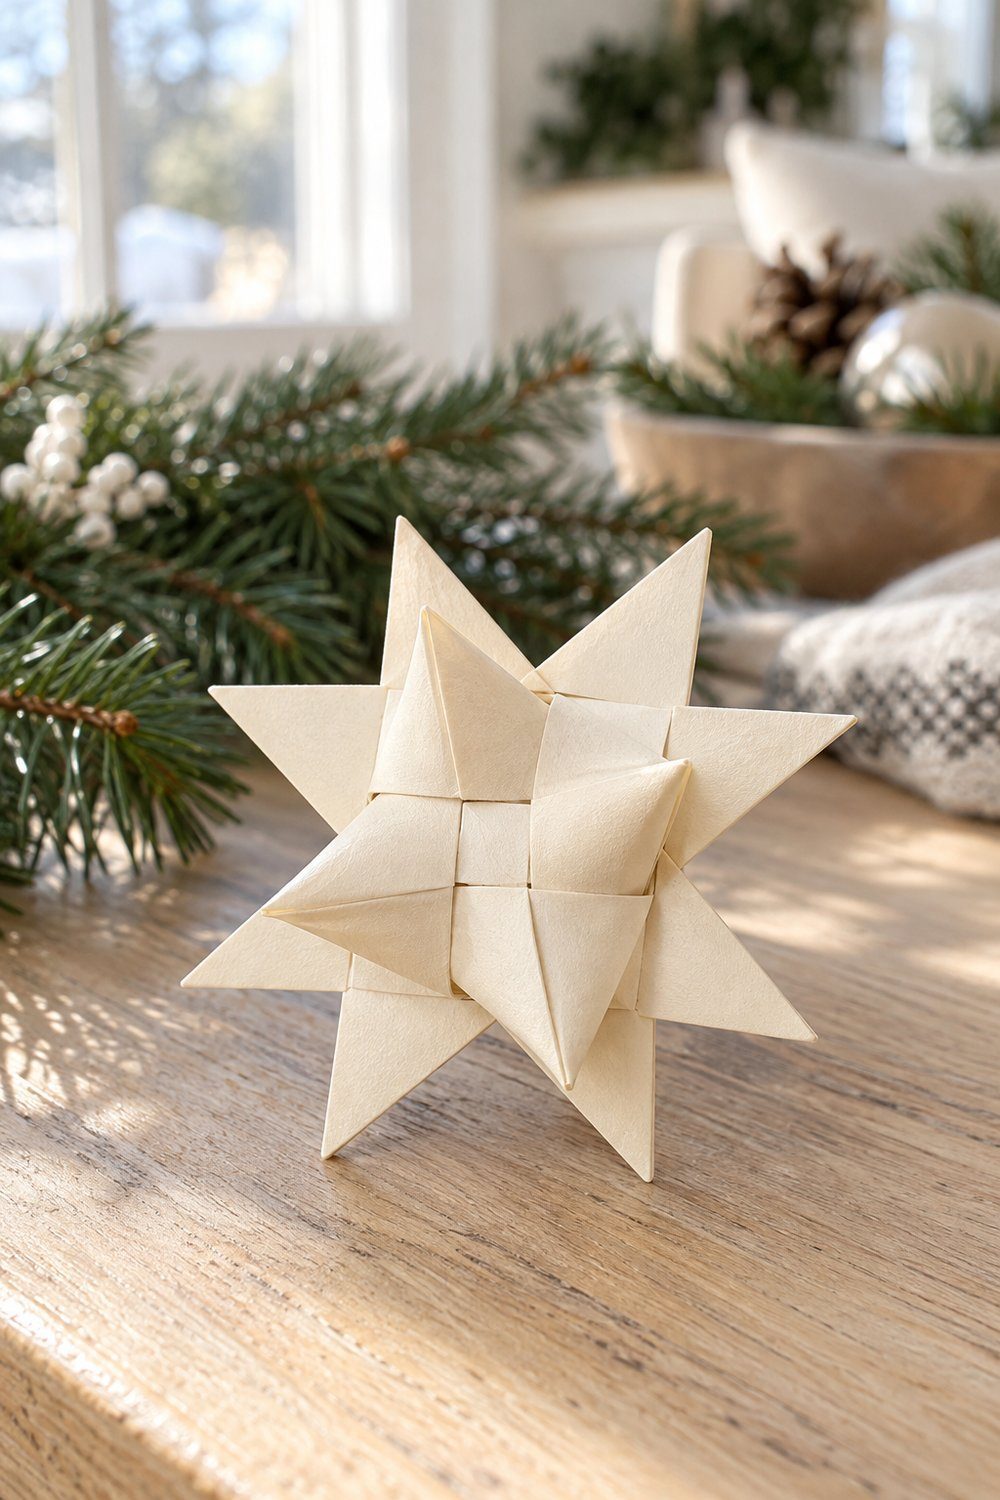
A Froebel star combines a woven center, flat perimeter points, and raised peaks. Fold the strips in half, weave a tight central square, then follow the diagrams through the side points and peaks on both faces. Origami Resource Center describes the task as manageable but potentially confusing for first-timers, rather than assigning a formal level. The repeated weaving rewards close attention to the strip order. Here, hang the finished star from a tree branch to show its raised structure; that placement is an editorial styling suggestion.
You'll need: 4 paper strips colored on both sides; the source lists 1/2 in wide by 12 in long (1.5 x 30 cm). Cut using the inch dimensions to preserve the ratio.
Tutorial by Origami Resource Center
Translucent window star

Overlapping translucent points give this window star a layered center that catches daylight. Crease each square, bring the corners inward, fold the narrower point, then glue the units around the middle. Jean Miller calls it a simple beginner fold and allows about 20 to 30 minutes. Her instructions finish with doubled clear tape on the window. Choose a single color or follow her alternating-color suggestion. For evening display, use LED lights only behind window stars, keeping the lighting separate from the paper.
You'll need: 8 squares of kite or tissue paper, each 6 in (15 cm), a glue stick, a flat folding surface, a flat creasing tool, and clear tape.
Tutorial by Jean Miller, Art of Homeschooling
Modular book-page ornament
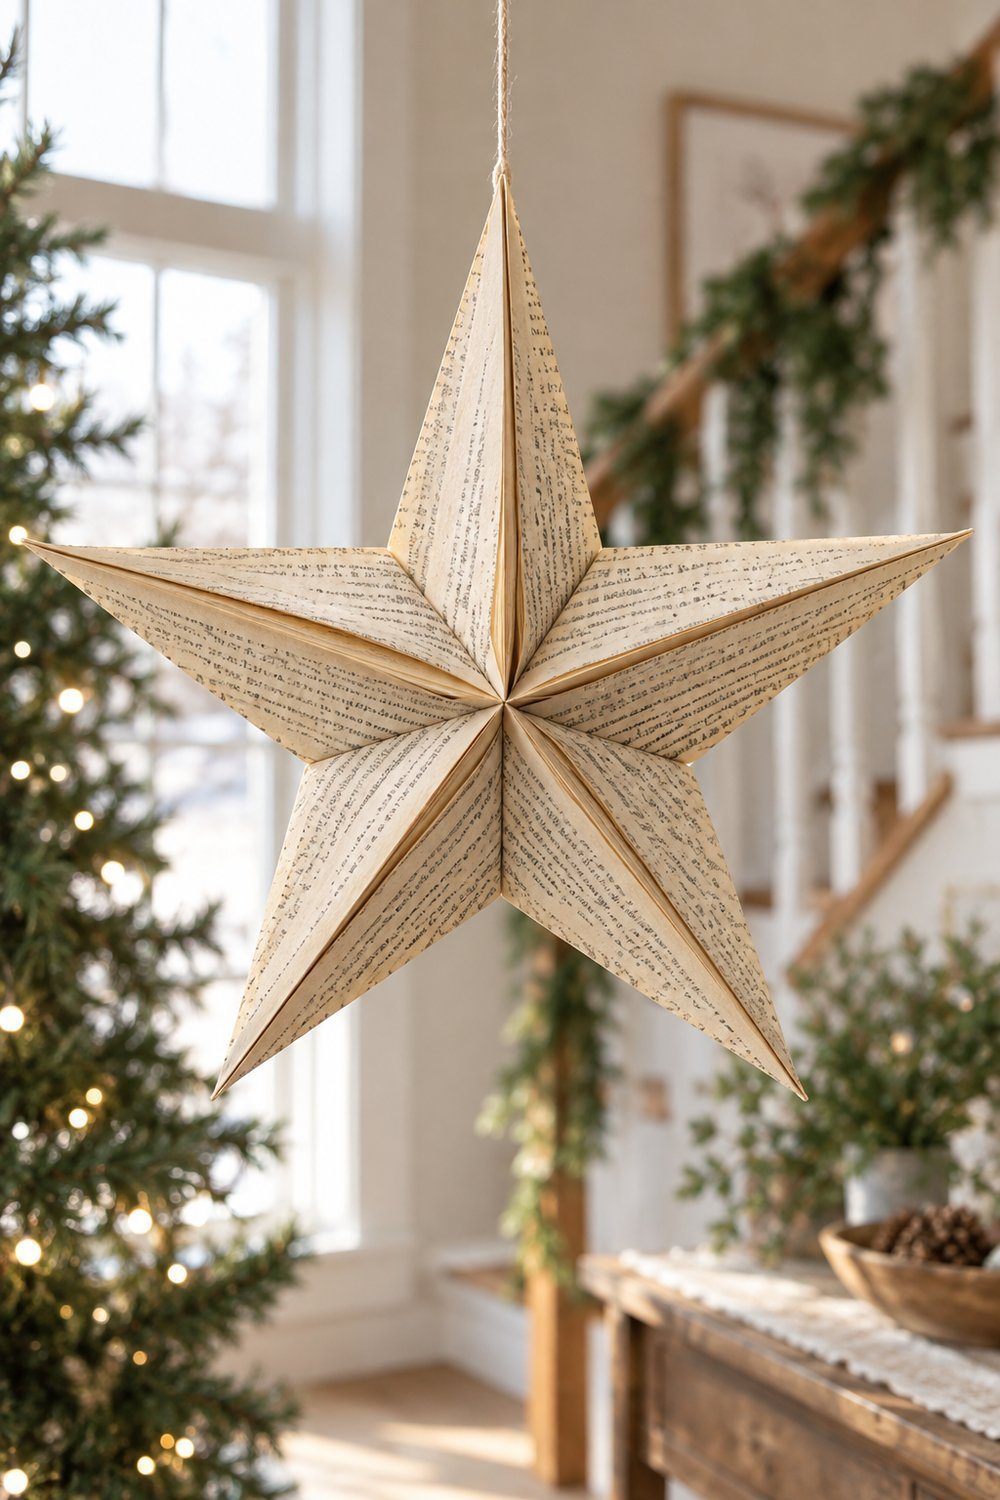
Folded book pages make a dimensional ornament with a softly patterned surface. Trim the pages into squares, fold the sides and upper corners inward, glue the folds, then join the matching units and close the ends into a star. Lily Suing describes the project as beginner-friendly and includes string for hanging. Her suggested display places are a wall or Christmas tree. Use pages from an unwanted book for the tutorial's reclaimed-paper approach; the printed surface supplies the ornament's decoration without an added finish.
You'll need: 5 book-page squares, scissors, glue, and string; the source leaves the square dimensions open.
Tutorial by Lily Suing, DIY Joy
Big stars from paper bags
Paper bags move the same repeated-piece idea up to a larger decorating scale. The versions below use different joins: a glued stack opens into a radial star, while trimmed gusseted bags are taped and tied. Follow the assembly for the version you choose, since the material counts belong to those particular methods. The sources leave bag dimensions open. Use LED lights only inside big paper stars.
Glued-stack paper-bag star
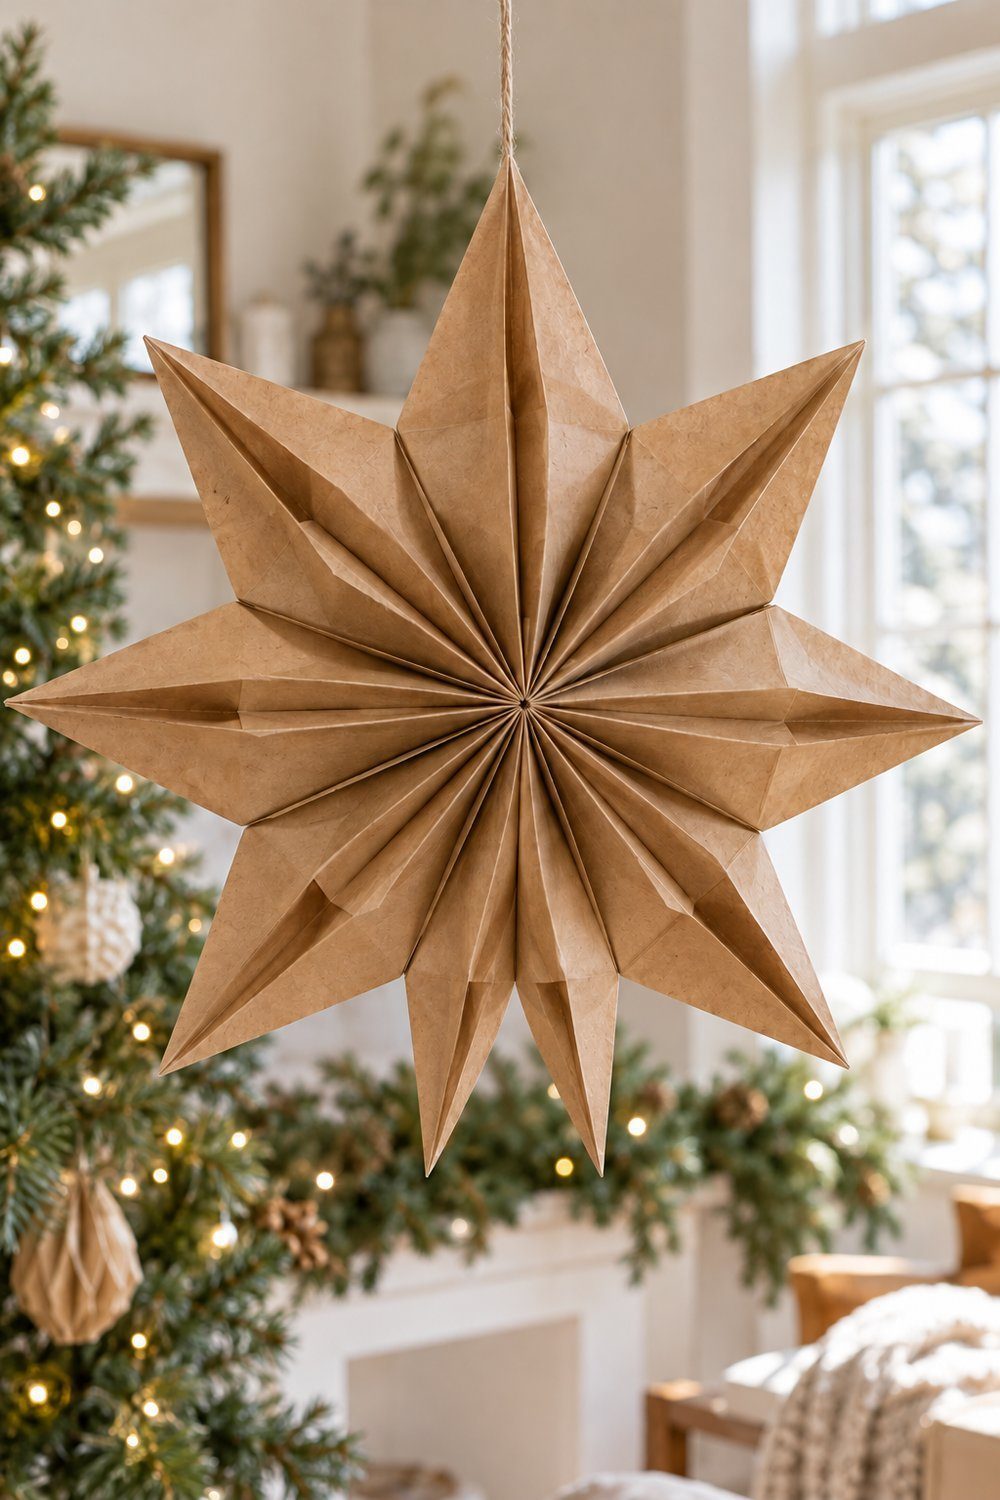
This radial paper-bag star opens from a compact stack into a large pointed decoration. Align the bags with their bottoms facing alike, apply glue in an inverted T, stack them, then cut the open ends into a point and fan the stack out. Red Ted Art calls the project easy and describes making it in less than five minutes. The page allows 7 to 10 bags; the demonstrated version uses 9. Hang it with the ribbon, tape or hole punch the page lists.
You'll need: 9 flat-bottom paper bags for the demonstrated version, a glue stick, scissors, and ribbon, tape, or a hole punch for hanging.
Tutorial by Red Ted Art
Tied gusseted-bag star

Open-ended gusseted bags produce a pleated hanging star with a tied center. Trim off the bag ends, point the opposite ends, add double-sided tape, then punch and loosely tie the stack before joining it into a circle. Deanna Talwalkar's page leaves the difficulty unrated. The tutorial uses patriotic party styling; here, use plain brown bags for Christmas. It suggests grocery bags for a giant version, while the photographed method uses lunch bags. Treat the larger scale as its suggested adaptation.
You'll need: 5 gusseted paper bags, double-sided tape, string, scissors, and a hole punch.
Tutorial by Deanna Talwalkar of Mirabelle Creations, Hostess with the Mostess
Hanging and storing paper stars
Tie a loop of thread or twine through the top point. Place translucent stars on a window, small paper star ornaments on the tree, and larger shapes where their points have room. Choose a hanging position before tying the final loop, and keep paper away from heat.
Store finished stars in flat boxes in a dry place, with space around raised folds. Lay dimensional stars in a single layer and cushion the gaps with clean tissue. Keep the window stars flat, and label the boxes so next Christmas's decorations are easy to find.
Next step: Build on the handmade theme with Christmas decorations to make at home and Christmas decorations using walnut shells.