Christmas Cloche Ideas: Winter Scenes Under Glass and DIY Domes


The best Christmas cloche ideas begin with what goes under the glass: a tiny village, woodland greenery, a little light, or a scene inside a homemade dome. For a quick arrangement, the truck-and-tree terrarium below took its maker almost 10 minutes. For a showpiece, build the snowy house-and-bottle-brush village on a wooden tray. These 12 projects range from miniature worlds to simple DIY covers, with each maker's materials and measurements kept beside the idea.
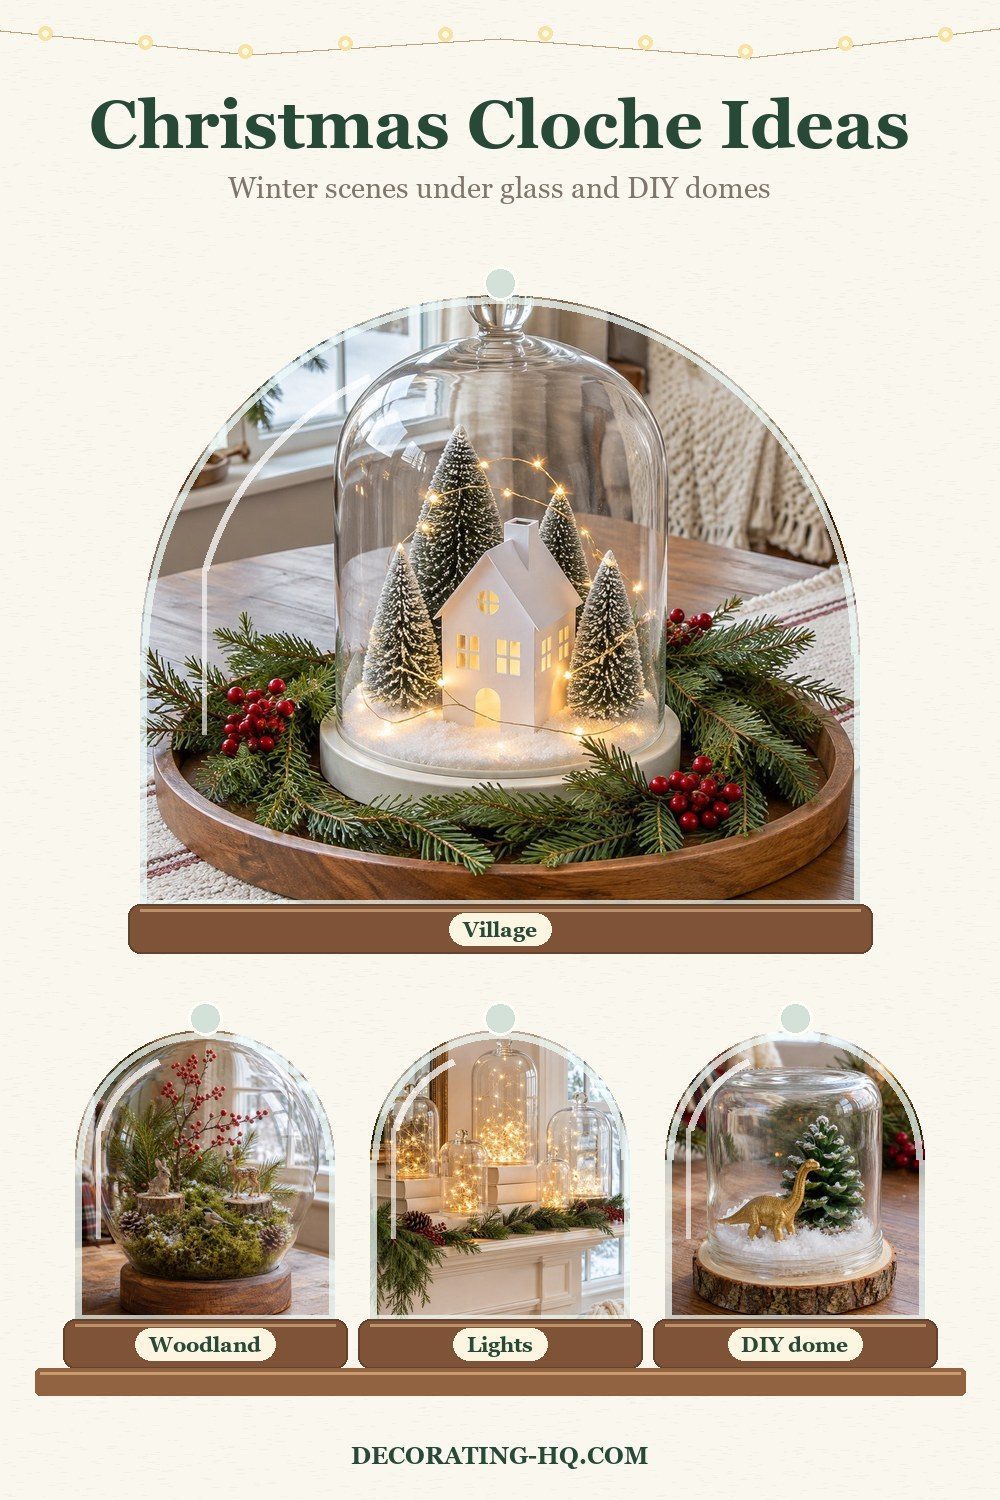
Before you start: the cloche, the base and the scale
Choose the contents and cover together. Anna Potter keeps the dome beside her floral arrangement so its height and width stay within the glass; Bloolands pairs a 3.5 in (9 cm) dome with a 4 in (10 cm) wood round. Other makers use a wooden tray, a cheese-platter base or a small plate. Keep the tallest stem or tree smaller than the cover, and use battery LED lighting under glass, as in the illuminated projects below. The table separates actual measurements from dimensions the makers leave unstated.
| Cloche | Size | Base | What's inside | Source |
|---|---|---|---|---|
| Snowy village | not stated | Cloche base on wooden tray | House, trees, faux snow | The Crafting Nook |
| Moss woodland | not stated | Wood round | Moss, creatures, branches | Root and Dwell |
| Winter flowers | not stated | Dish on cloche base | Flowers and berry branches | Gardens Illustrated |
| Paper woodland | 3.5 in (9 cm) diameter | 4 in (10 cm) wood round | Fawn, firs, moss, LEDs | Bloolands |
| Fairy-light cloches | not stated | Mantel or bookcase; optional books | Battery mini lights, optional Christmas balls | Hunker |
| Bottle dome | 2-liter donor bottle; finished size not stated | Small plate | Keepsake shoes in the demonstration | OH SO KEL |
A tiny village or scene
A house gives the display an immediate story, while small trees establish the setting. These three versions use paper, painted wood and a miniature vehicle. Pick the one whose central piece you already own: the surrounding snow and trees give each scene its Christmas character.
Snowy Christmas village on a wooden tray
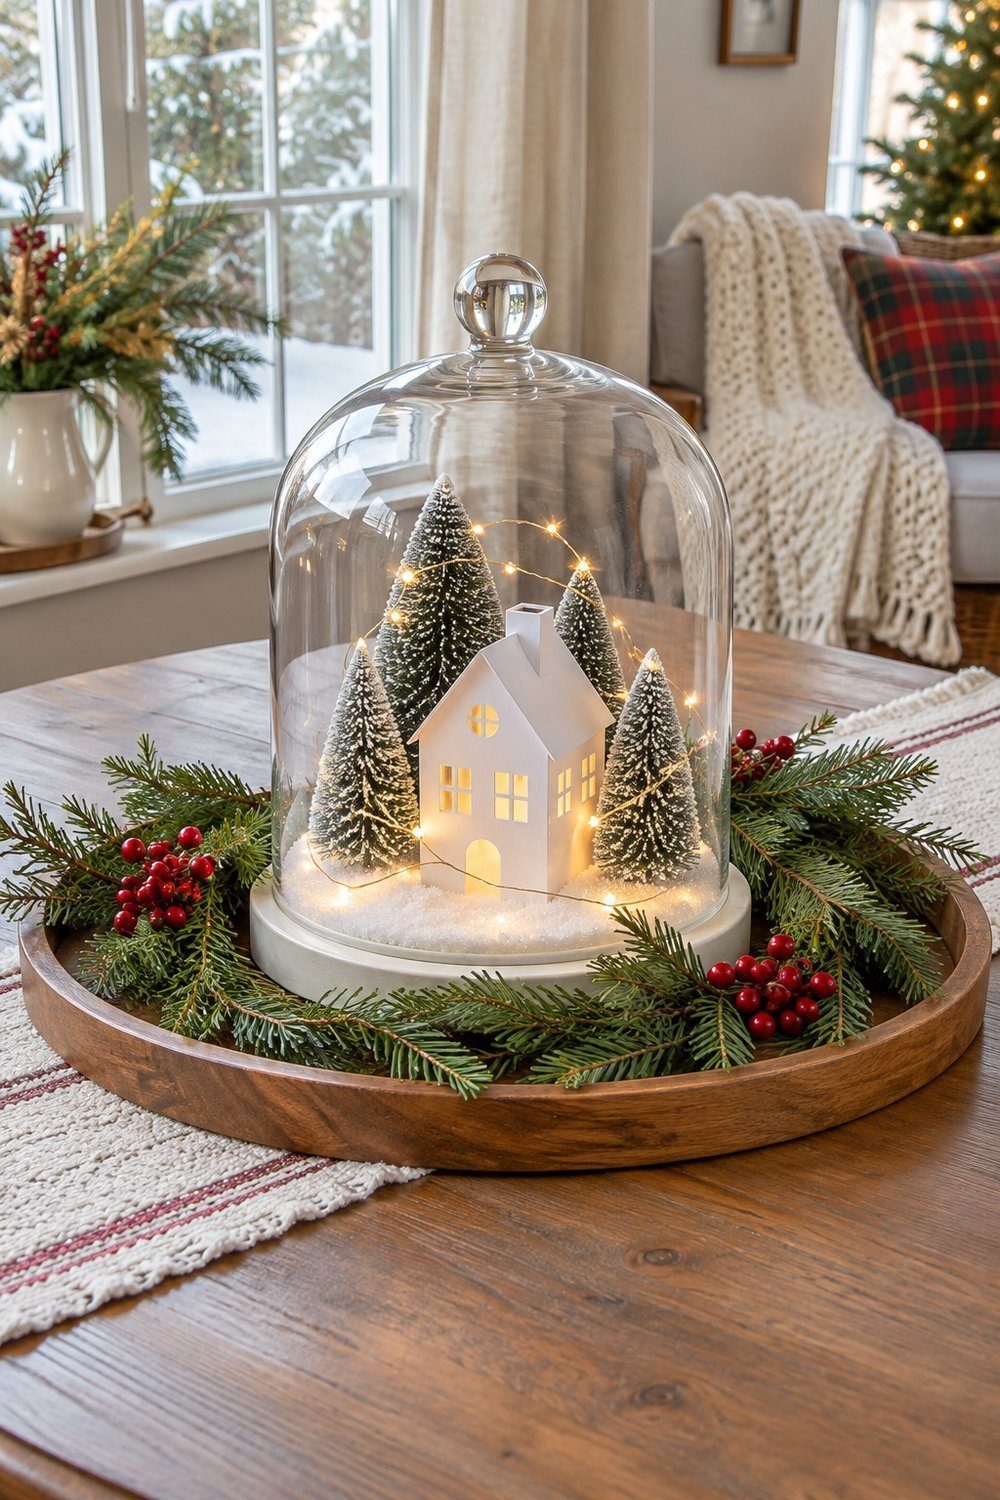
Idea by Camila Rojas, The Crafting Nook
This Christmas village under glass combines a small paper house, bottle-brush trees and a snowy paper floor. Greenery and berries frame the dome on a wooden tray. Rojas allows 1 hour 15 minutes, including 30 minutes of drying. The cardstock circle on the base keeps the snowy groundwork together while you arrange the village above it, and the light wire winds around the buildings and trees.
- Glass cloche and base; dimensions not stated.
- White cardstock sized to the dome; cut a couple of millimeters inside the traced edge.
- Small house and bottle-brush trees that fit beneath the cover.
- Faux snow, white glue, scissors and pencil.
- Battery LED wire lights; wooden tray, greenery and berry stems.
- Clean the dome and prepare the little paper house.
- Trace the cover on cardstock; cut inside the outline.
- Spread glue, add snow, press gently and let dry.
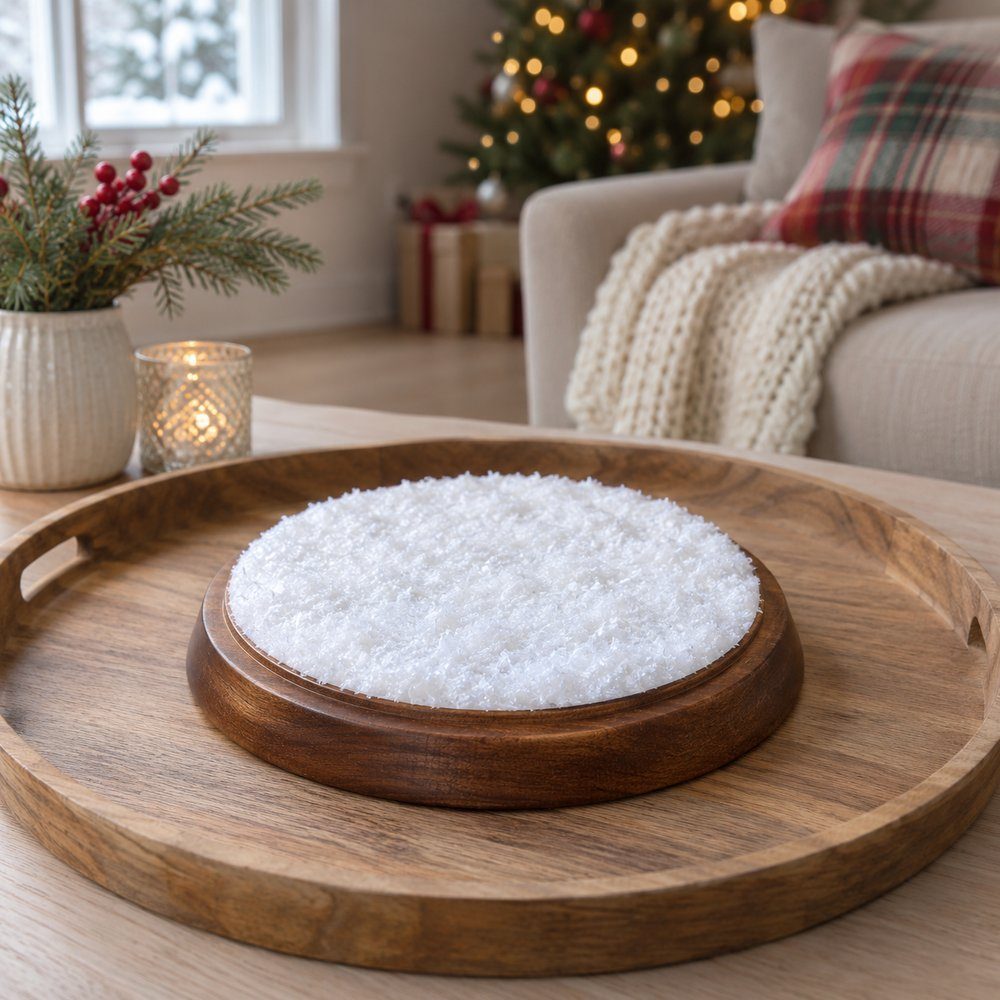
- Center the snowy circle on the cloche base.
- Arrange the trees, followed by the small house.
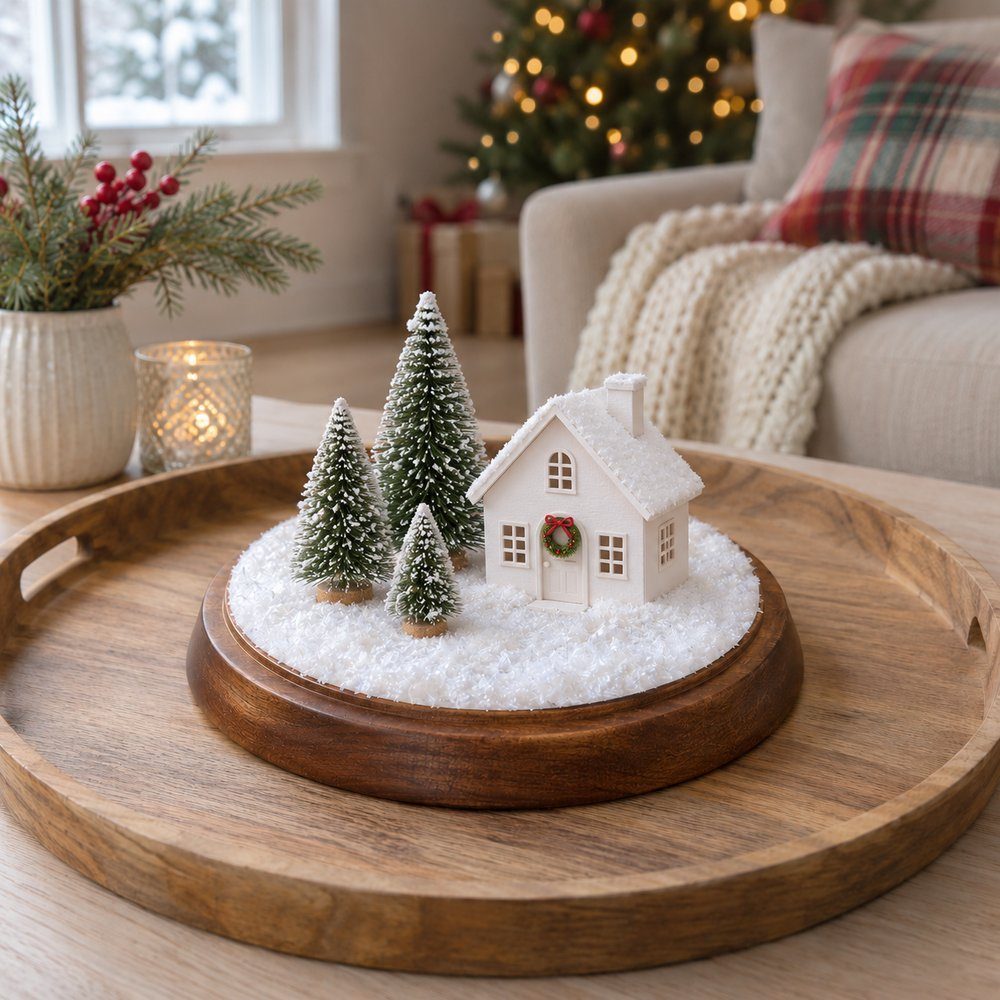
- Shape the light wire beneath and around the scene.
- Lower the dome carefully; surround it with tray greenery and berries.
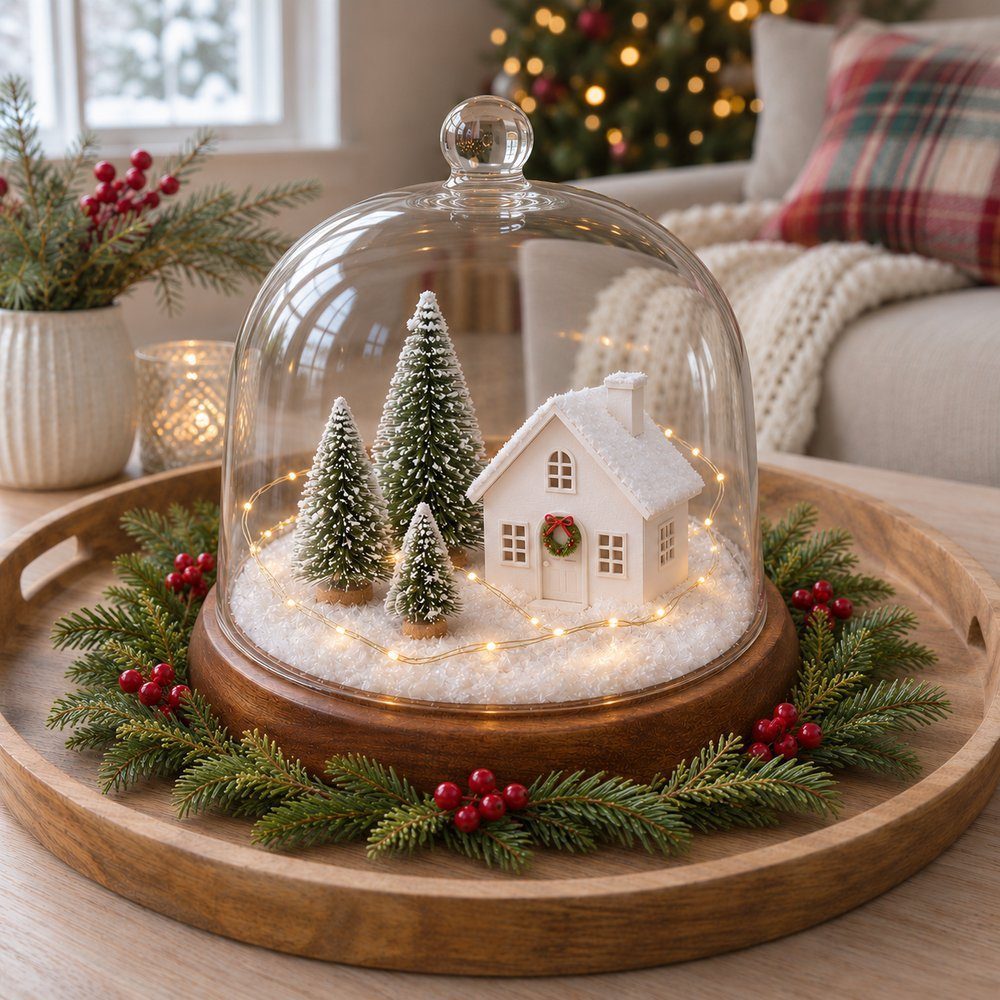
For a moving demonstration, The Magnolia Housewife styles a Christmas cloche from start to finish in her video. Watch how she layers the scene inside the glass before you build your own village.

Painted wooden-house village
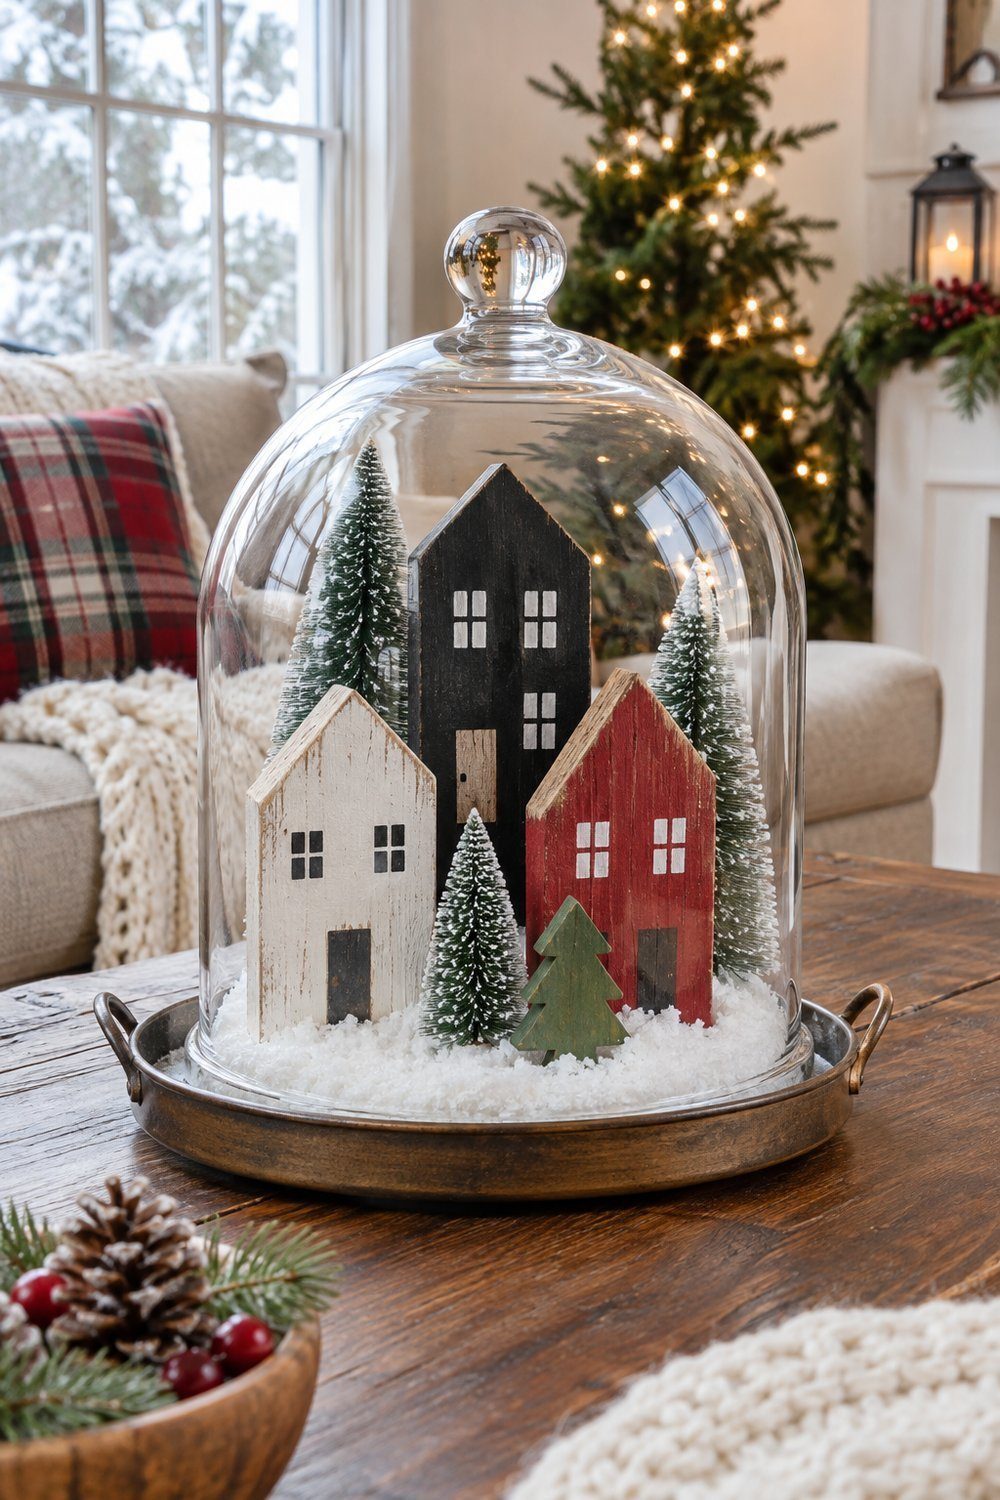
Crissy gives scrap wood a second life as tiny houses with simple painted windows, doors and roofs. Her cloche gathers the black, white and red buildings with bottle-brush trees, a wooden tree and artificial snow. Sketch the outlines on scrap wood, cut them with the saw used in her tutorial, then sand and paint. The optional final sanding creates a worn finish. Choose this version when the handmade buildings are the part you want to spend time on; their flat faces make the village look deliberately simple.
You'll need: Scrap wood or premade wooden houses, acrylic paint, 220-grit sandpaper for the tutorial's sanding step, artificial snow, bottle-brush trees, a wooden tree and a glass cloche.
Idea by Crissy, First Day of Home
Coming-home-with-the-tree terrarium
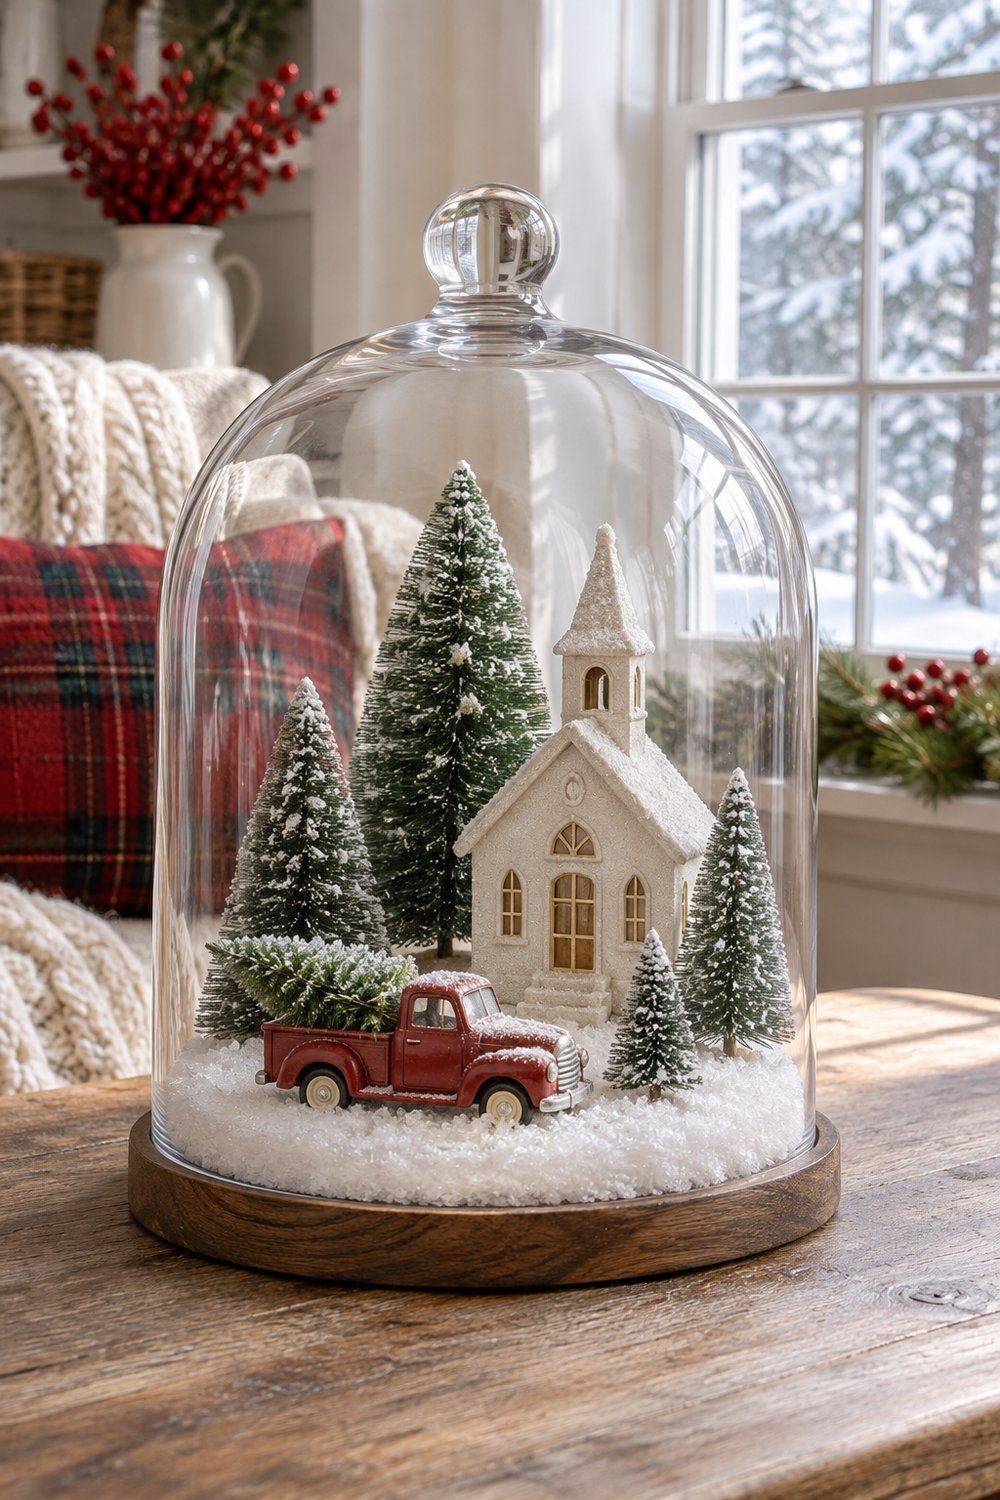
A miniature truck carrying a tree turns Michelle Beaton's snow globe terrarium into a homecoming scene. A white church and bottle-brush trees in several sizes complete the setting behind the glass. She starts with a mound of faux snow, sets the church in the center, adds the trees, then the borrowed truck with its tree. Her finished project took almost 10 minutes, making this the quickest documented arrangement here. The vehicle gives the display its story without requiring a whole street of buildings, and the different tree sizes help the little settlement read as a landscape.
You'll need: Glass dome, faux snow, a small white church, bottle-brush trees and miniature truck; allow almost 10 minutes, the maker's reported assembly time.
Idea by Michelle Beaton, Weekend Craft
Woodland and greenery
For a winter cloche display with a softer palette, put the emphasis on moss, branches or flowers. These projects work with the shapes of their ingredients: a raised moss floor, an airy floral arrangement and a layered paper woodland. For a larger setting around the dome, explore holiday decorating with natural elements.
Mossy woodland with winterberries
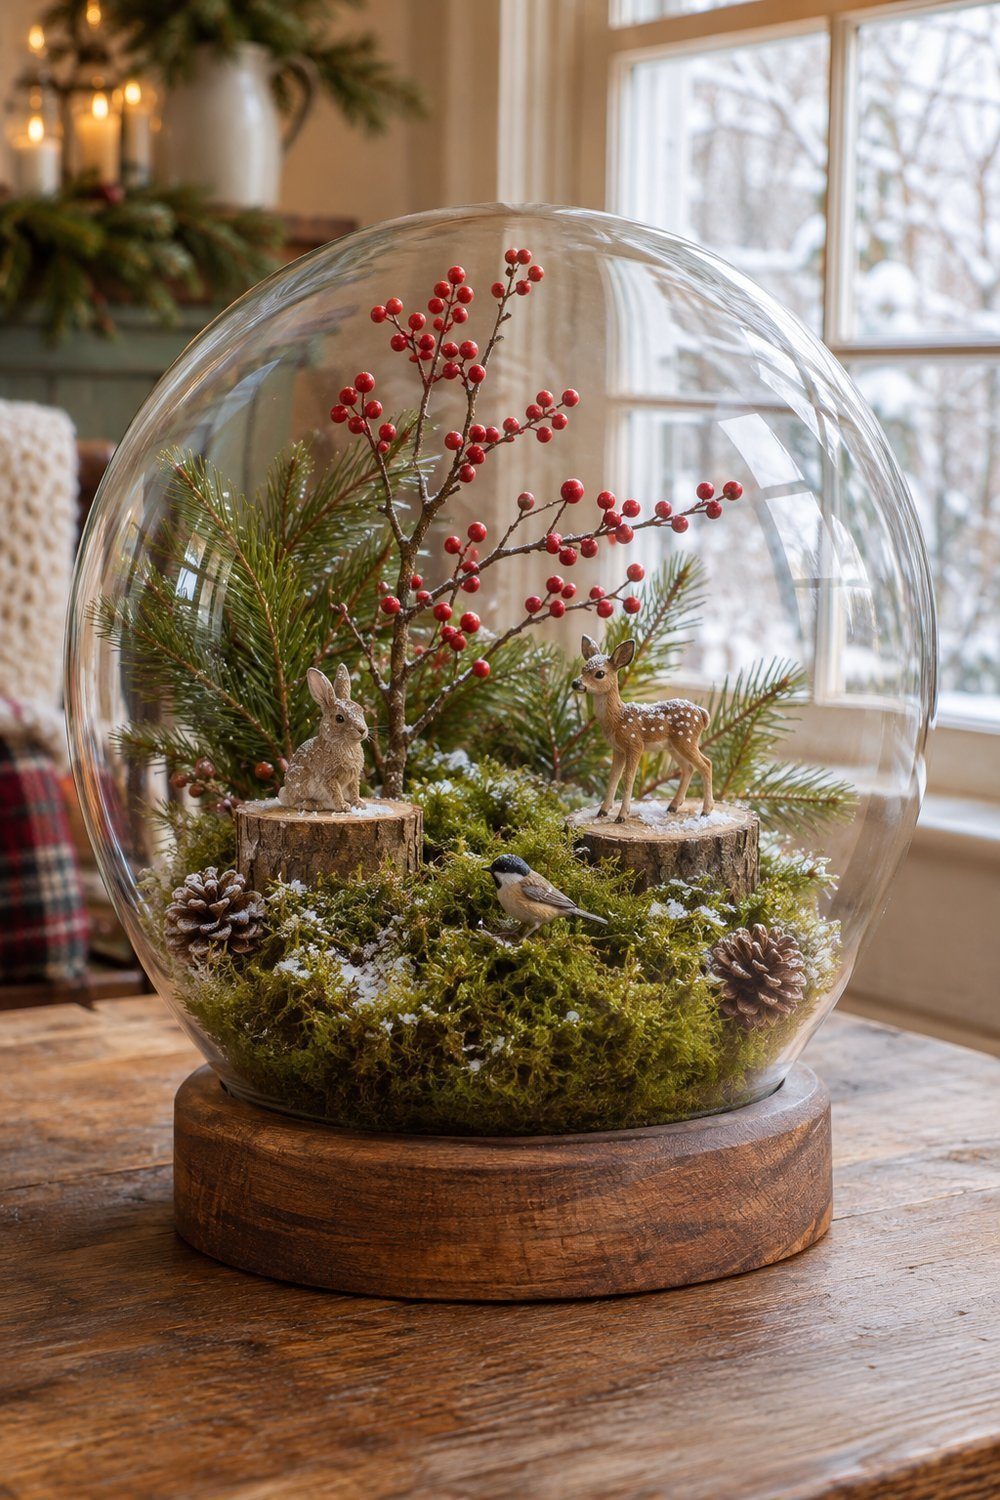
Root and Dwell raises the woodland floor on two small wood rounds, then piles moss over them and sprinkles flour for snow. Little creatures and pine branches tuck into the moss; taller branches go in last. The maker hides a small water-filled baby-bottle top in the moss for the winterberry stem. That concealed support is a useful detail to copy from this particular arrangement. The layers create an uneven forest floor, with greenery low down and the berry branch reaching higher into the dome.
You'll need: Cloche and wood base, 2 small wood rounds, moss, flour, miniature woodland creatures, pine branches, winterberries and a small concealed water container.
Idea by Root and Dwell
Winter flowers and berry branches
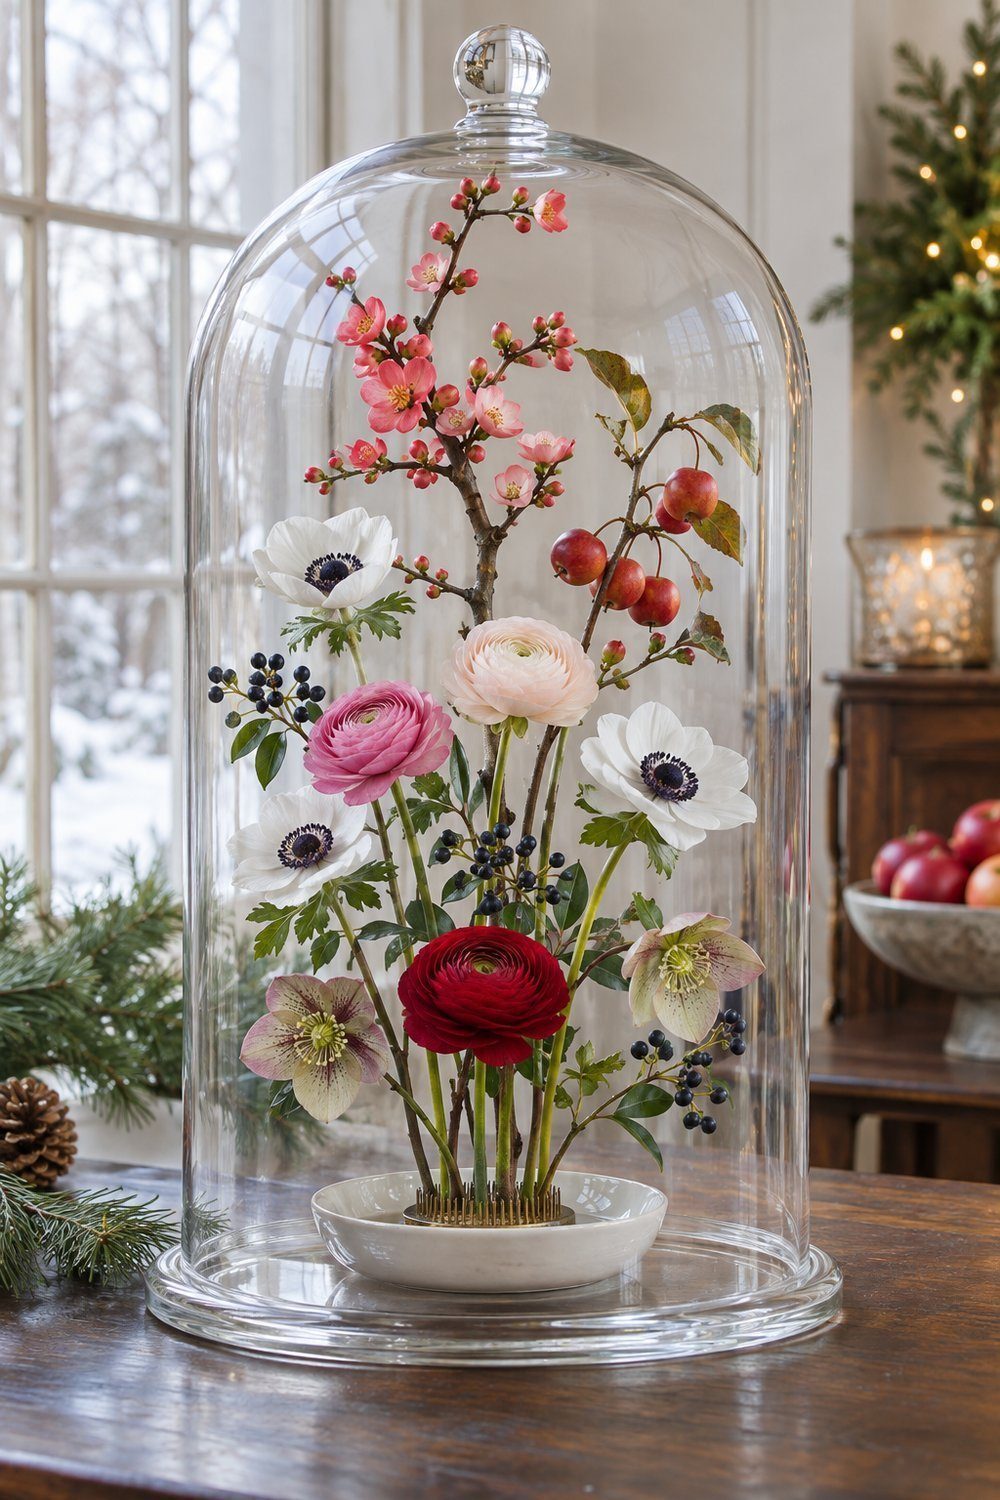
Anna Potter's floral cloche gives winter flowers the same sense of occasion as a miniature village. A flower frog secured inside a small dish holds the arrangement. Begin with the tallest stem, place a low focal flower or berry cluster, and fill the space between those points. Keep the dome beside you as you work so the design stays within its height and width. The result is an airy arrangement of individual stems and branches, with the glass framing their shapes rather than a crowded mass of foliage.
You'll need: Cloche and base, small dish, flower frog, florists' waterproof putty, 3 ranunculus stems, 3 anemone stems, 2 hellebores, 1 quince branch, 3 ligustrum berry stems and 1 crab apple branch.
Idea by Anna Potter, Gardens Illustrated
Paper fawn and moss woodland
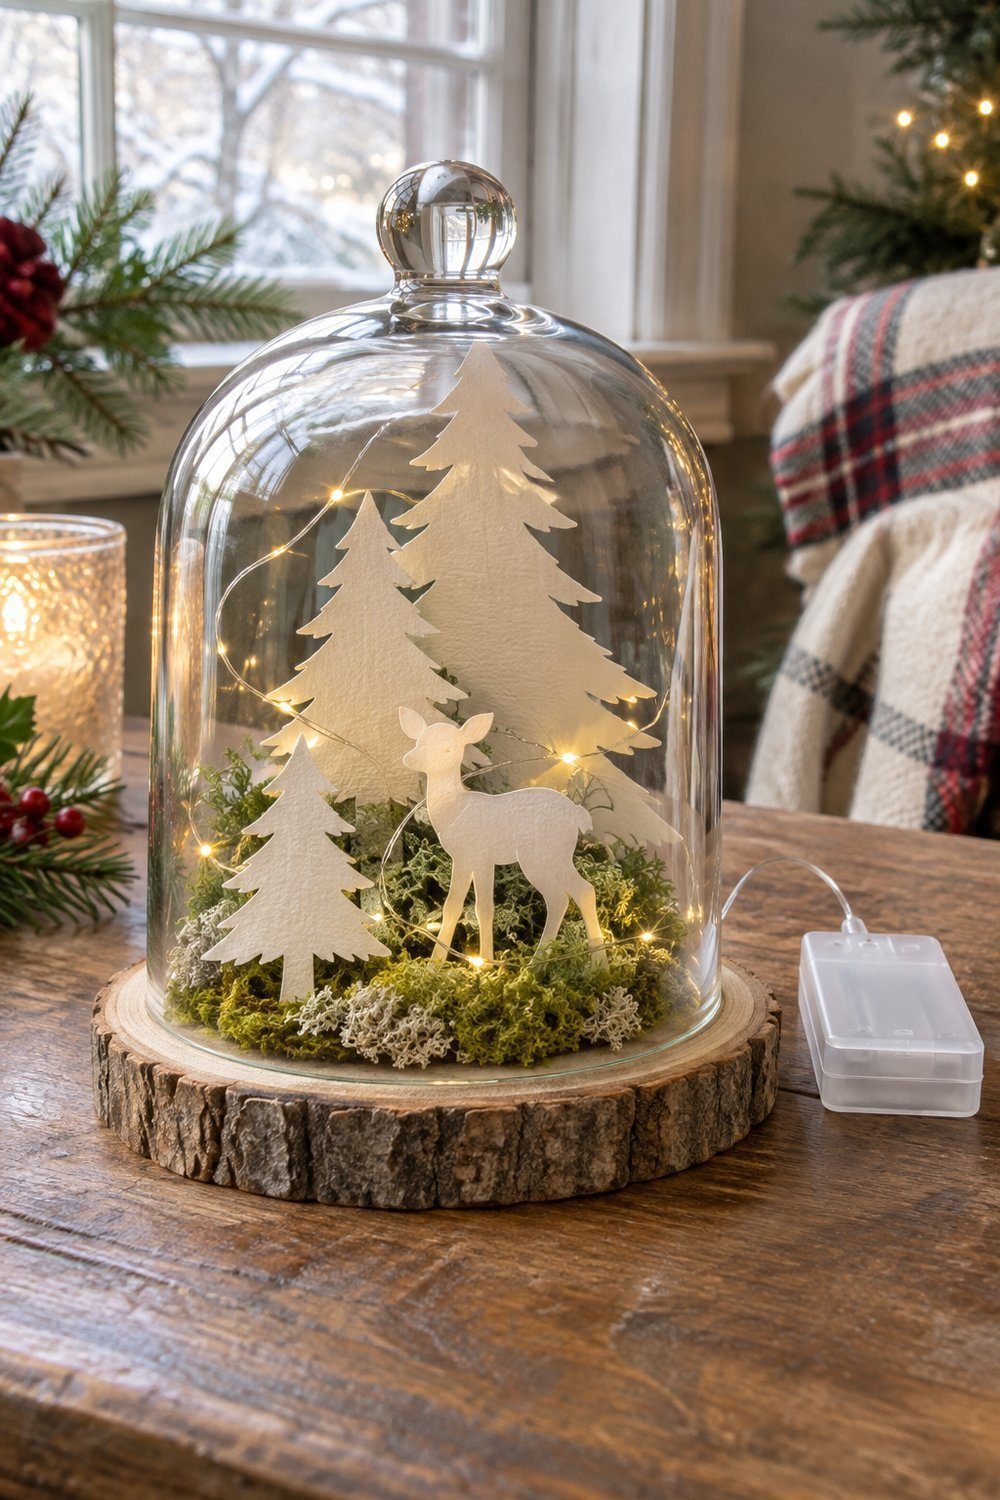
Pascale Fléchelles builds depth with paper silhouettes: a small fir at the front, then the fawn, a medium fir and the tallest tree behind. Folded tabs hold the cutouts on a wood round, while moss or lichen fills between them. The scene fits beneath a 3.5 in (9 cm) glass dome. Add the LED garland and leave its battery box outside, as the tutorial directs. The pale paper shapes and textured moss make a woodland that feels crisp and graphic while still using natural material.
You'll need: 3.5 in (9 cm) dome, 4 in (10 cm) wood round, LED string up to 2 m (about 6.5 ft), heavy paper, fawn-and-fir templates, moss or lichen, glue and cutting tools.
Idea by Pascale Fléchelles, Bloolands
Light under glass
Battery lights can become the main ingredient or disappear into the setting. Each project below explains a different way to manage the pack and wire: bury them among ornaments, cover them with batting, or conceal them beneath snow. Use the specified battery lighting when recreating these Christmas cloche decor projects.
Fairy-light cloches at different heights
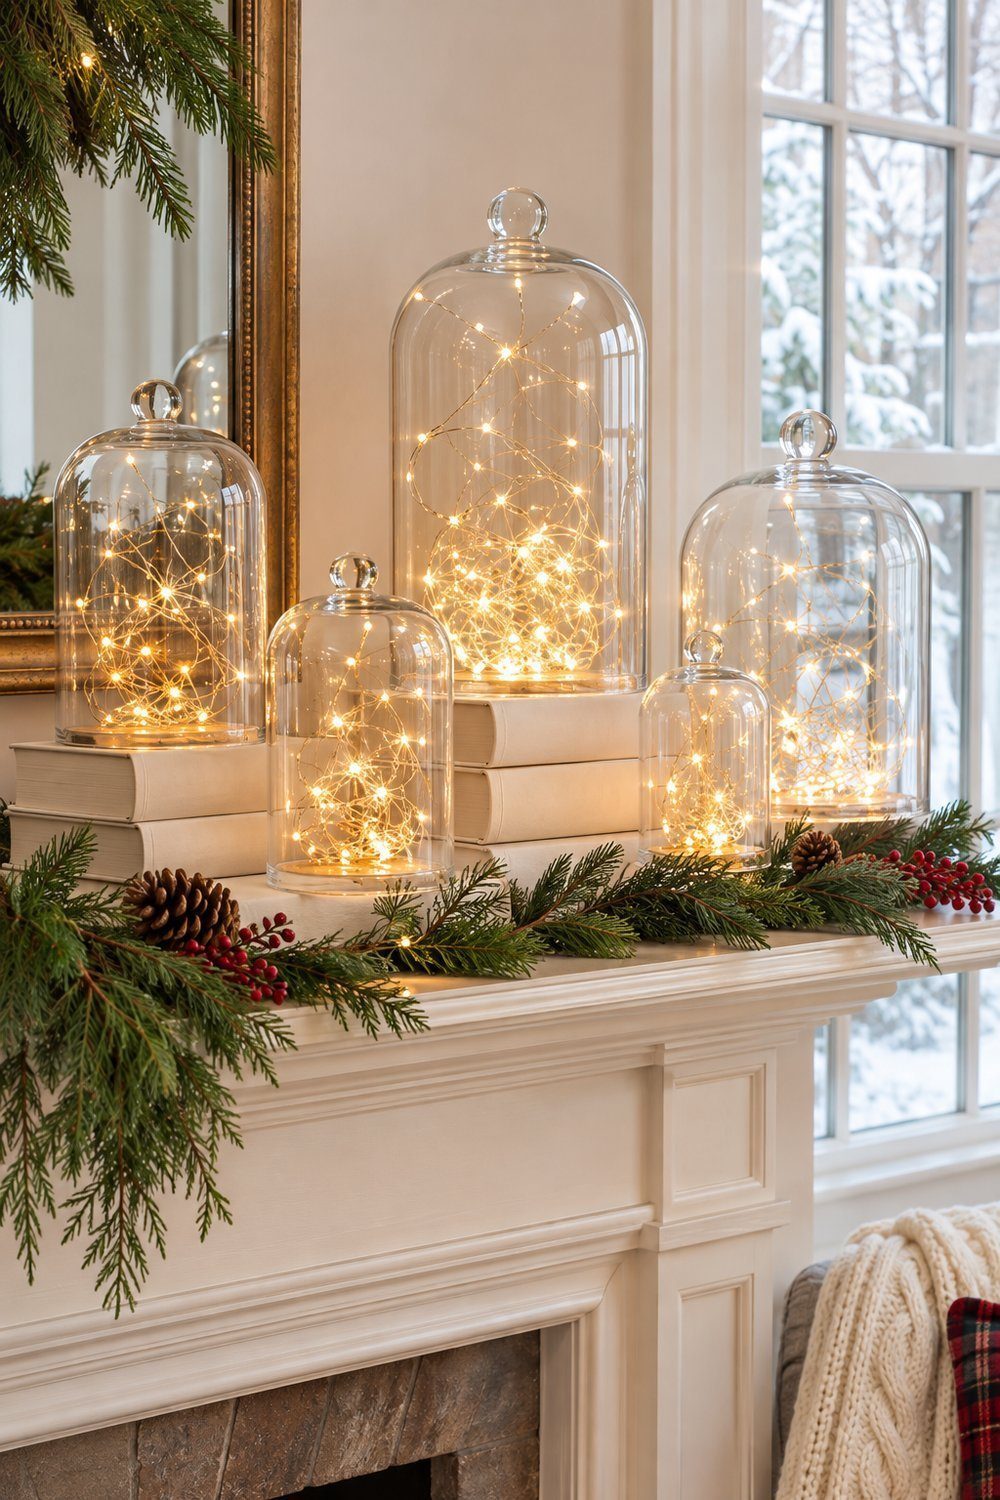
Lucy Akins creates a holiday display by putting battery-operated mini lights inside glass cloches of different sizes. She suggests extending some lights toward the top, then arranging the covers along a mantel or bookcase with alternating heights. Books can lift individual cloches where needed. Christmas ball ornaments are optional additions that bring interest and help conceal the battery packs. Her written tutorial presents the arrangement in three steps and also suggests jars or glass vases as alternative containers.
You'll need: Glass cloches in assorted sizes, battery-operated mini lights and optional Christmas ball ornaments; follow Akins's 3-step arrangement.
Idea by Lucy Akins, Hunker
Glowing penguin on a snowy floor
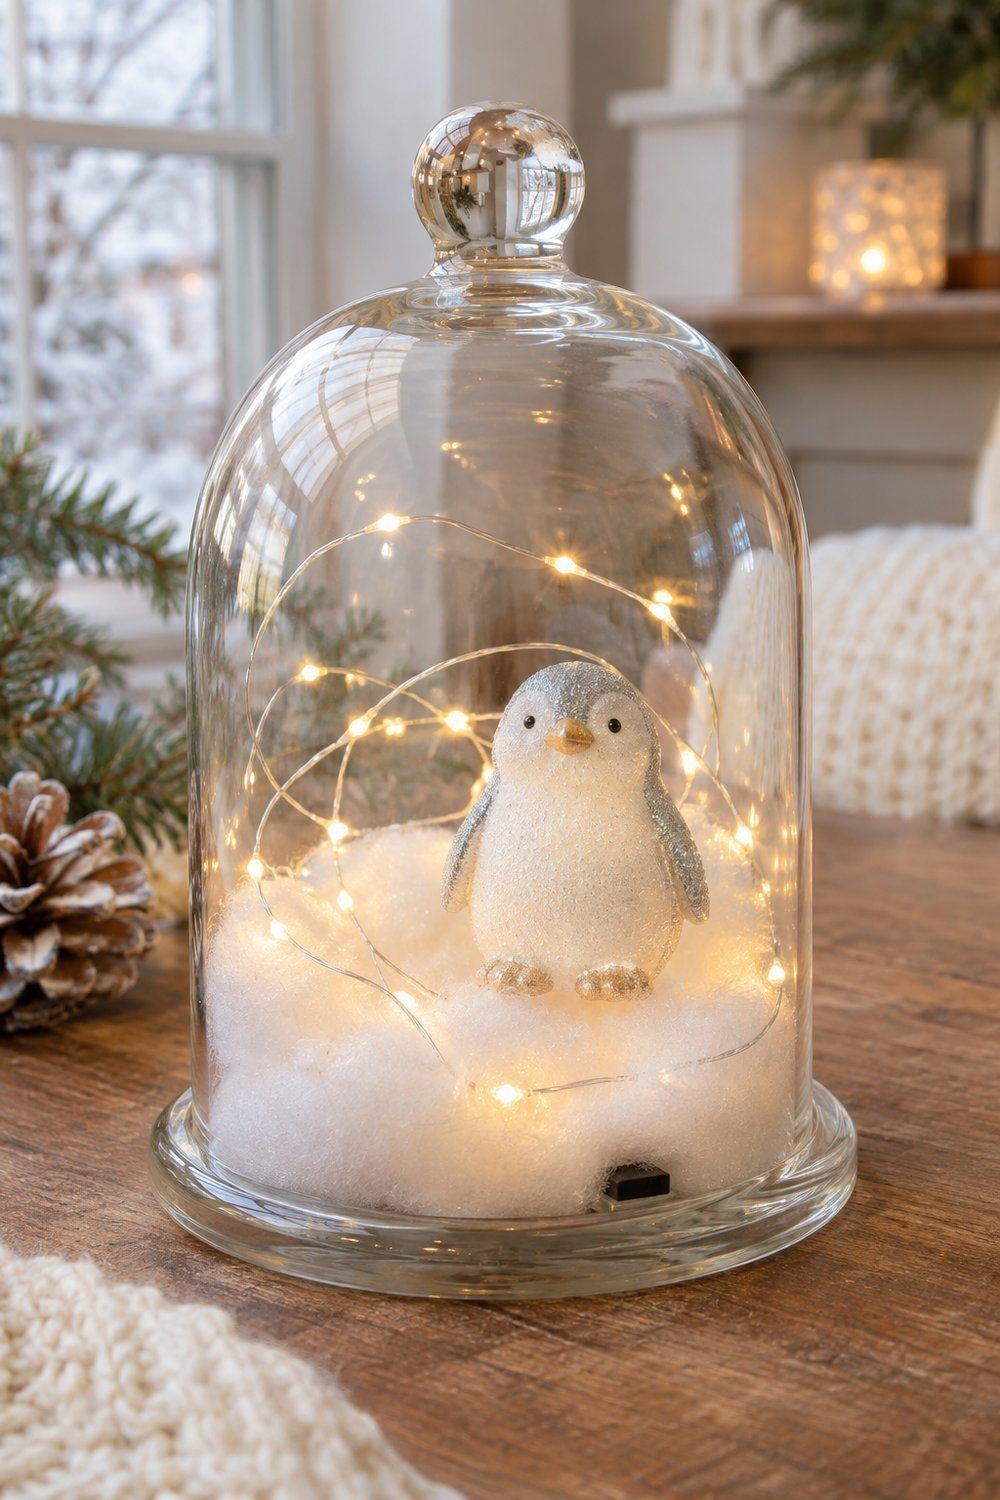
Aurélie's small winter cloche uses a white or glittered figurine, soft batting and a battery LED string. The clever construction is underneath: the battery compartment attaches to the base, and the batting covers it while leaving the switch accessible through the fabric. Cut the batting circle 1 cm (about 3/8 in) wider across than the base, following her allowance. Glue the figurine toward the front, switch on the lights and replace the dome. Her reported making time is 10 minutes for this compact, softly lit arrangement.
You'll need: Small glass cloche, 3.3 ft (1 m) battery LED string, batting, white or glittered penguin figurine, glue, pencil, ruler and scissors; allow 10 minutes.
Idea by Aurélie, Oh! Really?
Illuminated winter road with a green car
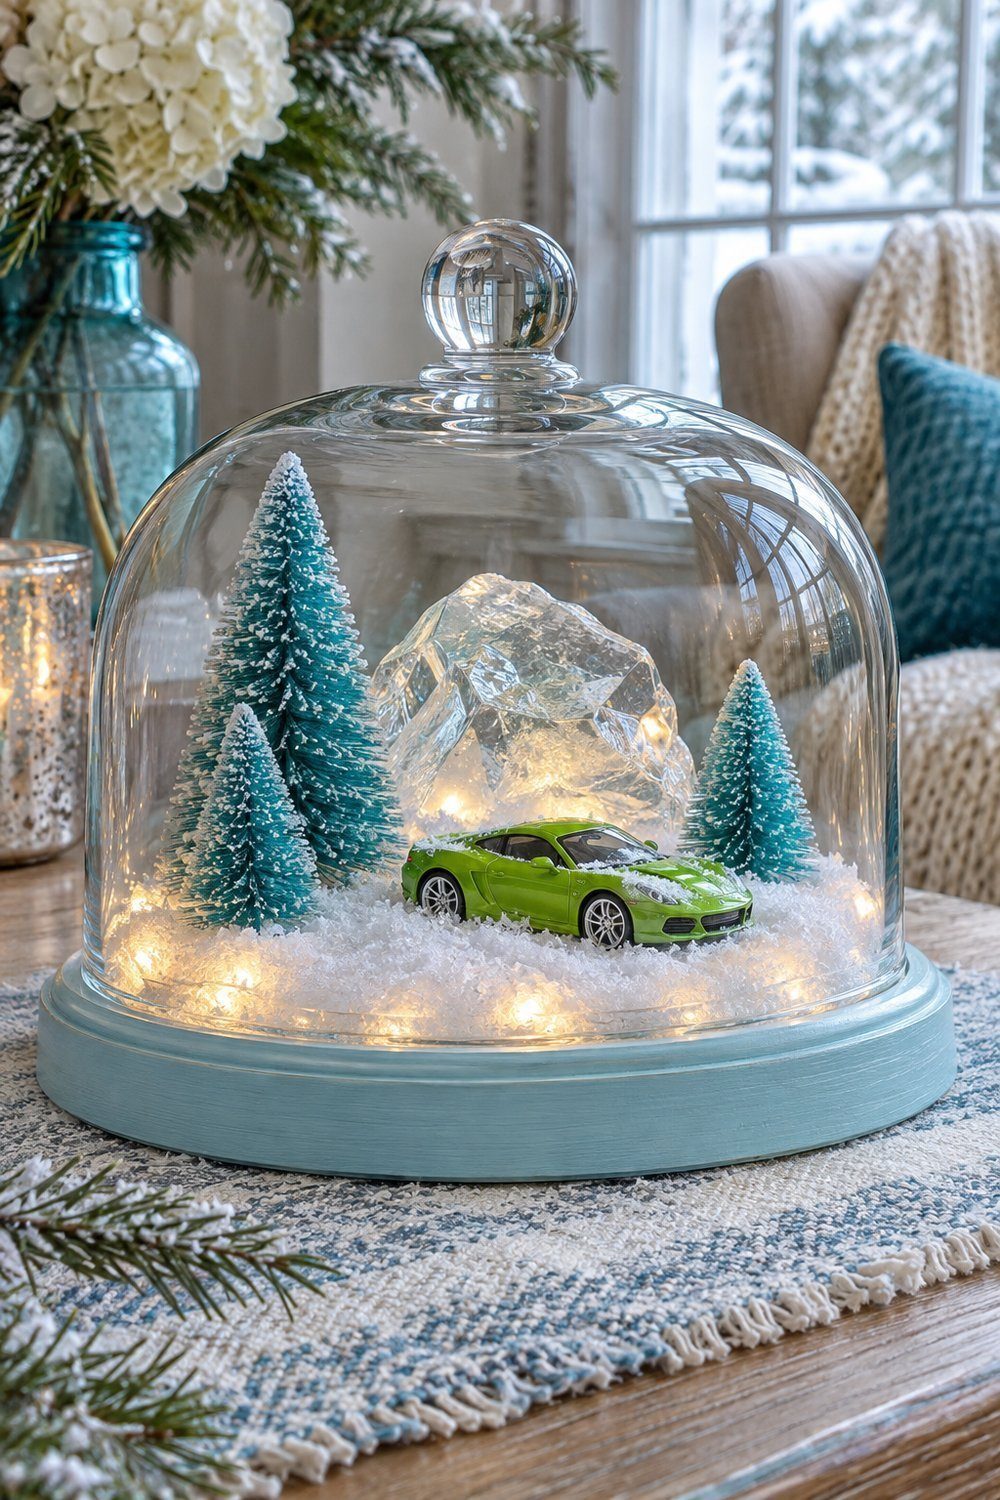
Tanya turns a thrifted cheese cloche into a winter road with turquoise trees, a bright green toy car and a glass chunk that catches the light. Battery lights run around the perimeter under faux snow, with the pack at the back. Her timer runs for 6 hours and stays off for 18 hours. Clear tape holds parts in position, and the unglued scene can be rearranged. The pale blue painted base echoes frozen water, while light behind the glass chunk adds a glowing focal point beside the car.
You'll need: Domed cheese platter, pale blue paint if desired, trees, faux snow, glass chunk, toy car, clear tape and battery string lights; the maker's timer uses a 6-hour on/18-hour off cycle.
Idea by Tanya, Dans le Lakehouse
Make your own dome
A DIY glass cloche can begin with a jar, while plastic drinkware and bottles offer other cover shapes. Here, making the dome is part of the project. Each example uses ordinary pieces instead of a purchased cloche; the original tutorials explain the bases and attachments that complete them.
Clear bottle dome with a ribbon collar
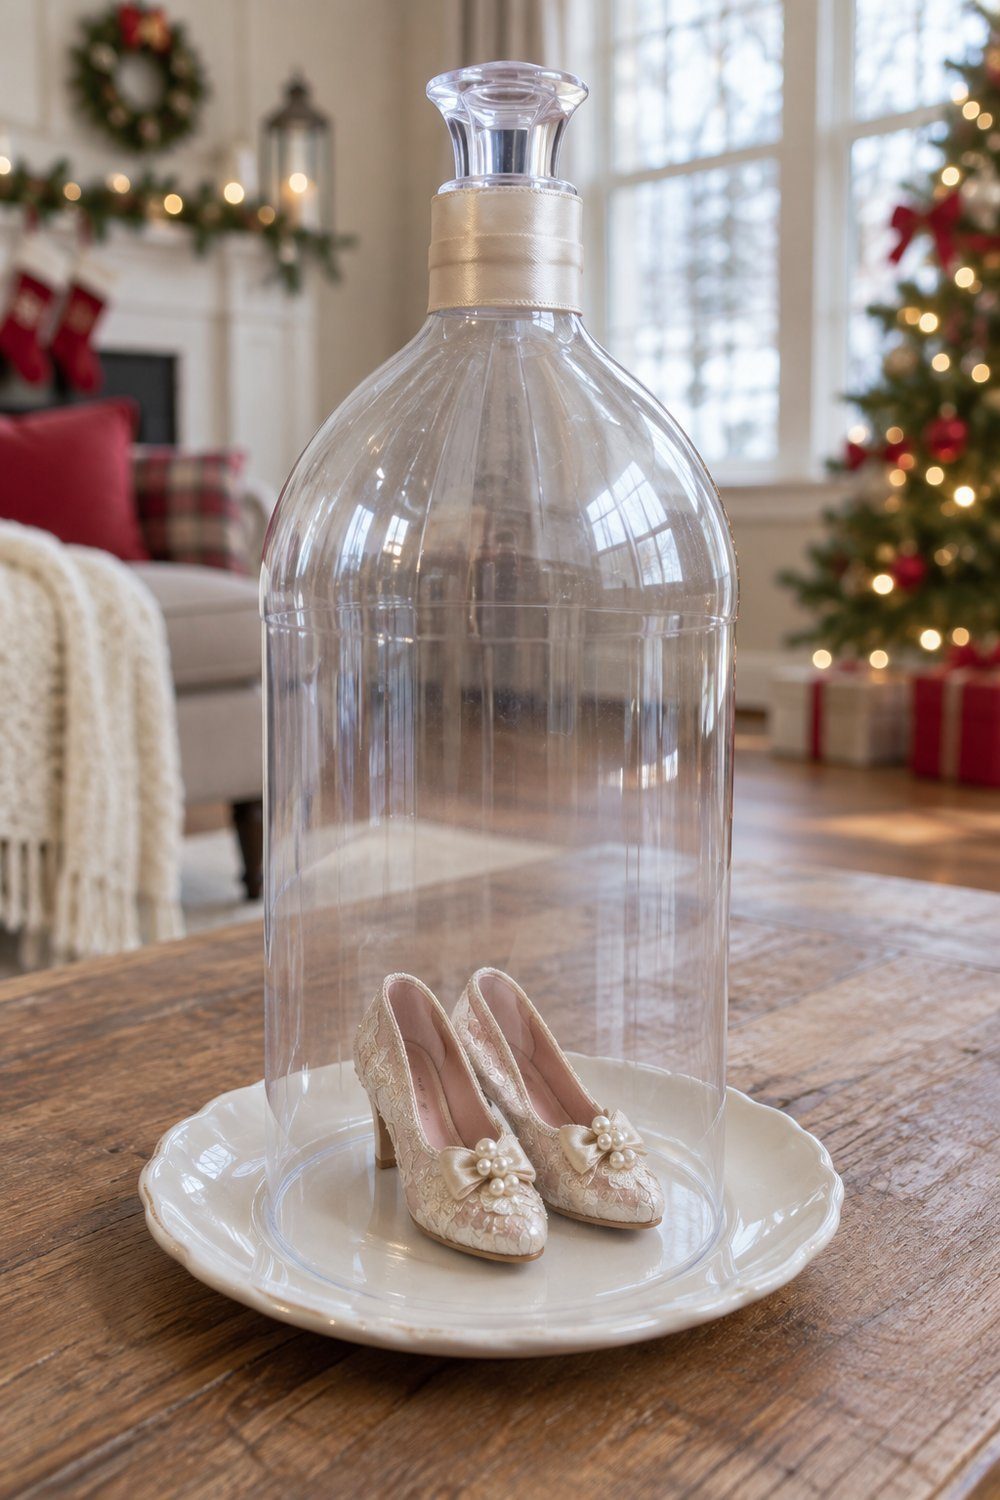
Kelly Harmer makes a lightweight cover from a clear plastic bottle, cutting its height to suit the object underneath. Ribbon hides the neck ridges, and a plastic wine stopper finishes the top; a small plate forms the base. Her photographed demonstration protects a pair of keepsake party shoes, so this is a dome-making technique rather than a finished Christmas scene. She also discusses festive brush-tree displays. Copy the construction when you need a custom-height cover and like the simple silhouette of a repurposed bottle.
You'll need: Clear 2-liter plastic bottle, scissors, small plate, ribbon, glue or double-sided tape and an optional plastic wine stopper.
Idea by Kelly Harmer, OH SO KEL
Wineglass snowman dome with a scalloped base
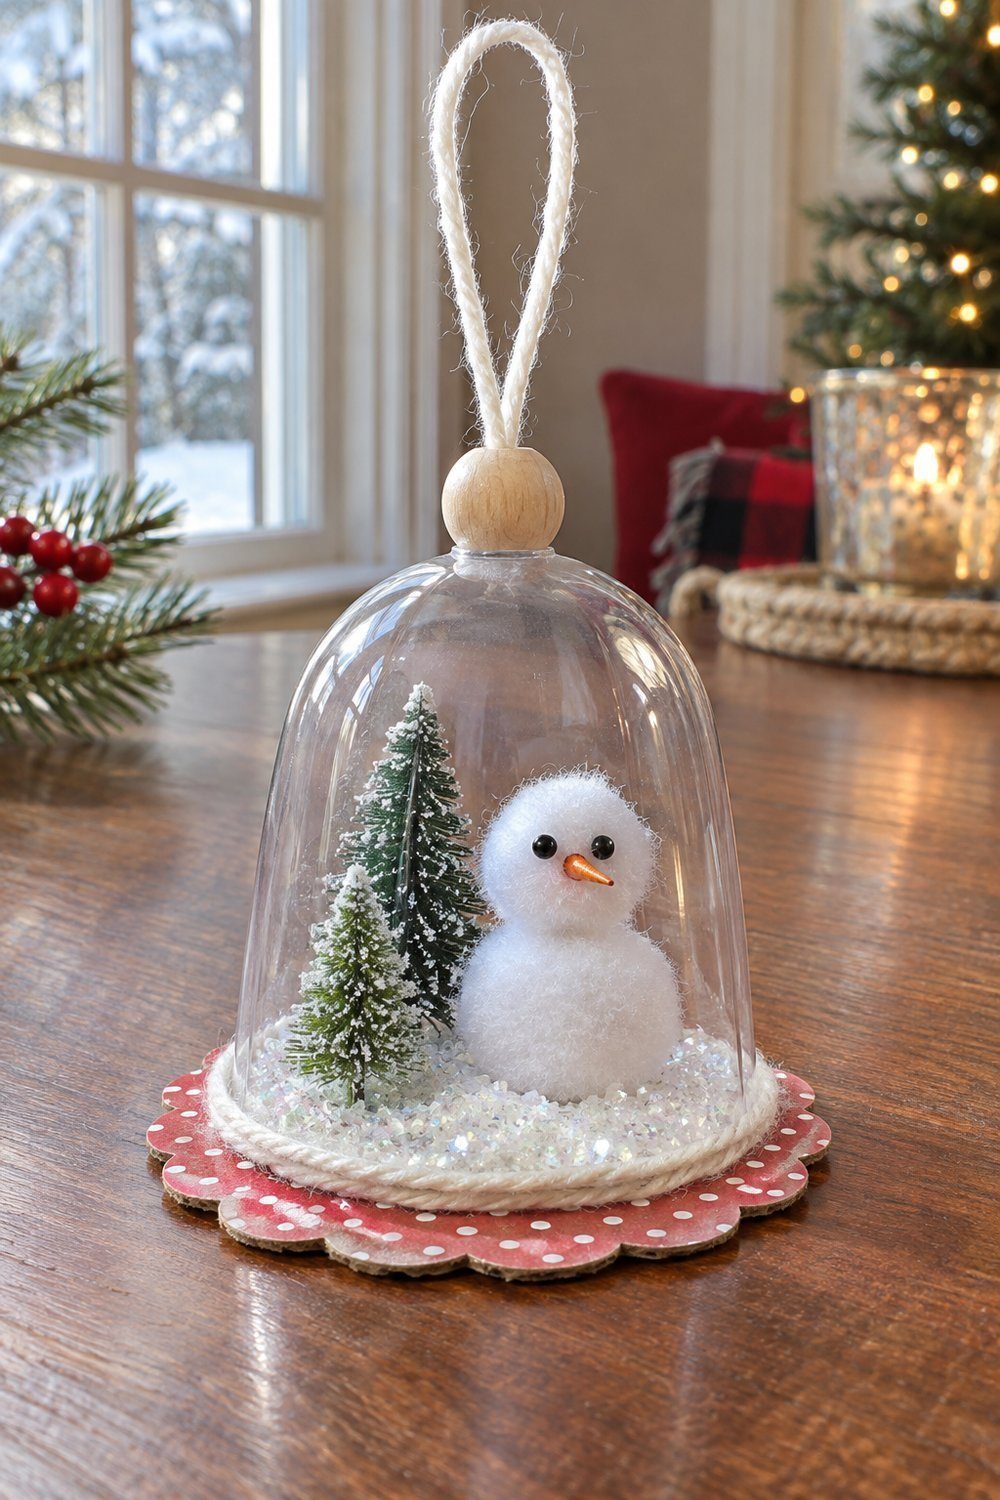
Janine Waite turns the cup of a two-piece plastic wineglass into a miniature Christmas cloche. She saws away the stem and sands the rough edges, then builds a scalloped base from cereal-box cardboard between two pieces of scrapbook paper. Inside, her snowman uses two white pom-poms and an orange toothpick tip, with bottle-brush trees and white glitter completing the scene. A wooden bead threaded with yarn forms the hanging loop, and yarn trims the base after the cover is glued down.
You'll need: Plastic wineglass cup, hacksaw, fine sandpaper, 3 1/2 in (9 cm) scalloped paper punch, scrapbook paper, cereal-box cardboard, glue, bottle-brush trees, 2 white pom-poms, orange toothpick tip, wooden bead, yarn and white glitter.
Idea by Janine Waite, Happy Happy Nester
Recycled jar dinosaur snow dome
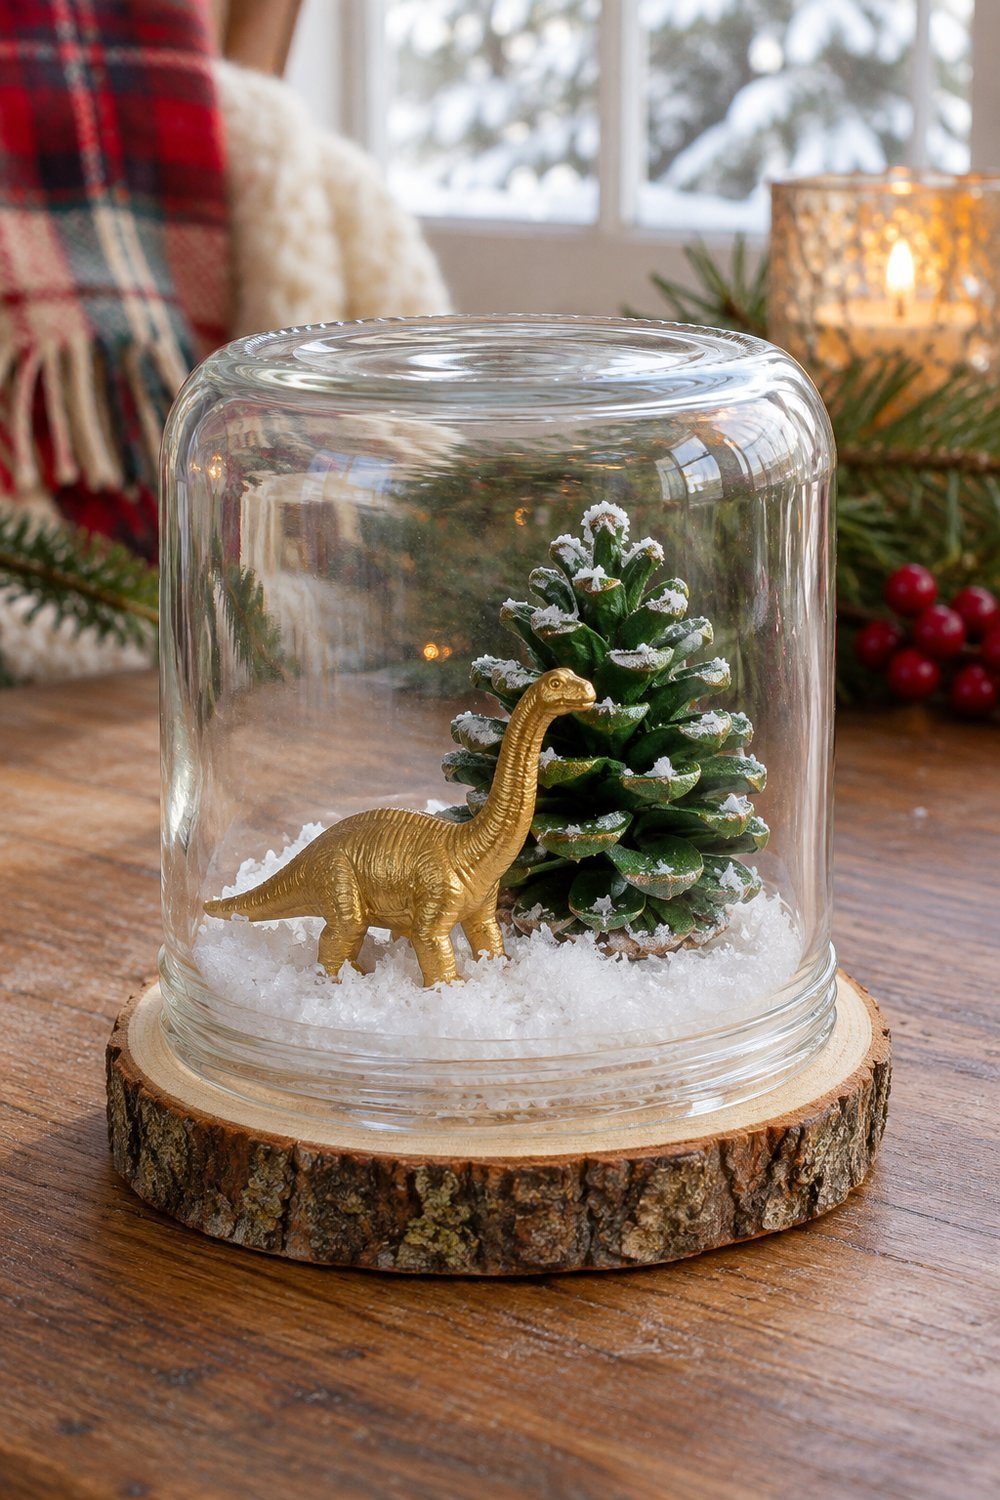
Claire Armstrong turns a small spread jar upside down over a snowy wood slice. A gold-painted dinosaur stands beside a green-painted pinecone tree, giving the familiar winter scene a playful occupant. Mask a border about 3/16 in (5 mm) wide around the wood before gluing on snow, then remove the tape after drying. That clear edge gives the jar a place to sit. Glue the painted figures to the snowy center and lower the clean jar over them; Claire leaves her cover removable.
You'll need: Small clear spread jar, slightly wider wood slice, miniature dinosaur, pinecone, gold and green paint, faux snow, glue and masking tape for the 3/16 in (5 mm) border.
Idea by Claire Armstrong, Pillar Box Blue
After Christmas
For winter, return to Tanya's snow, trees and car arrangement: she designed it for the long winter and kept its pieces unglued so she could rework it later. Keep the battery pack accessible when rearranging. When packing away ornaments, line the box with acid-free tissue or soft fabric and wrap each one separately, following organizer Meaghan Kessman's advice in Livingetc's Christmas storage guide.
Keep going: Explore winter centerpieces for after Christmas, try Christmas glass-jar decorating, or make DIY snow globes from jars.