Very easy to make crepe paper flowers step by step

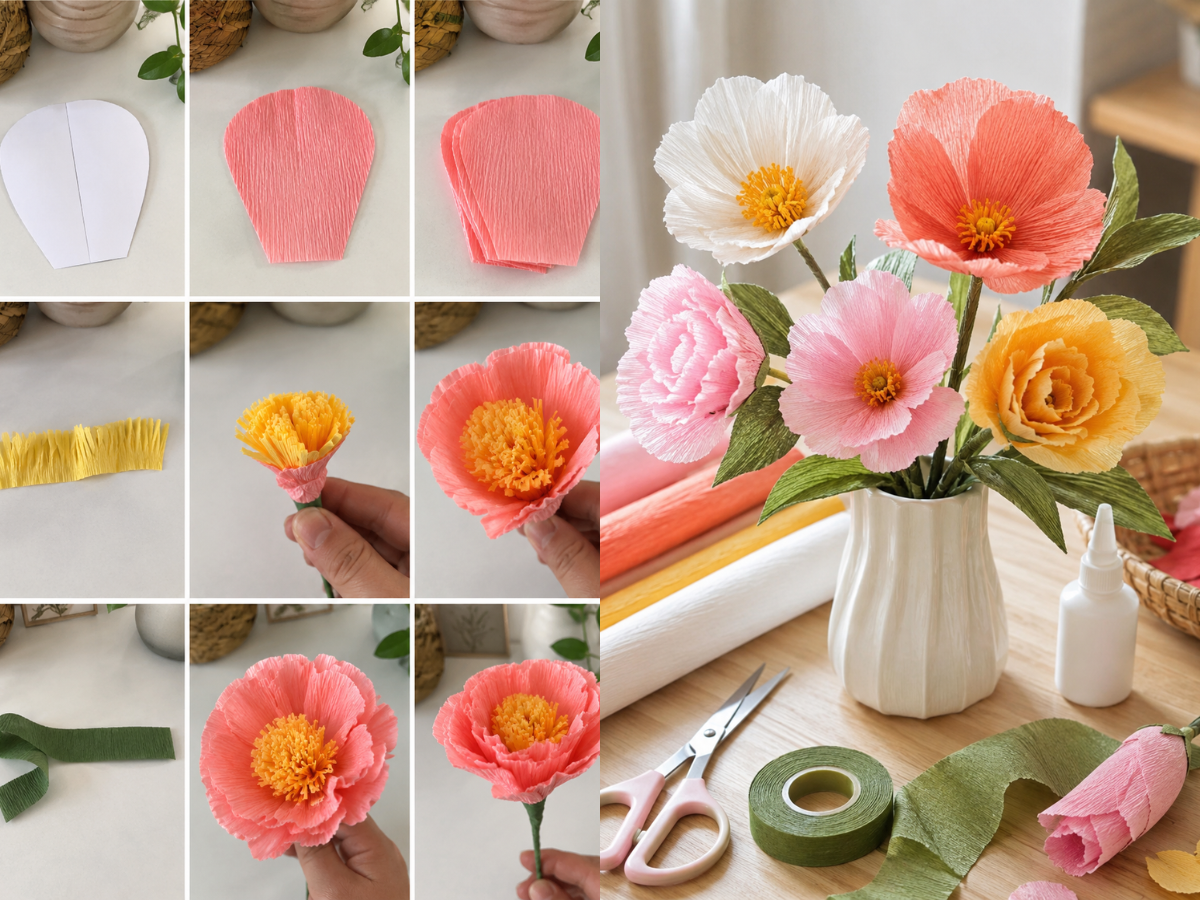
Handmade blooms bring warmth to any room, and crafting your own is more fun than you might think. Crepe paper flowers have become a favorite DIY trend across the United States, showing up in home decor, wedding centerpieces, and gift toppers everywhere.
This simple crepe paper flower tutorial was built with beginners in mind. You don't need fancy tools or years of crafting skill to get started here.
We break everything into small, friendly steps. From gathering basic supplies to shaping delicate petals, assembling each bloom, and adding those final touches, every stage feels manageable and calm.
By the end of this guide, you'll have a gorgeous handmade bloom ready to display proudly. This craft remains one of the most affordable and rewarding hobbies anyone can pick up, whether you're working solo or enjoying a weekend activity with the kids.
1. Gather Your Crepe Paper Flower Supplies
Grabbing the right tools first makes this whole project feel way less intimidating. Once your supplies are laid out on the table, the rest of the process practically flows on its own. This step is where most beginner crepe paper crafts either click into place or fall apart, so take a few extra minutes here.
Start with the star of the show: crepe paper sheets. Look for shades like blush pink, sunflower yellow, or soft ivory, depending on the look you're going for. If you want your blooms to feel extra realistic, consider adding a color you might not expect, since real flowers rarely come in just one flat shade.
Beyond the paper itself, you'll need a handful of everyday craft essentials:
- Floral wire to build sturdy stems that hold their shape
- Floral tape to wrap everything together neatly
- Sharp scissors for clean, precise petal cuts
- A pencil for tracing petal templates onto the paper
- A hot glue gun (optional, but great for added durability)
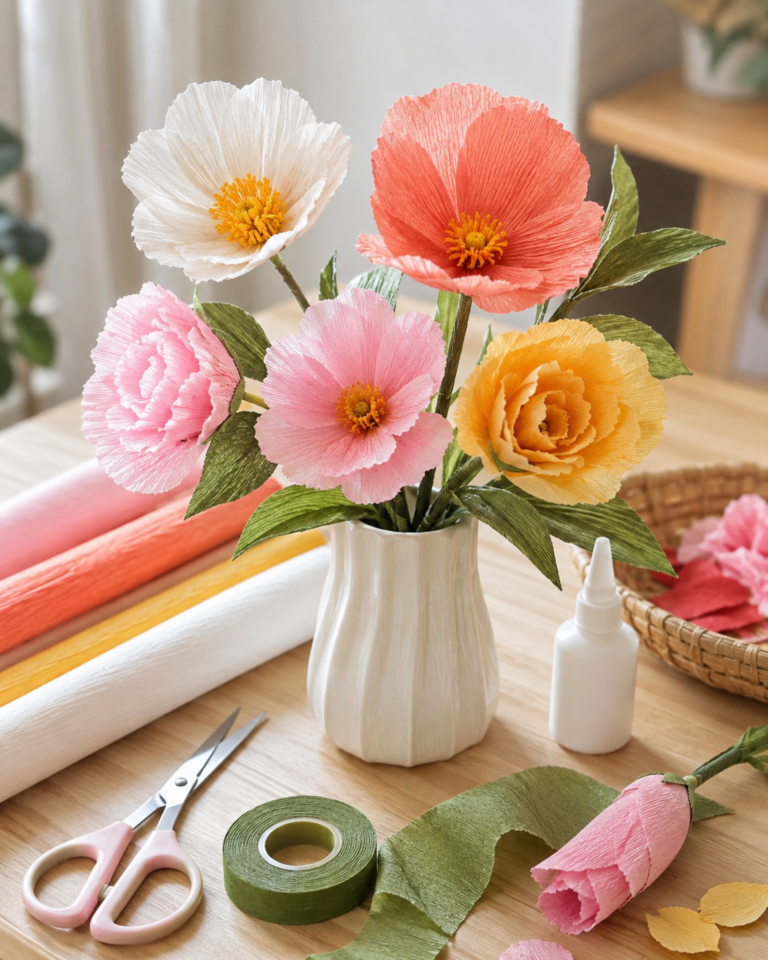
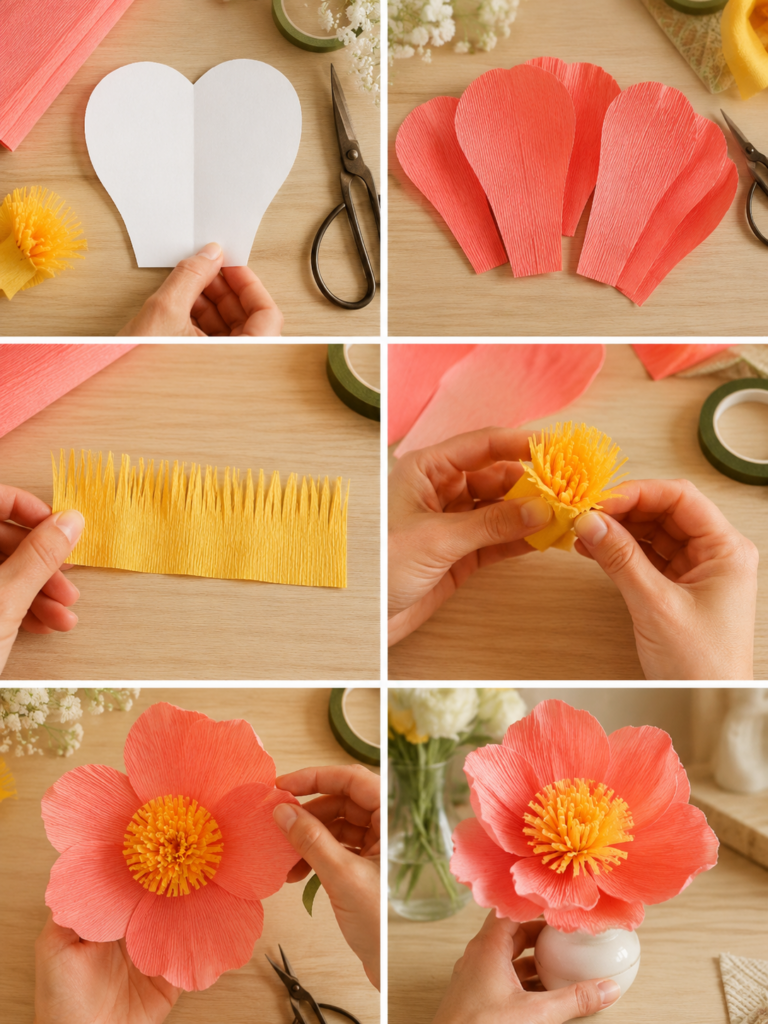
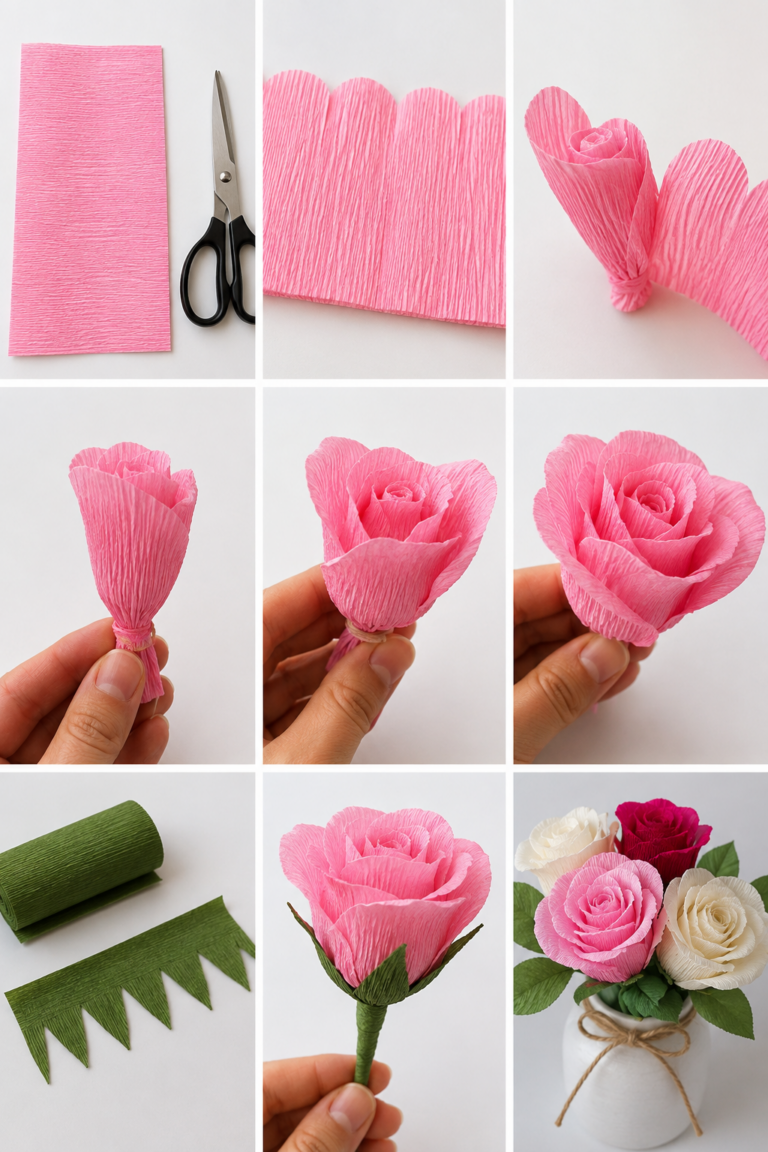
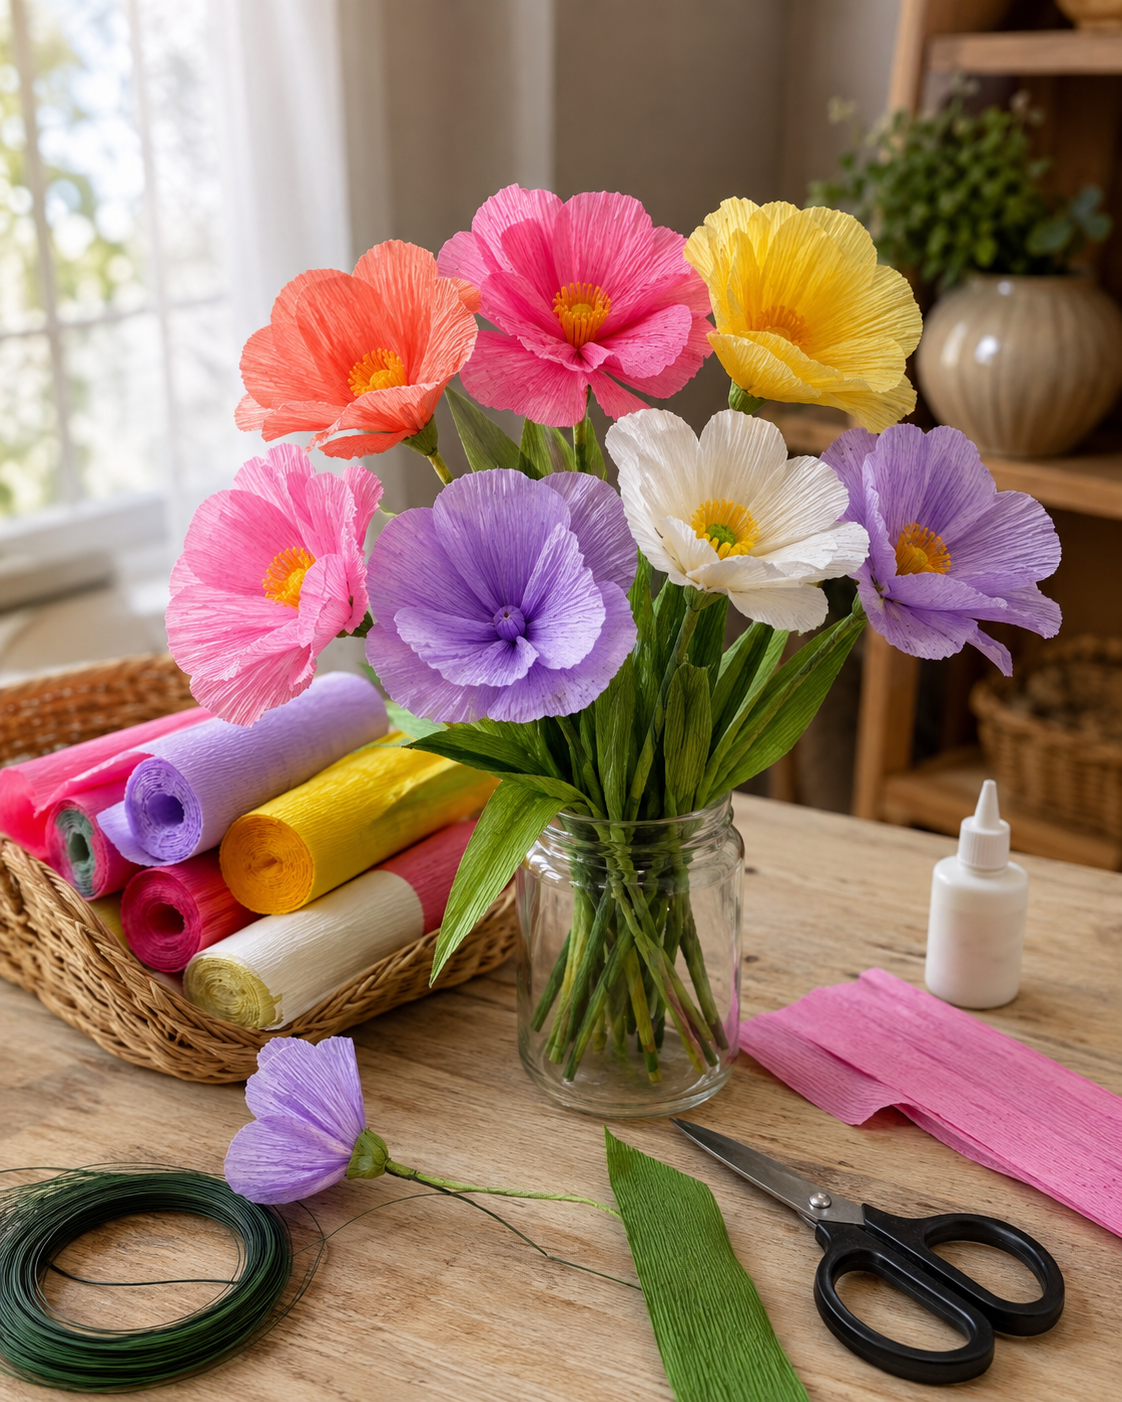
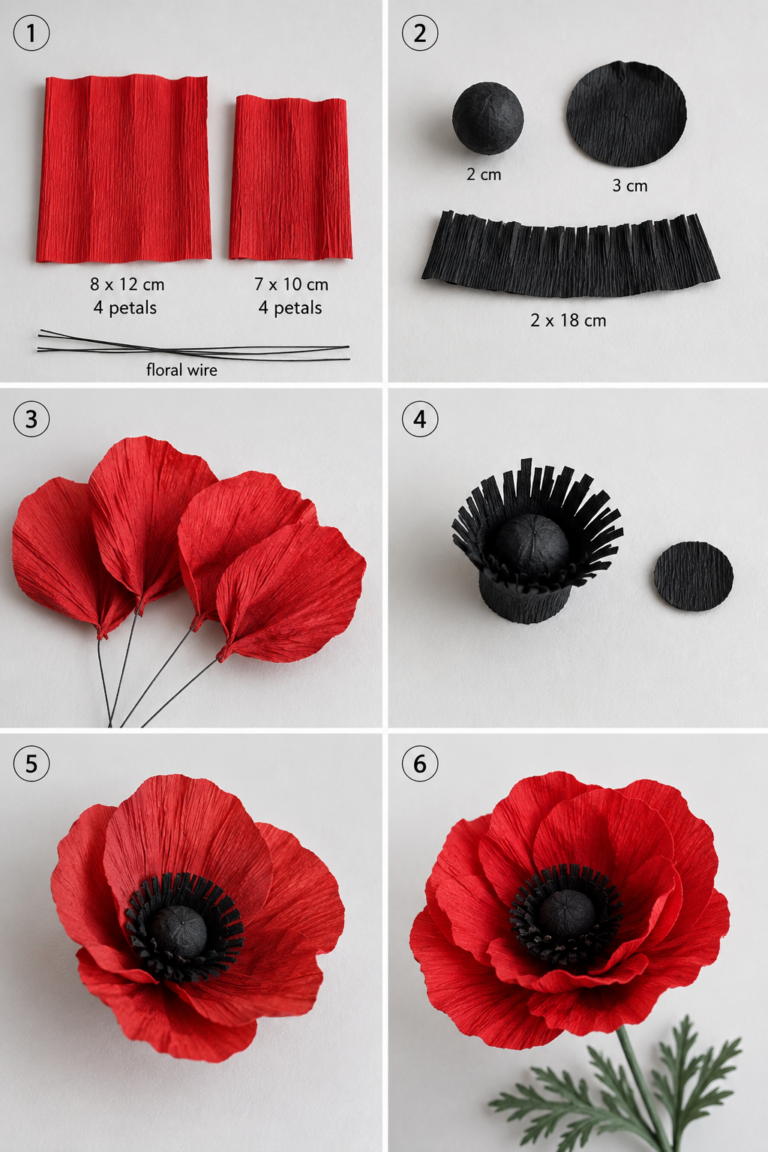
Here's a friendly tip that makes a real difference: reach for extra-fine or heavyweight Italian crepe paper whenever possible. This type stretches beautifully without tearing, which means your petals will curl and ruffle just like the real thing. Cheaper paper tends to rip or lose its shape after a bit of shaping, so investing a little more upfront pays off in the final look.
If you're curious about experimenting with other paper crafting projects before committing to crepe paper, you might also enjoy browsing these creative flower ideas made with toilet for another budget-friendly twist on handmade blooms.
Once your supplies are gathered, you're officially ready to move on to the fun part: shaping and assembling your very first flower.
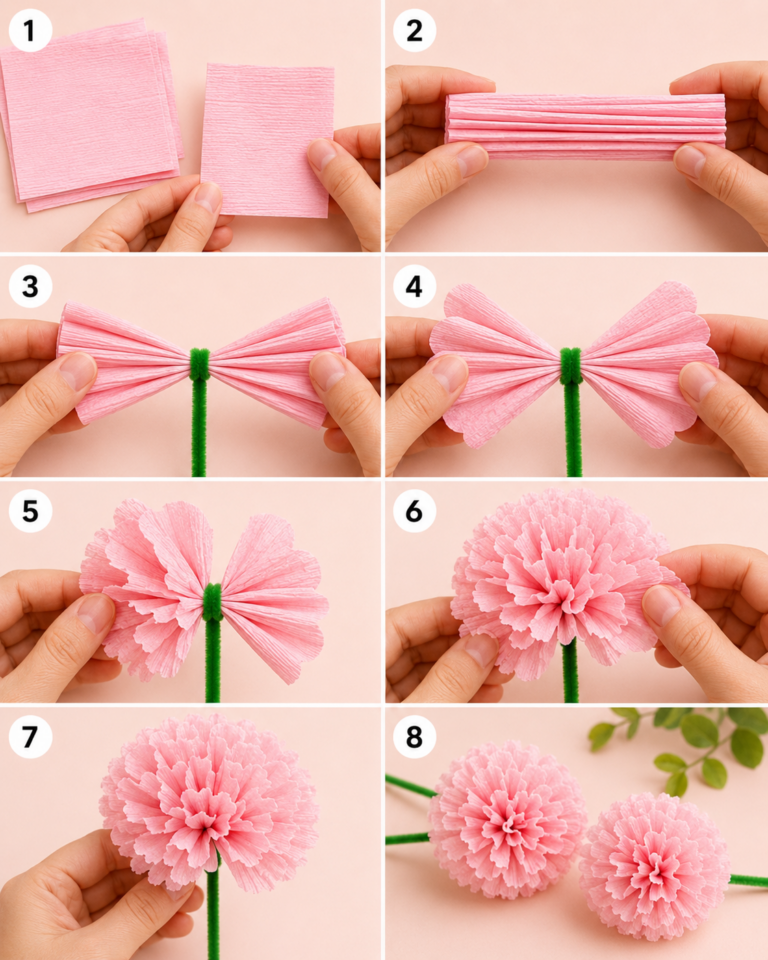
2. Very Easy to Make Crepe Paper Flowers Step by Step
Grab your scissors and floral wire, because it's time to start crafting. These step-by-step crepe flower instructions break the process into small, manageable steps.
Each stage builds on the last, so you'll watch your flower come together piece by piece. No fancy tools or prior craft experience are required, just a little patience and these simple directions.
Step 1: Cut the Petal Shapes
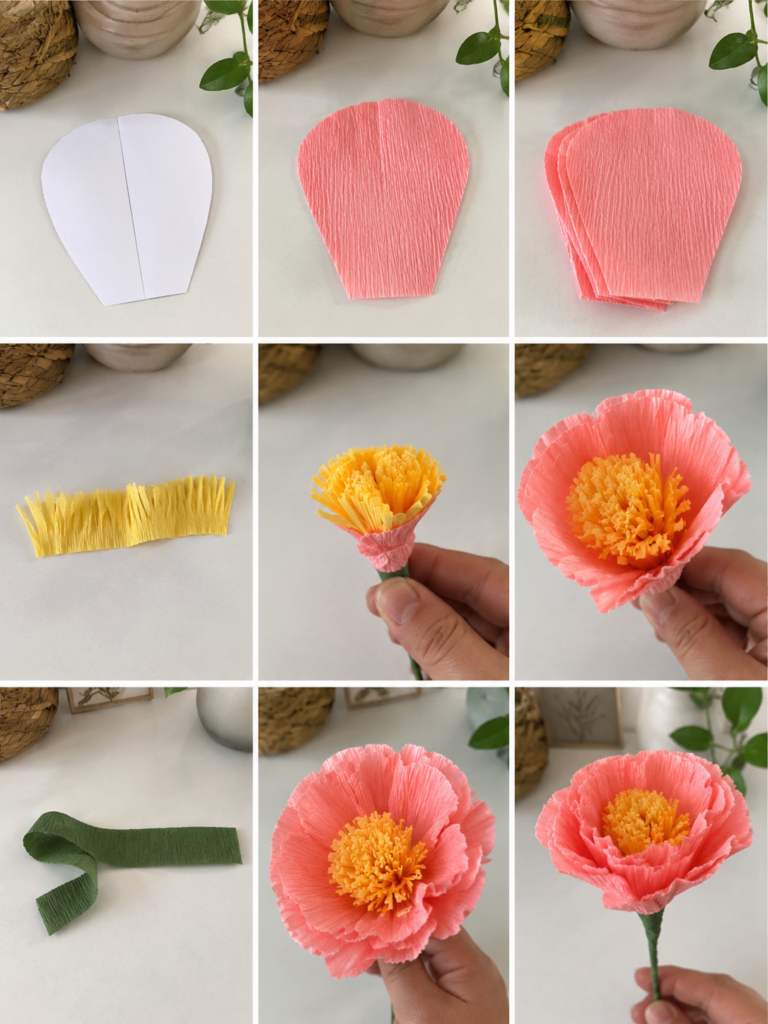
Start by folding your crepe paper sheet into two or three layers. Draw a simple teardrop or oval shape on top using a pencil.
Cut through all the layers at once. This trick saves time and makes quick crepe paper flower projects even faster, since you get several matching petals from one cut.
Aim for five to eight petals per flower, depending on how full you want the bloom to look. Smaller petals work great for the center, while larger ones fill out the outer layers.
Step 2: Stretch and Curl Each Petal
Hold a petal between your thumbs and gently pull outward on the center. This stretches the paper and gives it a soft, cupped shape.
Next, curl the edges backward by rolling them over a pencil or the blunt side of a scissor blade. This step adds realistic dimension, even for no-experience paper flowers made by first-time crafters.
Crepe paper has a natural grain, similar to fabric. Always stretch along the grain, not against it, to keep the paper from ripping.
Work slowly and use gentle pressure. If you feel resistance, stop and adjust your grip instead of pulling harder.
Step 3: Assemble the Petals into a Blossom
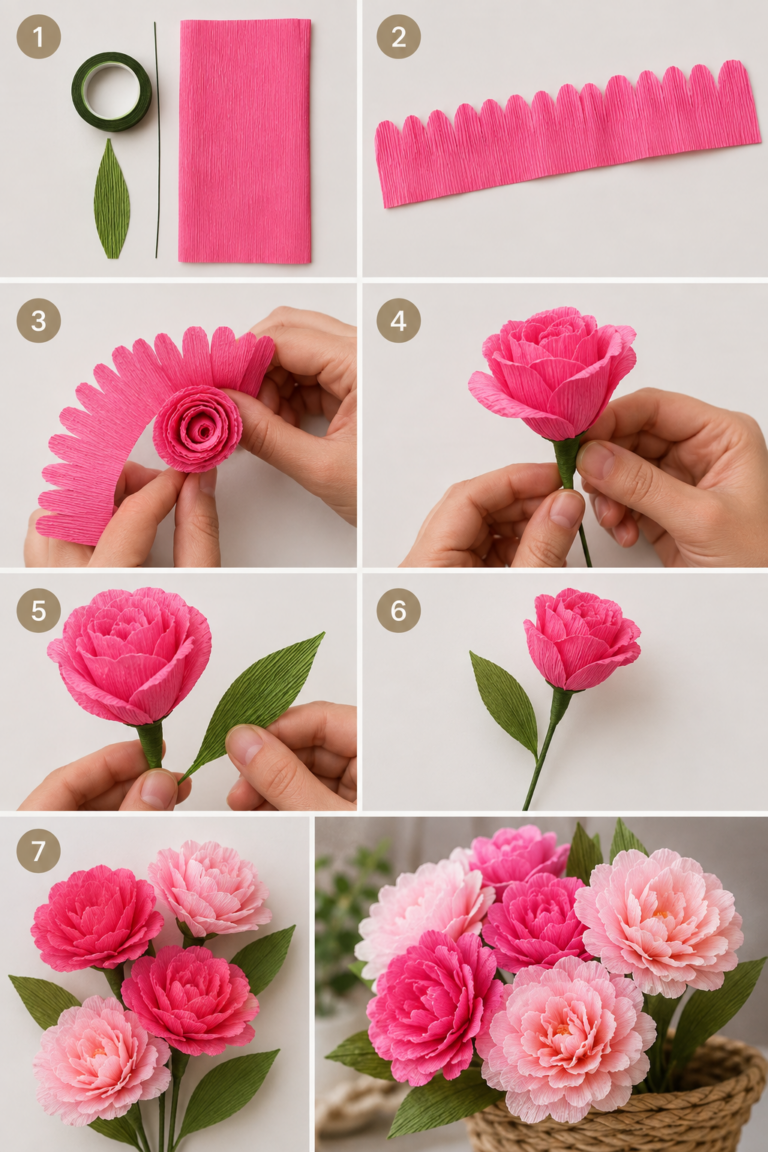
Take your smallest petal and wrap its base around the tip of a floral wire. Secure it with a small dab of glue or a twist of floral tape.
Add the next petal slightly overlapping the first, and continue working outward with larger petals. This layering technique is at the heart of most quick crepe paper flower projects, since it creates a full, natural-looking bloom.
Keep turning the flower as you add petals so they spread evenly around the stem. Six to eight petals usually create a nicely balanced shape.
Step 4: Attach Leaves and Wrap the Stem
Once your blossom is complete, position one or two leaves along the stem, a few inches below the flower head. Attach them with a small piece of floral tape.
Wrap the entire stem with floral tape, starting just under the petals and working your way down. Stretch the tape slightly as you go for a smooth, polished finish.
This final touch gives your project the look of professional easy tissue paper flower ideas you might spot in a home décor magazine.
Step 5: Fluff and Shape Your Finished Flower
Gently bend and separate the petals with your fingers to add movement and volume. For peonies, fluff the petals outward for a full, rounded shape.
Roses look best with petals curled tightly inward near the center. Poppies benefit from wide, flat petals with just a slight curl at the tips.
Take a step back and adjust as needed. Small tweaks make a big difference in how lifelike your flower appears.
3. Conclusion
Holding your first finished flower feels pretty amazing, especially knowing you made it from scratch. That mix of paper, glue, and a little patience just turned into something beautiful you can actually display or give away.
Making basic crepe paper blooms gets easier every time you sit down to craft. Your hands learn the stretching motion, your eye gets better at spotting how petals should curl, and soon you won't even need to think twice about the steps.
Once you feel comfortable with this technique, try branching out. Ranunculus and daisies use similar folding methods but create totally different looks. Playing with paper colors like blush pink, deep burgundy, or sunny yellow can completely change the mood of your arrangement.
These handmade flowers work great for so many occasions. Use them as table centerpieces for birthdays, tuck them into gift wrap for a personal touch, or build a bouquet for a wedding on a budget. They last far longer than fresh flowers and never wilt on you.
Crafting basic crepe paper blooms doesn't require expensive tools or fancy training. Just paper, wire, glue, and a bit of practice can turn into a hobby that brings color into your home and joy into your day.
Grab another sheet of crepe paper and start your next flower. The more you make, the more natural it becomes, and that's the real beauty of this craft.